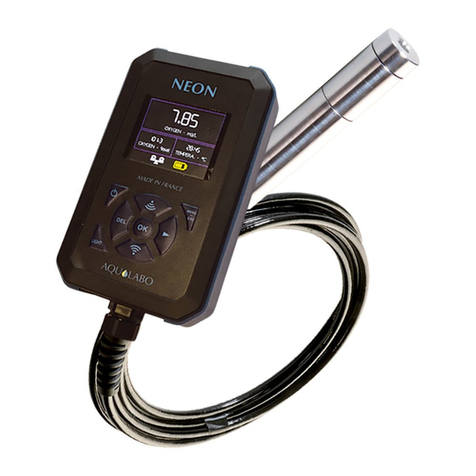
AquaLabo NEON pH-RedOx User manual

NEON_pH-RedOx
Hand-held field pH meter for measuring and recording pH values and redox
potential (ORP)
Operation Manual
Version 0.1

NEON_pH_Redox
- 2 -

NEON_pH_Rédox
- 3 -
The most recent version of this manual is available on our website:
https://www.aqualabo.fr/
NOTE:
The information contained in this document may be part of patents or patent applications by Aqualabo. Having
this document in your possession does not grant any license to these patents.
This manual is regularly updated. Updates are included in new issues.
All information provided in this issue of the manual may be modified before said products become available.
All rights reserved.
Copyright © 2023, Aqualabo
Reproduction in whole or in part is prohibited without the written consent of Aqualabo.

NEON_pH_Redox
- 4 -
CONTENTS
1. Warranty______________________________________________________________________ 6
2.Information ______________________________________________________________________ 7
3.Safety ___________________________________________________________________________ 8
3.1 Safety instructions _____________________________________________________________________ 8
3.2 Operating safety_______________________________________________________________________ 8
3.2.1 Intended use__________________________________________________________________________________ 8
3.2.2 Unauthorized use ______________________________________________________________________________ 8
3.2.3 User qualification ______________________________________________________________________________ 8
3.3 Handling hints_________________________________________________________________________ 8
3.4 Packaging ____________________________________________________________________________ 8
4.NEON_PHEHT PHMETER overview ____________________________________________________ 9
4.1 Contents of the package_________________________________________________________________ 9
4.2 General description of the product ________________________________________________________ 9
4.3 Main functions of the NEON PHMETER. ____________________________________________________ 9
5. Specifications ___________________________________________________________________ 10
5.1 NEON PHEHT data_____________________________________________________________________ 10
5.2 Description of NEON housing____________________________________________________________ 10
5.3 PHEHT sensor description ______________________________________________________________ 12
6. Getting started __________________________________________________________________ 14
6.1 Power supply ________________________________________________________________________ 14
6.1.1 Type of batteries permitted_____________________________________________________________________ 14
6.1.2 Changing the batteries _________________________________________________________________________ 14
6.1.3 Getting started _______________________________________________________________________________ 14
6.2 NEON general features_________________________________________________________________ 14
6.2.1 On/Off______________________________________________________________________________________ 14
6.2.2 Navigation keypad ____________________________________________________________________________ 14
6.3 Setting ______________________________________________________________________________ 15
6.3.1 Main screen _________________________________________________________________________________ 15
6.3.2 General menu ________________________________________________________________________________ 16
6.3.3 Calibration menu _____________________________________________________________________________ 16
6.3.3.1 pH main parameter __________________________________________________________________________ 16
6.3.3.2 Redox secondary parameter. __________________________________________________________________ 19
6.3.3.3 Factory coefficients __________________________________________________________________________ 20
6.3.4 Recording menu ______________________________________________________________________________ 21
6.3.4.1 Results ____________________________________________________________________________________ 21
6.3.4.2 Recording frequency _________________________________________________________________________ 21
6.3.4.3 Campaign name_____________________________________________________________________________ 22
6.3.4.4 Erasing data ________________________________________________________________________________ 22
6.3.5 Preferences menu ____________________________________________________________________________ 23
6.3.5.1 Date and time ______________________________________________________________________________ 23
6.3.5.2 Device ____________________________________________________________________________________ 23
6.3.5.3 Sensor ____________________________________________________________________________________ 24
6.3.5.4 Display ____________________________________________________________________________________ 24

NEON_pH_Rédox
- 5 -
6.3.5.5 Language __________________________________________________________________________________ 24
6.3.5.6 Factory configuration ________________________________________________________________________ 24
7. Unloading data__________________________________________________________________ 26
7.1 Activation and connection ______________________________________________________________ 26
7.2 Home screen _________________________________________________________________________ 26
7.3 Logout ______________________________________________________________________________ 27
8. PHEHT sensor maintenance ________________________________________________________ 28
8.1 Cleaning_____________________________________________________________________________ 28
8.2 Changing the cartridge _________________________________________________________________ 28
8.3 Storage _____________________________________________________________________________ 29
9. Accessories and consumables ______________________________________________________ 30

NEON_pH_Redox
- 6 -
1.WARRANTY
New devices and equipment sold by AQUALABO are guaranteed against any manufacturing defects for a period of 1 year
excluding consumables (unless expressly stipulated by AQUALABO) from:
-The technical receipt of the equipment in the factory by the buyer or reseller,
-Or, failing that,
▪For metropolitan France: From the date of the delivery note,
▪For other destinations: From the date of shipment confirmed by LTA, consignment note, bill of lading.
The AQUALABO company warranty applies exclusively in the event ofa malfunction resulting from a design flaw or latent defect.
It is strictlylimited to the freeshipment of replacementparts (excluding consumables) orthe repair of the device in our workshops
within 10 working days, excluding transport.
The following are specifically excluded from our warranty by express agreement:
-Any economic harm, including staff costs, loss of profits, business disruption, etc.
-Any failure due to improper use of the device (inappropriate mains supply, dropping, attempted conversion, etc.), lack
of maintenance by the user or poor storage conditions.
-Any equipment failure due to using parts not supplied by AQUALABO.
-Any failure due to the transport of the device in packaging other than the original one.
-Batteries, aerials and in general any item listed in the price list under "accessories".
Our customers are advised to always ask for our approval before sending us a device to be repaired. No return will be accepted
without prior written consent from our after-sales department which will specify the return procedure. In this case, the items will
be returned prepaid, in their original packaging, to the following address:
AQUALABO –115 rue Michel Marion - 56850 Caudan - France
We reserve the right to re-ship ‘freight collect’ any device received without this agreement. Regardless of the means and
conditions of transport used to ship the equipment to be repaired under warranty, as stipulated in the original packaging, the
related expenses as well as insurance costs, will be borne by the customer.
Any damage related to the return transport of the equipment falls within the scope of the warranty, subject to the specific
condition that the customer sends his/her claims within forty-eight hours by registered letter with acknowledgement of receipt,
to the carrier, with a duplicate of the letter being sent to AQUALABO.
The warranty card, where appropriate, only applies if the card delivered with the device is returned to AQUALABO duly filled
out.
SOFTWARE WARRANTY
The software is guaranteed by the author or distributor thereof, under the conditions specified in the documentation on said
software packages.
AQUALABO does not, under any circumstances, provide any warranty whatsoever regarding software packages.
The following are formally excluded, by express agreement, from our warranty: any economic harm, including staff costs, loss
of profits, business disruption, etc.
The customer is informed that AQUALABO may not, under any circumstances, be held liable for any errors or "bugs" that the
software may contain.
OWNERSHIP RIGHTS AND TRADE SECRETS
This document is protected by AQUALABO Copyright (C) 2023 and all copying rights are explicitly reserved. The software
referred to or supplied with the device contains trade secrets and confidential information which belong to AQUALABO. It is
legally protected by international Copyright (C) law.
AQUALABO grants the user a license to use its software. The software may not be disclosed, used or duplicated for backup
purposes without the written permission from AQUALABO. The user must attach a copy of this document to any authorized full
or partial reproduction.

NEON_pH_Rédox
- 7 -
2.INFORMATION
AQUALABO equipment has been designed, manufactured, tested and inspected in accordance with ISO 9001
procedures.
If the device is not used immediately, it should be stored in a clean, dry place. Observe storage temperatures ((10 -
35°C).
AQUALABO equipment is carefully inspected before packaging. Upon receipt of your device, check the condition of
the packaging and if you notice an anomaly, make your reservations known to the carrier within 48 hours. Review
the packing list next to check that everything is in order. Finally, if you find that something is missing or if the
equipment is damaged, contact AQUALABO immediately.
The NEON_PH_Redox hand-held pH meter is entirely designed and manufactured by AQUALABO in France.
AQUALABO
90 Rue du Professeur Paul Milliez • 94506 Champigny sur Marne • France
Tel.: +33 (0)1 55 09 10 10
Hotline: +33(0)4 11 71 97 41
E-mail: [email protected]
Web: https://www.aqualabo.fr/

NEON_pH_Redox
- 8 -
3.SAFETY
3.1 SAFETY INSTRUCTIONS
This manual provides important information about operating the product in total safety. Read it carefully to familiarize
yourself with the product before starting it up and using it. This manual should be kept near the product so that you
can always find the information you need.
3.2 OPERATING SAFETY
3.2.1 INTENDED USE
Comply with the following to ensure safe operation:
−Store and use the device under the environmental conditions specified in this manual (see Specifications)
−Do not disassemble the device
−Power the unit using the original batteries or those specified in Section 6.1.1
−Comply with the permitted use below
CAUTION:
If the device is used in a way not specified by Aqualabo (environment, handling, etc.), the
device may no longer protect you from harm.
3.2.2 UNAUTHORIZED USE
The product should not be start up if:
−It is visibly damaged (e.g. as a result of shipping),
-It has been stored for a long period of time in unsatisfactory conditions.
3.2.3 USER QUALIFICATION
We assume that operating personnel knows how to handle this equipment due to their professional training and
experience. In particular, operating personnel must be able to understand and correctly implement the safety labels
and instructions pertaining to the product use. Trained staff should be familiar with and follow the instructions in this
manual.
3.3 HANDLING HINTS
NEON hand-held Oximeter and OPTOD sensor assemblies are electronic devices. As such, they must be treated
with care. Always keep the device protected from conditions that could harm its components. In particular, comply
with the following points:
➢During use and storage, the ambient temperature and humidity must be within the range given in the section
entitled SPECIFICATIONS.
➢The device must be protected, at all times, from the following influences:
-Intensive exposure to light and heat
-Vapours that are caustic or have high solvent content.
➢All operations on the inside the device must be carried out by AQUALABO or by technicians authorized by
AQUALABO.
3.4 PACKAGING
The NEON_PH_Redox pH meter is shipped in packaging designed to protect it during transport. Always keep the
original packaging as well as the inner packaging to ensure optimum protection against impacts for any further
shipping. The original packaging is also required to ensure appropriate return transport in the event of repair. Please
remember that we shall not accept any warranty claims for damage caused by improper transportation.

NEON_pH_Rédox
- 9 -
4.NEON_PHEHT PHMETER OVERVIEW
4.1 CONTENTS OF THE PACKAGE
You have just received your NEON_PHEHT pH meter.
The package consists of a carry case containing:
-Neon assembly (containing 3 LR6 alkaline batteries, 1.5 volts) and PHEHT sensor (cable length varies
depending on the model ordered),
-A laminated field note;
-One bottle of pH4.01 (1TP061) standard solution, one pH 7.01 (1TP060) standard solution and one pH9
(1TP012) standard solution.
Upon receipt of your device, check the condition of the packaging and if you notice an anomaly, make your
reservations known to the carrier within 48 hours. If you find that something is missing or if the equipment is
damaged, contact AQUALABO immediately.
4.2 GENERAL DESCRIPTION OF THE PRODUCT
The NEON hand-held pH meter is combined with the PHEHT sensor to enable the following parameters to be
measured and recorded:
-Temperature,
-pH,
-ORP (mV).
4.3 MAIN FUNCTIONS OF THE NEON PHMETER.
The NEON PHEHT sensor unit dedicated to pH and ORP measurements offers the following features:
-Automatic recognition of the PHEHT sensor;
-Simultaneous display of 3 parameters (Temperature, pH, Redox in mV);
-ZOOM function on a parameter selected by the operator;
-Measurement stability indicator;
-Battery charge status indicator;
-Adjustable backlight intensity, backlight (configurable timing) and automatic screen off (battery life
optimization);
-Simple 3-point calibration menu (4, 7 and 9);
-Data logging (30,000 points) in 2 modes: Occasional or automatic with recording frequency configuration;
-Transfer of recordings via WiFi in "csv" format;
-Multi-Language device: French, English, Spanish, and German.

NEON_pH_Redox
- 10 -
5. SPECIFICATIONS
5.1 NEON PHEHT DATA
NEON_PHEHT data
Measurement ranges
pH: 0.00-14.00 pH
Temperature: 0.00-50.00°C
ORP: -1,000.0 to + 1,000.0 mV
Resolution
pH: 0.01
Temperature: 0.01
Redox: 0.1
Accuracy
pH: +/- 0.1
Temperature: 0.5°C
Redox: +/- 2 mV
Measurement principle
Combined electrode (pH/reference): Special glass, Ag/AgCI
reference. Gel electrolyte (KCI)
5.2 DESCRIPTION OF NEON HOUSING
➢Description of the front panel:
NEON housing specifications
Weight
880 g
Dimensions (H x W x Th)
146 x 88 x 33
Protection rating
IP 67
Operating temperature
-5 à 50°C
Storage temperature
-10°C to 60°C
Screen
Colour LCD
Backlight
Materials
ABS, UL 94V-0
Power supply
3 AA alkaline batteries
Sensor connection
Direct through spiral cable gland
Sensors on 3, 7 and 15 m of cable
ABS housing
LCD display
Navigation keypad
Sensor cable gland

NEON_pH_Rédox
- 11 -
➢Description of the rear panel:
Waterproof battery
compartment
Locked by a screw
(stainless steel 304,
M2.5x6)
Product information
label including the serial
number

NEON_pH_Redox
- 12 -
5.3 PHEHT SENSOR DESCRIPTION
A reference electrode, used for pH and Redox measurements, is built into the PONSEL sensor. It is an Ag/AgCl with
plasticized electrolyte saturated in KCl "PLASTOGEL"®
The "PLASTOGEL"® electrolyte communicates directly with the external medium without capillary or porous
intervention. Consequently, there is no risk of clogging or de-priming of the reference.
The measuring electrodes are in the form of a special pH-sensitive glass bulb welded to the end of a crystal tube for
pH and in the form of a platinum tip for redox.
Temperature: measurements via NTC inserted in a stainless-steel sheath.
The compact, robust sensor is particularly well suited to the following application areas:
• Industrial and municipal wastewater treatment plants,
• Wastewater management (nitrification and de-nitrification),
• Monitoring natural waterways,
• Fish farming, aquaculture,
• Testing drinking water.
pH measurement
pH measuring principle
Combined electrode (pH/reference): Special glass,
Ag/AgCI reference. Gel electrolyte (KCI)
Measurement range
0 –14 pH
Resolution / Accuracy
0.01 pH; 0.1 pH
Redox measurement
Redox measuring principle
Combined electrode (Redox/Reference): Platinum tip,
reference AG/AgCI. Gel electrolyte (KCI)
Measurement range
- 1,000.0 to + 1,000.0 mV
Resolution / Accuracy
0.1 mV; 2 mV
Response time
< 5 s
Temperature measurement
Temperature measuring principle
NTC
Operating temperature
0.00°C to + 50.00°C
Resolution
0.01°C
Accuracy
0.5 °C
Response time
< 5 s
Storage temperature
0°C to + 60°C
Protection rating
IP 68
Signal interface
Modbus RS-485 as standard and optional SDI-12
Measurement refresh rate
Maximum < 1 second
Sensor power supply
5 to 12 Volts
Consumption
Standby: 25 µA
RS485 average (1 measurement/second): 3.9 mA
SDI12 average (1 measurement/second): 6.8 mA
Current pulse: 500 mA
Sensor
Mounted sensor dimensions
Lower part: diameter 21 mm; length 92 mm,
Upper part: diameter 27 mm; length 103 mm,
Mounted sensor length: excluding cable gland 210 mm;
length with cable gland: 260mm.
Weight
350 g (sensor + cable)
Materials in contact with the medium
PVC, POM-C, pH special glass, platinum, polyurethane
Maximum pressure
5 bar
Cable / connections
9 shielded conductors, polyurethane sheath. Cable gland
connection

NEON_pH_Rédox
- 13 -
(1) Protective strainer
(2) Cartridge (consumable part)
(3) Clamping ring
(4) Sensor body with measuring electronics
(5) Cable gland
(6) Securely connected connection cable
1
2
3
4
5
6
Platinum disc for measuring the ORP
NTC for temperature measurement
Protective strainer
Special glass for pH
measurement

NEON_pH_Redox
- 14 -
6. GETTING STARTED
6.1 POWER SUPPLY
6.1.1 TYPE OF BATTERIES PERMITTED
The measuring unit comes with 3 AA alkaline batteries. The user must never mix different types of batteries.
Three AA NiMH batteries, 1.2 V (VARTA type) may be used.
6.1.2 CHANGING THE BATTERIES
The 3 used alkaline AA batteries must be replaced in a thoroughly clean, dry room so as not to contaminate the
inside of the compartment.
The operator will ensure that the batteries are installed according to the battery compartment’s polarity signs.
When closing the compartment, the user must:
- replace the battery compartment cover properly,
- firmly tighten the screw to crush the seal between the cover and the battery compartment.
Otherwise, the NEON device may not operate properly or the compartment seal may no longer be watertight.
The user shall also regularly inspect the batteries in order to avoid damage to the device from worn batteries.
6.1.3 GETTING STARTED
Remove the black protective cap on the PHEHT sensor (holding the sensor head down and unscrewing the cap to
the right (the direction is indicated on the protective case).
The sensor is delivered dry and must be rehydrated to optimize measurements.
Rehydrate the membrane, after dry storage, for 12 hours in a soaking solution (1SC009), a 3 mol/l KCl solution or a
pH 7 buffer solution.
6.2 NEON GENERAL FEATURES
6.2.1 ON/OFF
To turn the NEON oximeter on and off, press the on/off key for a few seconds.
NOTE: If, however, the device does not start, the user must check its power supply (ensure the batteries correctly
fitted in the battery holder).
6.2.2 NAVIGATION KEYPAD
1
ON/OFF
2
DEL
3
Screen on
4
Up arrow/WIFI 1 enabled
5
MENU & ESCAPE
6
Right arrow
7
OK/Confirm
8
Down Arrow/WIFI 2
enabled
6
1
2
3
4
5
7
8

NEON_pH_Rédox
- 15 -
6.3 SETTING
6.3.1 MAIN SCREEN
You can view the following in real time on the main screen:
- The parameters measured by the PHEHT sensor and the related units: Temperature (°C), pH in pH units, ORP in
mV. A ZOOM function shows a parameter in larger format.
- A series of icons (at the bottom of the screen) monitor the battery charge status, measurement stability, data
recording and activation of WiFi for data transfer to a PC.
When General parameter 1 changes, there is no measurement stability icon and the measurement fluctuates. When
this parameter is stable, the stability icon appears and the measurement flashes.
○You can scroll through the general parameters in position 1 (ZOOM), 2 or 3 by pressing the Up and Down keys.
○Hold down the “LIGHT” key and use the UP/DOWN keys to adjust the intensity of the backlight.
○Select the “OK” key to activate/deactivate recording. Refer to section 6.3.4 Recording Menu for more information.
○Press the "ESC" key to access the GENERAL MENU.
○ To access to the software update simultaneously press the up/down keys (WIFI activation 1 and WIFI activation
2). This feature is reserved for maintenance operations, access is restricted).
7.85
pH (pH)
-10.1
ORP (mV)
24.50
Temperature (°C)
General parameter 1
ZOOM display
General parameter 2
General parameter 3
WiFi icon
Recording icon
Measurement stability
icon
Battery charge status
icon

NEON_pH_Redox
- 16 -
6.3.2 GENERAL MENU
The "GENERAL MENU" screen provides access to calibration, recording as well as preference settings (date/time
configuration, NEON hand-held device and sensor information, standby delay configuration, language selection, and
settings RESET feature).
Move the cursor with the up and down arrows to access the desired menu and confirm the selection with the "OK"
key. Press the "ESC" key to return to the previous screen.
The menu frame changes to green when the cursor is placed on a menu.
6.3.3 CALIBRATION MENU
The calibration menu is used to calibrate the sensor connected to the NEON hand-held device (MAIN PARAMETER
menu), for the parameter pH and ORP as well as to restore the factory calibration coefficients (FACTORY COEFF
menu).
Move the cursor with the up and down arrows to access the desired menu and confirm the selection with the "OK"
key. Press the "ESC" key to return to the previous screen.
6.3.3.1 PHMAIN PARAMETER
This menu enables you to access the 3-point calibration steps using standard pH 7, pH 4 and pH 9 solutions.
First point calibration: STEP 1 using pH 7
Immerse the sensor head in a standard pH 7 solution, wait for both the measurement and temperature to stabilize.
As soon as the temperature stabilizes, record its value and refer to the table of variation in pH values according to
temperature (see label on the back of the bottle or table below).
The actual value of the pH buffer solution should then be adjusted according to the measured temperature.
CALIBRATION
RECORDING
PREFERENCES
MAIN PARAMETER
SECONDARY PARAM.
FACTORY COEFFS

NEON_pH_Rédox
- 17 -
You can then validate the calibration step with the OK key.
Second point calibration: STEP 2 using pH 4
After rinsing and wiping the sensor, immerse the sensor head in pH 4 solution.
As soon as the temperature stabilizes, record its value and refer to the table of variation in pH values according to
temperature (see label on the back of the bottle or table below).
The actual value of the pH buffer solution should then be adjusted according to the measured temperature.
Standard pH
4.01 at 25°C
°C
°F
pH
0
32
4.01
5
41
4.00
10
50
4.00
15
59
4.00
20
68
4.00
25
77
4.01
30
86
4.02
35
95
4.03
40
104
4.04
45
113
4.05
Standard pH
7.01 at 25°C
°C
°F
pH
0
32
7.13
5
41
7.10
10
50
7.07
15
59
7.04
20
68
7.03
25
77
7.01
30
86
7.00
35
95
6.99
40
104
6.98
45
113
6.98
If the temperature of the buffer solution is 20°C, the value of the
standard solution should be adjusted to pH 7.03.
To adjust this value, use the Up and Down arrows.
If the temperature of the buffer solution is 20 °C, the value of the
standard solution should be adjusted to pH 4.00.
To adjust this value, use the Up and Down arrows.
You can then validate the calibration step with the OK key.
STEP 1
pH 7.03
20.05°C
pH 7.02
Stable, OK to validate
Calibration condition to
adjust according to
temperature
Temperature measurement
Actual pH measurement
Measurement stability
message
STEP 2
pH 4.00
20.07°C
04:02:00
Stabilization in progress
Calibration condition
Measurement stability
message
Temperature measurement
Actual pH measurement

NEON_pH_Redox
- 18 -
Second point calibration: STEP 3 using pH 9
After rinsing and wiping the sensor, immerse the sensor head in pH 9 solution.
As soon as the temperature stabilizes, record its value and refer to the table of variation in pH values according to
temperature (see label on the back of the bottle or table below).
The actual value of the pH buffer solution should then be adjusted according to the measured temperature.
The calibration sequence can be interrupted at any time by pressing the Escape (ESC) key.
Calibration results:
After validating the calibration step, a screen appears with the calibration results.
The acceptance tolerances for the calibration steps are:
+/- 0.5% for the offset stage,
If tolerances are exceeded, it is advisable to check the cleanliness of the glass ball (measuring component for pH)
or even to change the sensor cartridge. Please refer to Section 8. PHEHT SENSOR MAINTENANCE for more
information.
To validate the calibration and complete this procedure, press the OK key.
If the calibration is rejected, press the Escape (ESC) key.
CALIB. SUMMARY
Step 1: pH 7.03
Coeff #1: pH 0.01
Step 2: pH 4.00
Coeff #2: 0.25%
Step 3: pH 9.02
OK to validate –ESC abort
STEP 3
pH 9.00
20.05°C
pH 9.02
Stable, OK to validate
Calibration condition to
adjust according to
temperature
Temperature measurement
Actual pH measurement
Measurement stability
message

NEON_pH_Rédox
- 19 -
6.3.3.2 REDOX SECONDARY PARAMETER.
To access the ORP calibration menu, select in the calibration menu, SECONDARY PARAMETER
OFFSET calibration: Electronics
This step involves setting the electronic zero of the ORP parameter. Put the dry sensor in the open air and wait for
the measurement to stabilize.
When the measurement has stabilised, confirm the calibration step using the OK key.
Slope calibration: 240 mV buffer solution
To calibrate the second point, immerse the sensor head in the 240 mV buffer solution and wait for the measurement
to stabilize.
Important: The platinum pad on the sensor cartridge must be immersed in the buffer solution.
When the measurement has stabilised, confirm the calibration step using the OK key.
Calibration results:
At the end of a calibration step, a screen showing the calibration results appears.
The acceptance tolerances for the calibration steps are:
+/- 10 mV for the offset step,
+/- 30% for the slope step.
If tolerances are exceeded, it is advisable to check the platinum cleanliness, or even replace the sensor cartridge.
Please refer to Section 8. PHEHT SENSOR MAINTENANCE for more information.
To validate the calibration and complete this procedure, press the OK key.
STEP 1
0.00 mV
20.05°C
0.02 mV
Stable, OK to validate
Calibration condition
Temperature measurement
Actual Redox
measurement
Measurement stability
message
ETAPE 2
240 mV
20.05°C
245 mV
Stable, OK to validate
Calibration condition
Temperature measurement
Actual Redox
measurement
Measurement stability
message
CALIB. SUMMARY
Step 1: 0.00 mV
Coeff #1: -0.01 mV
Step 2: 240 mV
Coeff #2: - 2.5 %
OK to validate –ESC abort

NEON_pH_Redox
- 20 -
If the calibration is rejected, press the Escape (ESC) key.
6.3.3.3 FACTORY COEFFICIENTS
In the event of mishandling during calibration or to check sensor operation, factory calibration coefficients can be
used to restore the sensor to its original coefficients.
To validate the setting the factory coefficients in the sensor, confirm with the OK key then press Escape (ESC) to
return to the previous screen.
FACTORY
COEFFS
---
OK key to confirm
Table of contents
Other AquaLabo Measuring Instrument manuals
Popular Measuring Instrument manuals by other brands

Endress+Hauser
Endress+Hauser Proline Promag W 800 operating instructions

Polimaster
Polimaster PM1603A operating manual

AndroTec
AndroTec Metor MTR-125 Operator's manual

Nieaf Instruments
Nieaf Instruments NI 31 manual

UWT
UWT Nivobob NB 4000 Technical Information/Instruction manual

Murphy
Murphy TANKTEND BGT Series Installation and operation instruction