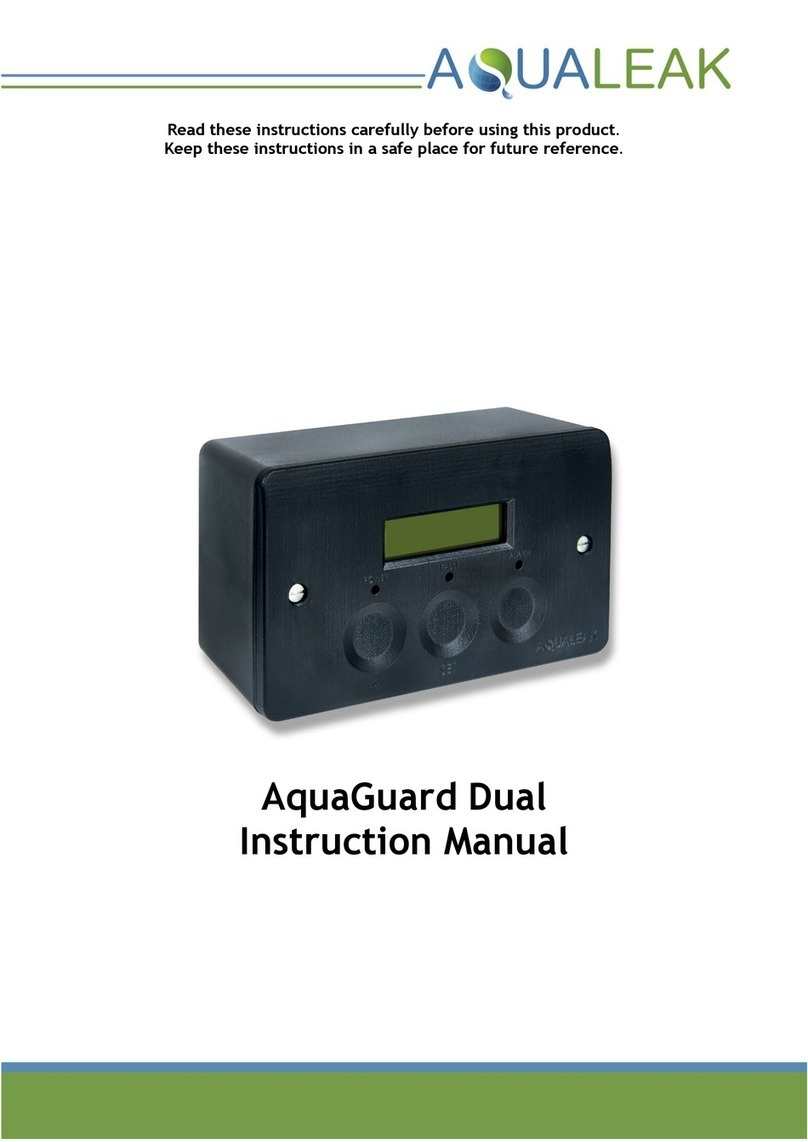
AQUALEAK WG2 Service manual

AQUALEAK DETECTION LTD
1 Silver St, Gastard, Wiltshire, SN13 9PY.
Tel: +44(0)1249 715698 F:+44(0)1249431363
Our full range of Water Leak Detection Systems, Oil Leak Detection, Overtemperature & Environmental Alarms,
Telephone Autodial Units can be seen at : http://www.aqualeak.com
www.aqualeak.com
Installation and Operation Instruction Manual
WG2 Major Water Leak Detection System
The WG2 system complies with BREEAM 2011 Section WAT03. It is a Major Leak Detection System
which covers all mains supplies both in and outside the building. It is programmable, has an audible
alarm and can identify different flow rates. It also complies with BREEAM W02 as the system uses water
meters with pulsed outputs and a pulse splitter that can connect to a BMS.
The standard two zone WG2 system comprises a WG2 Control Unit with two displays marked
“Internal Water Pipework” and “External Water Pipework”.
Connected to this are two pulsed output water meters. One water meter is installed at the property
boundary and the other inside the building just after the stopcock. The one at the boundary will
monitor for external leaks the other, internal leaks.

AQUALEAK DETECTION LTD
1 Silver St, Gastard, Wiltshire, SN13 9PY.
Tel: +44(0)1249 715698 F:+44(0)1249431363
Our full range of Water Leak Detection Systems, Oil Leak Detection, Overtemperature & Environmental Alarms,
Telephone Autodial Units can be seen at : http://www.aqualeak.com
www.aqualeak.com
Contents
2.0 Introduction
3.0 The Water Meters
4.0 Connecting the Water Meters
5.0 Connecting to a BMS
6.0 Connecting the Latching Valves
7.0 Connecting the Power
8.0 Navigating the Menus
9.0 The Alarm Modes available
10.0 The Hi Guard setting
11.0 The Lo Guard setting
12.0 Setting the Permanent Mode
13.0 Setting the Daily Mode
14.0 Setting the Daily Mode cont’
15.0 Setting the 7 day Mode
16.0 Setting the 7 day Mode cont’
17.0 Setting the Weekend Mode
18.0 Setting the Weekend Mode cont’
19.0 The Settings Menu
20.0 The Settings Menu cont’
21.0 The Log Menu
21.0 In The Event of an Alarm
22.0 Trouble Shooting Guide

1 Silver St, Gastard, Wiltshire, SN13 9PY.
Tel: +44(0)1249 715698 F:+44(0)1249431363
Our full range of Water Leak Detection Systems, Oil Leak Detection, Overtemperature & Environmental Alarms,
Telephone Autodial Units can be seen at : http://www.aqualeak.com
www.aqualeak.com
AQUALEAK DETECTION LTD
The WG2 Panel
HelpSetup
X
AQUALEAK
HelpSetup
X
AQUALEAK
Tel: +44(0)1249 715698
www.aqualeak.com
AQUALEAK DETECTION LTD
EXTERNAL WATER PIPEWORK
AQUALEAK B REEAM C RIT ERIA W ATERLEAK D ETECTIO N S YSTEM
System is live
System is off
System is clear
Water detection
Press to
mute alarm
PRESS
System is live
System is off
System is clear
Water detection
INTERNAL WATER PIPEWORK
m
e
t
s
y
S
n
o
i
t
c
e
t
e
D
k
a
e
L
r
e
t
a
W
2
G
W
PRESS
External Display
and Setting Panel
External Display
and Setting Panel
LED (green) when
system is switched on.
LED (off) when the
system is switched off.
LED (Red) when the
system is in alarm.
LED (off) when the
system is all OK.
External Water Pipework
Mute Button
Sounder
LED (green) when
system is switched on.
LED (off) when the
system is switched off.
LED (Red) when the
system is in alarm.
LED (off) when the
system is all OK.
Internal Water Pipework
Battery Cover
(2)

1 Silver St, Gastard, Wiltshire, SN13 9PY.
Tel: +44(0)1249 715698 F:+44(0)1249431363
Our full range of Water Leak Detection Systems, Oil Leak Detection, Overtemperature & Environmental Alarms,
Telephone Autodial Units can be seen at : http://www.aqualeak.com
www.aqualeak.com
AQUALEAK DETECTION LTD
The Water Meters
The WG2 uses 2 turbine water meters with pulse readers preconnected. One of the water meters needs
to go at the boundary (usually adjacent to the authority meter) and the second one goes inside the
building (where the pipework first enters) just after the main stop cock.
Types of water meters:
There are two different types of water meter supplied with the WG2.
Sizes between 15mm diameter and 40mm diameter use a screw type
meter. These meters are supplied with BSP union kits as standard.
Sizes between 50mm and 200mm use a flanged type water meter.
Both types have a pulse reader that has been attached during
manufacture and all have an output of 1 = 10 litres of water at a pulse
rate of 128 milliseconds or greater.
The pulse reader attached to the screw type water meter has a fly lead
with a red and black wire coming from it. The flange type meter has a
fly lead with a grey and white wire. The section on connecting the
system will explain where these wires are connected.
(3)

AQUALEAK DETECTION LTD
1 Silver St, Gastard, Wiltshire, SN13 9PY.
Tel: +44(0)1249 715698 F:+44(0)1249431363
Our full range of Water Leak Detection Systems, Oil Leak Detection, Overtemperature & Environmental Alarms,
Telephone Autodial Units can be seen at : http://www.aqualeak.com
www.aqualeak.com
Connecting the Water Meters
15CB to 200CB
AQUALEAK DETECTION LTD
The water meters are connected to the WG2 using a braided screened cable containing a pair of copper
conductors. For distances of up to 100m please use a minimum of 1mm² conductor and distances up to
500m please use a 2.5mm² conductor.
VALVE
BLUE
WHITE
METER
PULSE
PULSE
INTERNAL
VALVE PULSE
EXTERNAL
METER
Both style of water meter are connected in
the same way. Both have a fly lead coming
off the pulse reader with a red and black
wire. These are not polarity conscious and
can be connected anyway round. It is
advised that the connections to the cable
between the fly lead and the terminals in the
WG2 are made using an IP67 rated junction
box.
If the water meter is positioned more than 20m
away from the WG2 panel it is necessary to
connect the braiding to the negative connector on
the battery terminals. This is to reduce problems
with interference on the connection cable.
NB: It is not necessary to connect the braiding at
the water meter end to anything.
6 way chop block
Please be aware that older systems
will use a different water meter and the
wiring from these will be different
(4)

AQUALEAK DETECTION LTD
1 Silver St, Gastard, Wiltshire, SN13 9PY.
Tel: +44(0)1249 715698 F:+44(0)1249431363
Our full range of Water Leak Detection Systems, Oil Leak Detection, Overtemperature & Environmental Alarms,
Telephone Autodial Units can be seen at : http://www.aqualeak.com
www.aqualeak.com
AQUALEAK DETECTION LTD
Connecting the Latching Valves
VL15 to VL50
VALVE
BLUE
WHITE
METER
PULSE
PULSE
VALVE PULSEMETER
If the latching valve option has been ordered, they need to be connected to the WG2 panel using a pair of
copper conductors at least 1mm² in size. Aqualeak do not usually supply the cable to make this connection.
The latching valve uses a 9 - 12VDC pulse at 50 m/s, DO NOT PUT 230VAC TO THE VALVES
All latching valves supplied by Aqualeak
are connected in the same way. A pair of
wires are run to each valve from the panel
and connected to the terminals in the
connection block on the valve. The
connections are not polarity conscious,
with one wire going to the terminal marked
1 and the other to the one marked 2. The
internal valve connects to the terminals on
the 6 way chop block inside the panel
across connectors marked VALVE. The
external valve connects directly to the
terminals on the PCB labelled EXTERNAL
SYSTEM, VALVE and WHITE.
Please note that the external connection
marked as WHITE shares this with the
connection from the water meter.
INTERNAL EXTERNAL
6 way chop block
(5)

AQUALEAK DETECTION LTD
1 Silver St, Gastard, Wiltshire, SN13 9PY.
Tel: +44(0)1249 715698 F:+44(0)1249431363
Our full range of Water Leak Detection Systems, Oil Leak Detection, Overtemperature & Environmental Alarms,
Telephone Autodial Units can be seen at : http://www.aqualeak.com
www.aqualeak.com
AQUALEAK DETECTION LTD
Connecting to a BMS
VALVE
BLUE
WHITE
METER
PULSE
PULSE
VALVE PULSEMETER
Pulse output connection to allow for the monitoring of consumption by the BMS (BREEAM WAT02):
6 way chop block
To BMS
Connection to the BMS to indicate that a leak has been identified:
To BMS
To BMS
NB: The output from to the BMS is a pulse
equal to 10 litres of water.
NB: It is possible to common up
the two pairs from the internal
and external outputs to allow for a
single connection to the BMS.
This will alert the BMS that there
is a water leak but will not indicate
if the leak in external or internal.
Connection is made
across the Common
and Normally Open
(6)

AQUALEAK DETECTION LTD
1 Silver St, Gastard, Wiltshire, SN13 9PY.
Tel: +44(0)1249 715698 F:+44(0)1249431363
Our full range of Water Leak Detection Systems, Oil Leak Detection, Overtemperature & Environmental Alarms,
Telephone Autodial Units can be seen at : http://www.aqualeak.com
www.aqualeak.com
AQUALEAK DETECTION LTD
Connecting power
The WG2 panel requires a 230VAC supply from a
2Afused spur
Connecting the battery to the WG2 panel.
12V BATTERY
NB: The battery is packed separately in the same
box as the WG2 panel. When unpacking the WG2
panel please be careful to also unpack and save
the battery somewhere safe.
Fuses
1.5amp
1.5amp
1 amp
L E N
(7)

AQUALEAK DETECTION LTD
1 Silver St, Gastard, Wiltshire, SN13 9PY.
Tel: +44(0)1249 715698 F:+44(0)1249431363
Our full range of Water Leak Detection Systems, Oil Leak Detection, Overtemperature & Environmental Alarms,
Telephone Autodial Units can be seen at : http://www.aqualeak.com
www.aqualeak.com
AQUALEAK DETECTION LTD
Normal Display:
Displays time and current Guard setting.
Press to check the software version number, press
again to check the voltage and again to check the
pulses read by the water meter.
Navigation button:
scrolls between menus. Indexes between numbers in date and time
moves up and down the menus and changes the values
Setup:
To enter menus and to edit and save settings
Water off:
Turns the water supply off only if a latching solenoid valve has been fitted
Override:
Allows an unlimited volume of water through in a pre-set period (set in “Timeout”
in the Settings Menu)
Water on:
Resets the WG2 to normal guard mode after an alarm has been triggered and
switches the water back on if valve has been fitted.
It is also used to toggle between High and Low Guard modes, Daily mode, 7
Day mode and Weekend mode.
Navigating the Menus
(8)

AQUALEAK DETECTION LTD
1 Silver St, Gastard, Wiltshire, SN13 9PY.
Tel: +44(0)1249 715698 F:+44(0)1249431363
Our full range of Water Leak Detection Systems, Oil Leak Detection, Overtemperature & Environmental Alarms,
Telephone Autodial Units can be seen at : http://www.aqualeak.com
www.aqualeak.com
AQUALEAK DETECTION LTD
The Modes (Guard Menu)
Understanding the different modes
Permanent (default)
This allows whatever is set into the “High Guard” (please see “High Guard” set up later in this manual)
through in any 24 hour period.
Daily
This allows the setting of 4 different Guard Settings, 2 high and 2 low for each day. All days of the week
are equal to those set for Sunday.
7 Day
This is set up as for “Daily” only it allows the user to set each day of the week with a different High Guard
1 and 2 as well as a different Low Guard 1 and 2.
Weekend
This is set up as for “Daily” only it allows the user to set a different rate for the weekend than that set for
the week. The weekend setting uses the figures for Sunday and the weekday setting uses the figures for
Monday.
To set the mode:
Press to go into “Guard Menu”
Press to go into the “Mode Menu”
The default mode is Permanent, the display will say “Mode Permanent”.
To change to a different mode press the button, the “P” in Permanent will start to flash.
Press the and buttons to toggle between Permanent/Daily/7 Day/Weekend.
Press to store
NOTE: All WG2 panels leave the factory with a default setting of 1 pulse. This means that only 10
litres of water will pass through the water meters before an alarm is given. The amount of water
allowed through the meters before an alarm must be increased by setting the Hi Guard figure to more
than 1 (see page 10). Remember 1 is equal to 10 litres, so 2 will be 20 litres and 10 will be 100 litres and
so on.
(9)

AQUALEAK DETECTION LTD
1 Silver St, Gastard, Wiltshire, SN13 9PY.
Tel: +44(0)1249 715698 F:+44(0)1249431363
Our full range of Water Leak Detection Systems, Oil Leak Detection, Overtemperature & Environmental Alarms,
Telephone Autodial Units can be seen at : http://www.aqualeak.com
www.aqualeak.com
AQUALEAK DETECTION LTD
The Hi Guard (Guard Menu)
Understanding the Hi Guard Settings
The Hi Guard number equates to the amount of water flowing through the water meter in a half hour period
before the WG2 will go into alarm. Every increment of 1 will allow an extra 10 litres of water to pass through.
The WG2 is factory set to 1 (this equates to only 10 litres of water passing through the water meter in half an
hour) and the system will almost certainly go in to alarm as soon as water is run off. It is advised that the Hi
Guard setting is increased to reflect the buildings occupancy and facilities. The Hi Guard figure is used when
the system is set to Permanent, Daily, 7 Day or Weekend.
Please note that the highest setting possible is 32,000, this will equate to allowing 320,000 litres of water to
flow through the water meter in a half hour period. This is physically not possible, but you can use this setting
where the actual amount of expected usage is not known when commissioning. You will however need to
return at a later date to adjust the figure to reflect the usage once the amount has been established.
To set the Hi Guard figure:
Press to go into “Guard Menu”
Press twice to go into the “Hi Guard”
The default mode is 1, the display will say “Hi Guard 1”.
To change to a different value press the button, the “1” will start to flash.
Press the buttons to toggle up or the to toggle down from 32,000
Press to store
NOTE: When the unit is first powered live, the default setting is 1 pulse. If the building is occupied and water is
being drawn, the WG2 will go into alarm. It is not possible to set the Hi Guard figure to a higher one if water is
being run off when in the Guard Menu section. Please isolate the water at the stop cock or should this not be
possible, disconnect one of the wires from the water meter in the terminal block inside the WG2 control panel.
This will need to be done for both the internal and external water meters. Once the HI Guard figure has been
increased, the wires can be replaced.
(10)

AQUALEAK DETECTION LTD
1 Silver St, Gastard, Wiltshire, SN13 9PY.
Tel: +44(0)1249 715698 F:+44(0)1249431363
Our full range of Water Leak Detection Systems, Oil Leak Detection, Overtemperature & Environmental Alarms,
Telephone Autodial Units can be seen at : http://www.aqualeak.com
www.aqualeak.com
AQUALEAK DETECTION LTD
The Lo Guard (Guard Menu)
Understanding the Lo Guard Settings
The Lo Guard feature is used when using Daily, 7 Day or Weekend mode. It is always used in conjunction
with the Hi Guard setting (see page 10 for setting the Hi Guard).
Hi Guards are used where the building is in full occupancy. There are 2 settings the first accounts for the time
that the building is in continuous use (i.e. if it's a school then from 8.30am to 4.30pm), the second accounts for
perhaps when the cleaners arrive and need to draw water (i.e. if it's a school then from 6.30pm to 8.30pm).
Lo Guards are used where the building is vacated. There are 2 settings the first accounts for the time that the
building is vacated (i.e. if it's a school then between 4.30pm when the school finishes and 6.30pm when the
cleaners arrive), the second accounts for the period after the cleaners have left and when the school re-opens
in the morning (i.e. 8.30pm to 8.30am).
To set the Lo Guard figure:
Press to go into “Guard Menu”
Press three times to go into the “Lo Guard”
The default mode is 1, the display will say “Lo Guard 1”.
To change to a different value press the button, the “1” will start to flash.
Press the buttons to toggle up or the to toggle down from 32,000
Press to store
(11)

AQUALEAK DETECTION LTD
1 Silver St, Gastard, Wiltshire, SN13 9PY.
Tel: +44(0)1249 715698 F:+44(0)1249431363
Our full range of Water Leak Detection Systems, Oil Leak Detection, Overtemperature & Environmental Alarms,
Telephone Autodial Units can be seen at : http://www.aqualeak.com
www.aqualeak.com
AQUALEAK DETECTION LTD
(12)
The Permanent Mode (Guard Menu)
Setting the Permanent Mode
This mode is used when the same amount of water can pass through the water meter at any time of the day or
night. This mode is often used when the actual consumption of the building isn’t known at the time of
commissioning.
To set the Permanent Mode:
Press to go into “Guard Menu”
Press to go into the “mode” this will show “Permanent” if setting from factory default
Press the button, the display will show “Hi Guard”.
The default mode is 1, the display will say “Hi Guard 1”.
To change to a different value press the button, the “1” will start to flash.
Press the buttons to toggle up or the to toggle down from 32,000
Press to store (please see the section on setting the Hi Guard for an explanation about what this is)

AQUALEAK DETECTION LTD
1 Silver St, Gastard, Wiltshire, SN13 9PY.
Tel: +44(0)1249 715698 F:+44(0)1249431363
Our full range of Water Leak Detection Systems, Oil Leak Detection, Overtemperature & Environmental Alarms,
Telephone Autodial Units can be seen at : http://www.aqualeak.com
www.aqualeak.com
AQUALEAK DETECTION LTD
The Daily Mode (Guard Menu)
Setting the Daily Mode
This mode is used when a higher amount of water is required to pass through the water meter at times when
the building is occupied and a lower amount when the building is empty. Up to 2 different amounts can be set
for when the building has people in it (HI Guard) and 2 different amounts for when the building is empty (LO
Guard). The example of a school on the previous page helps to explain when this would be used.
Setting the Daily Mode
is continued on the
next page
To set the Daily Mode:
Press to go into “Guard Menu”
Press to go into the “mode” this will show “Permanent” if setting from factory default
To change to a different value press the button, the “P” will start to flash.
Press the buttons to toggle up or the to toggle down until “Daily” is on the display
Press to store
Press the button, the display will show “Hi Guard”.
The default mode is 1, the display will say “Hi Guard 1”.
To change to a different value press the button, the “1” will start to flash.
Press the buttons to toggle up or the to toggle down from 32,000
Press to store (please see the section on setting the Hi Guard for an explanation about what this is)
Press the button, the display will show “Lo Guard”.
The default mode is 1, the display will say “Lo Guard 1”.
To change to a different value press the button, the “1” will start to flash.
Press the buttons to toggle up or the to toggle down from 32,000
Press to store (please see the section on setting the Lo Guard for an explanation about what this is)
Press the button, the display will show “Sun High 1 00:00”. This is where you set the start time for when the
building will be occupied. eg. in the example of the school 8.30am.
To set the time press the button, the first “0” of the “00:00” will start to flash.
Press the buttons to toggle up or the to toggle down. The first two “00” will count between 00 and 23 being
the hour, working on a 24 hour clock
Once the correct hour has been set (08 in the school example) press the button to toggle across to the last 2 “00”
Press the buttons to toggle up or the to toggle down. The last two “00” will count between 00 and 59 being
the minutes.
Once the correct minutes have been set (30 in the school example) press the button to store (in the example of
the school this will display 08:30).
Setting the Mode
Setting the
Hi Guard 1
Setting the
Lo Guard 1
Setting the Start
time for high use
(13)

AQUALEAK DETECTION LTD
1 Silver St, Gastard, Wiltshire, SN13 9PY.
Tel: +44(0)1249 715698 F:+44(0)1249431363
Our full range of Water Leak Detection Systems, Oil Leak Detection, Overtemperature & Environmental Alarms,
Telephone Autodial Units can be seen at : http://www.aqualeak.com
www.aqualeak.com
AQUALEAK DETECTION LTD
The Daily Mode (Guard Menu) cont’
Press the button, the display will show “Sun Lo 1 00:00”. This is where you set the start time for when the
building will be unoccupied. eg. in the example of the school 4.30pm.
To set the time press the button, the first “0” of the “00:00” will start to flash.
Press the buttons to toggle up or the to toggle down. The first two “00” will count between 00 and 23 being
the hour, working on a 24 hour clock
Once the correct hour has been set (16 in the school example) press the button to toggle across to the last two
“00”
Press the buttons to toggle up or the to toggle down. The last two “00” will count between 00 and 59 being
the minutes.
Once the correct minutes have been set (30 in the school example) press the button to store (in the example of
the school this will display 16:30).
Press the button, the display will show “Sun High 2 00:00”. This is where you set the start time for when the
building will be occupied at a later time on the same day. eg. in the example of the school 6.30pm when the cleaners
come in.
To set the time press the button, the first “0” of the “00:00” will start to flash.
Press the buttons to toggle up or the to toggle down. The first two “00” will count between 00 and 23 being
the hour, working on a 24 hour clock
Once the correct hour has been set (18 in the school example) press the button to toggle across to the last two
“00”
Press the buttons to toggle up or the to toggle down. The last two “00” will count between 00 and 59 being
the minutes.
Once the correct minutes have been set (30 in the school example) press the button to store (in the example of
the school this will display 18:30).
Press the button, the display will show “Sun Lo 2 00:00”. This is where you set the start time for when the
building will be unoccupied. eg. in the example of the school 4.30pm.
To set the time press the button, the first “0” of the “00:00” will start to flash.
Press the buttons to toggle up or the to toggle down. The first two “00” will count between 00 and 23 being
the hour, working on a 24 hour clock
Once the correct hour has been set (16 in the school example) press the button to toggle across to the last two
“00”
Press the buttons to toggle up or the to toggle down. The last two “00” will count between 00 and 59 being
the minutes.
Once the correct minutes have been set (30 in the school example) press the button to store (in the example of
the school this will display 16:30).
Setting the start
time for low use
Setting the start time for
second high use
Setting the start time for
second low use
(14)

AQUALEAK DETECTION LTD
1 Silver St, Gastard, Wiltshire, SN13 9PY.
Tel: +44(0)1249 715698 F:+44(0)1249431363
Our full range of Water Leak Detection Systems, Oil Leak Detection, Overtemperature & Environmental Alarms,
Telephone Autodial Units can be seen at : http://www.aqualeak.com
www.aqualeak.com
AQUALEAK DETECTION LTD
The 7 Day Mode (Guard Menu)
Setting the 7 Day Mode
This mode is used to set the system up to allow a different amount of water through on every day of the week.
There are two times each day when a greater amount of water can be allowed to flow and two times each day
when only a small amount of water flowing would be detected.
Setting the 7 Day Mode
is continued on the
next page
To set the 7 Day Mode:
Press to go into “Guard Menu”
Press to go into the “mode” this will show “Permanent” if setting from factory default
To change to a different value press the button, the “P” will start to flash.
Press the buttons to toggle up or the to toggle down until “7 Day” is on the display
Press to store
Press the button, the display will show “Hi Guard”.
The default mode is 1, the display will say “Hi Guard 1”.
To change to a different value press the button, the “1” will start to flash.
Press the buttons to toggle up or the to toggle down from 32,000
Press to store (please see the section on setting the Hi Guard for an explanation about what this is)
Press the button, the display will show “Lo Guard”.
The default mode is 1, the display will say “Lo Guard 1”.
To change to a different value press the button, the “1” will start to flash.
Press the buttons to toggle up or the to toggle down from 32,000
Press to store (please see the section on setting the Lo Guard for an explanation about what this is)
Press the button, the display will show “Sun High 1 00:00”. This is where you set the start time for when the
building will be occupied. eg. in the example of the school 8.30am.
To set the time press the button, the first “0” of the “00:00” will start to flash.
Press the buttons to toggle up or the to toggle down. The first two “00” will count between 00 and 23 being
the hour, working on a 24 hour clock
Once the correct hour has been set (08 in the school example) press the button to toggle across to the last 2 “00”
Press the buttons to toggle up or the to toggle down. The last two “00” will count between 00 and 59 being
the minutes.
Once the correct minutes have been set (30 in the school example) press the button to store (in the example of
the school this will display 08:30).
Setting the Mode
Setting the
Hi Guard 1
Setting the
Lo Guard 1
(1.0) Setting the start
time for high use on Sundays
(15)

AQUALEAK DETECTION LTD
1 Silver St, Gastard, Wiltshire, SN13 9PY.
Tel: +44(0)1249 715698 F:+44(0)1249431363
Our full range of Water Leak Detection Systems, Oil Leak Detection, Overtemperature & Environmental Alarms,
Telephone Autodial Units can be seen at : http://www.aqualeak.com
www.aqualeak.com
AQUALEAK DETECTION LTD
The 7 Day Mode (Guard Menu) cont’
Press the button, the display will show “Sun Lo 1 00:00”. This is where you set the start time for when the
building will be unoccupied. eg. in the example of the school 4.30pm.
To set the time press the button, the first “0” of the “00:00” will start to flash.
Press the buttons to toggle up or the to toggle down. The first two “00” will count between 00 and 23 being
the hour, working on a 24 hour clock
Once the correct hour has been set (16 in the school example) press the button to toggle across to the last two
“00”
Press the buttons to toggle up or the to toggle down. The last two “00” will count between 00 and 59 being
the minutes.
Once the correct minutes have been set (30 in the school example) press the button to store (in the example of
the school this will display 16:30).
Press the button, the display will show “Sun High 2 00:00”. This is where you set the start time for when the
building will be occupied at a later time on the same day. eg. in the example of the school 6.30pm when the cleaners
come in.
To set the time press the button, the first “0” of the “00:00” will start to flash.
Press the buttons to toggle up or the to toggle down. The first two “00” will count between 00 and 23 being
the hour, working on a 24 hour clock
Once the correct hour has been set (18 in the school example) press the button to toggle across to the last two
“00”
Press the buttons to toggle up or the to toggle down. The last two “00” will count between 00 and 59 being
the minutes.
Once the correct minutes have been set (30 in the school example) press the button to store (in the example of
the school this will display 18:30).
Press the button, the display will show “Sun Lo 2 00:00”. This is where you set the start time for when the
building will be unoccupied. eg. in the example of the school 4.30pm.
To set the time press the button, the first “0” of the “00:00” will start to flash.
Press the buttons to toggle up or the to toggle down. The first two “00” will count between 00 and 23 being
the hour, working on a 24 hour clock
Once the correct hour has been set (16 in the school example) press the button to toggle across to the last two
“00”
Press the buttons to toggle up or the to toggle down. The last two “00” will count between 00 and 59 being
the minutes.
Once the correct minutes have been set (30 in the school example) press the button to store (in the example of
the school this will display 16:30).
(2.0) Setting the start time for
low use time for Sundays
(3.0) Setting the start time for
second high use time on Sundays
(4.0) Setting the start time for
second low use time on Sundays
Repeat the process for (1.0) to (4.0) to set Monday, Tuesday, Wednesday, Thursday, Friday and Saturday
Setting the other days of the week:
(16)

AQUALEAK DETECTION LTD
1 Silver St, Gastard, Wiltshire, SN13 9PY.
Tel: +44(0)1249 715698 F:+44(0)1249431363
Our full range of Water Leak Detection Systems, Oil Leak Detection, Overtemperature & Environmental Alarms,
Telephone Autodial Units can be seen at : http://www.aqualeak.com
www.aqualeak.com
AQUALEAK DETECTION LTD
The Weekend Mode (Guard Menu)
Setting the Weekend Mode
This mode is used to set the system up to allow a different amount of water through on the week end than that
set for the weekdays.
Setting the Weekend
Mode is continued on
the next page
To set the Weekend Mode:
Press to go into “Guard Menu”
Press to go into the “mode” this will show “Permanent” if setting from factory default
To change to a different value press the button, the “P” will start to flash.
Press the buttons to toggle up or the to toggle down until “Weekend” is on the display
Press to store
Press the button, the display will show “Hi Guard”.
The default mode is 1, the display will say “Hi Guard 1”.
To change to a different value press the button, the “1” will start to flash.
Press the buttons to toggle up or the to toggle down from 32,000
Press to store (please see the section on setting the Hi Guard for an explanation about what this is)
Press the button, the display will show “Lo Guard”.
The default mode is 1, the display will say “Lo Guard 1”.
To change to a different value press the button, the “1” will start to flash.
Press the buttons to toggle up or the to toggle down from 32,000
Press to store (please see the section on setting the Lo Guard for an explanation about what this is)
Press the button, the display will show “Sun High 1 00:00”. This is where you set the start time for when the
building will be occupied. eg. in the example of the school 8.30am.
To set the time press the button, the first “0” of the “00:00” will start to flash.
Press the buttons to toggle up or the to toggle down. The first two “00” will count between 00 and 23 being
the hour, working on a 24 hour clock
Once the correct hour has been set (08 in the school example) press the button to toggle across to the last 2 “00”
Press the buttons to toggle up or the to toggle down. The last two “00” will count between 00 and 59 being
the minutes.
Once the correct minutes have been set (30 in the school example) press the button to store (in the example of
the school this will display 08:30).
Setting the Mode
Setting the
Hi Guard 1
Setting the
Lo Guard 1
(1.0) Setting the start
time for high use on Sundays
(17)

AQUALEAK DETECTION LTD
1 Silver St, Gastard, Wiltshire, SN13 9PY.
Tel: +44(0)1249 715698 F:+44(0)1249431363
Our full range of Water Leak Detection Systems, Oil Leak Detection, Overtemperature & Environmental Alarms,
Telephone Autodial Units can be seen at : http://www.aqualeak.com
www.aqualeak.com
AQUALEAK DETECTION LTD
The Weekend Mode (Guard Menu) cont’
Press the button, the display will show “Sun Lo 1 00:00”. This is where you set the start time for when the
building will be unoccupied. eg. in the example of the school 4.30pm.
To set the time press the button, the first “0” of the “00:00” will start to flash.
Press the buttons to toggle up or the to toggle down. The first two “00” will count between 00 and 23 being
the hour, working on a 24 hour clock
Once the correct hour has been set (16 in the school example) press the button to toggle across to the last two
“00”
Press the buttons to toggle up or the to toggle down. The last two “00” will count between 00 and 59 being
the minutes.
Once the correct minutes have been set (30 in the school example) press the button to store (in the example of
the school this will display 16:30).
Press the button, the display will show “Sun High 2 00:00”. This is where you set the start time for when the
building will be occupied at a later time on the same day. eg. in the example of the school 6.30pm when the cleaners
come in.
To set the time press the button, the first “0” of the “00:00” will start to flash.
Press the buttons to toggle up or the to toggle down. The first two “00” will count between 00 and 23 being
the hour, working on a 24 hour clock
Once the correct hour has been set (18 in the school example) press the button to toggle across to the last two
“00”
Press the buttons to toggle up or the to toggle down. The last two “00” will count between 00 and 59 being
the minutes.
Once the correct minutes have been set (30 in the school example) press the button to store (in the example of
the school this will display 18:30).
Press the button, the display will show “Sun Lo 2 00:00”. This is where you set the start time for when the
building will be unoccupied. eg. in the example of the school 4.30pm.
To set the time press the button, the first “0” of the “00:00” will start to flash.
Press the buttons to toggle up or the to toggle down. The first two “00” will count between 00 and 23 being
the hour, working on a 24 hour clock
Once the correct hour has been set (16 in the school example) press the button to toggle across to the last two
“00”
Press the buttons to toggle up or the to toggle down. The last two “00” will count between 00 and 59 being
the minutes.
Once the correct minutes have been set (30 in the school example) press the button to store (in the example of
the school this will display 16:30).
(2.0) Setting the start time for
low use time for Sundays
(3.0) Setting the start time for
second high use time on Sundays
(4.0) Setting the start time for
second low use time on Sundays
NOTE: The settings for Sunday will be used for the weekend and the settings for Monday for
Monday to Friday. To set up the parameters for Monday
“Mon High” is on the display.
repeat the process for (1.0) to (4.0) starting when
(18)

AQUALEAK DETECTION LTD
1 Silver St, Gastard, Wiltshire, SN13 9PY.
Tel: +44(0)1249 715698 F:+44(0)1249431363
Our full range of Water Leak Detection Systems, Oil Leak Detection, Overtemperature & Environmental Alarms,
Telephone Autodial Units can be seen at : http://www.aqualeak.com
www.aqualeak.com
AQUALEAK DETECTION LTD
The Settings Menu
Understanding the different settings
Keylock
This feature is set to “No” as a default, to switch on this feature please contact Aqualeak Detection
Date
The current date will need to be input when commissioning the system for the first time
Time
The current time will need to input when commissioning the system for the first time
Timeout
This is where you set the time the over-ride feature will run for
BuzzerEn
This will turn the internal buzzer on or off
www.aqualeak.com
To get into the Settings Menu:
Press to wake up the display, then press to go into “Guard Menu”
Press to go into the “Settings Menu”
Setting the Date:
Press the the display will show “Keylock”, press the again, the display will show “Date”
Press to make the first number of the date flash 01/01/01
(a) Press to increment the number up and the to increment the number down, then press the
to move the curser to make the second set of numbers flash 01/01/01 and repeat (a) to set. Then press
the to move the curser to make the second set of numbers flash 01/01/01 and repeat (a) to set, press
the to store the date.
(19)
Table of contents
Other AQUALEAK Security Sensor manuals
Popular Security Sensor manuals by other brands

Dielectric
Dielectric MGD-2002 instruction manual

Honeywell
Honeywell Sensepoint XCD RFD Technical manual

Inficon
Inficon HLD6000 installation manual

SPX
SPX Radiodetection RD7000+ Operation manual

Emerson
Emerson Dixell GDS41 Installing and operating instructions

Lince
Lince 1597ZENITHDT Programming and operating manual

Bircher
Bircher Merkur 2 ES.SM Series Translation of the original instructions

STEINEL
STEINEL Professional Series instructions

Gas Clip Technologies
Gas Clip Technologies Multi Gas Clip Simple user manual

Argus Security
Argus Security Taurus TW-DO-01/916 manual

DirekTronik
DirekTronik LSN50v2-S31 user manual

Eterna
Eterna MHDB installation instructions