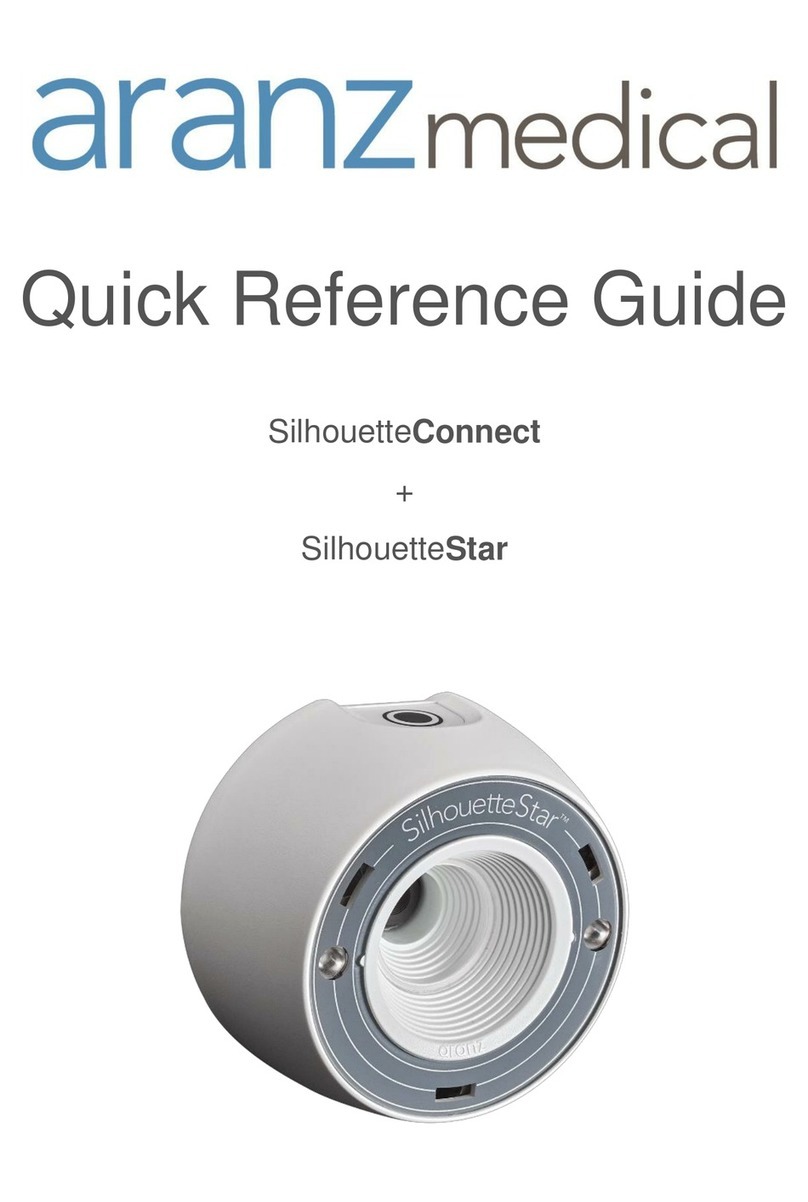
Aranz medical SilhouetteStar 1 User manual

Quick Reference Guide
SilhouetteStar 1
+
SilhouetteConnect


Document # 2018-00357 Rev2.0 Copyright © 2020 ARANZ Medical Limited Page 1 of 14
Welcome
SilhouetteStar™ is a non-contact device used to collect images, measurements and
other information from all external wound types at the point of care; it is connected to
a computer via a USB cable.
SilhouetteConnect™ is the software that runs on the computer; it controls the SilhouetteStar
device and functions as a wound-focused electronic medical record system.
This quick reference guide is the reference for using SilhouetteStar + SilhouetteConnect. It
summarizes important points in regards to wound imaging, measurement, and
documentation.
You can find more detailed information in the user manuals or SilhouetteConnect help
documentation or the Silhouette Clinical User’s Guide.

Document # 2018-00357 Rev2.0 Copyright © 2020 ARANZ Medical Limited Page 2 of 14
Contents
Warnings ....................................................................................................................................................... 3
Installation and Getting Started..................................................................................................................... 6
Obtaining and Activating Your License .......................................................................................................... 6
Connecting the SilhouetteStar....................................................................................................................... 7
Disconnecting the SilhouetteStar .................................................................................................................. 7
Typical Silhouette Data Collection Workflow................................................................................................. 8
Capturing Images........................................................................................................................................... 8
Tracing Wound Boundaries ......................................................................................................................... 10
Taking a Multiple Image Measurement....................................................................................................... 11
Measurement Accuracy............................................................................................................................... 12
Good Habits................................................................................................................................................. 13
Getting Support ........................................................................................................................................... 14

Document # 2018-00357 Rev2.0 Copyright © 2020 ARANZ Medical Limited Page 3 of 14
Warnings
Laser Warnings
SilhouetteStar is designated as a Class 1 laser product during all operational procedures. A Class 1 laser
product is safe under reasonably foreseeable conditions per the requirements in IEC 60825-1. However,
the following precautions are recommended:
•Never stare into the laser beam.
•Do not view the laser with optical instruments.
•Do not use SilhouetteStar in a manner that causes the laser light to shine into people’s eyes.
•Warn patients not to stare into the laser beam. Young children or subjects whose natural aversion
reflex may be dulled due to medication or a medical condition may be advised to wear a blindfold.
•Operate the device so that it is pointing away from windows, doors, mirrors, and other shiny reflective
surfaces, and areas where other people are working.
•There are no controls, adjustments, or user serviceable parts that can affect the laser output. In the
event of equipment failure, contact the manufacturer or agent for repair and servicing.
SilhouetteStar complies with FDA performance standards for laser products except for deviations pursuant
to Laser Notice No. 50, dated June 24, 2007.
CAUTION: Use of controls or adjustments or performance of procedures other than those
specified in this guide may result in hazardous radiation exposure.
WARNING: Laser light Class 1 product. Do not view directly with optical instruments.
Other Warnings
•Do not use SilhouetteStar in humidity or temperature conditions outside those listed in Appendix A:
Operating Conditions in SilhouetteConnect help.
•Wipe any condensation from the SilhouetteStar protective optical plastic covers.
•Do not touch the optical plastic covering the SilhouetteStar lasers, LEDs or camera lens. Avoid contact
with sharp objects. SilhouetteStar should be placed face-down on a clean, dry, flat surface when not in
use.
•Use standard sterility protocols. Do not allow SilhouetteStar or the USB cable to come into contact with
the patient or with contaminated materials.
•When using SilhouetteStar, the operator and others in the room should use caution to avoid tripping
when the USB cable is draped across the floor. When SilhouetteStar is not in use, the cable should be
disconnected and stored.
•Use only a SilhouetteStar USB cable. Use of a non-factory cable may cause interference with other
electronic devices and/or unreliable operation.
•If the USB cable becomes damaged, please contact ARANZ Medical for a replacement. Continued use
with a damaged cable may cause interference with other electronic devices and/or result in incorrect
measurements and/or cause permanent damage to SilhouetteStar or to the attached computer.
•SilhouetteStar can be plugged into any available USB 2.0 port that meets electrical specifications of the
USB standard.

Document # 2018-00357 Rev2.0 Copyright © 2020 ARANZ Medical Limited Page 4 of 14
•Ensure the computer power supply, and any USB hubs used are approved for medical use according to
IEC60601-1.
•SilhouetteStar has an Ingress Protection rating of IP40, which means it is protected against dust but not
water ingress.
•SilhouetteStar contains no user serviceable parts.
•This product is designed to have a nominal operational life of five years.
•At end of unit life, please recycle in accordance with local government regulations.

Document # 2018-00357 Rev2.0 Copyright © 2020 ARANZ Medical Limited Page 5 of 14
SilhouetteStar Label Information
The warning label on the SilhouetteStar device shows information about your SilhouetteStar. The symbols
on the label and their meanings are as follows:
Manufacturer reference / Model number
Major Model Number
SilhouetteStar Model
2001
SilhouetteStar 1 (3MP)
2005
SilhouetteStar 1 (5MP)
There are other models of SilhouetteStar (e.g. SilhouetteStar 2 (2010)), refer to
separate quick reference guides for details.
Manufacturer assigned device serial number
Date of manufacture
Manufacturer
ARANZ Medical Limited
Tel +64-3-3 74-6120, Fax +64-3-374-6130
Postal Address:
ARANZ Medical Limited
PO Box 3894
Christchurch 8140
New Zealand
Delivery Address:
ARANZ Medical Limited
47 Hereford Street
Christchurch 8013
New Zealand
CE-mark. EU Declaration of Conformity and Notified Body Identifier
C-Tick. New Zealand and Australia Declaration of Conformity and Identifier
Warning: Laser light. SilhouetteStar is designated as a Class 1 laser product during
all operational procedures.
Waste Electrical and Electronic Equipment Directive (WEEE) Symbol. Separate
collection for electrical and electronic equipment under WEEE EC Directive.

Document # 2018-00357 Rev2.0 Copyright © 2020 ARANZ Medical Limited Page 6 of 14
Installation and Getting Started
The files required to install SilhouetteConnect are delivered as a zip file, which will
require extracting to a known location. Once you have downloaded these files:
1. Navigate to the folder that contains the installation files.
2. Right click on setup.exe, and run as Administrator to start installation.
3. Follow the on-screen instructions.
Once the installation is complete, launch SilhouetteConnect by double-clicking on
the icon created on your desktop.
Obtaining and Activating Your License
To obtain a license or client code, contact Customer Support using the details
provided on page 14 of this guide.
When you first launch SilhouetteConnect, a screen will appear prompting you to
enter a Client Code.
•If you have a client code, ensure your computer is connected to the internet, enter
the code, and select Check License.
•If you have received a license file, select Import License to locate the file.
Once you have activated your license, the Log On screen will be the first screen
displayed whenever you launch SilhouetteConnect.
If you select Continue without entering a client code or importing a valid license,
you can use SilhouetteConnect for the 30-day trial period only.

Document # 2018-00357 Rev2.0 Copyright © 2020 ARANZ Medical Limited Page 7 of 14
Connecting the SilhouetteStar
To connect SilhouetteStar, insert the square end of the cable into the port on the
device.
Insert the flat end of the cable into one of the USB 2.0 ports on your computer:
You can also connect the SIlhouetteStar via a powered USB hub.
Your computer will automatically detect the device and install the required drivers. If
the computer’s sound is on, the computer will chime to indicate successful
connection.
The SilhouetteStar’s lasers will not operate until you initiate image capture from
SilhouetteConnect.
Performing a test image capture ensures that the correct drivers have been loaded
and that the SilhouetteStar is working correctly. Please note that your system
includes a Silhouette Test Target (a card with 4 dots supplied with SilhouetteStar).
The Silhouette Test Target is used to perform a SilhouetteStar calibration test
capture if your software provides the calibration test capture facility.
Disconnecting the SilhouetteStar
To disconnect the SilhouetteStar, make sure the lasers are off and simply remove the
USB cable from your SilhouetteStar and/or the computer’s USB port.

Document # 2018-00357 Rev2.0 Copyright © 2020 ARANZ Medical Limited Page 8 of 14
Typical Silhouette Data Collection Workflow
Silhouette captures images of wounds in order to generate dimensional information
about the wound. A typical workflow is:
1. Log on to SilhouetteConnect
2. Select a patient from the list or create a new patient
3. Create a new assessment
4. Capture images
5. Assign images to wounds, trace wound boundaries, and take measurements
6. Generate an assessment PDF report or synchronize with SilhouetteCentral
8. Log off
The user interface and operation differs with your system configuration and
Silhouette software version. Refer to the SilhouetteConnect help or Silhouette
Clinical User’s Guide for more specific instructions.
Capturing Images
To capture images with the SilhouetteStar device, ensure that the device is
connected to your computer via the USB cable provided and that you have the
correct patient selected in SilhouetteConnect.
If using SilhouetteConnect software prior to v4.0, enter capture mode by selecting
the Capture Images button in. If using SilhouetteConnect software v4.0 or greater,
enter capture mode by pressing the button on the SilhouetteStar.
The SilhouetteStar lasers will be activated when in image capture mode. When using
SilhouetteConnect v4.0 or greater, image capture mode will timeout and the device
lasers will turn off. Reactivate them by pressing the button on the device.
Hold the SilhouetteStar so that your hand sits comfortably, with your index finger in
reach of the button, this may take two hands. The device takes a series of images
and it is important to keep it steady during the capture sequence to get the best
results.

Document # 2018-00357 Rev2.0 Copyright © 2020 ARANZ Medical Limited Page 9 of 14
Position the SilhouetteStar facing the wound so that the laser lines cross near the
center of the wound to form a star shape. The laser lines do not need to cross in a
perfect star shape, but all the crossing points should be within the wound. One of
the laser lines should cross the deepest part of the wound. For very large wounds,
see the instructions in “Taking a Multiple Image Measurement” on page 11.
Gently squeeze the button on the SilhouetteStar to capture the image, keeping the
device still until you hear the shutter sound from SilhouetteConnect or, if your
computer’s sound is off, until the image appears on-screen in SilhouetteConnect.
Continue capturing as many images as required.

Document # 2018-00357 Rev2.0 Copyright © 2020 ARANZ Medical Limited Page 10 of 14
Tracing Wound Boundaries
Once the captured images have been assigned to wound assessments, the next step
is to trace the wound boundaries. The following guidelines for tracing wounds are
provided:
•Starting an outline create a target circle on the first point. The outline is
completed by tracing back to the target circle.
•Use image zoom and pan to optimise the tracing accuracy.
•Trace the wound boundary by clicking to add points to the outline.
•When tracing the wound boundary, it is important to draw in one direction.
For example, draw in the clockwise direction or the counter-clockwise
direction, but do not draw in one direction then switch to the other
direction.
•Always trace using a comfortable hand position. The tracing does not need
to be completed in a single motion, reposition your hand or mouse to make
tracing easy.
•Wound outlines are considered invalid if they cross themselves or other
wound outlines.
•The drawing tools differ depending on the version of software you are using
and the computing device you are using. Practice a little with the drawing
tools to find the tracing method that works the best for you.
Once you have reached the target, the outline will close and the wound’s area and
perimeter will be displayed. Maximum depth and volume may also be displayed for
some wounds.
You can also draw outlines of any wound fragments or islands. Outlines created
inside the main wound outline are regarded as islands of that wound, and outlines
outside the main outline are regarded as fragments. When you outline islands
and/or fragments for a wound, maximum depth and volume will not be displayed for
that wound.

Document # 2018-00357 Rev2.0 Copyright © 2020 ARANZ Medical Limited Page 11 of 14
Taking a Multiple Image Measurement
If it proves difficult to capture a wound in one image, you can capture a series of
images and individually outline the separate segments. SilhouetteConnect will then
automatically calculate wound area for the different segments of the wound. This is
useful for large wounds or when a wound occurs on a part of the body that is curved
and, therefore, difficult to capture in a single image.
1. Plan where the different images of the wound will be captured.
2. Use a surgical marker to mark on healthy skin where the edges of the different
images will fall.
3. Capture an image of each segment of the wound and the surgical marker lines.
Make sure the laser crossing point is located within the wound segment.
4. Assign each image to the same wound.
5. To trace the first image, start at a surgical marker point and trace the wound
boundary for the first segment. Stop when you reach the other surgical marker
point, then click on the circular target at the starting point to close the wound
boundary.
6. For the next image, trace the second segment of the wound in the same manner
as the first. Try to draw the outline as close as possible to where you drew the
outline for the first segment of the wound.

Document # 2018-00357 Rev2.0 Copyright © 2020 ARANZ Medical Limited Page 12 of 14
When wound area is calculated, the measurements for the different parts of the
wound will be combined to give overall measurements for the wound. Maximum
depth and volume will not be calculated.
Measurement Accuracy
A study on wound models with known dimensions and a variety of different shapes (flat,
cylindrical, concave, and convex) has shown that any single Silhouette-derived
measurement is within approximately 2% for area, 1% for perimeter, 5% for average
depth, and 5% for volume (95% confidence interval). Inter- and intra-rater variability is
extremely low; <1% for area and perimeter, and <2% for average depth and volume.
Reference: Nixon, Rivett and Robinson; Accuracy and repeatability of wound measurement
http://www.aranzmedical.com/wound-measurement-accuracy-study/

Document # 2018-00357 Rev2.0 Copyright © 2020 ARANZ Medical Limited Page 13 of 14
Good Habits
Backing Up Information on SilhouetteConnect
If using SilhouetteConnect standalone (not synchronized to SilhouetteCentral), then
regularly back up patient information. Instructions to perform backups are provided
in the help documentation.
If using SilhouetteConnect synchronized to SilhouetteCentral then synchronize
regularly.
Exiting SilhouetteConnect
To exit the SilhouetteConnect application firstly log-off by clicking on the Log Off
button in the lower right hand corner of the screen or in the application menu, then
click on the Exit button.
This closes the application, reducing the risk of unauthorized access to the
information in SilhouetteConnect.
Housekeeping
After using SilhouetteStar, ensure the device is cleaned and stored safely. Ensure the
USB cable is tidied away following use to avoid tripping over the cable.
Care of SilhouetteStar
SilhouetteStar is a precision optical instrument and must be handled with care at all
times.
•Do not drop, knock, or shake SilhouetteStar.
•Ensure there is no dirt, moisture, or scratching over the device, laser, and LED
apertures.
•Do not let SilhouetteStar come into contact with the patient.
•Keep SilhouetteStar and the USB cable clean at all times by wiping them regularly
with an antiseptic cloth. Ensure SilhouetteStar and the USB cable are thoroughly
dry before use.
•Do not immerse SilhouetteStar in liquid.
•SilhouetteStar should be placed face-down on a clean, dry, flat surface when not in
use.
•Do not leave the SilhouetteStar in places where it will be exposed to temperature
extremes for extended periods of time, e.g. in a vehicle in the hot sun or in
freezing conditions.

Document # 2018-00357 Rev2.0 Copyright © 2020 ARANZ Medical Limited Page 14 of 14
Getting Support
Customer Support
Please contact your system administrator
for support information.
Sales Enquiries
Phone (International): +64-3-374-6120
Phone (US customers): +1 866-467-0934
Email: sales@aranzmedical.com
Other ARANZ Medical contact details:
ARANZ Medical website: www.aranzmedical.com Fax: +64-3-374-6130
Regulatory contact details:
CE Authorized
Representative
FDA Authorized
Representative
TGA Sponsor #55050
Brandwood CKC Pty Ltd
Phone +61 (0) 2 9906 2984
Suite 2, Level 8, 1 Chandos Street
St. Leonards NSW 2065
AUSTRALIA
Appendix A: Operating Conditions
Parameter
Min
Nominal
Max
Operating temperature
10°C (50°F)
30°C (86°F)
Storage temperature
-5°C (23°F)
50°C (122°F)
Operating humidity
0% RH
80% RH
Lighting
100 lux
400 lux
1000 lux
For lighting, 100 lux is considered equivalent to a dark, heavily overcast day. 500 lux is
equivalent to typical office lighting and 1000 lux is equivalent to TV studio lighting levels


© ARANZ Medical Limited 2020
Table of contents
Other Aranz medical Medical Equipment manuals
Popular Medical Equipment manuals by other brands
gbo Medizintechnik
gbo Medizintechnik ULTRATHERM 1008 Instructions for use
Spencer
Spencer CROSS CHAIR user manual
Top shelf Orthopedics
Top shelf Orthopedics Hinge Knee Plus Instructions for use

Adaptivation
Adaptivation FreeHand instruction manual
Aquolab
Aquolab Aquolab Basic user manual
Bayer HealthCare
Bayer HealthCare Rapidlab 800 Operator's manual

Earthlite
Earthlite Vibra-Therm Sports Therapy Table user guide
Gate
Gate Bure Rise & Go DB 56-309 Instructions for use

Sunrise Medical
Sunrise Medical Series 550 user manual
Panasonic
Panasonic EJCA01UP user guide
ALICE
ALICE NightOne quick start guide
DeVilbiss
DeVilbiss PulseDose LT Series Instruction guide
