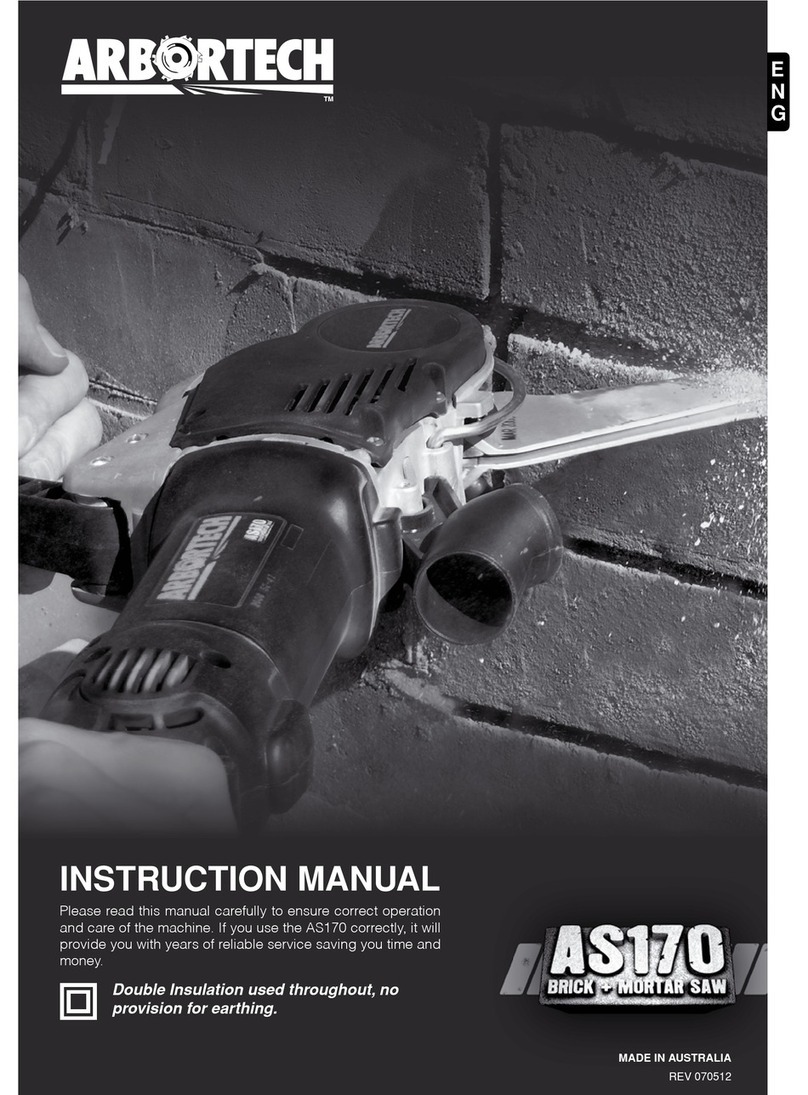
Arbortech AS170 User manual

E
N
G
D
E
U
E
S
P
F
R
A
D
A
N
N
E
D
P
O
L
TM
Double Insulation used throughout, no
provision for earthing.
INSTRUCTION MANUAL
BEDIENUNGSANLEITUNG
MANUAL DE INSTRUCCIONES
MANUEL D’INSTRUCTION
GEBRUIKERSHANDLEIDING
INSTRUKCJA OBSŁUGI
Please read this manual carefully to ensure correct operation and care of
the machine. If you use the AS170 correctly, it will provide you with years
of reliable service saving you time and money.
Bitte lesen Sie diese Bedienungsanleitung sorgfältig durch, um den
Bei korrekter Anwendung der AS170 sichern Sie sich über Jahre
Por favor, lea atentamente este manual para asegurar el
funcionamiento correcto y el cuidado adecuado de la herramienta.
l’AS170 correctement, elle vous offrira de nombreuses années de
service et vous fera économiser du temps.
het apparaat werkt en hoe het moet worden onderhouden. Als u de
tijd en geld besparen.


E
N
G
INSTRUCTION MANUAL
Double Insulation used throughout, no
provision for earthing.
Please read this manual carefully to ensure correct operation
and care of the machine. If you use the AS170 correctly, it will
provide you with years of reliable service saving you time and
money.
TM
rev 290310

E
N
G
eNGLISH 1
TABLE OF CONTENTS
PAGE
1. INTRODUCTION 2
2. GENERAL SAFETY RULES 2
3. SPECIFIC SAFETY RULES 3-4
4. FUNCTIONAL DESCRIPTION 4
4.1 Tool Description 4
4.2 Blade Description 4
5. ASSEMBLY 5-6
6. OPERATION 7
6.1 Setup 7
6.2 Operation 7-9
7. MAINTENANCE 9
7.1 Motor 9
7.2 V-Belt and Pulleys 9-10
7.3 Blade Mount Bolts and Threads 10
7.4 Top Handle and Rubber Bushes 10
8. ACCESSORIES 10
8.1 Dust Extraction 10
9. SPECIFICATIONS 10-11
10. WARRANTY AND SERVICE 11
11. TROUBLESHOOTING 11-13
Please read these instructions before you use your AS170 Brick + Mortar Saw

E
N
G
1. INTRODUCTION
The Arbortech AS170 is designed and
manufactured in Australia, using only the highest
quality components and manufacturing processes.
The unique patented orbital cutting action of two
reciprocating blades, allows cutting of brick, mortar
and masonry faster than traditional reciprocating
saws.
This cutting action also produces minimal amounts
of airborne dust, offering a safe and controllable
operation, with the ability to cut to a depth of
120mm (4 3/4”), cut square corners, and make
variable width cuts. The AS170 is ideally suited to a
variety of tasks including:
• removalofmortarfor“tuckpointing”ofbrick
walls.
• removalofsinglebricksfromwalls.
• cuttingofbrickswithoutdamagetoadjacent
areasor“blow-out”stitching,keyingortoothing
ofbrickwalls“chasing”cutsforconduitsand
similar items into walls.
• cuttingholesinwallsorothersurfaces.
• nishingcornercutsinwalls.
• cuttingindirtywood.
• cuttingwoodintheground.
• treerootremoval.
• pruningtrees.
The tool can be fitted with a range of blades to
best suit different applications.
Definitions: Safety Guidelines
Thedenitionsbelowdescribethelevelofseverity
for each signal word. Please read the manual and
pay attention to these symbols.
DANGER: Indicates an imminently hazardous
situation which, if not avoided, will result in death or
serious injury.
WARNING: Indicates a potentially hazardous
situation which, if not avoided, could result in death
or serious injury.
CAUTION: Indicates a potentially hazardous
situation which, if not avoided, may result in minor
or moderate injury.
CAUTION: Used without the safety alert symbol
indicates a potentially hazardous situation which, if
not avoided, may result in property damage.
Denotes risk of electric shock.
IMPORTANT INCORRECT USE OF THE
AS170 MAY LEAD TO PREMATURE WEAR
AND/OR DAMAGE. PLEASE READ THESE USER
INSTRUCTIONS CAREFULLY BEFORE USE TO
ENSURE CORRECT OPERATION.
2. GENERAL SAFETY RULES
WARNING! Read all instructions. Failure to follow
all instructions listed below may result in electric
shock,reand/orseriousinjury.
Save all warnings and instructions for future
reference.
Theterm“powertool”inallofthewarningslisted
below refers to your mains-operated (corded) power
tool or battery-operated (cordless) power tool.
SAVE THESE INSTRUCTIONS
1) Work area
a) Keep work area clean and well lit. Cluttered and
dark areas invite accidents.
b) Do not operate power tools in explosive
atmospheres, such as in the presence of
flammable liquids,gases or dust. Power tools
create sparks which may ignite the dust or fumes.
c) Keep children and bystanders away while
operating a power tool. Distractions can cause you
to lose control
2) Electrical safety
a) Power tool plugs must match the outlet. Never
modify the plug in any way. Do not use any
adapter plugs with earthed (grounded) power
tools. Unmodiedplugsandmatchingoutletswill
reduce risk of electric shock.
b) Avoid body contact with earthed or grounded
surfaces such as pipes, radiators, ranges and
refrigerators. There is an increased risk of electric
shock if your body is earthed or grounded.
c) Do not expose power tools to rain or wet
conditions. Water entering a power tool will
increase the risk of electric shock.
d) Do not abuse the cord. Never use the cord
for carrying, pulling or unplugging the power
tool. Keep cord away from heat, oil, sharp edges
or moving parts. Damaged or entangled cords
increase the risk of electric shock.
e) When operating a power tool outdoors, use an
extension cord suitable for outdoor use. Use of
a cord suitable for outdoor use reduces the risk of
electric shock.
eNGLISH 2

f) If operating a power tool in a damp location is
unavoidable, use a residual current device (RCD)
protected supply. Use of an RCD reduces the risk
of electric shock.
3) Personal safety
a) Stay alert, watch what you are doing and use
common sense when operating a power tool. Do
not use a power tool while you are tired or under
the influence of drugs, alcohol or medication. A
moment of inattention while operating power tools
mayresultinseriouspersonalinjury.
b) Use personal protective equipment. Always
wear eye protection. Protecive equipment such
as dust mask, non-skid safety shoes, hard hat, or
hearing protection used for appropriate conditions
willreducepersonalinjuries.
c) Avoid accidental starting. Ensure the switch
is in the off-position before plugging in. Carrying
powertoolswithyourngerontheswitchor
plugging in power tools that have the switch on
invites accidents.
d) Remove any adjusting key or wrench before
turning the power tool on. A wrench or a key left
attached to a rotating part of the power tool may
resultinpersonalinjury.
e) Do not overreach. Keep proper footing and
balance at all times. This enables better control of
the power tool in unexpected situations.
f) Dress properly. Do not wear loose clothing or
jewellery. Keep your hair, clothing and gloves
away from moving parts.Looseclothes,jewellery
or long hair can be caught in moving parts.
g) If devices are provided for the connection of
dust extraction and collection facilities, ensure
these are connected and properly used. Use of
these devices can reduce dust-related hazards.
4) Power tool use and care
a) Do not force the power tool. Use the correct
power tool for your application. The correct power
toolwilldothejobbetterandsaferattheratefor
which it was designed.
b) Do not use the power tool if the switch does
not turn it on and off. Any power tool that cannot
be controlled with the switch is dangerous and must
be repaired.
c) Disconnect the plug from the power source
and/or the battery pack from the power tool
before making any adjustments, changing
accessories, or storing power tools. Such
preventive safety measures reduce the risk of
starting the power tool accidentally.
d) Store idle power tools out of the reach of
children and do not allow persons unfamiliar
with the power tool or these instructions to
operate the power tool. Power tools are dangerous
in the hands of untrained users.
e) Maintain power tools. Check for misalignment
or binding of moving parts, breakage of parts
and any other condition that may affect the
power tools operation. If damaged, have the
power tool repaired before use. Many accidents
are caused by poorly maintained power tools.
f) Keep cutting tools sharp and clean. Properly
maintained cutting tools with sharp cutting edges
are less likely to bind and are easier to control.
g) Use the power tool, accessories and tool bits
etc. in accordance with these instructions and
in the manner intended for the particular type
of power tool, taking into account the working
conditions and the work to be performed. Use
of the power tool for operations different from those
intended could result in a hazardous situation
5) Service
a) Have your power tool serviced by a qualified
repair person using only identical replacement
parts. This will ensure that the safety of the power
tool is maintained.
NOTE: Refer to the assembly (section 5) for a list
of user replacable parts.
3. SPECIFIC SAFETY RULES
1. Hold tool by insulated gripping surfaces when
performing an operation where the cutting tool
may contact hidden wiring or its own cord.
Contactwitha“live”wirewillmakeexposedmetal
partsofthetool“live”andshocktheoperator.
2. Remove adjusting tools such as Allen & Ian
keys and wrenches before operating the tool.
3. Do not operate the tool with any attachment
other than those recommended in this instruction
manual.
4. Only use the tool with the correct voltage, as
speciedinthetoollable.
5. Never start a tool under load. Start the tool
E
N
G
eNGLISH 3

E
N
G
before engaging the work piece.
6. Never start or operate the tool with fingers or
other objects through the holes in the blades.
7. Use care when handling blades during and
after use. The blades and some areas of the tool
become hot in use.
8. Always ensure that before cutting there are
no hazards such as electrical wiring, pipes or
insulation in the area to be cut.
9. Allow for resting periods to ease the effect
of the vibration of the tool. Use work gloves to
minimise vibration effect on the body.
10. Ensure the dust extraction equipment is
connected and properly used.
11. Keep handles dry, clean and free from oil and
grease.
12. If the guard or other parts appears to be
damaged, it should be carefully checked to
determine that it will operate properly and perform
its intended function.
13. The use of any accessory or attachment other
than those recommended in this instruction manual
maypresentariskofpersonalinjury.
14. Do not force the tool. It is designed to
operate with moderate effort. Overheating of the
drive system and motor can occur if the tool is
overloaded.
15. Always operate the tool holding it with both
hands.
SYMBOLS The following show the symbols used
in this manual
Class 2 Construction (Double
Insulation used throughout, no
provision for earthing.)
VAC volts alternating current
A amperes
Hz hertz
W watt
N0no load speed
rpm revolutions per minute
dB decibels
Nm newton meters
m meters
SYMBOLS The following show the symbols used
in this manual
m/s meters per second
mm millimeters
kg-m kilogram meters
ft-lb foot pounds
4. FUNCTIONAL DESCRIPTION
4.1 AS170 TOOL DESCRIPTION
The AS170 is designed to cut rigid materials
suchasmortar,clayredbricks,plasterboard,
breboard,weatherboardandwood.TheAS170
uses a variety of blades to suit the material being
cut. Blades may also be changed to suit the
required depth or length of cut.
The blades are driven via conrods and a camshaft,
which is belt-driven. The V-belt is designed to allow
someslipincaseofthebladesjamming.The belt
tension must be checked after the first 5 hours
of use. It is easily tightened by removing the plastic
coverandistensionedusingtheadjustableidler
pulley (see section 7.2).Blades are mounted to the
conrods using high tensile Allen™ head bolts.
A replaceable metal guard is provided to limit the
maximum cutting depth and prevent the blade
mounts from damaging the surface of the material
being cut. Shock and vibration to the operator are
reduced by a rubber-mounted top handle. The top
handle is also designed for comfort when used in
a variety of cutting orientations. The rubber bushes
on the top handle can be replaced if they become
worn or damaged.
4.2 BLADE DESCRIPTION
The AS170 uses a variety of blades to cut different
materialsanddifferentproles.
General Purpose blades use Tungsten
Carbide teeth and are suited for working
generalmasonryand“intheground”cutting.
General Purpose blades are designed to cut
to a depth of 115mm (4 1/2”).
Plunge blades use Tungsten Carbide teeth
and have a maximum cutting depth of
120mm (4 3/4”). Mortar plunge blades can cut
slots of 75mm (3”) in length.
eNGLISH 4

E
N
G
eNGLISH 5
PARTS
KEY NO. DESCRIPTION QUANTITY
1 Screw - Belt Cover , M4 X 12 4
2 Screw - Blade , M6 X 10 4
3 Brush - Cover 2
4 Washer - Step 1
5 Nut - Nyloc M6 1
6 Brush - Carbon 2
7 Clip - Internal 2
8 Pin 2
9 Pulley - Tension including Bearing - 696 1
10 Pulley - Power 1
11 Pulley - Drive 1
12 Belt 1
13 Bush 4
14 Guard 1
15 Handle - Top 1
16 Cover - Belt 1
17 Housing 1
18 Motor - (Regional) 1
29 ELECTRICAL PLUG (REGIONAL) 1
20 Boot - Dust Extraction Funnel 1
21 Bracket - Dust Extraction Fitting 1
22 Switch - (Regional) 1
23 Cover - Vent 1
24 General Purpose Blades 1
TM
ALLSAW™ 160
E
N
G
eNGLISH 6
1 Screw - Belt Cover , M4 X 12 4
2 Screw - Blade , M6 X 10 4
3 Brush - Cover 2
4 Washer - Step 1
5 Nut - Nyloc M6 1
6 Brush - Carbon 2
7 Clip - Internal 2
8 Pin 2
9 Pulley - Tension including Bearing - 696 1
10 Pulley - Power 1
11 Pulley - Drive 1
12 Belt 1
13 Bush 4
14 Guard 1
15 Handle - Top 1
16 Cover - Belt 1
17 Housing 1
18 Motor - (Regional) 1
19 ELECTRICAL PLUG (REGIONAL) 1
20 Boot - Dust Extraction Funnel 1
21 Bracket - Dust Extraction Fitting 1
22 Switch - 1
24 General Purpose Blades 1

Switch Box blades use Tungsten Carbide
teeth and have a maximum cutting depth of
120mm (4 3/4”). Suitable for installing small
electrical switch boxes into plaster, brick/
masonry walls.
Tuckpointing blades are used for removing
the mortar between the bricks in restoration
work. Maximum cutting depth of 35mm (1
3/8”).
Wood blades are used for cutting clean
wood and have a maximum cutting depth of
110mm (4 1/2”).
NOTE: ALL blades can be re-
sharpened. If not excessively worn.
6. OPERATION
6.1 Setup
The AS170 is supplied ready for operation. However
in some cases the blades may need to be changed
to suit the application.
Before changing
blades, the guard
around the blade
mounts must be levered
gently out of its groove
at the front of the tool
and swung away to
give access to the cap
screws. (See Fig.1) Guard
Fig.1
Usethe“Iankey”
supplied to loosen and
remove the cap screws
securing the blades,
then remove the blades
asshowning.2.
Ian Key
Fig.2
Hold near
end
Torque
indicator
coil
Select the correct blades for the cutting task and
mount each with their cap screws . Verify that the
surfaces of the blade mounts, conrod thread and
screws are clean and free of grit or lubricant before
tting.Ensuretheguardcanbeclosedbeforexing
thebladestotheconrod(Seeg.2).
NOTE: Always use matched pairs of blades.
Never mix used blades with new blades. Use only
the bolts supplied with the tool.
Usethe“Iankey”(see
g.2),totightenthe
blade mounting screws
until the torque indicator
coildeectssufciently
so that the sides meet.
The“IanKey”will
tighten the bolts to the
required 18Nm (13.2
ft lb).
Fig.3
NOTE: Blades are a wearing part. In normal
operation, blade life may vary with the hardness
of materials cut.
CAUTION:
Do not operate the tool
if the blades are loose.
Operation with loose
blades will severely
damage the blade mount
& bolts requiring repair.
Check that the teeth of
the blades are lightly
contacting, or within
approximately 1mm
(1/16”) of contacting each
other(g.4).
Fig.4
90o1mm Max
(1/16”)
If the gap between the blades is too large, remove
andgentlybentinwardtoadjustthegap.
Ensure that both blades are aligned vertically to the
tool(Seeg.4).
CAUTION: If the blades rub against each other
anywhere other than within 25 mm/1” of the cutting
edge, or contact force is high, it is possible to
overload the tool and cause premature belt wear.
Swing the guard to its groove at the front of the tool
andsnapitintoplace.(Seeg.1)
6.2 Operation
E
N
G
eNGLISH 7

E
N
G
CAUTION: During
operation the AS170
may cause hand-arm
vibration, which can result
in fatigue or discomfort
after long periods of
continuous use. Vibration
will increase with the
hardness of material.
Do not operate the
tool if discomfort is
experienced, and ensure
thatsufcientrestperiods
are taken during cutting.
For further information,
contact the manufacturer.
Fig.5
Fig.6
Before attempting to operate the tool, please ensure
that the safety section of this manual has been
consulted.
Apply protective hearing, breathing, eyes and body
protection as appropriate.
With the blades secured and the tool switch OFF,
plug the tool into the power socket.
CAUTION:
Do not block the cooling
intake vents or ingest
dust or debris at the
rear of the motor as this
may cause the motor
to overheat. If working
in dusty conditions, it
is recommended that
the vents be regularly
cleaned with an air blast.
(Seeg.7)
Fig.7
Hold the tool by both the top handle and the motor
housing. (Fig.5 & 6)
Tostartthecut,holdthetoolrmlyinyourhands
and apply the middle of the blade cutting edge to
the work, keeping in mind that the direction of cut is
towards the rear of the blades.
While cutting, move the tool and blade in a slow
“sawing”motion,whichimprovesthecutrate,
reduces concentrated heat build-up and evens the
wearontheblades.(Seeg.8&9)
Direction of cut
Fig.8
Direction of cut
Fig.9
CAUTION: Do Not allow the forward or rear end of
the blades to hammer onto hard surfaces (shown in
gs:10,11&13)asthiswilldamagethebladesand
tool. If unintentional hammering occurs, stop the tool
or withdraw it from the cut immediately.
When using any of the blade types, avoid
hammering of the ends of the blades into the ends
of the cut by using a slow rocking and sweeping
motion. For best performance try to ensure that the
teeth are the only part of the blade in contact with
the workpiece.
CAUTION: Take care when setting the tool down to
avoid chipping the tungsten carbide teeth.
eNGLISH 8

Fig.10
“Hammering!”
Fig.11
“Hammering!”
Clearance
each end
Fig.12
When using the Mortar Plunge blades, the cut
should have enough clearance on each end
(showning:12),toensurethatnohammeringof
thebladeendsoccurs(asshowning.13).
“Hammering!”
Fig.13
7. MAINTENANCE
WARNING: To reduce the risk of serious personal
injury,turnthetooloffanddisconnecttoolfromthe
powersourcebeforemakinganyadjustmentsor
removing/installing attachments or accessories.
Before reconnecting the tool, depress and release
the trigger switch to ensure that the tool is turned
off.
To assure product SAFETY and RELIABILITY,
repairs,maintenanceandadjustment(including
brush inspection and replacement) should be
performed by an ARBORTECH authorised service
center. Always use identical replacement parts.
7.1 Motor
Cleaning
CAUTION: Blowing dust and grit out of the motor
and switch actuator using clean, dry compressed
air is a necessary regular maintenance procedure.
Dust and grit particles often accumulate on interior
surfaces and can cause premature failure. Not
regularly cleaning the AS170 will affect the tools
warranty.
CAUTION: ALWAYS WEAR SAFETY GLASSES
when using or cleaning this tool.
Never use solvents or other harsh chemicals for
cleaning the non-metallic parts of the tool. Use a
clean, dry cloth only.
Lubrication
ARBORTECH tools are properly lubricated at the
factory and are ready for use.
Accessories
eNGLISH 9
E
N
G

E
N
G
Toreducetheriskofinjury,onlyARBORTECH,
accessories should be used with this product.
Recommended accessories for use with your tool
are available at extra cost from your local dealer or
authorised service centre.
Repairs
If you need any assistance in locating any
accessory, or general tool query please contact
ARBORTECH. www.arbortech.com.au
Brushes
TheAS170isttedwithAuto-cutoffbrushes.When
the brushes are worn below minimum length they
stop tool operation reducing internal motor damage.
Contact your local dealer or authorised service
center for brush replacement.
7.2 V Belt and Pulleys
CAUTION: The V-Belt should be re-tensioned after
therst5hoursofuse.
To access these items, remove the 4 screws holding
the plastic cover on the right side of the tool (see
g.14).Inspectthebeltforcorrecttensionandsigns
of damage. If tensioning is required, loosen the the
tension idler nut (one turn only). Slide the tension
idler outward to increase the tension to the value
noted in the General Specifications in Section
3 and re-tighten. If belt replacement is required,
loosen the tensioner idler, replace the belt and re-
tensiontheidlerasspecied.
Tension Idler
Cover
Fig.14
If excessive slipping has occurred, the pulleys
can become worn. A worn pulley is evidenced by
thegroovehavinglostitswelldened“V”shape,
resulting in a rounded or flattened groove. To
replace either pulley, contact your ARBORTECH
authorised service centre.
7.3 Blade Mount Bolts and Threads
The blade cap screws should be regularly checked
for correct torque (18Nm.)(13.2 ft lb).Whenever
blades are changed, the bolt and conrod threads
should be checked to ensure they are not worn or
lledwithdebris.UseonlygenuineARBORTECH
spares and do not lubricate bolts, threads or conrod
mating surfaces.
Fig.15
CAUTION: DO NOT operate the tool with loose
blades. If blades should come loose while
operating, the blade mounts and threads can
becomedamaged,requiringsignicantrepairsto
the tool.
7.4 Tooth Sharpness
With use, the blades will become dull and the
cutting performance will decrease. This can be
largely restored by re-sharpening the teeth. To
re-sharpen blade teeth, use the ARBORTECH
Sharpening disk (BLA.FG.SHARP001) Occasionally,
if very hard materials are cut, or the teeth impact a
hard surface at an odd angle, teeth may become
chipped or broken. The blades can still be used,
but cutting performance will be reduced.
If“blueing”ofthebladeperipheryoccurs,the
blades are running too hot. This occurs when the
blades become worn, too much force being used,
insufcient“sweeping”motionbytheoperator,or
material being too hard.
IMPORTANT To ensure optimal performance and
reduce load on motor, Blades should be kept sharp.
8. ACCESSORIES
8.1 Dust Extraction
TheAS170shouldbettedwithadustextraction
funnel,whichsignicantlyreducesairborneand
heavy dust when used correctly. It consists of a
ttingattachedtotheundersideofthealuminium
housingandanadjustableextractionfunnelwhich
isreplaceable.Thedustextractionttinghasa
standard 30mm (1 3/16”) bore.
eNGLISH 10

NOTE: Failure to use the dust extraction funnel
when cutting masonry materials will cause
excessive wear of electrical components. Damage
caused by dust will lead to premature failure of the
motor, which will affect the warranty.
CAUTION: Verify that the vacuum machine being
usedhasaltersystemappropriateforthe
materialbeingcut.Incorrectltrationcanresultin
inadequate dust control and also possible damage
to the vacuum machine.
Dust extraction funnel
9. SPECIFICATIONS
ITEM SPECIFICATION
Cutting depth/width 120mm (4
3/4”)/6.5mm (1/4”),
depending on blade
Weight, with cutting
blades 4.3kg (9.5lb)
Dimensions without
blades 450 mm (17 7/8”) L
75 mm (3”) W
240 mm (9 1/2”) H
No load speed n05100 rpm
ITEM SPECIFICATION
Electrical rating,
nominal 230-240 VAC, 50Hz,
1250W (Australia)
230 VAC, 50 Hz
1250W (Europe)
110 - 120 VAC,
50-60 Hz 13A
(USA/CANADA/UK
Industrial)
Dust extraction vacuum
hose interface Suits vacuum hose
with inner diameter
of 25mm (1”) , 32mm
(1 1/4”), 37mm (1
3/8”) or outer hose
diameter 32mm
Belt tension 1 mm (1/16”)
maximum mid-span
deflection with
25 N (2.5 kg) (5lb)
deflection force
Blade mount bolt
torque 18 Nm (1.8 kg-m),
(13.2ft-lb),
TECHNICAL DATA
Vibration 7.7 m/s2
Noise 92db max at 1.0m
The declared vibration emission level is based
no measurements representing the main
applications of the tool. However if the tool is
used for different applications, with different
accessories or poorly maintained, the vibration
emissionmaydiffer.Thismaysignicantly
increase the exposure level over the total
working period. An estimation of the level of
exposure to vibration should also take into
account the times when the tool is switched off or
whenitisrunningbutnotactuallydoingthejob.
Thismaysignicantlyreducetheexposurelevel
over the total working period. Identify additional
safety measures to protect the operator from
the effects of vibration such as: maintain the
tool and the accessories, keep the hands warm,
organisation of work patterns.
E
N
G
eNGLISH 11

E
N
G
eNGLISH 12
The values state here only indicates the
loudness emitted by this machine. Whether the
operator is required to wear hearing protection
can not be determined here. This depends on
how much noise reaches the operator’s ear.
Even though it may not be explicitly required, it
is in your own interest to always wear hearing
protection when operating this machine.
10. WARRANTY AND SERVICE
For warranty repair, inspection, service and spare
parts, please contact your place of purchase,
or
Check out our website www.arbortech.com.au to
locate a dealer or service agent in your area
Disposal
The machine, accessories and packaging should
be sorted for environmental-friendly recycling.
Only for EC countries: Do not dispose of power
tools into household waste! According the European
Guideline 2002/96/EC for Waste Electrical and
Electronic Equipment and its implementation into
national right, power tools that are no longer usable
must be collected separately and disposed of in an
environmentally correct manner.
Declaration of Conformity
We declare under our sole responsibility that the
product AS170 Brick and Mortar Saw described
under“Specications”isinconformitywiththe
following standards or standardization documents:
EN 60745 according to the provisions of the
Machinery Directive 2006/42/EC
Technicalleat:
Arbortech PTY LTD
67 Westchester Road
Malaga, WA 6090
__________________
Kevin Inkster
Chairman
Arbortech Pty Ltd
__________________
Sven Blicks
Commercial Director
Arbortech Pty Ltd
Arbortech PTY LTD
67 Westchester Road
Malaga, WA 6090
11.TROUBLESHOOTING
This fault diagnosis is intended for use by persons
familiar with mechanical devices, and provides a
basic capability to maintain the tool. To correct the
user serviceable faults, refer to the Maintenance
section of this manual. The more complex repairs as
noted below, must be performed by an authorised
service centre.
ITEM
SYMPTOM CHECK/REMEDY
1 Motor overheating •Verifythatallcoolingventsarenotobstructedbyoperatorshand,debris
in vents, or other. Remedy or clean as required.
•Verifybladesarenotrubbingagainsteachotherwithexcessiveforce,
either at cutting edge or close to blade mounts.
•Bladesmaybewornandoverheating.Replaceasrequired.
•Checkthatbelttensionisnotexcessive.
•Checkthatbearingshavenotfailedbyremovingplasticsidecoverand
belt and rotating both pulleys independently checking for roughness. The
power pulley should rotate easily and smoothly. The driven pulley should
rotatesmoothlybutwillhavea“springy”feel,wantingtostayineitherof2
positions.
•Verifythatthemotorhousingissecurewiththetool.Ifloose,referto
authorised service centre immediately.

E
N
G
eNGLISH 13
ITEM
SYMPTOM CHECK/REMEDY
2 Noisy operation or unusual
vibration
•Bladesloose-tightenblademountbolts
•Bladefailure-replacebladeset
•Leafspringfailure-contactauthorisedservicecentre
•Bearingfailure-contactauthorisedservicecentre.
•Gearboxfailure-contactauthorisedservicecentre.
•Handlerubbermountsdamagedorworn-replace.
3 Handle rubber mounts
damaged or worn
•replace
4 One or both conrods/blades
loose, even when mounting
bolts tightened
•Leafspringfailure-contactARBORTECHauthorisedservicecentre.
5 Tool running and blades not
moving
•Loosebeltorbrokenbelt-re-tensionorreplaceasnecessary.
•Wornbelt-replacebelt.
7 Blades continually comming
loose
•Checkthebladeboltholes.Ifboltholesareelongatedreplaceblades
8 Worn pulleys •contactARBORTECHauthorisedservicecentre.
9 Slow cutting performance •Teethworn,chippedorlost.Sharpenorreplaceblade.
•Beltslipping-seeSymptom4.
10 Blades rubbing against each
other with excessive force
•Attemptingtocutmaterialwhichistoohard.
11 Blades continually coming loose •Checkthebladeboltholes.Ifboltholesareelongatedreplaceblades.
12 Blades rubbing together with
excessive force.
•Removeblade/sandbendslightlytocorrect.
13 Blade teeth chipped or lost.
·
•Occursoccasionallyifhardmaterialisencountered,orifthe“backside”
of teeth are impacted.
•Carenottakeninsettingtooldownonteethonhardsurfacesorloosein
tool box.
•Wornbladeswillstarttobecomehotincertainareas,causingteethtode-
bond - replace blades.
•Materialtoohard.
14 Loose top handle. •Wornordamagedrubberbushes-replace.
15 Blades“blueing”. •Wornteeth-replaceblades.
•Excessiveforcebeingused.
•Insufcient“sawing”motionbytheoperator.
•Materialtoohard.
Blades rubbing together with excessive force (see section 8).
16 Blade mounting bolts not
tightening fully. •Threadsonboltsstripped-replaceboltsnottightening.
17 Threads on tool stripped •ContactyourARBORTECHauthorizedservicecenter.
18 Tool will not run. •TheAS170isttedwithAutocutoffbrushes.
•Checkbrushesarenotdamagedorexcessivelyworn-replaceContact
your ARBORTECH authorised service centre.

D
E
U
BEDIENUNGSANLEITUNG
durchgängig doppelt isoliert keine Erdung
vorgesehen
Bitte lesen Sie diese Bedienungsanleitung sorgfältig durch, um
den korrekten Betrieb und die richtige Pflege des Geräts zu
gewährleisten. Bei korrekter Anwendung der AS170 sichern Sie sich
über Jahre hinweg den zuverlässigen Betrieb und sparen dabei Zeit
und Geld.
TM
rev 111109
D
E
U

INHALTSVERZEICHNIS
SEITE
1. EINLEITUNG 2
2. ALLGEMEINE SICHERHEITSHINWEISE FÜR ELEKTROWERKZEUGE 2-4
3. SPEZIELLE SICHERHEITSHINWEISE 4
4. FUNKTIONSBESCHREIBUNG 7
4.1 AS170 Beshreibung des Werkzeugs 7
4.2 Beschreibung der Klingen 7
5. LEGENDE DER STANDARDTEILE 5-6
6. BETRIEB 7
6.1Inbetriebnahme 7
6.2 Bedienung 8-10
7. WARTUNG UND INSTANDHALTUNG 10
7.1 Motor 10
7.2 Keilriemen und Scheiben 10-11
7.3 Schrauben und Gewinde am Klingenaufsatz 11
7.4 Oberer Griff und Gummibuchsen 11
8. ZUBEHÖR 11
8.1 Staubabsaugung 11
9. ALLGEMEINE SPEZIFIKATIONEN 12
10. GEWÄHRLEISTUNG, REPARATUR- UND SERVICECENTER 12-13
11. FEHLERBEHEBUNG 14-15
Bitte lesen Sie diese Anweisungen, bevor Sie das erste Mal mit Ihrer AS170 arbeiten.
D
E
U
DeutScH 1

1. EINLEITUNG
Die Arbortech AS170 wurde in Australien
entworfen und hergestellt unter ausschließlicher
Verwendung der hochwertigsten Komponenten und
Herstellungsprozesse.
Die einzigartige, patentierte, Schneidbewegung
derbeidengegenläugenKlingenermöglicht
efzientesSchneidenvonMörtelundMauersteinen
(Ziegelsteine, Kalksandstein, Porenbeton, etc.).
Durch diese Schneidbewegung entsteht nur
minimaler herumfliegender Feinstaub. Zudem
gewährleistet die AS170 einen sicheren
undkontrollierbarenBetriebundermöglicht
Einstechschnitte von bis zu 120 mm Tiefe,
Schnitte in rechteckige Winkel sowie Schnitte von
unterschiedlicher Breite. Die AS170 ist optimal
geeignet zum Ausführen einer Reihe von Aufgaben,
unter anderem:
• EntfernungvonMörtelzumAufarbeitenvon
Ziegelstein-Zwischenräumen
• EntfernungvoneinzelnenZiegelsteinenaus
Mauern
• SchneidenvonZiegelsteinenohnedie
angrenzenden Teile zu beschädigen und ohne
Ausbruch,
•KeilenoderVorzahnenvonZiegelsteinmauern
•AusmeißelnvonKanälenzurVerlegungvon
Leitung usw. in Mauern
• SchneidenvonLöcherninMauernoderanderen
Flächen
• FertigstellungvonEckschnitteninMauern.
• SchneidenvonverunreinigtemHolz
• SchneidenvonHolzimBoden
• EntfernungvonBaumwurzeln
• BeschneidenvonBäumen.
Das Werkzeug kann mit einer Reihe von
Klingen ausgestattet werden, die sich für
unterschiedliche Anwendungen bestens eignen.
Definitionen: Sicherheitsrichtlinien:
DienachfolgendenDenitionenbeschreibendie
RelevanzdereinzelnenWarnhinweiswörter.Bitte
lesen Sie das Handbuch und achten Sie auf diese
Symbole.
GEFAHR: Weist auf eine unmittelbar
drohende gefährliche Situation hin, die, sofern
nichtvermieden,zutödlichenoderschweren
Verletzungen führen wird.
WARNUNG: Weistaufeinemöglicherweise
gefährliche Situation hin, die, sofern nicht
vermieden,zutödlichenoderschweren
Verletzungen führen kann.
VORSICHT: Weistaufeinemöglicherweise
gefährliche Situation hin, die, sofern nicht
vermieden, u. U. zu leichten oder mittelschweren
Verletzungen führen kann.
VORSICHT: Weist bei Verwendung ohne das
Sicherheitssymbolaufeinemöglicherweise
gefährliche Situation hin, die, sofern nicht
vermieden, ggf. zu Sachschäden führt.
Weist auf ein Stromschlagrisiko hin.
WICHTIG: INKORREKTE BEDIENUNG KANN
ZU FRÜHZEITIGEM VERSCHLEISS ODER
BESCHÄDIGUNG DES WERKZEUGES FÜHREN.
LESEN SIE DIE BEDIENUNGSANLEITUNG,
UM EINE KORREKTE VERWENDUNG DES
WERKZEUGES ZU GEWÄHRLEISTEN.
2. ALLGEMEINE SICHERHEITSHINWEISE
FÜR ELEKTROWERKZEUGE
ACHTUNG! Lesen Sie alle Sicherheitshinweise
und Anweisungen. Versäumnisse bei der Einhaltung
derSicherheitshinweiseundAnweisungenkönnen
elektrischen Schlag, Brand und/oder schwere
Verletzun-gen verursachen.
BEWAHREN SIE ALLE SICHERHEITSHINWEISE
UND ANWEISUNGEN FÜR DIE ZUKUNFT AUF.
1) Arbeitsplatzsicherheit
a) Halten Sie Ihren Arbeitsbereich sauber und
gut beleuchtet. Unordnung oder unbeleuchtete
ArbeitsbereichekönnenzuUnfällenführen.
b) Arbeiten Sie mit dem Elektrowerkzeug nicht
in explosionsgefährdeter Umgebung, in der
sich brennbare Flüssigkeiten, Gase oder Stäube
befinden.
c) Halten Sie Kinder und andere Personen
während der Benutzung des Elektrowerkzeugs
fern. BeiAblenkungkönnenSiedieKontrolleüber
das Gerät verlieren
2) Elektrische Sicherheit
a) Der Anschlussstecker des Elektrowerkzeuges
muss in die Steckdose passen. Der Stecker
darf in keiner Weise verändert werden.
Verwenden Sie keine Adapterstecker gemeinsam
mit schutzgeerdeten Elektrowerkzeugen.
Unveränderte Stecker und passende Steckdosen
verringern das Risiko eines elektrischen Schlages.
b) Vermeiden Sie Körperkontakt mit geerdeten
Oberflächen wie Rohren, Heizungen, Herden und
Kühlschränken. EsbestehteinerhöhtesRisiko
D
E
U
DeutScH 2

durchelektrischenSchlag,wennIhrKörpergeerdet
ist.
c) Halten Sie das Gerät von Regen oder
Nässe fern. Das Eindringen von Wasser in
einElektrowerkzeugerhöhtdasRisikoeines
elektrischen Schlages.
d) Zweckentfremden Sie das Kabel nicht, um das
Elektrowerkzeug zu tragen, aufzuhängen oder
um den Stecker aus der Steckdose zu ziehen.
Halten Sie das Kabel fern von Hitze, Öl, scharfen
Kanten oder sich bewegenden Geräteteilen.
BeschädigteoderverwickelteKabelerhöhendas
Risiko eines elektrischen Schlages.
e) Wenn Sie mit einem Elektrowerkzeug
im Freien arbeiten, verwenden Sie nur
Verlängerungskabel, die auch für den
Außenbereich geeignet sind. Die Anwendung
eines für den Außenbereich geeigneten
Verlängerungskabels verringert das Risiko eines
elektrischen Schlages.
f) Wenn der Betrieb des Elektrowerkzeuges
in feuchter Umgebung nicht vermeidbar ist,
verwenden Sie einen Fehlerstromschutzschalter.
Der Einsatz eines Fehlerstromschutzschalters
vermindert das Risiko eines elektrischen Schlages.
3) Sicherheit von Personen
a) Seien Sie aufmerksam, achten Sie darauf,
was Sie tun und gehen Sie mit Vernunft
an die Arbeit mit einem Elektrowerkzeug.
Benutzen Sie kein Elektrowerkzeug, wenn
Sie müde sind oder unter dem Einfluss von
Drogen, Alkohol oder Medikamenten stehen.
Ein Moment der Unachtsamkeit beim Gebrauch
des Elektrowerkzeuges kann zu ernsthaften
Verletzungen führen.
b) Tragen Sie persönliche Schutzausrüstung und
immer eine Schutzbrille. DasTragenpersönlicher
Schutzausrüstung, wie Staubmaske, rutschfeste
Sicherheitsschuhe,SchutzhelmoderGehörschutz,
jenachArtundEinsatzdesElektrowerkzeuges,
verringert das Risiko von Verletzungen.
c) Vermeiden Sie eine unbeabsichtigte
Inbetriebnahme. Vergewissern Sie sich, dass das
Elektrowerkzeug ausgeschaltet ist, bevor Sie
es an die Stromversorgung und/oder den Akku
anschließen, es aufnehmen oder tragen. Wenn
Sie beim Tragen des Elektrowerkzeuges den Finger
am Schalter haben oder das Gerät eingeschaltet
an die Stromversorgung anschließen, kann dies zu
Unfällen führen.
d) Entfernen Sie Einstellwerkzeuge oder
Schraubenschlüssel, bevor Sie das
Elektrowerkzeug einschalten. Ein Werkzeug oder
Schlüssel, der sich in einem drehenden Geräteteil
bendet,kannzuVerletzungenführen.
e) Vermeiden Sie eine abnormale Körperhaltung.
Sorgen Sie für einen sicheren Stand und halten
Sie jederzeit das Gleichgewicht. Dadurchkönnen
Sie das Elektrowerkzeug in unerwarteten Situationen
besser kontrollieren.
f) Tragen Sie geeignete Kleidung. Tragen Sie
keine weite Kleidung oder Schmuck. Halten Sie
Haare, Kleidung und Handschuhefern von sich
bewegenden Teilen. Lockere Kleidung, Schmuck
oderlangeHaarekönnenvonsichbewegenden
Teilen erfasst werden.
g) Wenn Staubabsaug- und Auffangeinrichtungen
montiertwerdenkönnen,vergewissernSie
sich, dass diese angeschlossen sind und
richtig verwendet werden. Verwendung einer
Staubabsaugung kann Gefährdungen durch Staub
verringern.
4) Sorgfältiger Umgang mit und Gebrauch
von Elektrowerkzeugen
a) Überlasten Sie das Gerät nicht. Verwenden
Sie für Ihre Arbeit das dafür bestimmte
Elektrowerkzeug. Mit dem passenden
Elektrowerkzeug arbeiten Sie besser und sicherer
im angegebenen Leistungsbereich.
b) Benutzen Sie kein Elektrowerkzeug, dessen
Schalter defekt ist. Ein Elektrowerkzeug, das sich
nicht mehr ein- oder ausschalten lässt, ist gefährlich
und muss repariert werden.
c) Ziehen Sie den Stecker aus der Steckdose
und/oder entfernen Sie den Akku, bevor Sie
Geräteeinstellungen vornehmen, Zubehörteile
wechseln oder das Gerät weglegen.
Diese Vorsichtsmaßnahme verhindert den
unbeabsichtigten Start des Elektrowerkzeuges.
d) Bewahren Sie unbenutzte Elektrowerkzeuge
außerhalb der Reichweite von Kindern
auf. Lassen Sie Personen das Gerät nicht
benutzen, die mit diesem nicht vertraut sind
oder diese Anweisungen nicht gelesen haben.
Elektrowerkzeuge sind gefährlich, wenn sie von
unerfahrenen Personen benutzt werden.
e) Pflegen Sie das Elektrowerkzeug mit Sorgfalt.
Kontrollieren Sie, ob bewegliche Geräteteile
einwandfrei funktionieren und nicht klemmen,
ob Teile gebrochen oder so beschädigt sind,
D
E
U
DeutScH 3
Other manuals for AS170
2
Table of contents
Languages:
Other Arbortech Saw manuals

Arbortech
Arbortech AS160 User manual

Arbortech
Arbortech AS170 User manual

Arbortech
Arbortech ALL.FG.175240.00/40 Setup guide

Arbortech
Arbortech AS200X Setup guide

Arbortech
Arbortech AS200X Setup guide

Arbortech
Arbortech ALLSAW AS175 Setup guide

Arbortech
Arbortech AS170 User manual

Arbortech
Arbortech ALLSAW AS175 Setup guide

Arbortech
Arbortech ALLSAW AS175 Setup guide
Popular Saw manuals by other brands

Meec tools
Meec tools 380-035 operating instructions

Craftsman
Craftsman Accra-Arm 113.29440 Assembly, operating instructions and parts list

Skymsen
Skymsen BAND SAW instruction manual

GMC
GMC LSM210A instruction manual

MasterCraft
MasterCraft 055-6751-6 instruction manual

Sealey
Sealey Siegen S01045.V3 manual