ARC Audio M-PAK 14CX User manual

1

Table Of Contents
1. Remove the Seat 4
2. Remove the rear Tank Bolts 5
3. Remove the Front Tank Bolts 6
4. Disconnect the Fuel Line 7
5. Tank Removal 8
Special Note: Brake Lines 9
6. Expose the Harness 10
7. Power Harness 11
8. Exposing the Battery 12
9. Connecting the Power Harness 13
Note: Remove the Fuse 14
10. Windshield Removal 15
11. Vent AssemblyRemoval 16
12. Disconnect the Turn Signals 17
13. Remove the Turn Signals 18
14. Remove the Speaker Grill 19
15. Remove the Front Fairing Outer Screws 20
16. Remove the Front Fairing 21
17. Remove the Front Speakers 22
18. Trim the Enclosure Alignment Pins 20
19. Install the New Speakers 21
20. Remove the Headlight 22
21. Remove the Radio 23
22. Prepare the Harness 24
23. Connect the Power Harness 25
24. Connect the Input Plug 26
25. Connect the Speaker Wires 27
26. Connect to the Stock Harness 28
27. Connect to the Stock Harness 29
28. Remote Turn-on P&A Plug 30
29. Amplifier Mounting Plate 31
30.Mounting the Amplifier 33
Note: Install the Fuse 33
31. Mount the Amplifier 34
33. Confirming Fitment & Wiring 36
34. Finishing Up 37
2 Channel Tuning Guide 38
4 Channel Tuning Guide 39
2

1. Remove the Seat 1
2. Remove the rear Tank Bolts 2
3. Remove the Front Tank Bolts 3
4. Disconnect the Fuel Line 4
5. Tank Removal 5
Special Note: Brake Lines 6
6. Expose the Harness 7
7. Power Harness 8
8. Exposing the Battery 9
9. Connecting the Power Harness 10
Note: Remove the Fuse 11
10. Windshield Removal 12
11. Vent AssemblyRemoval 13
12. Disconnect the Turn Signals 14
13. Remove the Turn Signals 15
14. Remove the Speaker Grill 16
15. Remove the Front Fairing Outer Screws 17
16. Remove the Front Fairing 18
17. Remove the Front Speakers 19
23
24
25
26
27
28
29
30
31
32
33
34
35
36
18. Trim the Enclosure Alignment Pins
19. Install the New Speakers
20. Remove the Headlight
21. Remove the Radio
22. Prepare the Harness
23. Connect the Power Harness
24. Connect the Input Plug
25. Connect the Speaker Wires
26. Connect to the Stock Harness
27. Connect to the Stock Harness
28. Remote Turn-on P&A Plug
29. Amplifier Mounting Plate
30. Mounting the Amplifier
31. Secure the Amplifier
32. Final Amplifier Installation 37
33. Confirming Fitment & Wiring 38
34. Finishing Up
2 Channel Tuning Guide
4 Channel Tuning Guide
3

1. Locate the Philips head screw at the back of the seat and remove it
being careful not to drop it. This will free the back of the seat. Raise it
slightly and slide the seat toward the back of the bike until it comes free.
Note: It maybe necessary to remove the seat strap. The Philips screw for
the strap can be found behind the saddle bag.
TOP
4


4. To disconnect the fuel line from the fuel tank, locate the quick discon-
nect fitting on the left side of the tank.
Push up on the chrome plated portion of the connector. Work the black
elbow fitting free while holding the chrome fitting in the up position.
The elbow and attached fuel line
should come free with very little
effort. This fitting is self sealing
however a small amount of fuel
may drip for the connector. You
may want to put a rag under it to
catch any gas.
TOP
7
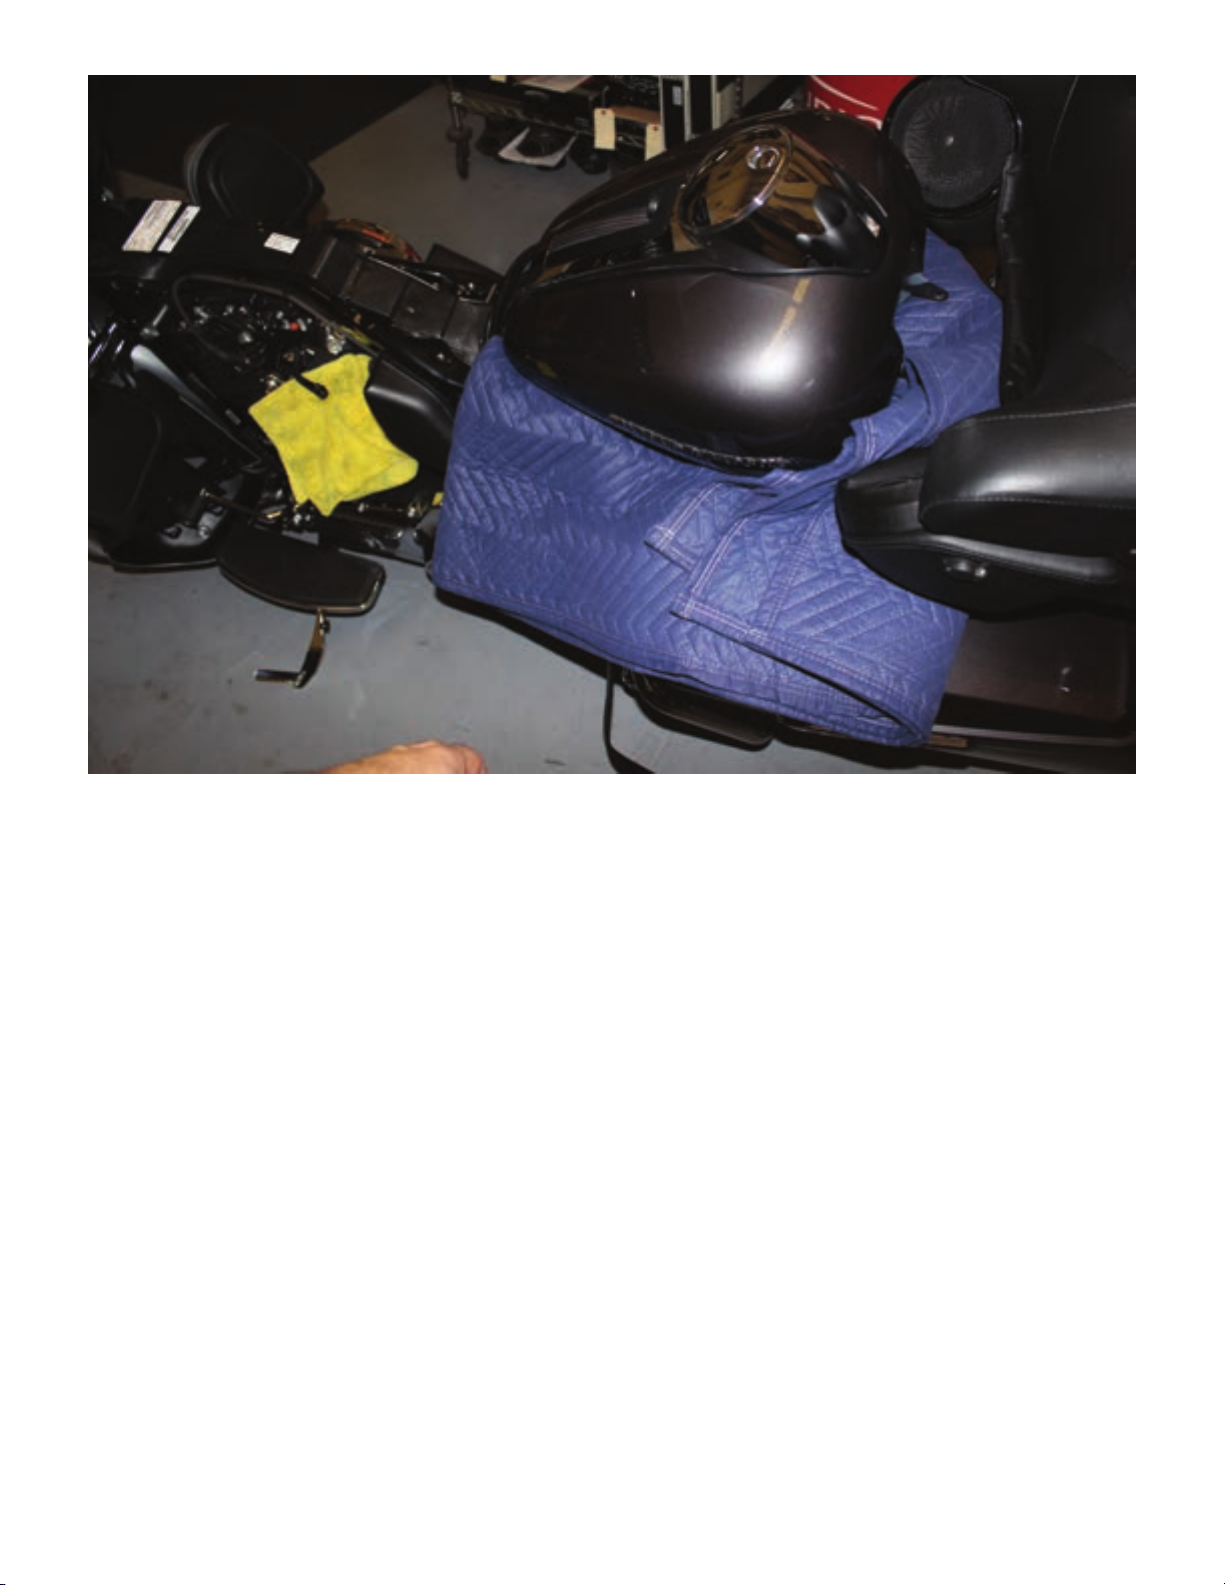
5. Short Cut. While it is advisable to remove the chrome "Dash Board"
from the tank and fully disconnect all wires and lines attached, you can
carefully swing the tank around and set it in the seat position. A great
deal of care must be taken to insure nothing is scratched or damaged. If
you are uncomfortable with this method, please watch the tank video
below for complete tank removal instructions.
https://www.youtube.com/watch?v=TOaxIr8BCgU
TOP
8

Special Note: This 2014 model has had 3 zip ties added under the tank
the secure the brake lines. If your bike does not have these it is recom-
mended that you contact your local dealer and find out if it is necessary.
If they are present they must be replaced exactly as they are. ARC Audio
takes no responsibility for this modification.
TOP
9
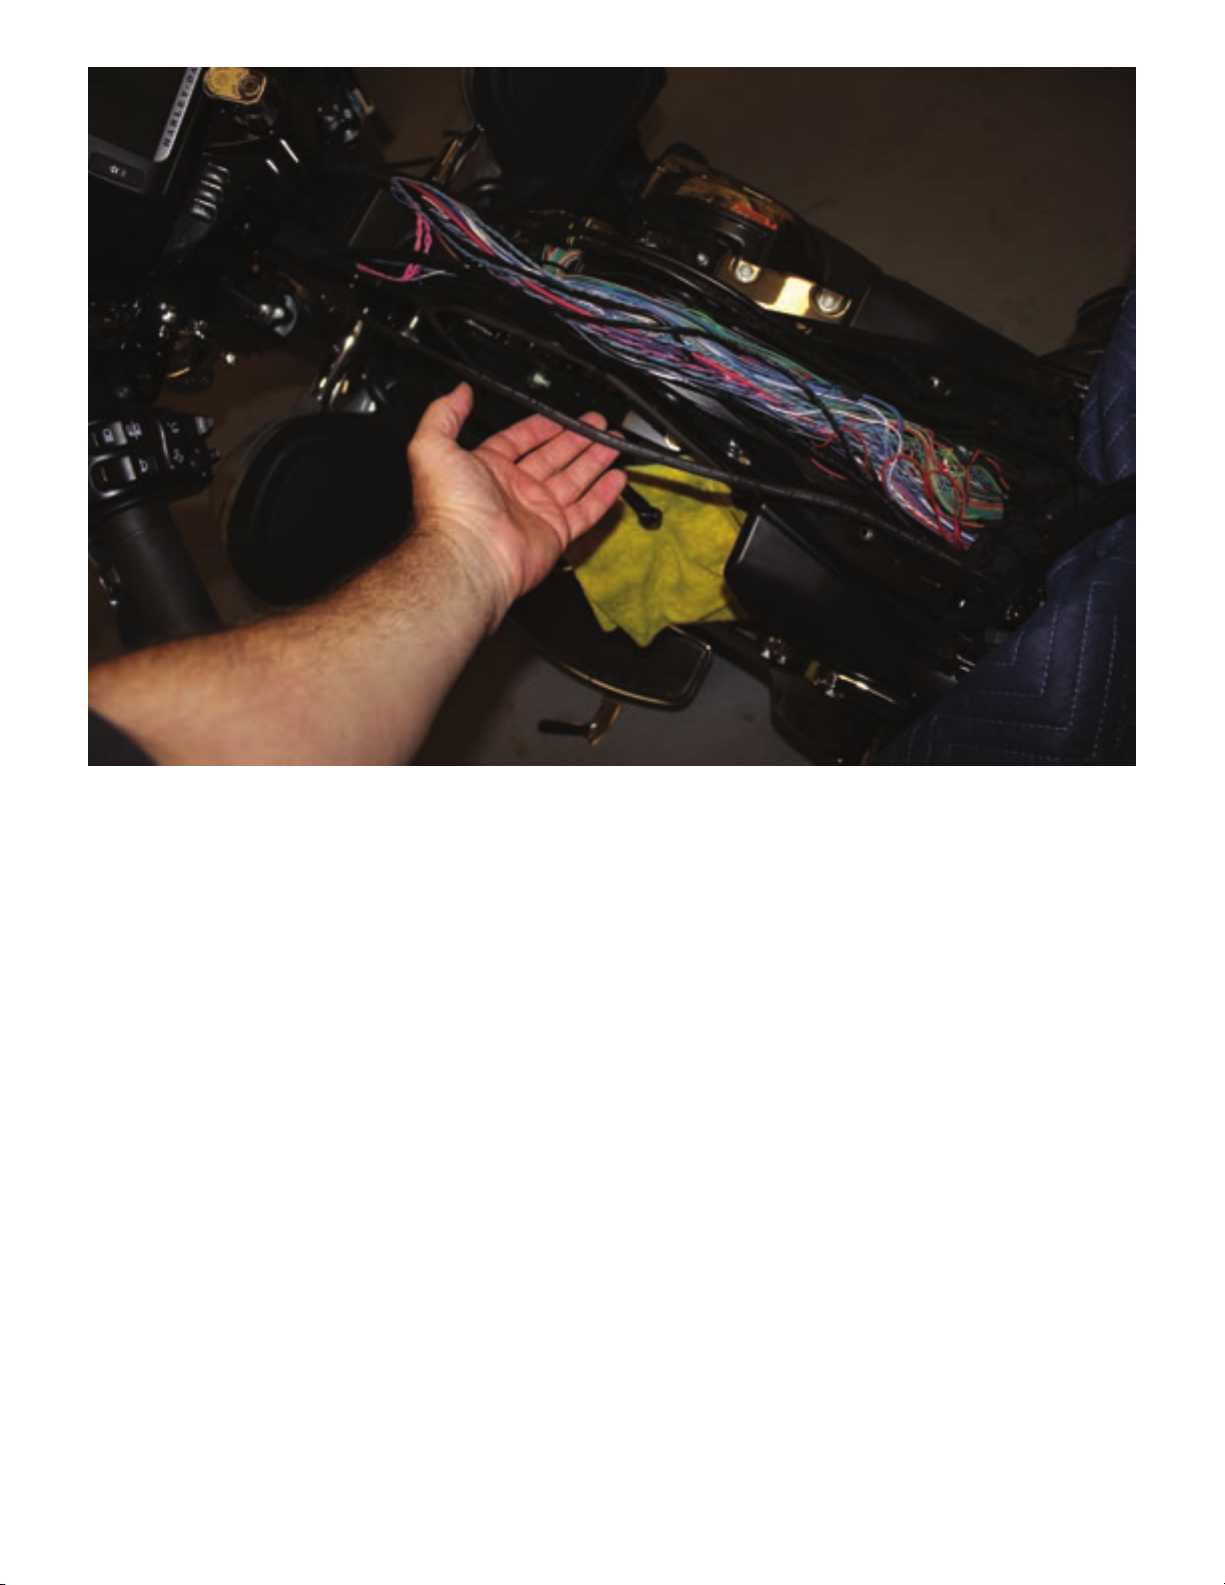
6. Remove the black plastic cover off the top of the wire cover on the back
bone of the frame. No tools here, just work it loose from the tabs.
Lay the Provided HD Power Upgrade Harness in with the rest of the
wires. Make sure the fuse holder is at the battery end. Nothing special
here, just tuck it in place. Make sure you leave enough to make the con-
nection to the battery.
Warning: Remove the supplied fuse from the fuse holder before you
begin.
TOP
10

7. This is what it should look like before you put the cover back on.
At this point you can reverse the process, putting the cover back on and
putting the tank back in place and secure all the hardware tightly. Don't
forget the fuel line. Give it a gentle tug to make sure it is securely con-
nected.
Warning: Do Not Use the Small Power Harness that is also provided in
this kit. Only Use the 8 Gauge power harness provided.
TOP
11

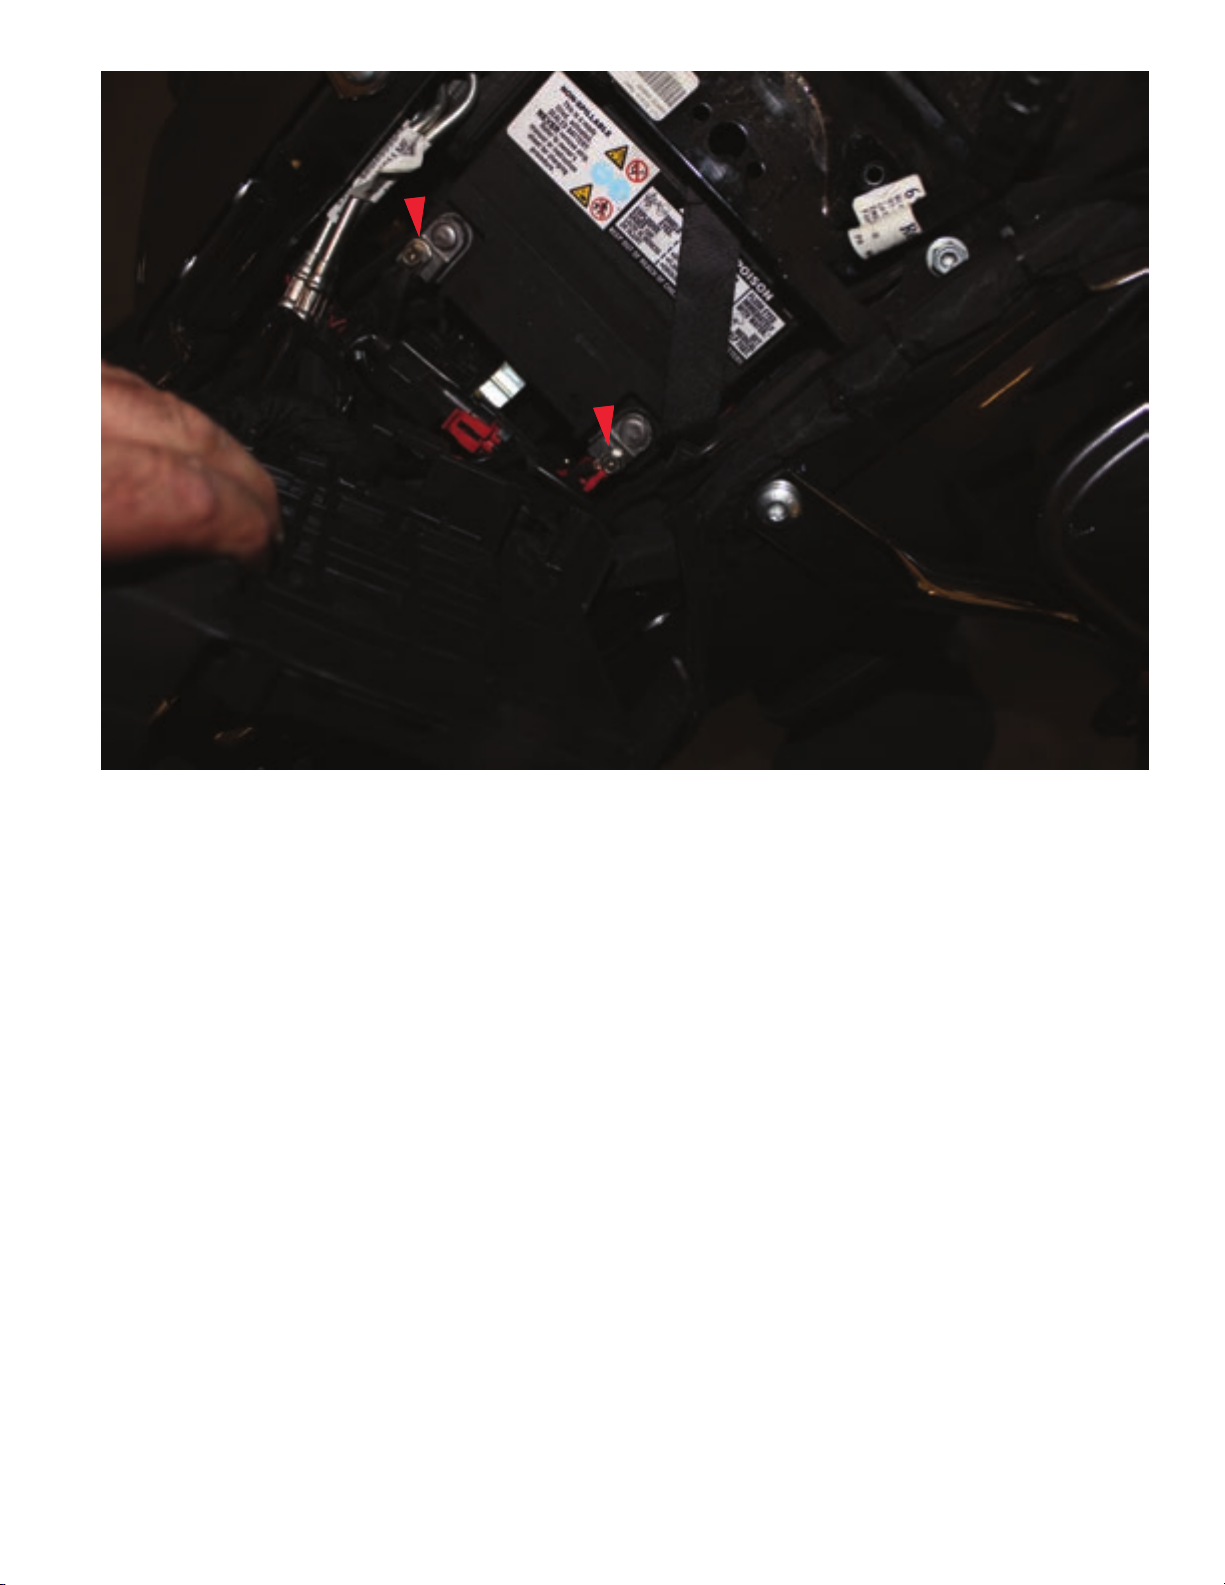
9. You have now exposed the top of the battery. The 2 ends of the power
harness with the metal ring terminal can now be connected to the battery
at this location. Take extra care when working around the positive (+)
battery terminal. You should always wear safety glasses when working
with the battery.
Just a reminder, the red wire connects to the battery positive (+) and the
black wire to the battery negative (-).
TOP
13


Other manuals for M-PAK 14CX
1
This manual suits for next models
1
Other ARC Audio Motorcycle Accessories manuals


