Anbauanleitung Fitting Instructions Istruzione
B
Y
W
U
N
D
E
R
L
I
C
H
Bestell Nummer/ Part Number/: 8600886
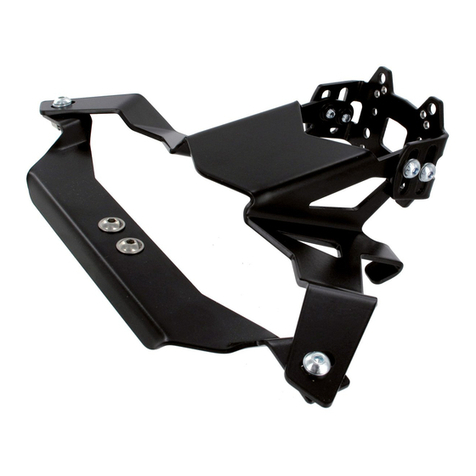
K 1200 GT (2006-) Navihalterung / GPS Bracket / Supporto GPS
1. Entfernen Sie die Verkleidungsscheibe, die darunter
liegende Abdeckung, die Batterieabdeckung (Bild B + C)
und das linke Verkleidungsseitenteil.
2. Klemmen Sie die Batterie ab (erst Masse, dann Plus).
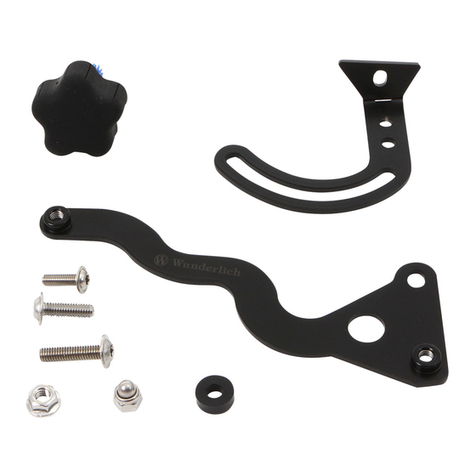
3. Montieren Sie den Halter mit den Schrauben M6x12, U- Scheibe
und Spezialmutter am Halteblech (A1).
4. Der Navihalter wird mit den Schrauben M5x12 U- Scheibe und U-
Scheibe Plastik zwischen dem Halter und dem Navihalter montiert
(Bild A2).
5. Bauen Sie die Steckdose ein und schließen Sie die Kabel an (Rot an
+, Braun an -) wie es auf der Unterseite der Steckdose aufgezeichnet
ist (Bild A3).
6. Trennen Sie die beiden Rundstecker (am Kabelbaum, A4) und
schieben Sie den Kabelbaum durch die Bohrung der Verkleidung
(Bild D).
7. Legen Sie unter den Navihalter jeweils eine Plastik U- Scheibe und
montieren Sie die Abdeckung zusammen mit dem Navihalter mit
Schrauben M5x25 (Bild D + E). Tipp: Um das Verrutschen der kleinen
Plastikscheiben während dem Anbau zu vermeiden, können diese
mit einem Tropfen Silikon oder Fett in Position gehalten werden.
8. Setzen Sie den beigelegten Kantenschutz auf den Halter (Bild D2).
9. Ziehen Sie die Kabel unten aus der Verkleidung und führen es durch
den Halter der Kupplungsleitung (Bild F).
10. Verbinden Sie wieder die Rundstecker (Rot mit Rot und Braun mit
Braun) und führen das Kabel durch die Öffnung der Bremsleitung
durch den Verkleidungsträger zur Batterie (Bild G).
11. Schließen Sie zuerst das rote Kabel zusammen mit dem Plus-Kabel,
und dann das braune zusammen mit dem Massekabel wieder an
die Batterie an (Bild H).
12. Nach der Montage bauen Sie die Sicherung ein und fi xieren Sie die
Leitungen mit Kabelbinder.
13. Montieren Sie wieder alle Bauteile am Fahrzeug, kontrollieren Sie
den festen Sitz aller Schraubverbindungeben.
14. Stellen Sie nach der Montage des Navigationsgerätes (oder anderen
Gräten) den Navihalter so ein, das er nicht mit der Verkleidungsschei-
be oder anderen Lenkungs.- oder Verkleidungsteilen in Berührung
kommt.
HINWEIS: Die Sicherung sichert eine max. Leistung von 10A ab,
sollten Sie nur ein Navigationsgerät (oder anderes Gerät) daran
anschließen, empfehlen wir ihnen, nur so hoch abzusichern, wie
der Gerätehersteller es empfi ehlt oder das Originalkabel mit ori-
ginaler Sicherung zu verwenden.
1. Remove the screen, the cover below the screen, the bat-
tery cover (Image B+C) and the left fairing panel.
2. Disconnect the battery, fi rst the negative (-) and then the positive
(+) terminal.
3. Attach the middle bracket to the base bracket using the supplied
M5x12 bolts, steel washers and special nut (Image A1).
4. The device carrier is loosely attached to the middle bracket using
M5x12 bolts, steel washers on the outside and plastic washers
between the brackets (Image A2).
5. Attach the supplied 12V socket to the base bracket (A3). Connect
the red wire to the (+) and the brown wire to the (-) (underside of
the 12V socket has “+ -” markings).
6. Disconnect the two round “bullet” connectors (in harness, Image
A4). Thread the wires (from the 12V socket) through the hole in the
front fairing (Image D).
7. Place plastic washers between the base bracket and the fairing,
and attach the bracket together with the cover using the supplied
M5x25 bolts (Image D + E). Tip: To prevent the small plastic washers
from moving/falling down during installation, use a drop of silicone
or grease to keep them in position.
8. Push the supplied edge protector onto the bracket (Image D2).
9. Route the 12V socket wiring downwards, and then along the hy-
draulic clutch line into the left side panel (Image F).
10. Re-connect the round “bullet” connectors (red to red, brown to
brown). Route the wires into the battery compartment together with
the brake hose (Image G).
11. Connect the red wire together with the positive lead to the (+) terminal
of the battery, and then the brown wire together with the earth lead
to the minus (-) terminal (Image H).
12. When fi nished, install a fuse into the fuse carrier and secure the
wiring with cable ties.
13. Re-attach all previously removed parts to the bike and check that
all bolts and nuts are tight.
14. After any device has been bolted to the carrier plate, adjust the
position of it so that it does not touch the screen or any other parts
of the bike, and that the steering is not affected even when turning
the handle bars fully from side to side.
Important note: The supplied “blade” type fuse has a value of
10 amperes. If only a navigation system is connected (with a low
power consumption), it may be better to use a smaller fuse (value
as recommended by the device manufacturer), unless the device
already has a power cable with its own separate fuse.
1. Rimuovere il parabrezza, il suo coperchio e il coperchio
batteria (fi gura B+C), qindi rimuovere anche la carena sx.
2. Disconnettere la batteria (prima il polo negativo, poi il positivo).
3. Montare supporto navigatore con le viti M6x12, rondella U e ron-
della e dado speciale alla staffa del supporto parabrezza (A1).
4. Il supporto navigatore va montato con le viti M5x12 , rondella U in
acciaio al esterno e rondella a U di plastica fra staffa parabrezza
e supporto navigatore (fi gura A2).
5. Installare la presa a 12V alla staffa e collegare i cavi (rosso a “+”,
marrone a “-”) come descritto al retro della presa (fi gura A3).
6. Scollegare i due connettori rotondi (del cablaggio, pagina A4).
Spingere i cavi nel foro della carena anteriore (fi gura D).
7. Posizionare una rondella a U di plastica fra staffa e carena e mon-
tare la copertura e la staffa con i bulloni M5x25 come raffi gurato
in D+E.
Consiglio: Per evitare una perdita delle rondelle mentre l’istallazio-
ne, raccomandiamo di utilizzare grasso o silicone per mantenere
le rondelle in posizione.
8. Applicare la guarnizione di gomma al supporto (fi gura D 2).
9. Portare i cavi della presa a 12V giù verso attraverso il supporto
del tubo idraulico della frizione ed inserirli nella carena sx (fi gura
F).
10. Ri collegare i due connettori (rosso a rosso e marrone a marrone).
Portare i cavi verso il compatimento della batteria (fi gura G).
11. Collegare prima il cavo rosso assieme al polo positivo (+) ed il
cavo marrone assieme il polo negativo (-) alla batteria (fi gura H).
12. Dopo l’istallazione montare il fusibile nel suo posto previsto e
mettere un fermacavo per fi ssare il cablaggio.
13. Ri-montare tutti i pezzi rimossi alla moto e controllare che i dadi
siano serrati.
14. Dopo l’istallazione di qualsiasi apparecchio raccomandiamo di
controllare che non tochi il parabrezza e sterzando non interferisce
con altri pezzi della moto.
Note important: Il fusibile in dotazione ha un valore di 10 Ampere.
Se si collega solo un apparecchio, raccomandiamo di utilizzare un
fusibile più piccolo (valore raccomandato dal produttore dell’ap-
parecchio), almeno se il cavo di alimentazione dell’apparecchio
non ha un fusibile separato.
Thank you for purchasing our product. Grazie di aver acquistato un prodotto WunderlichVielen Dank für Ihr Vertrauen zu unserem Produkt.
General note: Our fi tting instructions are
written to the best of our knowledge but
specifi cations or details may change. If you have diffi culties or have doubts with
fi tting this part please seek advice from your BMW dealer or workshop of your choice.
Please note that in some cases due to vehicle related tolerances beyond our control
some products might need adjusting to fi t. We cannot warranty parts fi tting in those
circumstances.
Note generali: Le nostre istruzioni di montaggio
sono scritte al meglio delle nostre possibilità
ma dettagli o specifi che possono venire variate. Se avete diffi coltà o dubbi sul montaggio
di questo accessorio vi invitiamo a rivolgervi al vostro concessionario BMW o alla vostra
offi cina di fi ducia.Prendete nota che in qualche caso per tolleranze relative al veicolo
al di fuori del nostro controllo alcuni accessori possono necessitare di aggiustamenti
appropriati. In questo caso non possiamo garantire un perfetto montaggio.
Genereller Hinweis: Unsere Anleitungen
sind nach bestem Wissen erstellt worden,
erfolgen jedoch ohne Gewähr. Sollten Sie mit dem Anbau nicht zurecht kommen
oder Zweifel haben, so wenden Sie sich bitte an Ihren BMW-Händler oder die
Werkstatt Ihres Vertrauens. Bitte beachten Sie , dass wir keine Gewährleistungen für
fahrzeugspezifi sche Toleranzen übernehmen können! Es kann im Einzelfall notwendig
sein, dass Produkte diesen angepasst werden müssen.
News, Shop, Downloads und Informationen: www.wunderlich.de
Alles um das Thema Navigation: www.navigation.wunderlich.de
Copyright by Wunderlich® Copyright by Wunderlich®Copyright by Wunderlich®
1
Nuovi sezioni del catalogo ed ultime Novità:
Istruzioni di montaggio download (colore)
www.wunderlich.de/update
www.wunderlich.de/manuals
The latest catalogue sections and news:
Fitting instructions download (full colour):
www.wunderlich.de/update
www.wunderlich.de/manuals

