arcelik 3881 KTS User manual

2960311873_EN/2 8 1119 .1157
Döküman Numarası
Dryer
User Manual
3881 KTS

Please read this user manual first!
Dear Customer,
Thank you for prefering a Arçelik product.
We hope that your product which has been
manufactured with high quality and technology
will give you the best results. We advise you
to read through this manual and the other
accompanying documentation carefully
before using your product and keep it for
future reference. If you transfer the product
to someone else, give its manual as well. Pay
attention to all details and warnings specified
in the user manual and follow the instructions
given therein.
Use this user manual for the model indicated
on the cover page.
• Read the instructions.
Explanation of symbols
Throughout this user manual the following
symbols are used:
BDANGER!
• Warning against electric shock.
DANGER!
• Warning against fire hazard.
AWARNING!
• Warning for hazardous situations with regard
to life and property.
WARNING!
• Warning against hot surfaces.
WARNING!
• Warning against scalding hazard.
CNOTE
• Important information or useful hints about
usage.
Packaging materials of the product
are manufactured from recyclable
materials in accordance with our
National Environment Regulations.
Do not dispose of the packaging wastes with
the domestic waste or other wastes, discard
them to the dedicated collection points
designated by the local authorities.
WEEE It complies with the WEEE Directive

3
Dryer / User Manual
1 Important instructions for safety and environment
CNOTE
• This section contains safety
instructions that will help protect
from risk of personal injury or
property damage. Failure to follow
these instructions shall void any
warranty.
1.1 General safety
AWARNING!
The dryer can be used by children
at and above 8 years old and by
persons whose physical, sensory
or mental capabilities were not fully
developed or who lack experience
and knowledge provided that they
are supervised or trained on the
safe usage of the product and the
risks it brings out. Children should
not play with the product. Cleaning
and maintenance works should not
be performed by children unless
they are supervised by someone.
Children of less than 3 years should
be kept away unless continously
supervised.
• Adjustable feet should not be
removed. The gap between the
dryer and the floor should not be
reduced with materials such as
carpet, wood and tape. This will
cause problems with the dryer.
AWARNING!
Always have the installation and
repairing procedures carried
out by the Authorized Service.
Manufacturer shall not be held
liable for damages that may arise
from procedures carried out by
unauthorized persons.
• Never wash the dryer by spraying
or pouring water onto it! There is
the risk of electric shock!
For the products with
a steam function:
AWARNING!
• Use only distilled water or water
condensed in the water tank of the
machine in steam programs. Do
not use mains water or additives.
When using condensed water in the
water tank, it should be filtered and
cleared of fibres.
• Do not open the door when steam
programs are running. Hot water
may be expelled.
• Before putting laundry in a steam
program, stains on it should be
removed.
• You may only put laundry that is not
dirty or stained but permeated with
unpleasant odour in steam (odour
removal) program.
• Do not use any dry cleaning sets
or additional materials in a steam
program or in any program.

4 Dryer / User Manual
1.1.1 Electrical safety
BDANGER!
• Electrical safety instructions
should be followed while electrical
connection is made during the
installation.
• The appliance must not be
supplied through an external
switching device, such as a timer,or
connected to a circuit that is
regularly switched on and off by
utility.
• Connect the dryer to a grounded
outlet protected by a fuse at the
value specified on the type label.
Have the grounding installation
performed by a qualified electrician.
Our company shall not be liable for
any damages that will arise when
the dryer is used without grounding
in accordance with the local
regulations.
• The voltage and allowed fuse
protection is stated on the type label
plate.
• The voltage specified on the type
label must be equal to your mains
voltage.
• Unplug the dryer when it is not in
use.
• Unplug the dryer from the mains
during installation, maintenance,
cleaning and repair works.
• Do not touch the plug with wet
hands! Never unplug by pulling
on the cable, always pull out by
grabbing the plug.
BDANGER!
• Do not use extension cords, multi-
plugs or adaptors to connect the
dryer to power supply in order to
decrease the risk of fire and electric
shock.
• Power cable plug must be easily
accessible after installation.
• Damaged mains cable should be
changed notifying the Authorized
Service.
• If the dryer is faulty, it must not be
operated unless it is repaired by an
authorized service agent! There is
the risk of electric shock!
1.1.2 Product safety
DANGER!
• Superheating of the clothes inside
of the dryer can occur if you cancel
the programme or in the event of
a power failure whilst the dryer is
running, this concentration of heat
can cause self-combustion and fire
so always activate the ventilation
programme to cool down or quickly
remove all laundry from the dryer in
order to hang them up and dissipate
the heat.

5
Dryer / User Manual
DANGER!
Points to be taken into
consideration for fire hazard:
Below specified laundry or items
must not be dried in the dryer
considering fire hazard.
• Unwashed laundry items
• Items soiled with oil, acetone,
alcohol, fuel oil, kerosene, stain
removers, turpentine, paraffin or
paraffin removers must be washed
in hot water with plenty of detergent
before being dried in the dryer.
For this reason especially the items
containing the above specified
stains must be washed very well,
to do this use adequate detergent
and choose a high washing
temperature.
Below specified laundry or
items must not be dried in the
dryer due to the fire hazard:
• Garments or pillows bolstered with
rubber foam (latex foam), shower
bonnets, water resistant textiles,
materials with rubber reinforcement
and rubber foam pads.
Clothing cleaned with industrial
chemicals.
Items such as lighter, match,
coins, metal parts, needle etc. may
damage the drum set or may lead
to functional problems. Therefore
check all the laundry that you will
load into your dryer.
DANGER!
• Never stop your dryer before the
programme completes. If you must
do this, remove all laundry quickly
and lay them out to dissipate the
heat.
• Clothes that are washed
inadequately may ignite on their
own and even may ignite after
drying ends.
• You must provide enough ventilation
in order to prevent gases exiting
from devices operating with other
types of fuels including the naked
flame from accumulating in the
room due to the back fire effect.
AWARNING!
• Underwear that contains metal
reinforcements should not be dried
in the dryer. Dryer may be damaged
if metal reinforcements come loose
and break off during drying.
CNOTE
• Use softeners and similar products
in accordance with the instructions
of their manufacturers.
Always clean the lint filter before or
after each loading. Never operate
the dryer without the lint filter
installed.

6 Dryer / User Manual
AWARNING!
• Never attempt to repair the dryer
by yourself. Do not perform any
repair or replacement procedures
on the product even if you know
or have the ability to perform the
required procedure unless it is
clearly suggested in the operating
instructions or the published service
manual. Otherwise, you will be
putting your life and others’ lives in
danger.
• There must not be a lockable, sliding
or hinged door that may block the
opening of the loading door in the
place where your dryer is to be
installed.
• Install your dryer at places suitable
for home use. (Bathroom, closed
balcony, garage etc.)
• Make sure that pets do not enter the
dryer. Check the inside of the dryer
before operating it.
• Do not lean on the loading door of
your dryer when it is open, otherwise
it may fall over.
• The lint must not be allowed to
accumulate around the tumble dryer
• The tumble dryer is not to be used if
industrial chemicals have been used
for cleaning.
• Fabric softeners, or similar products.
should be used as specified by the
fabric softener instructions.
• Exhaust air must not be discharged
into a flue which is used for
exhausting fumes from appliances
burning gas or other fuels.
1.2 Mounting over a washing machine
• A fixing device should be used between
the two machines when installing the
dryer above a washing machine. The
fitting device must be installed by the
authorized service agent.
• Total weight of the washing machine
and the dryer -with full load- when
they are placed on top of each other
reaches to approx. 180 kilograms. Place
the products on a solid floor that has
sufficient load carrying capacity!
AWARNING!
• Washing machine cannot be placed on
the dryer. Pay attention to the above
warnings during the installation on your
washing machine.
Installation Table for Washing Machine and Dryer
Dryer
Depth
Washing Machine Depth
62 cm
60 cm
54 cm
< 50 cm
54 cm Can be installed Cannot be
installed
60 cm Can be
installed Cannot be installed
1.3 Intended use
• Dryer has been designed for domestic
use. It is not suitable for commercial
use and it must not be used out of its
intended use.
• Use the dryer only for drying laundry that
are marked accordingly.
• The manufacturer waives any
responsibility arisen from incorrect usage
or transportation.
• The service life of the dryer that you
purchased is 10 years. During this period,
original spare parts will be available to
operate the dryer properly.

7
Dryer / User Manual
1.4 Child safety
• Packaging materials are dangerous for
the children. Keep packaging materials
away from children.
• Electrical products are dangerous for the
children. Keep children away from the
product when it is operating. Do not let
them tamper with the dryer. Use the child-
proof lock in order to prevent the children
to tamper with the dryer.
CNOTE
Child-proof lock is on the control panel.
(See Child lock)
• Keep loading door closed even when the
dryer is not in use.
1.5 Compliance with the WEEE
Directive and Disposing of the Waste
Product:
This product complies with EU
WEEE Directive (2012/19/EU). This
product bears a classification
symbol for waste electrical and
electronic equipment (WEEE).
This symbol indicates that this
product shall not be disposed
with other household wastes at the end of its
service life. Used device must be returned to
offical collection point for recycling of electrical
and electronic devices. To find these collection
systems please contact to your local authorities
or retailer where the product was puchased.
Each household performs important role in
recovering and recycling of old appliance.
Appropriate disposal of used appliance helps
prevent potential negative consequences for
the environment and human
health.
1.6 Compliance with RoHS Directive
The product you have purchased complies
with EU RoHS Directive (2011/65/EU). It does
not contain harmful and prohibited materials
specified in the Directive.
1.7 Package information
Packaging materials of the product are
manufactured from recyclable materials
in accordance with our National
Environment Regulations. Do not
dispose of the packaging materials together
with the domestic or other wastes. Take them
to the packaging material collection points
designated by the local authorities.
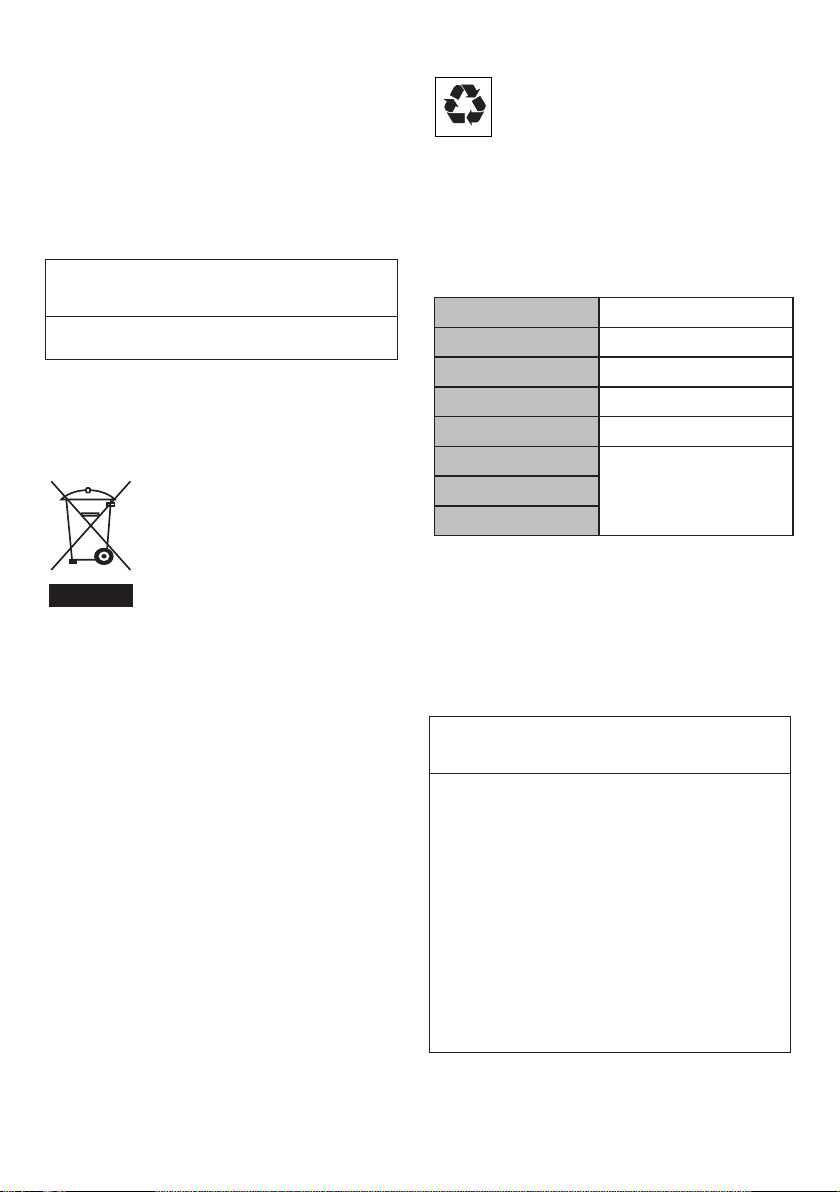
1.8 Technical Specifications
EN
Height (Min. / Max.) 84,6 cm / 86,6 cm*
Width 59,7 cm
Depth 57,8 cm
Capacity (max.) 8 kg**
Net weight (± 4 kg) 44 kg
Voltage
See type label***Rated power input
Model code
* Min. height: Height with adjustable feet are
closed.
Max. height: Height with adjustable feet are
opened maximum.
** Dry laundry weight before washing.
*** Type label is located behind the loading
door.
CNOTE
• Technical specifications of the dryer are
subject to specification without notice to
improve the quality of the product.
• Figures in this manual are schematic and
may not match the product exactly.
• Values stated on markers on the dryer
or in the other published documentation
accompanying with the dryer are
obtained in laboratory in accordance with
the relevant standards. Depending on
operational and environmental conditions
of the dryer, these values may vary.

8 Dryer / User Manual
2 Your Dryer
2.1 Overview
11
10
1
2
3
4
5
6
7
8
9
1. Top panel
2. Control panel
3. Loading door
4. Kick plate opening button
5. Ventilation grids
6. Adjustable legs
7. In models where the tank is placed below,
the water tank is inside the toe board
8. Type label
9. Lint filter
10. Water tank drawer (in models where the tank
is placed above)
11. Power cord
2.2 Package Contents
1. Water
drain
hose *
5. Drying
basket
user
manual*
2. Filter
drawer
spare
sponge*
6. Water
Filling
Container*
3. User
Manual 7. Pure
Water*
4. Drying
basket*
8.
Fragrance
Capsules
Group*
*Optional - may not be included, depends on
model.
3 Installation
Before the calling the nearest Authorized
Service for the installation of the dryer, ensure
that electrical installation and water drain is
appropriate referring to the user’s manual.
If they are not suitable, contact a qualified
electrician and technician to make necessary
arrangements.
CNOTE
• Preparation of the dryer’s location
as well as the electrical and waste
water installations is under customer’s
responsibility.
AWARNING!
• Prior to installation, visually check if the
dryer has any defects on it. If the drier
is damaged, do not have it installed.
Damaged products cause risks for your
safety.
• Let your dryer wait for 12 hours before
starting to use it.
3.1 Appropriate installation location
Install the dryer on a stable and level surface.
Dryer is heavy. Do not move it by yourself.
• Operate your dryer in a well ventilated,
dust-free environment.
• The gap between the dryer and the
surface should not be reduced by the
materials such as carpet, wood and tape.
• Do not cover the ventilation grills of the
dryer.
• There must not be a lockable, sliding or
hinged door that may block the opening
of the loading door in the place where
your dryer is to be installed.
• Once the dryer is installed, it should stay
at the same place where its connections
have been made. When installing the
dryer, make sure that its rear wall does
not touch anywhere (tap, socket, etc.).
• Place the dryer at least 1 cm away from
the edges of other furniture.
• Your dryer can be operated at
temperatures between +5°C and +35°C.
If the operating conditions fall outside
of this range, operation of the dryer will
be adversely affected and it can get
damaged.

9
Dryer / User Manual
• The rear surface of the tumble dryer shall
be placed against a wall.
BDANGER!
Do not place the dryer on the power cable.
*Ignore following warning if your
product’s system does not contains
R290.
DANGER!
• Dryer contains R290 refrigerant.*
• R290 is an environment-friendly, but
flammable refrigerant.*
• Ensure that the air inlet of the dryer is
open and it is well-ventilated.*
• Keep potential flame sources away from
the dryer.*
3.2 Removing the transportation
safety assembly
AWARNING!
• Remove the
transportation
safety assembly
before using the
dryer for the first
time.
• If the door swing
side of your
appliance can
be modified, see
the reversible
door mounting
instructions.
3.3 Connecting to the drain
You can directly drain accumulated water
through the water drain hose supplied with
the product instead of periodically draining the
water collected in the water tank.
Connecting the water drain hose
1
3 4
2
1-2 Pull hose at
the behind of
the dryer by
hand in order
to disconnect
it from where it
is connected.
Do not use
any tools to
remove the
hose.
3Connect one end of the drain hose
supplied with the dryer to the connection
point from where you removed the hose of
the product in previous step.
4Connect the other end of the drain hose
directly to the wastewater drain or to the
washbasin.
CNOTE
• Water drain hose should be attached to a
height of maximum 80 cm.
• Make sure that the water drain hose is not
stepped on and it is not folded between
the drain and the machine.
• If there is an accessories pack supplied
with your product, please see the detailed
description.
3.4 Adjusting the feet
• Turn the feet to
left or right until
the dryer stands
level and firmly.

10 Dryer / User Manual
3.5 Transportation of the dryer
Drain all water that has remained in the dryer.
If direct water drain connection is made, then
remove the hose connections.
AWARNING!
• We recommend carrying the dryer in
upright position. If it is not possible to
carry the machine in the upright position,
we recommend carrying it by tilting
towards the right side when looked from
the front.
3.6 Warnings about sounds
CNOTE
• It is normal to
hear a metallic
noise from the
compressor
sometimes during
operation.
• Water collected during operation is
pumped to water tank. It is normal to
hear pumping noise during this process.
3.7 Changing the illumination lamp
In case an illumination lamp is used in your
laundry dryer.To change the Bulb/LED used
for illumination of your tumble dryer, call your
Authorized Service.The lamp(s) used in this
appliance is not suitable for household room
illumination. The intended purpose of this
lamp is to assist the user to place laundry in
the tumble dryer in a comfortable way. The
lamps used in this appliance have to withstand
extreme physical conditions such as vibrations
and temperatures above 50 °C

11
Dryer / User Manual
4 Preparation
4.1 Laundry suitable for drying in the
dryer
Always obey the instructions given on the
garment tags. Dry only the laundry having a
label stating that they are suitable for drying in
a dryer.
4.2 Laundry not suitable for drying in
the dryer
Items with this symbol Do not dry
with dryer should not be
dried in the dryer.
CNOTE
• Delicate embroidered fabrics, woollen,
silk garments, delicate and valuable
fabrics, airtight items and tulle curtains
are not suitable for machine drying.
4.3 Preparing laundry for drying
• Laundry may be tangled with each other
after washing. Separate the laundry items
before placing them into the dryer.
• Dry garments having metal accessories
such as zippers, inside out.
• Fasten the zippers, hooks and buckles
and button sheets.
4.4 Things to be done for energy
saving
• Spin your laundry at the highest speed
possible when washing them. Thus,
the drying time is shortened and energy
consumption is reduced.
• Sort out the laundry depending on their
type and thickness. Dry the same type of
laundry together. For example thin kitchen
towels and tableclothes dries earlier than
thick bathroom towels.
• Follow the instructions in the user manual
for programme selection.
• Do not open the loading door of the
machine during drying unless necessary.
If you must open the loading door, do not
keep it open for a long time.
• Do not add wet laundry while the dryer is
in operation
• For models with a condenser unit: clean
the condenser once in a month or after
every 30 operations regularly. .
• Clean the filter periodically.Read the
Maintenance and cleaning of filters for
detalied information.
• For models with flue unit: comply with the
flue connection instructions and clean the
flue.
• During the drying process, air the room
well where your tumble dryer is operating.
4.5 Correct load capacity
Follow the instructions
in the “Programme
selection and
consumption table”.
Do not load more than
the capacity values
stated in the table.
Following weights are given as examples.
Laundry Approximate
weights (g)* Laundry Approximate
weights (g)*
Cotton
quilt covers
(double)
1500 Blouses 150
Cotton quilt
covers (single) 1000 Cotton shirts 300
Bed sheets
(double) 500 Shirts 250
Bed sheets
(single) 350 Cotton
dresses 500
Large
tablecloths 700 Dresses 350
Small
tablecloths 250 Jeans 700
Tea napkins 100 Handkerchiefs
(10 pieces) 100
Bath towels 700 T-Shirts 125
Hand towels 350
*Dry laundry weight before washing.

12 Dryer / User Manual
5.1 Control panel
5. Operating the product
8
1 2
7 6 54
3
Remaining time indicator*
Filter Drawer Cleaning warning symbol
Filter cleaning warning symbol
Audio warning Symbol
Child-proof Lock warning symbol
Water Tank warning symbol
Time Delaying Symbol
Start / Pause symbol
Program number indicator
Time that appears on display indicates the remaining time
until the end of the programme and changes according to
the dampness level of the laundry.
1. On/Off/Cancel button
2. Programme number indicator
3. Display
4. Start / Pause button
5. End time setting selection button
6. Audio warning level / Child lock button
7. Timer programmes selection button
8. Programme selection knob
5.2 Display Symbols

13
Dryer / User Manual
5.3 Preparing the machine
1. Plug in the machine.
2. Place the laundry in the machine.
3. Press the On/off/cancel button for
1 second (long).
4. When your machine is operated for
the first time, it starts with the default
programme (wardrobe dryness for
cottons).
CPressing the On/Off/
Cancel button does not
necessarily mean the programme
has started. Press Start/
Pause button to start the
programme.

14 Dryer / User Manual
5.4 Programme selection and consumption table
EN
Programmes Programme Description
Capacity (kg)
Spin speed
in washing
machine (rpm)
Drying Time
(minutes)
Cottons Iron Dry
You may dry your cotton laundry to be ironed
in this program to have them slightly damp for
ease of ironing. (Shirt, T-shirt, tablecloth, etc.)
8 1000 145
Cottons Eco
You may dry all your cotton laundry in this
program. (T-shirt, pants, pyjamas, baby
clothes, underwear, linen, etc.) You can put
your laundry in the wardrobe without ironing.
8 1000 197
Cottons Cupboard Dry
You may use this program for extra dryness
in thick laundry such as pants, tracksuit. You
can put your laundry in the wardrobe without
ironing.
8 1000 205
Cottons Extra Dry
You may dry your thick cotton laundry in this
program such as towels, bathrobe, etc. You
can put your laundry in the wardrobe without
ironing.
8 1000 215
Synthetics Iron Dry
You may dry your synthetic laundry to be
ironed in this program to have them slightly
damp for ease of ironing. (Shirt, T-shirt,
tablecloth, etc.)
4 800 60
Synthetics Cupboard Dry
You may dry all your synthetic laundry in this
program. (Shirt, T-shirt, underwear, tablecloth,
etc.) You can put your laundry in the wardrobe
without ironing.
4 800 70
Drying Rack/ TimeDry
You may select from time programmes
between 10 and 160 minutes to achieve the
desired drying level at low temperature. In this
programme, tumble drier’s operation lasts for
the set time independently from the dryness
of laundry. This product is available to be used
with a drying basket as option. For products
that are sold without a basket, you can obtain
a basket from an authorized service and use
the drying programs specified above. For
details of use, see the drying basket user
guide.
- - -
Refresh (Wool Refresh)
Ventilates for 10 minutes without blowing
hot air. You can ventilate the cotton and linen
clothes that have been enclosed for a long
time with this program to remove their odour.
You can use this program to ventilate and
soften wool laundry that can be washed in a
washing machine. Do not use for full drying.
- - 10
Delicates
You may dry your delicate laundry or laundry
with hand wash symbol (silk blouses, thin
underwear, etc.) at low temperature in this
program.
1,5 1200 70
Jeans You may dry denim pants, skirts, shirts or
jackets in this program. 4 1200 150
Outdoor/Sports (Goretex)
Use it to dry your clothes made of synthetics,
cotton or mixed fabrics or waterproof products
such as functional jacket, raincoat etc. Turn
them inside out prior to drying.
2 1000 135
Mix(Daily)
You can dry both cotton and synthetic laundry
with this programme.Sports and fitness
clothes may be dried with this program.
4 1000 125

15
Dryer / User Manual
Gentle Care / Shirts It dries the shirts in a more sensitive manner,
and causes less creasing and easier ironing. 1,5 1200 60
Hygiene (BabyProtect+)
It is a long-term program that you can use for
the clothes (baby clothes, towels, underwear,
etc. cotton) you require hygeine. Hygiene is
provided with high temperature. It is especially
suitable for durable fabrics. ((This program is
identified and approved by England’s “The
British Foundation” (Allergy UK).))
5 800 185
Bedding/Feather
You can dry your feather or fibre filled textile
that bears can be dried in drier label as a
single piece of laundry. You can dry double
duvet, pillow or coats as single piece of
laundry. Dry your cloths such as coats and
jackets turned inside out.
- 800 165
Express Super Short Use this program to have 2 shirts ready for
ironing. 0,5 1200 30
Energy consumption values
Programmes Capacity (kg)
Spin speed
in washing
machine (rpm)
Approximate
amount of
remaining
humidity
Energy
consumption
value kWh
Cottons Eco * 8 1000 60% 1,96
Cottons Iron dry 8 1000 60% 1,5
Synthetics cupboard dry 4 800 40% 0,75
Contains fluorinated greenhouse gases. Hermetically sealed R450a / 0,22 kg - GWP:604 - 0,133
tCO2e
“Cottons Eco programme” used at full and partial load is the standard drying programme
to which the information in the label and the fiche relates, that this programme is suitable
for drying normal wet Cottons laundry and that it is the most efficient programme in terms
of energy consumption for Cottons.
* : Energy Label standard programme (EN
61121:2012).All the filters must be cleaned
prior to test series.All values given in the table
have been fixed according to EN 61121:2012
Standard. These values may deviate from the
values in the table according to the laundry
type, laundry spin speed, environmental
conditions and voltage fluctuations.
Allergy UK is the brand of the
British Allergy Association. Seal
of Approval is created to guide
people that require
recommendation about a
product that the related
product restricts / reduces / eliminates the
allergens or reduces the allergen content
significantly in the ambient where allergy
patients exist. It aims to provide assurance
that the products are tested scientifically or
examined in a way to provide measurable
results.
5.5 Auxiliary functions
Audio Warning
The machine will give an audio warning
when the programme comes to an end. Use
the Audio Warning Level button to
adjust the sound level.
CYou can change the sound level
either before the programme
starts or while the programme is in
progress.
Anti-creasing
A 2-hour anti creasing programme to prevent
laundry from creasing will be activated if you do
not take the laundry out after the programme
has come to an end. This programme rotates
the laundry in 10-minute intervals without heat
to prevent creasing.

16 Dryer / User Manual
3. Press End Time Setting selection
button to set the desired End Time
Setting symbol lights up on the
display.(When the button is pressed
and hold, End Time proceeds
uninterruptedly).
4. Press Start/Pause button. End
Time Setting starts to count down.
The “:” in the middle of the displayed
End Time Setting will start to
flash.
CAdditional laundry may be loaded
/ taken out during the End Time
period. At the end of the End Time
countdown process, End Time
symbol disappears, drying process
starts and the programme duration
is displayed. The time on the display
is the total of normal drying time and
End Time .
Changing the End Time
If you want to change the time during
countdown:
1. Press On/Off/Cancel button for 3 seconds
to cancel the programme. Restart the
machine and repeat the End Time
procedure for the desired time.
2. When your machine is operated for
the first time, it starts with the default
programme (wardrobe dryness for
cottons).
Cancelling End Time function
If you want to cancel the End Time countdown
and start the programme immediately:
1. Press On/Off/Cancel button for 3 seconds
to cancel the programme.
2. Press On/Off/Cancel button to start the
programme you have previously selected.
5.7 Starting the programme
Press Start/Pause button to start the
programme.
Start symbol will light up to indicate that
the programme has started and “:” symbol
in the middle of the remaining time will keep
flashing.
5.8 Child Lock
Machine is equipped with a Child Lock which
prevents interfering with the current programme
flow by pressing any button. All buttons except
the On/Off/Cancel button on the control
5.6 Warning symbols
CWarning symbols may differ
according to the model of your
machine.
Lint filter cleaning
When the programme is completed, a warning
symbol will appear to remind that the filter
needs to be cleaned.
CIf the Filter Cleaning symbol
in continuously, refer to
“Troubleshooting” section.
Water tank
When the programme is completed, a warning
symbol will appear to remind that the water
tank needs to be drained.
If the water tank becomes full while the
programme is running, the warning symbol
will start to flash and machine will pause.
Drain the water in the water tank and press
Start / Pause button to resume the
programme. The warning symbol turns off and
the programme resumes operating.
Cleaning the filter drawer
Warning symbol flashes with certain intervals
to remind that the filter drawer needs to be
cleaned.
End Time Setting
End Time Setting function allows you
to delay the ending time of the programme up
to 24 hours.
1. Open the loading door and put the
laundry in.
2. Select the drying programme, spin speed
and, if required, the auxiliary functions.

17
Dryer / User Manual
Adding / removing laundry in
Pause mode
In order to add or take out laundry after the
drying programme has started:
1. Press Start/Pause button to switch the
machine to Pause mode. Drying process
will stop.
2. While in Pause mode, open the loading
door, add or take out laundry and close
the loading door.
3. Press the Start/Pause button to start the
programme.
CAny laundry added after the drying
process has started may cause
the clothes that are already dried in
the machine intermingle with wet
clothes and the result will be wet
laundry after the drying process is
over.
CYou may repeat laundry adding
or removing process as many
times as you desire during
drying. However, this process
will increase the programme
time and energy consumption
since the drying process will be
interrupted repeatedly. Therefore,
it is recommended to add laundry
before the drying programme has
started.
CIf you select a new programme by
turning the Programme Selection
knob while your machine is in
Pause mode, then the current
programme is aborted and
new programme information is
displayed.
CAUTION: Do not touch the
inner surface of the drum when
adding or taking out laundry while
a programme is running. Surfaces
of the drum are hot.
5.10 Cancelling the programme
If you want to stop drying and cancel the
programme for any reason after the machine
has started to run, press and hold the On/
Off/Cancel button for 3 seconds.
panel are deactivated when the Child Lock is
active.
In order to activate the Child Lock, press Audio
Warning, Child Lock button for 3 seconds.
To start a new programme after the current
programme is over or to interrupt the
current programme, the Child Lock should
be deactivated. Press the same button for
3 seconds again to deactivate the
Child Lock.
CLock symbol will appear on the
display when the Child Lock is
activated.
CChild Lock is deactivated when the
machine is switched off and on with
On/Off/Cancel button.
When the Child Lock is activated:
Display symbols will not change even if the
position of Programme Selection knob is
changed while the machine is running or in halt.
If the Child Lock is deactivated after changing
the position of the Programme Selection knob
while the machine is running, the machine
stops and new programme information is
displayed.
5.9 Changing the programme after it
has started
After the machine starts, you can change the
selected programme and dry your laundry in a
different programme.
1. If you want to select Extra Dry programme
instead of Iron Dry programme, for
instance, press the Start / Pause button
for 1 second to stop the programme.
2. Select Extra Dry programme by turning
the Programme Selection knob.
3. Press the Start/Pause button to start the
programme.

18 Dryer / User Manual
ACAUTION: As the inside of
the machine will be excessively hot
when you cancel the programme
while the machine is running,
activate the ventilation programme
to cool it down.
5.11 End of programme
Lint Filter Cleaning and Water Tank warning
symbols light up in the programme follow-up
indicator when the programme comes to an
end. The loading door can be opened and the
machine becomes ready for a second cycle.
Press On/Off/Cancel button to switch off
the machine.
C2-hour Anti-creasing programme
will be activated if the laundry is not
taken out after the programme has
come to an end.
CClean the lint filter after each
drying. (See "Lint Filter and Loading
Door Inner Surface")
CDrain the water tank after each
drying cycle. (See "Draining the
water tank")
5.12 Odor Feature
Read the ProScent manual for the use of
this feature if your dryer has odor application
capability.

19
Dryer / User Manual
6 Maintenance and cleaning
6.1 Loading Door Inner Surface
The hair and fibres that are separated from the
laundry during drying process is collected by
the Fibre Filter.
CNOTE
• Fibres are formed during wearing and
washing clothes.
• You can clean the filter slot with a
vacuum cleaner.
AWARNING!
• After each drying cycle, clean the fibre
filter and the inner surface of the loading
door.
To clean the fibre filter:
• Open the loading door.
• Hold the first part (inner filter) of the two
part fibre filter and remove it by pulling it
upwards.
• Collect the hair, fibres and cotton balls with
hand or with a soft cloth.
• Remove the second part (outer filter) by
pulling it upwards.
CNOTE
• Ensure that hair, fibre and cotton balls do
not fall into the slot where the filters are
installed.
• Open both fibre filters (inner and outer
filters) remove the hair, fibre, cotton balls
with your damp hand or a vacuum cleaner
or a cloth.
• Clean both filters under water running in
reverse direction of fibre accumulation
or with a soft brush. Dry the filter before
placing it back.
• Insert the fibre filters
on one another and
place it back in its
place.
• Clean the loading door interior and its
washer with a soft damp cloth.
6.2 Cleaning the sensor
There are
dampness sensors
in the dryer that
detect whether
the laundry is dry
or not.
To clean the
sensors:
• Open the loading door of the dryer.
• Allow the machine to cool down if it is still
hot due to the drying process.
• Wipe the metal surfaces of the sensor
with a soft cloth, dampened with vinegar
and dry them.

20 Dryer / User Manual
CNOTE
• Clean metal surfaces of the sensors 4
times a year.
• Do not use metal tools when cleaning
metal surfaces of the sensors.
AWARNING!
• Never use solvents, cleaning agents or
similar substances for cleaning due to the
risk of fire and explosion!
6.3 Draining the water tank
Dampness of the laundry is removed and
condensed during drying process and the
water that arise accumulates in the water tank.
Drain the water tank after each drying cycle.
AWARNING!
• Condensed water is not drinkable!
• Never remove the water tank when the
program is running!
If you forget to drain the water tank, the
machine will stop during the subsequent drying
cycles when the water tank is full and the Water
Tank warning symbol will flash. If this is the
case, drain the water tank and press Start /
Pause button to resume the drying cycle.
To drain the water tank:
1. Remove the water tank in the drawer
or container carefully.
2. Drain the water in the tank.
• If there is lint accumulation in the funnel
of the water tank, clean it under running
water.
• Place the water tank into its seat.
CNOTE
• If the direct water draining is used as an
option, there is no need to empty the
water tank.
6.4 Cleaning the evaporator
The hair and fibres that are not caught by the
fibre filter goes to the fins of the evaporator
behind the toe board and accumulates here.
If the evaporator” ” icon is flashing or in 6
month periods, clean the evaporator.
• Open the toe
board by pressing
on it.
• To open the air
routing door, move
the release latch.
• Clean the fibres
on the evaporator
with a damp cloth
/ vacuum cleaner
with a brush by
moving upwards
and downwards.
• After the cleaning
process is
completed, place
the air router door
to its place, move
the latches to close
it and close the toe
board.
Table of contents
Other arcelik Dryer manuals

arcelik
arcelik 3870 KT User manual

arcelik
arcelik 910 KM User manual

arcelik
arcelik KM 810 User manual

arcelik
arcelik 2782 KT User manual

arcelik
arcelik 3886 KT User manual

arcelik
arcelik 3890 KT User manual

arcelik
arcelik 3886 CNT User manual

arcelik
arcelik 900 KM User manual

arcelik
arcelik 800KM User manual

arcelik
arcelik 930 KMB User manual
Popular Dryer manuals by other brands

Maytag
Maytag MD-170PTVW installation manual

GE
GE DSXH47GG Dimensions and installation information

Frigidaire
Frigidaire GLER341CES0 operating instructions

Maytag
Maytag MDG30PNH installation manual

OMEGA AIR
OMEGA AIR B-DRY Series Installation and operating manual

Stirling
Stirling STR-CD50 instruction manual