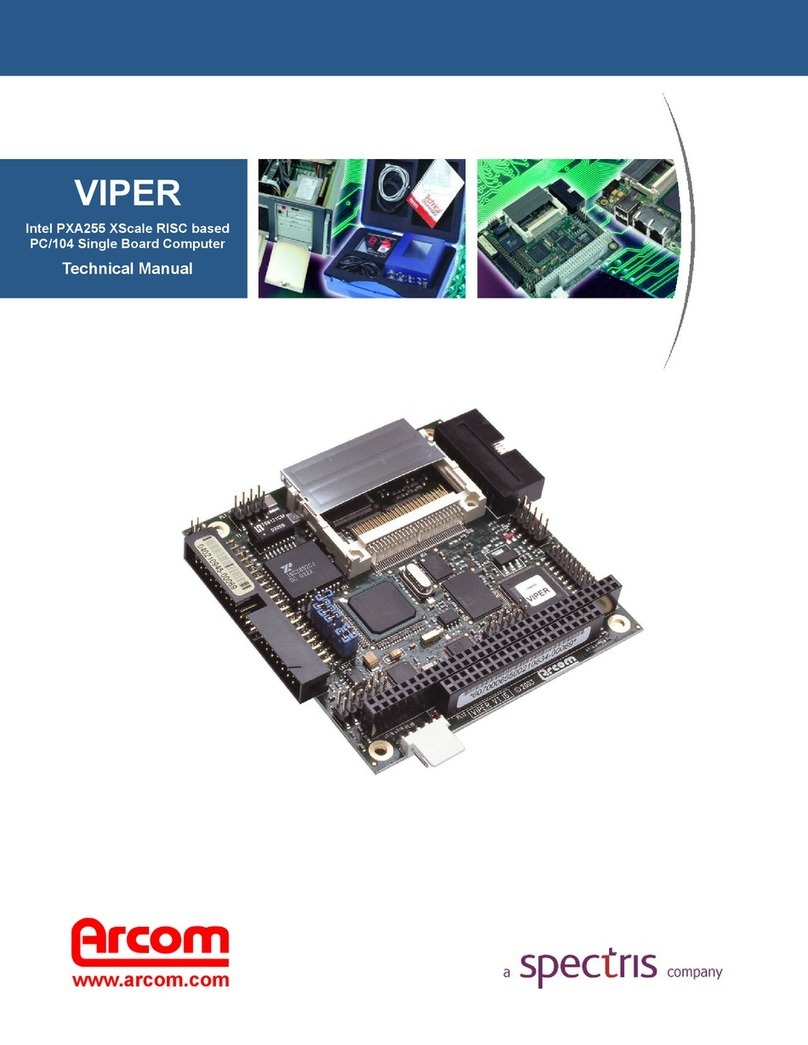
Arcom SBC-GX1 User manual

SBC-GX1
Technical Manual
company
a
www.arcom.com

Definitions
Arcom is the trading name for Arcom Control Systems Inc and Arcom Control Systems Ltd.
Disclaimer
The information in this manual has been carefully checked and is believed to be accurate.Arcom assumes no responsibility
for any infringements of patents or other rights of third parties, which may result from its use.
Arcom assumes no responsibility for any inaccuracies that may be contained in this document. Arcom makes no commitment
to update or keep current the information contained in this manual.
Arcom reserves the right to make improvements to this document and /or product at any time and without notice.
Warranty
This product is supplied with a full 3 year warranty. Product warranty covers failure caused by any manufacturing defects.
Arcom will make all reasonable effort to repair the product or replace it with an identical variant. Arcom reserves the right to
replace the returned product with an alternative variant or an equivalent fit, form and functional product. Delivery charges will
apply to all returned products. Please go to www.arcom.com/support for information about Product Return Forms.
Trademarks
ROM-DOS and FlashFX are trademarks of Datalight Inc.
MS-DOS, Windows NT, Windows CE, Windows 98 are trademarks of the Microsoft Corporation.
Intel is a registered trademark of Intel Corporation or its subsidiaries in the United States and other countries.
CompactFlash is the registered trademark of The CompactFlash Association.
Linux is a registered trademark of Linus Torvalds.
VxWorks is a registered trademark of Windriver.
All other trademarks recognized.
Revision History
Manual PCB Date Comments
Issue A
Issue B
Issue C
Issue D
V1 Issue 3
V1 Issue 4
V1 Issue 4
V1 Issue 4
17 May 2001
22 November 2002
7 July 2004
26 January 2005
First full release of Manual
Minor edits and addition of General Software
Embedded BIOS 2000 documentation.
Minor edits, additional information about display
converter, updated layout.
Link 8 jumper default setting shown as enabled.
Eco 3295.
© 2004 Arcom.
Arcom is a subsidiary of Spectris plc.
For contact details, see page 82.
Arcom operates a company-wide
quality management system
which has been certified by the
British Standards Institution (BSI)
as compliant with ISO9001:2000

SBC-GX1 Technical Manual Contents
Contents
Introduction........................................................................................................................................6
SBC-GX1 ‘at a glance’...........................................................................................................7
Features.................................................................................................................................8
SBC-GX1 support products .................................................................................................10
Handling your board safely..................................................................................................11
Conventions.........................................................................................................................12
Getting started with your SBC-GX1 .................................................................................................13
CPU configuration................................................................................................................13
Installing memory.................................................................................................................13
Connecting a floppy disk drive.............................................................................................14
Connecting a hard disk drive ...............................................................................................14
Connecting a CD-ROM (IDE Type)......................................................................................14
Using the CompactFlash socket..........................................................................................15
Connecting a mouse............................................................................................................15
Using the serial interfaces (RS232).....................................................................................15
Connecting a printer.............................................................................................................15
Using the audio features......................................................................................................15
Using the flat panel interface ...............................................................................................16
Using the PC/104 expansion bus.........................................................................................16
Using the USB ports ............................................................................................................17
Using the Ethernet interface ................................................................................................17
Jumpers and connectors..................................................................................................................18
Jumpers...............................................................................................................................20
Connectors...........................................................................................................................24
Award BIOS setup ...........................................................................................................................25
The Main menu....................................................................................................................26
Control keys.........................................................................................................................29
Standard CMOS setup.........................................................................................................30
BIOS features setup.............................................................................................................31
Chipset features setup.........................................................................................................34
Power management.............................................................................................................36
PNP / PCI configuration setup.............................................................................................38
Integrated peripherals..........................................................................................................39
General Software Embedded BIOS 2000........................................................................................42
The Main menu....................................................................................................................43
Control keys.........................................................................................................................45
Basic CMOS configuration screen.......................................................................................46
Custom configuration screen...............................................................................................49
Shadow configuration setup screen.....................................................................................51
Software support..............................................................................................................................52
Datalight ROM-DOS 6.22 ....................................................................................................52
Datalight FlashFX flash filing system...................................................................................52
FLASHROM Utility...............................................................................................................53
© 2004 Arcom Issue D 3

SBC-GX1 Technical Manual Contents
Boot disk..............................................................................................................................53
Operating System drivers ................................................................................................................54
Windows 98 driver support ..................................................................................................54
Windows NT4.0 Driver Support ...........................................................................................58
Other software support ........................................................................................................60
Hardware support ............................................................................................................................61
Detailed hardware description .........................................................................................................62
SBC-GX1 block diagram......................................................................................................62
Processor.............................................................................................................................63
Memory................................................................................................................................63
Static RAM...........................................................................................................................66
Memory map........................................................................................................................66
I/O map................................................................................................................................67
Graphics controller...............................................................................................................68
Interrupt assignments ..........................................................................................................70
DMA controller .....................................................................................................................71
IDE interface........................................................................................................................72
Floppy disk controller...........................................................................................................72
Real time clock.....................................................................................................................73
Keyboard/mouse controller..................................................................................................73
Ethernet controller................................................................................................................73
16-bit SoundBlaster .............................................................................................................74
Watchdog timer....................................................................................................................74
User jumpers........................................................................................................................75
USB interface.......................................................................................................................75
General purpose I/O ............................................................................................................76
CPU temperature sensor.....................................................................................................77
PC/104 interface..................................................................................................................77
PCI bus interface .................................................................................................................78
Serial ports...........................................................................................................................78
RS422/485 interfaces ..........................................................................................................78
RS422..................................................................................................................................79
RS485..................................................................................................................................79
Parallel port..........................................................................................................................79
Power supply .......................................................................................................................80
Status LED’s ........................................................................................................................81
PC speaker..........................................................................................................................81
Suspend/resume switch.......................................................................................................81
RESET switch......................................................................................................................81
© 2004 Arcom Issue D 4

SBC-GX1 Technical Manual Contents
Appendix A – Contacting Arcom.......................................................................................................82
Appendix B – Connector details.......................................................................................................83
Appendix C – Specification..............................................................................................................95
Appendix D – SBC-GX1 mechanical diagram .................................................................................96
Appendix E – TFT display interface cable........................................................................................97
Appendix F – Reference information ...............................................................................................98
Appendix G – Display Converter 1 (DC1)......................................................................................100
Index..............................................................................................................................................111
© 2004 Arcom Issue D 5

SBC-GX1 Technical Manual Introduction
Introduction
The SBC-GX1 is a high-performance, high-functionality multimedia PC/AT compatible
processor board designed to be embedded into OEM equipment. It contains all the
standard features found in a PC/AT system with some embedded and multimedia
additions. These include silicon disk drive, 10/100 Base-T Ethernet, 16-bit
SoundBlaster, PC/104 bus, PCI bus, CompactFlash socket, MMX-enhanced CPU and
high performance Flat Panel VGA controller.
Once you have completed development the board can be purchased in the following
standard variants:
• SBC-GX1-M0-F0 AMD GeodeTM GX1 300MHz CPU, No DRAM, No Flash
• SBC-GX1-M32-F0 AMD GeodeTM GX1 300MHz CPU, 32M DRAM, No Flash
• SBC-GX1-M0-F16 AMD GeodeTM GX1 300MHz CPU, No DRAM, 16M Flash
• SBC-GX1-M32-F16 AMD GeodeTM GX1 300MHz CPU, 32M DRAM, 16M Flash.
The SBC-GX1 can also be supplied with other DRAM options up to 256MB. Please
contactArcom for details.
© 2004 Arcom Issue D 6

SBC-GX1 Technical Manual Introduction
SBC-GX1 ‘at a glance’
EBX power supply connector COM4 RS422/485 serial port Floppy disk interface
COM4 RS232 port Gen. purpose I/O Parallel port interface COM2 RS232 serial port
Ethernet interface VGA CRT interface
VGA flat panel interface
PS/2 mouse
PS/2 keyboard
USB serial port
COM3 RS232
Serial Port
Auxiliar
y
functions
PCI Interface
IDE interface
Ethernet
controller status
LEDs
COM1 RS232
serial port
A
udio
functions
Flash Access
LED
64-way PC/104
expansion
40-way PC/104
expansion
In-System-
Program
header
B1
A1
© 2004 Arcom Issue D 7

SBC-GX1 Technical Manual Introduction
Features
CPU
• AMD GeodeTM GX1 300MHz MMX-enhanced processor.
Chipset
• AMD CS5530A I/O Companion.
Cache
• 16K L1 write-back cache.
BIOS
• Award Software PCI Plug and Play BIOS or General Software Embedded
BIOS 2000.
• On-board reprogramming.
System memory
• Up to 256MB un-buffered 3.3V SDRAM (144-pin SODIMM).
Silicon disk
• Up to 16MB Intel StrataFlash.
• Datalight FlashFX Flash filling system.
Video
• National Geode XpressGraphicsTM.
• 1MB – 4MB shared memory.
• XVGA for CRT and Flat Panel displays.
• 32-bit PCI local bus interface.
• VGA BIOS integrated into system ROM.
• Simultaneous CRT and Flat panel display.
Integrated I/O
• National Semiconductor NS97317 with built-in Real Time Clock and
Keyboard controller.
Audio
• XpressAUDIOTM 16-bit SoundBlaster compatible.
• National Semiconductor LM4548 CODEC.
• Line IN, Line OUT and Microphone.
Enhanced IDE
• Bus Mastering mode, up to two devices.
• Supports PIO Mode 4 and Ultra DMA/33 Hard Disk and ATAPI CD-ROM
Interface.
• Supports two floppy drives 360KB, 720KB, 1.2MB, 1.44MB, 2.88MB.
© 2004 Arcom Issue D 8

SBC-GX1 Technical Manual Introduction
Parallel port
• High speed parallel port SPP/EPP/ECP mode.
• BIOS Configurable.
Serial ports
• Four 16C550 compatible high speed UARTs.
• 3 x RS232 and 1 x RS232/422/485 Interfaces.
USB interface
• Two Universal Serial Bus (USB) interfaces.
• USB 1.0 Compliant.
Network support
• National Semiconductor DP83815 10/100-BASETX Ethernet controller.
• 32-bit PCI interface.
Expansion
• PC/104 expansion bus - 8/16 bit ISAbus compatible interface.
• 33MHz +5V PCI Interface.
Software compatibility
• Datalight ROM-DOS operating system licence supplied with each board (if
flash memory is fitted).
• Windows 98/NT/CE/2000/XP/Embedded NT, Linux, QNX, VxWorks.
• Other x86 compatible software applications.
Size
• EBX Compatible footprint 5.75” x 8.00” (146mm x 203mm).
© 2004 Arcom Issue D 9

SBC-GX1 Technical Manual Introduction
SBC-GX1 support products
The SBC-GX1 is supported by the following products:
• DC1 (Display Converter board)
This interface board enables the SBC-GX1 to be used to drive DSTN flat panel
displays via the TFT output. The board supports both monochrome and color DSTN
displays. Full details of this product can be found in Appendix G – Display Converter
1 (DC1).
• SBC-GX1-ICE (Industrial Compact Enclosure)
The SBC-GX1-ICE is a simple low cost aluminium enclosure, which provides a
suitable EMC compatible enclosure for the SBC-GX1 board. The ICE box is
available as either an AC or DC version. For more details go to www.arcom.com or
contact theArcom sales team.
• TSC1 (TouchScreen Controller)
The TSC1 can be used to provide analog resistive touchscreen support for the
SBC-GX1. The TSC1 is designed to directly interface between either 4, 5 or 8-wire
analog touchscreens and a serial connection.A 1:1 ribbon cable can be used to
connect directly to one of the RS232 ports on the SBC-GX1 and a separate +5V
connection is also required. For more details go to www.arcom.com or contact the
Arcom sales team.
© 2004 Arcom Issue D 10

SBC-GX1 Technical Manual Introduction
Handling your board safely
Anti-static handling
This board contains CMOS devices that could be damaged in the event of static
electricity discharged through them. At all times, please observe anti-static precautions
when handling the board. This includes storing the board in appropriate anti-static
packaging and wearing a wrist strap when handling the board.
Battery The board contains a Lithium non-rechargeable battery. Do not short circuit the battery
or place on a metal surface where the battery terminals could be shorted. During
shipment the battery is isolated from the boards circuitry and should be connected
before using the board, please refer to the link section of this manual for details.
When disposing of the board or battery, take appropriate care. Do not incinerate, crush
or otherwise damage the battery.
Packaging Please ensure that should a board need to be returned to Arcom, it is adequately
packed, preferably in the original packing material.
Electromagnetic compatibility (EMC)
The SBC-GX1 is classified as a component with regard to the European Community
EMC regulations and it is the users responsibility to ensure that systems using the
board are compliant with the appropriate EMC standards.
© 2004 Arcom Issue D 11

SBC-GX1 Technical Manual Introduction
Conventions
The following symbols are used in this guide:
Symbol Explanation
Note - information that requires your attention.
Tip - a handy hint that may provide a useful
alternative or save time.
Caution – proceeding with a course of action may
damage your equipment or result in loss of data.
Jumper fitted on pin A.
Jumper fitted on pin B.
Jumper is fitted.
Jumper is not fitted.
© 2004 Arcom Issue D 12

SBC-GX1 Technical Manual Getting started with your SBC-GX1
Getting started with your SBC-GX1
The Development Kit contains a ‘Quickstart’ manual. You should read this manual for
information about setting up and starting to use the SBC-GX1 board. Once you have
completed this task you will have a working SBC-GX1 system and can start adding
other peripherals to enable you to start development.
In this section we guide you through setting up and using some of the features of the
SBC-GX1. If you would like more detailed information on any aspect of the board refer
to the Detailed hardware description section beginning on page 62.
The SBC-GX1 uses an Award Software PCI BIOS (Basic Input-Output System) to
provide support for the board as standard. The BIOS has a built-in setup program that
you use to modify the basic system configuration. The setup program can be started
during the power on sequence by pressing the DEL key when prompted or by pressing
CTRL – ALT – ESC. The setup parameters are stored in the CMOS RAM and are
retained when the power is switched off, providing the battery backup supply is
connected (see Jumpers and connectors, page 18, for details).
The BIOS defaults have been selected to enable the board to operate with a minimum
of devices connected. If CMOS settings are lost the board will correctly power up and
boot from the on-board flash disk (if present), without any other peripherals connected.
In order to support Windows CE. NET and Windows XP Embedded, the SBC-
GX1 uses a General Software Embedded BIOS 2000. Throughout this manual
there are references to the Award BIOS If your board is using the General
Software BIOS, see the section General Software Embedded BIOS 2000 on
page 42 for configuration information.
CPU configuration
The SBC-GX1 board has been specifically designed to support AMD’s Geode™ GX1
MMX – Enhanced processor. The appropriate voltage and speed selections are
configured during the assembly process - no user configuration required. The CPU is
fitted to the board during assembly and is supplied ‘ready to run’.
Installing memory
The SBC-GX1 supports a single 144-pin SODIMM (Small Outline Dual In-line Memory
Module). If your board was supplied without any memory fitted (M0 variant) or you wish
to upgrade your memory, then you need to source a standard un-buffered 3.3V SDRAM
module that conforms to either the PC100 or PC133 specifications. The SBC-GX1
supports 16MB, 32MB, 64MB, 128MB and 256MB modules.
No link settings are required to enable the board to support different memory sizes. The
BIOS automatically detects the memory and configures the board appropriately. Always
ensure that the power is switched off before attempting to insert a memory module. The
© 2004 Arcom Issue D 13

SBC-GX1 Technical Manual Getting started with your SBC-GX1
module should be inserted in the DIMM1 socket (on the underside of the board) in an
ESD safe area, and you should be wearing an earth strap or touching a grounded
surface to protect the device. The memory module is designed to ensure that it can only
be plugged in with the correct orientation. If the module does not fit, check the key
locations and ensure the memory is the correct type.
The memory module should be inserted into the socket at a 45 degree angle. Once fully
pushed into the socket the module can be pressed down towards the board. The tabs
on the socket automatically latch over the module and secure it in place. Removal of
the memory is achieved by gently pulling the two tabs sideways. The module will
release and can then be removed easily.
Once power is applied to the board, the BIOS automatically configures the memory.
During the memory check, a message is displayed show the amount of DRAM found.
Connecting a floppy disk drive
The SBC-GX1 supports up to two standard floppy disk drives. These can be connected
to PL17 via a 34 way twisted ribbon cable. Both disk drives should be configured to use
drive select 1. Drive A: should be connected via a twisted cable and drive B: via a
straight cable. The BIOS default configuration assumes that a 1.44MB floppy disk is
connected as drive A:. If you require a different configuration you must configure the
BIOS using the setup utility – see Award BIOS setupon page 25 for details.
In order to support two floppy disk drives at the same time the 34 way cable
should be fitted with three connectors. The board connector and one of the drive
connectors should be fitted 1:1 and the third connector should have a twist in the
cable which swaps pins 10 to 16 on this connector.
Connecting a hard disk drive
Up to two IDE hard disk drives can be supported by the SBC-GX1. Both drives should
be connected to PL2 via a 40 way 1:1 ribbon cable. The primary drive should be setup
as a ‘master’ and the secondary drive as a ‘slave’. The BIOS automatically detects the
hard disk drive during the POST processes and configures the hardware correctly. The
BIOS attempts to load an operating system from the primary disk drive which becomes
drive C: once the operating system has loaded. If the board is fitted with flash memory
and this has been formatted as a silicon disk drive, then it will be allocated drive D:. The
secondary drive will be allocated the next available drive letter.
Connecting a CD-ROM (IDE Type)
If a CD-ROM drive is required in the system, it may be connected in place of the
secondary drive detailed above. The CD-ROM should be configured as a ‘slave’ device.
Drivers are required to support the drive under DOS. If a bootable CD is inserted in the
drive the BIOS can be configured to automatically boot from this CD. See the BIOS
features setup section beginning on page 31 for details.
© 2004 Arcom Issue D 14

SBC-GX1 Technical Manual Getting started with your SBC-GX1
Using the CompactFlash socket
The SBC-GX1 has a Type II CompactFlash socket mounted on the underside of the
board. This socket is connected to the secondary IDE controller. The socket supports
both Type I and Type II CompactFlash cards. If a CompactFlash card is plugged into the
socket it acts as a normal hard disk drive and is detected by the BIOS during the POST
process. If the card has an operating system loaded and there are no standard hard
disk drives connected the board boots from the CompactFlash card and this becomes
drive C:.
The CompactFlash card can only be inserted into the socket one way. The correct
orientation is for the top of the card i.e. the normal printed side to be closest to the PCB.
Connecting a mouse
A PS/2 mouse can be connected to PL9. A suitable mouse is supplied as part of the
development kit and a driver has been included on the support CD to enable this mouse
to be used under DOS. Windows 98/2000/NT/XP provides mouse support via built-in
drivers.
Using the serial interfaces (RS232)
The four serial port interfaces on the SBC-GX1 are fully PC compatible. These are
decoded at standard PC address locations for COM1, COM2, COM3 and COM4.
PC applications can use these ports without any special configuration. COM3 and
COM4 can use non-standard IRQ lines, which enables all four ports to have an
individual IRQ assigned. See the Jumpers and connectors section, page 18, for details.
Connection to the serial ports is via a 10-way boxed header. The pin assignment of
these headers is arranged to enable a 9-way IDC D-Type Plug to be connected directly
to pins 1-9 on the cable. The D-Type connector is compatible with the standard 9-way
connector on a desktop machine. A suitable cable is provided in the development kit.
See Appendix B – Connector details for pin details.
Connecting a printer
An enhanced printer port is incorporated onto the SBC-GX1. This port can be used to
support a Centronics-compatible printer or ECP/EPP bi-directional device. The signals
are routed to a 26-way boxed header and the pin assignment has been arranged to
allow 1:1 connection with a 25-way IDC D-Type socket. This socket is compatible with a
standard printer port connector on a desktop machine. See Appendix B – Connector
details for pin details.
Using the audio features
There are three audio interfaces supported on the SBC-GX1: line in, line out and
microphone. the line in and line out interfaces support stereo signals and the
microphone provides a mono input. Connections are routed to a 10-way boxed header
PL24. The relevant signals for each interface are shown in Appendix B – Connector
details.
© 2004 Arcom Issue D 15

SBC-GX1 Technical Manual Getting started with your SBC-GX1
The standard connector for these signals is a 3.5mm stereo jack.
The audio device is a 16-bit SoundBlaster compatible interface. The BIOS provides the
user the ability to configure the I/O address, IRQ and DMA settings for this device. This
enables it to be used with existing Soundblaster-16 applications. The audio features are
supported by installable device drivers under Windows 98/NT/2000/XP (see the
Operating System drivers section, beginning on page 54, for details).
Settings are configured in the BIOS as default. These can be modified during POST
using the setup utility. See 16-bit SoundBlaster, page 74 for details.
If you are using Windows you must install the audio drivers before these features can
be used. The drivers enable the standard Windows add on to access the SBC-GX1
audio functions.
Using the flat panel interface
AMD’s CS5530, used on the SBC-GX1, supports an 18-bit TFT flat panel display
interface as well as a conventional CRT monitor. Flat panel support is configured using
the Integrated Peripherals option within the Setup utility. See page 39, for details.
The default BIOS for the SBC-GX1 sets the output to simultaneous CRT and flat panel
display. This ensures that you can plug in a standard PC style monitor and start using
the board straight away. The default BIOS can be used to drive a color 640 x 480 6.5”
NEC TFT flat panel part number NL6448BC20-08. This panel is supplied in the flat
panel variant of the SBC-GX1 development kit. The development kit also contains the
associated cable to enable connection of the display.
If you wish to use this display then connect it to the SBC-GX1 via the flat panel interface
connector PL15.
The BIOS has built-in support for other display resolutions and these can be selected
using the BIOS setup menus. If you need further information regarding other flat panels
supported by the SBC-GX1 contact Technical Support. See page 82 for details.
Using the PC/104 expansion bus
PC/104 modules can be used with the SBC-GX1 to add extra functionality to the
system. This interface supports 8/16 bit ISA bus style peripherals.
Arcom has a wide range of PC/104 modules which are compatible with the SBC-GX1.
These include modules for digital I/O, analog I/O, motion control, video capture, CAN
bus, serial interfaces etc. Please contact Arcom sales (see page ) if a particular
interface you require does not seem to be available as these modules are continually
being developed. Other manufacturers boards can also be used with this interface if
they conform to the PC/104 specification.
In order to use a PC/104 board with the SBC-GX1 it should be plugged into PL20 for 8-
bit cards and PL20/PL23 for 16-bit cards. Before powering up the system ensure that
© 2004 Arcom Issue D 16

SBC-GX1 Technical Manual Getting started with your SBC-GX1
you have checked that the link settings on the card for I/O address, IRQ and DMA
settings do not conflict with any devices on the SBC-GX1.
If you are using a PC/104 card that requires +5V, this is automatically supplied via the
PC/104 header. If you require +12V this is only available if the +12V pin on the power
connector PL12 has been connected to a supply. If you require –12V or –5V these must
be supplied directly to the PC/104 board.
Using the USB ports
The Universal Serial Bus (USB) controller is disabled by default. To enable this feature
you use the Chipset features setup option within the Setup utility - see page 34 for
details. Once this device has been enabled, the PCI Plug and Play BIOS sets up the
control registers and the device is available for use. The standard USB connector is a 4-
way socket, which provides power and data signals to the USB peripheral. The 10-way
header (PL8) has been designed to be compatible with PC expansion brackets that
support two USB sockets (See the USB interface section on page 75 and Appendix B –
Connector details for further details.)
The USB device should be supplied with a driver that must be installed to enable the
device to be used. (Refer to the documentation supplied with the device.) Most USB
peripherals are only supplied with drivers for Windows 98/2000/XP operating systems. If
you are not using one of these operating systems then you will need to investigate the
availability of drivers.
Using the Ethernet interface
National Semiconductor’s DP83815 Ethernet controller is configured by the Award Plug
and Play BIOS during the POST process. Drivers for various operating systems are
supplied on the support CD. The appropriate driver must be loaded before the Ethernet
interface can be used.
Connection is made via the 8 way RJ45 connector PL5. A second connector PL3
provides outputs that can be used to control LED's for 10M, 100M and LINK status. See
Appendix B – Connector details for pin assignments for this connector.
© 2004 Arcom Issue D 17

SBC-GX1 Technical Manual Jumpers and connectors
Jumpers and connectors
The following diagram shows the jumpers and connectors on the front of the SBC-GX1. Click on any
jumper or connector for information.
PL6 PL8 PL10 PL13 PL16 PL17
PL7 PL9 PL12 PL14 PL18 PL19
PL5 PL15 PL11
LK1
LK2
PL1
PL4
LK10
LK9
LK8
PL2
LK5
LK6
LK7
PL3
3
LK4
A B
B A
PL24
12
LK11
PL21
PL20
PL23
PL22
C0
D0
B32
B1
A1
© 2004 Arcom Issue D 18

SBC-GX1 Technical Manual Jumpers and connectors
Jumpers
There are twelve user-selectable jumpers on the SBC-GX1. Further details are provided
about each of these below. The diagram indicates the default position for each link.
Jumper Description
LK1 Watchdog timer timeout selection
LK2 Watchdog timer enable
LK3 LCD backlight supply voltage
LK4 LCD panel power supply voltage
LK5 COM4 IRQ routing
LK6 COM3 IRQ routing
LK7 Clear CMOS/battery disable
LK8, LK9, LK10 RS485/422 configuration
LK11, LK12 User jumpers
LK1 – Watchdog timer timeout selection
The watchdog timer has two pre-configured timeout delays: 2 or 8 seconds. This link is
used to choose the timeout period you require.
LK1 Description
2 second timeout.
8 second timeout.
Default setting:
LK2 – Watchdog timer enable
Used to enable/disable the watchdog function. When the link is in the enabled position,
the watchdog timer can be started by writing to I/O location 93H. See the Watchdog
timersection, page 74, for further details.
LK2 Description
Enabled
Disabled
Default setting:
© 2004 Arcom Issue D 20
Other manuals for SBC-GX1
2
Table of contents
Other Arcom Motherboard manuals

