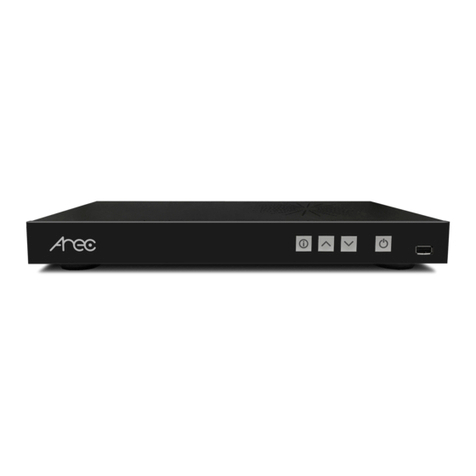
Arec KS-CC1 User manual

AREC Inc.© All Rights Reserved 2022. l www.arec.com
All information contained in this document is Proprietary
KS-CC1
Media Station
User Manual English

KS-CC1 User Manual
Introduction
Specifications
Package Contents
Product Appearance
Connection
Record Button and the Indicator
External Control via USB Keypad
Getting start
Overview of the Web Interface
Chapter 1 Administrator
1.1 Media I/O
1.1.1 Video inputs
1.1.1.1 Content / Cam 1
1.1.1.2 Advanced conguration
1.1.2 Network device manager
1.1.3 Audio
1.1.4 Display
1.2 Video
1.2.1 Recording
1.2.2 Streaming
1.2.3 Content
1.2.4 Theme
1.3 Storage
1.4 Scheduler
1.5 Upload
1.5.1 Upload settings
1.5.2 Transfer settings
1.6 System
1.6.1 General settings
1.6.2 Network
1.6.3 Cloud Manager
1.6.4 Firmware
1.6.5 Conguration
1.7 Account
1.8 Mini Controller (mobile phone)
1.8.1 Page1
1.8.2 Page2
Chapter 2 Director
2.1 Local Director
4
4
4
5
6
7
7
8
8
9
9
10
10
11
12
13
14
14
15
16
19
19
21
22
26
27
28
29
30
32
33
34
34
35
36
36
37
39
39
Table of Contents

KS-CC1 User Manual
Table of Contents
2.1.1 Preview
2.1.2 Toolbar
2.1.2.1 Theme and Display
2.1.2.2 Recording, Streaming control and Snapshot
2.1.2.3 Playback Video
2.1.2.4 Settings
2.1.2.5 Others
2.2 Online Director
2.2.1 Recording controls panel
2.2.1.1 Background
2.2.1.2 Layout
2.2.1.3 Overlay
2.2.1.4 Theme
2.2.1.5 Admin Volume control
2.2.1.6 Recording/ Streaming control and Snapshot buttons
2.2.2 Visual Sources Monitoring
2.2.3 Subtitle Editor
2.2.4 Recording/Streaming setup
Chapter 3 Video Manager
3.1 Video Management
3.1.1 Upload the recording
3.1.2 Download the recording
3.1.3 Delete the recording
3.1.4 Playback the recording
3.1.5 Edit the recording information
3.1.6 Edit the bookmark information
3.2 Snapshot Management
3.2.1 Upload the photo
3.2.2 Download the photo
3.2.3 Delete the photo
3.2.4 Preview the photo
Table of On Screen Disaplay Icons
39
40
40
41
43
45
46
47
48
48
48
48
49
50
50
51
52
53
54
54
55
55
55
56
56
57
57
58
58
58
59
60

KS-CC1 User Manual
4www.arec.com
Specifications
KS-CC1 can output instant transcription on monitors automatically in a speech event. It also can show the speech script or
the translation on audience mobile device. Supporting recording, streaming, and exporting the transcription text le benet
the event host to provide various services for the attendees. It’s compact and affordable for all the conference scenario.
Product Name Media Station
Model Name KS-CC1
Dimension 95mm(L) x 80mm(W) x 65mm(H)
Weight 490g
Power Requirement 12V/3.34A
Power Consumption (Max.) 40W (Max.)
Operating Temperature / Humidity 0ºC ~ 40ºC / 90%
Maximum normal load description
Supports one channel of video & audio signal input, include one HDMI or IP Cam/
Stream or UVC video and one line-in or Mic-in audio. Output the transcoded video
to the HDMI port(with GUI) and loop through one HDMI video source at the same
time. Record the video le to the USB storage via USB port.
Introduction
Package Contents
AREC KS-CC1 Media Station Quick Installation Guide Power Adapter
* Note: The shape of the plug may vary depending on the country or region.

KS-CC1 User Manual
5www.arec.com
Product Appearance
No. Name Brief introduction
1Start/Stop function key Start/Stop transcription, translation, recording and streaming services simultaneously.
2Micro SD card slot Please prepare Micro SD card for internal storage
3Reboot Button Reboot the device
4Ethernet Port(WAN) For the internet access to google service, do live broadcasting or remote device control.
5Mic-in Connected with microphone
6Line-In Connected with audio mixer or amplier
7USB-In
1. Available for the USB audio/video inputs
2. Available for the USB mouse and touch devices
3. For the export of video with SRT les
8HDMI-In 2
(Max. 3840x2160@60Hz ) HDMI input source, connected with PC or cameras.
9HDMI-In 1
(Max. 3840x2160@60Hz ) HDMI input source, connected with PC or cameras.
10 HDMI Loop Out Loop through HDMI video of HDMI-in 1
11 HDMI Out Display video with closed captions or the transcription only.
(comes with graphic tool bar)
12 Power Port 12V / 3A
13 Power Button
When the device is ON, push twice to turn OFF
Long press 3 seconds to restart
When the device is OFF, push to turn ON.
14 Reset button Long press to reset the device to default settings
15 Power Indicator LED Indicator for device boot status
NOTE: The KS-CC1 can detect and record to USB storage devices using FAT32, NTFS, exFAT, Ext3, Ext4 le systems.
Front Back
18 1065
12
11
7
4
3
2
15
14 9
13

KS-CC1 User Manual
6www.arec.com
Connection
USB
Power
Micro SD card
external hard disk
USB cam
USB Keyboard
Speakerphone
USB mouse
Line audio input
Mic audio input
projector
TV
projector
TV
notebook
DV
HDMI video input
HDMI video output
HDMI video output
microphone
AREC
Network Camera
notebook
network

KS-CC1 User Manual
7www.arec.com
Function key and the indicator
Button/Indicator Display method of indicator Product status
Service Button
Red light glows continuously
Speech-to-text recognition in progress.
*Along with translating, recording, and streaming
if enabled.
Power indicator Green and red light flash alternately. Device is booting up.

KS-CC1 User Manual
8www.arec.com
Getting start
KS-CC1 supports HDMI, UVC(USB Video Class), network cameras, and IP video sources.
1. Connect your video source.
• HDMI: Connect the source to HDMI input 1 or 2
* If you intend to use your video source for other device/monitor, please connect the source to HDMI input 1 and connect
the other device to the HDMI loop-through port.
• UVC(USB): Connect the USB video source to the USB port.
* If there are multiple USB devices needed for your case (USB cameras/mouse/flash drives…etc.), we recommend to use a
USB hub which comes with its own power adaptor to provide more stability for your USB source and devices.
• Network camera or IP source: Connect the source under the same subnet with KS-CC1.
2. Go to the KS-CC1’s web page to set the video input
• Open a browser and insert the KS-CC1’s IP address. The IP address can be found on the GUI menu shown on display that
connected to the HDMI preview output port.
Connect KS-CC1 to a router or switch and please ensure that it is accessible to the internet. On the KS-CC1’s rst bootup, it
will register to AREC server and receiving a 10-hour service time for live transcription.
• Login the web administrator page with default username/password: admin/admin
Configure video & audio inputs for your speech
Video Input
Connecting to network
Hostname
Device description
IP address
Model
Version
Brand
KS-CC1
KS-CC1
192.168.0.159
KS-CC1(C-120)
v2.0.0.11
AREC Inc.

KS-CC1 User Manual
9www.arec.com
Please select “Video port” in Signal type, and select the corresponding option in “Video source”. And click Apply to take
effect.
First, go to the Network device manager page and click scan to nd your network camera.
Click and insert the camera’s ONVIF credential to register the camera.
Go back to the Video inputs page, and select “Network Camera” in Signal type and select the camera in IP address.
Click Apply to take effect.
• HDMI & USB video source
• Network camera
3. Congure your video source
Login

KS-CC1 User Manual
10www.arec.com
KS-CC1 supports RTP/RTMP/RTSP for video inputs. Please select “IP source” in Signal type and insert the correct
stream URL in “Primary URL”.
Click Apply to take effect.
• IP source
KS-CC1 support multiple audio input types: Line-in/Min-in/HDMI/USB audio input.
Connect your audio input source to the KS-CC1 and go to web administrator →Media I/O → Audio page to congure the
volume level.
If you are using USB audio source, please select your USB audio device in the “USB Audio (UAC) settings” drop-down list.
Audio Input

KS-CC1 User Manual
11www.arec.com
1. Go to the web administrator → Live Transcription → Live Caption settings
2. Select the language used in your speech in the “Closed Caption” drop-down list.
KS-CC1 will use this language for speech-to-text recognition.
3. Select the languages in Subtitle 1 & 2. KS-CC1 will translate the speech into these languages and create subtitles.
KS-CC1 provides a web page for the audience to view the subtitle in live. You can congure a QR code for the audiences to
use their smartphone to scan and it will redirect them to the subtitle page.
To set the QR code, please follow the steps below.
1. Go to the web administrator → Live Transcription → Live Caption preview, and scroll down to the Web URL & QR code.
Configure live transcription
Configure the live caption preview

KS-CC1 User Manual
12www.arec.com
2. Insert the IP address of KS-CC1. If you’re using port forwarding on KS-CC1 or setting it with a public IP, please insert the
external IP address or domain name along with the external port number.
3. In the “Notication message”, you can customize the message shown with the QR code.
You can also design the subtitle font properties in the Display Output section under the same page
You can go to the subtitle web page by scanning QR code or
To connect the subtitle web view, you can inert the URL* directly or by scanning the QR code shown on the GUI display.
* The subtitle URL is http://[KS-CC1 address]/subtitle. EX. http://192.168.0.10/subtitle
You can switch the subtitle language by click the button in the top-right corner, and change the view page to day/night mode
for better view.
Subtitles web view page
Night mode Day mode

KS-CC1 User Manual
13www.arec.com
1. Insert a storage device (USB drive/Micro SD card)
2. Go to the web administrator → Storage page.
3. Find the storage device on the list and click
4. Select the storage in the Record disk settings section and click “Apply”
Configure recording
Format
1
3
2

KS-CC1 User Manual
14www.arec.com
Overview of the Web Interface
KS-CC1 web interface has two user types, Administrator and Video Manager, described as below :
Administrator
To setup the device, log in Administrator with default username admin and password
admin, then entering System Administrator webpages. The admin account provides the
user both two types of privileges.
Video Manager
If you only need to access to the recordings, log in Video Manager with default username
video and password video. You can also log in with Administrator account and switch to
Administrator page.
Live Subtitle
The live subtitle web page allows users to view the live subtitle. Each audience can select
the language of the subtitle from the three language that set in the live transcription
conguration without interfering others.

KS-CC1 User Manual
15www.arec.com
Chapter 1 Administrator
The Administrator web pages provide a system administration interface of the KS-CC1: it can perform Media I/O, Video, Live
Transcription, Storage, Account, System settings and conrm operations.
The Media I/O contains congurations of video and audio input sources as well as of video/audio outputs.
The Video tab contains everything related to recording and streaming.
In Live Transcription, you can change the language used in the speech and captions, as well as the subtitle’s font properties.
The System are pages contain basic settings and information of this device.
Click icon can switch to Video Manager page.
1.1 Media I/O
Use this menu to congure the video/audio input and output settings
The Media I/O menu consists of the following sections:
Video inputs Congure the video input source name and signal type.
Network device manager List of all network cameras within the same LAN.
Audio Adjust the audio volume and dene the USB audio input source.
Display Set the KS-CC1 on screen display language.

KS-CC1 User Manual
16www.arec.com
1.1.1 Video inputs
The KS-CC1 can be set with one video input at the same time.
1.1.1.1 Content
Name
Signal Type
Edit the name of the video input source.
Select the signal type of the video input from Video port, Network Camera, or IP source.
Video port
Under “Video port”, KS-CC1 lists HDMI input 1 & 2 and all the USB video sources connected to it.
You may select one as video source and configure its profile. The available options are: format*,
resolution(max.), and FPS(max.)**
* Format refers to video format, there is two formats supported which are: MJPEG and YUV
** KS-CC1 will set the video source to the highest resolution and FPS it supports, but not exceed the
max resolution and FPS set here.
Network Camera
To connect an IP camera as the video source, select from the camera’s IP address from the dropdown
list of those available.
* Note: A login authentication with the camera would be required.
See “Media I/O” → “Network device manager” for more details.
IP Source To connect an IP source, select protocol rst. The supported protocols are RTP, RTSP, or RTMP. Enter
the primary and secondary URL and port number if needed.

KS-CC1 User Manual
17www.arec.com
1.1.2 Network device manager
By clicking the “Scan” button, KS-CC1 will search all the ONVIF network cameras that are connected on the same subnet.
The system automatically scans and lists the network cameras connected to the Media Station once entering the [ Network
device manager ] page. You may click “Scan” button to scan again. Click “Login” button, and the login authentication dialog
pops out.
Enter the username and password of the camera to complete the authentication. Take AREC network camera for example,
enter the default username and password admin/ admin. The status then changes to OK, which indicates it is available for
video input selection.
Note : If you fail to nd your camera by clicking on “Scan”, please click button to add the camera manually*, or select
“Signal type” to “IP source” in the “Video Inputs” and ll in your camera stream URL.
* To add a camera manually, please click the button, and insert the camera’s IP address, ONVIF port number and
credentials.

KS-CC1 User Manual
18www.arec.com
1.1.3 Audio
Input volume control
Users can control mute/unmute and the volume of the audio inputs here.
The HDMI input 1, Line-in, and Mic-in are mixed into to the same audio group, so any setting changed in this group will affect
all three audio inputs.
HDMI input 2 has its individual audio control.
If the KS-CC1 is using an IP video source and it contains audio codec that KS-CC1 supports, you will see the IP audio control
UI here.
In the USB Audio (UAC) settings, you can select one USB audio source connected to KS-CC1 from the drop-down menu. After
selecting the USB audio source, the audio control interface will be appeared and allowing volume and mute control. You can
also select ‘None’ to disable capturing any USB audio source.
Recording volume control
The audio control of this section will affect all audio sources mixed for recording and streaming.
The audio level meter shows the current mixed audio level.
Output volume control
The HDMI output audio control only affects the audio playout on HDMI display. It doesn’t affect the sound captured for live
transcription, recording, and streaming.
You can adjust the audio volume for input sources, the mixed of all audio sources, and also the output. You can also set one
USB audio source here.

KS-CC1 User Manual
19www.arec.com
1.1.4 Display
Set the KS-CC1 on screen display language.
On-screen language: Change the GUI menu language.

KS-CC1 User Manual
20www.arec.com
1.2 Video
The pages within Video contains settings related to streaming and recording.
Recording Encoder settings (of recording), Recording le name setting, and Audio shift for recording.
Streaming Encoder settings (of streaming) and streaming settings.
Other manuals for KS-CC1
2
Table of contents
Other Arec Media Converter manuals
Popular Media Converter manuals by other brands

Behringer
Behringer ULTRAGAIN PRO-8 DIGITAL ADA8000 quick start guide

Allied Telesis
Allied Telesis CONVERTEON AT-CM2K0S datasheet

Lantronix
Lantronix S3100 Series install guide

CYP
CYP CPT-385AM Operation manual

Intellinet
Intellinet 506502 user manual

Texas Instruments
Texas Instruments TPS53319EVM-136 user guide