FRAMATOME ANP
An AREVA and Siemens company
Model Design: Thomas Pleiner
Published and Copyright (2004):
Framatome ANP GmbH
P.O. Box 3220
91050 Erlangen
Germany
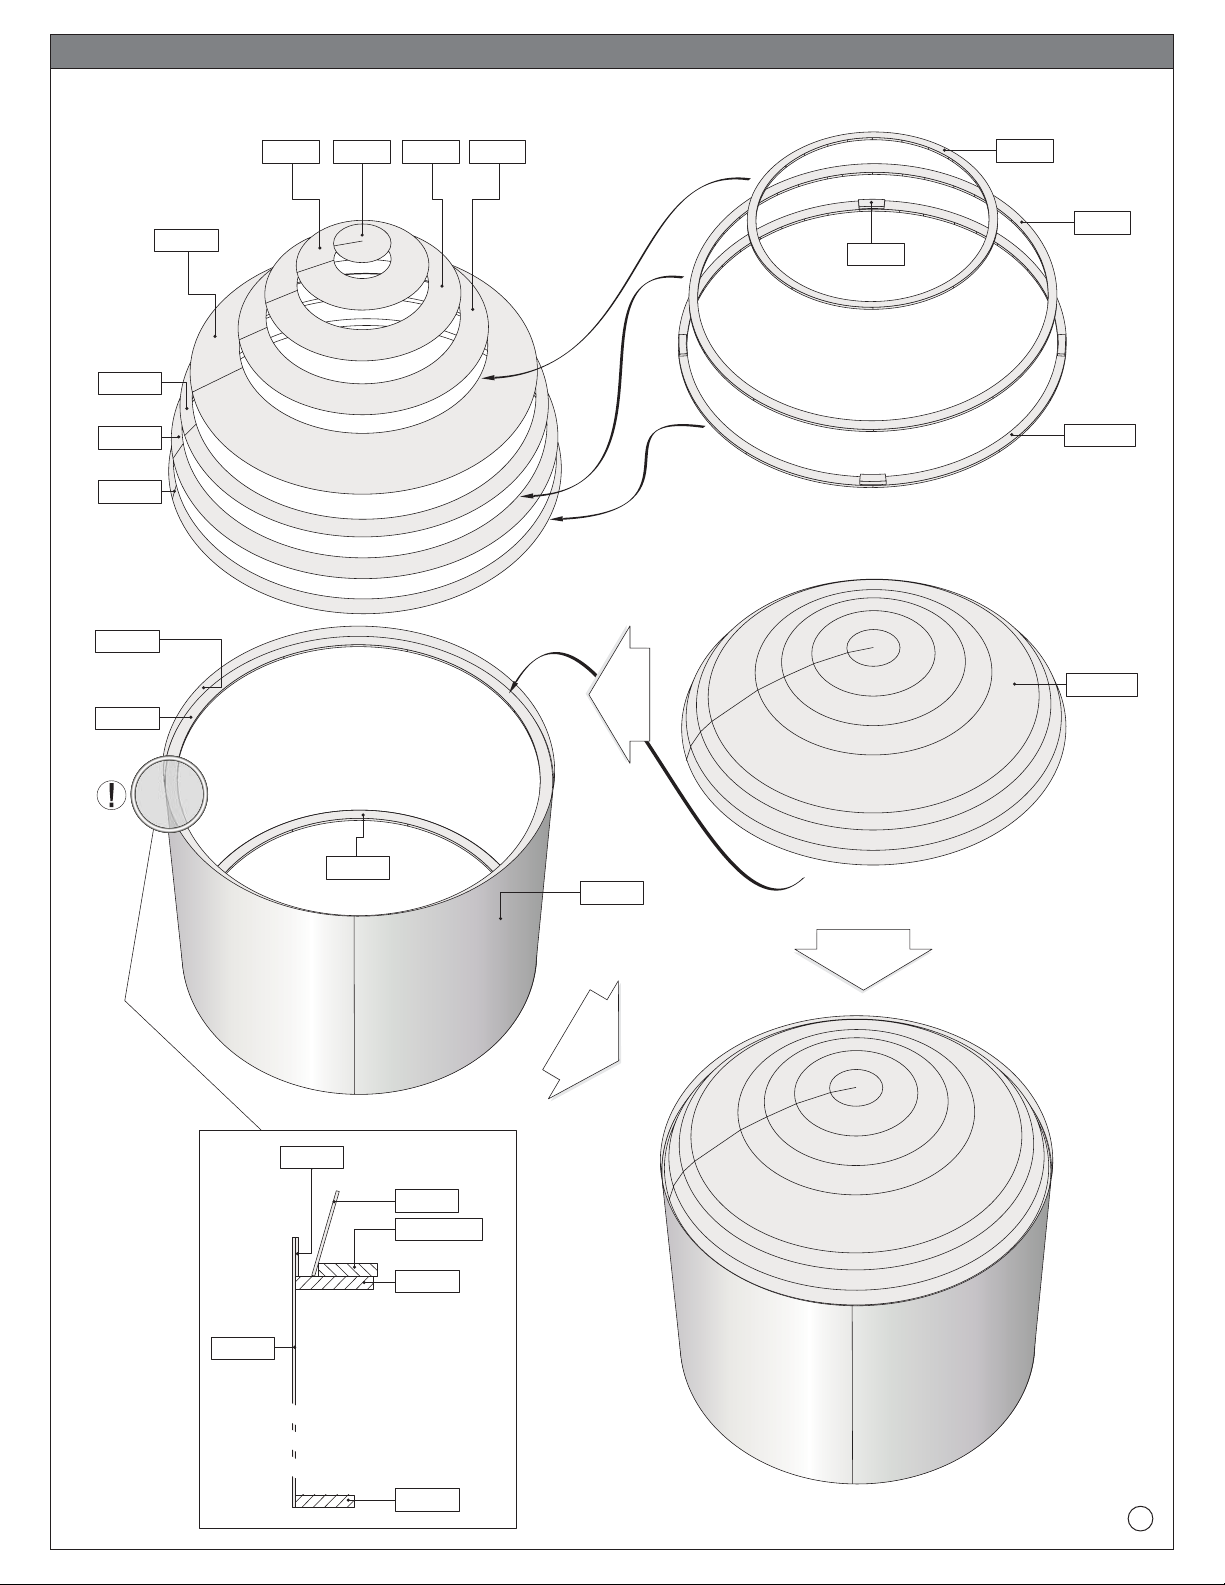
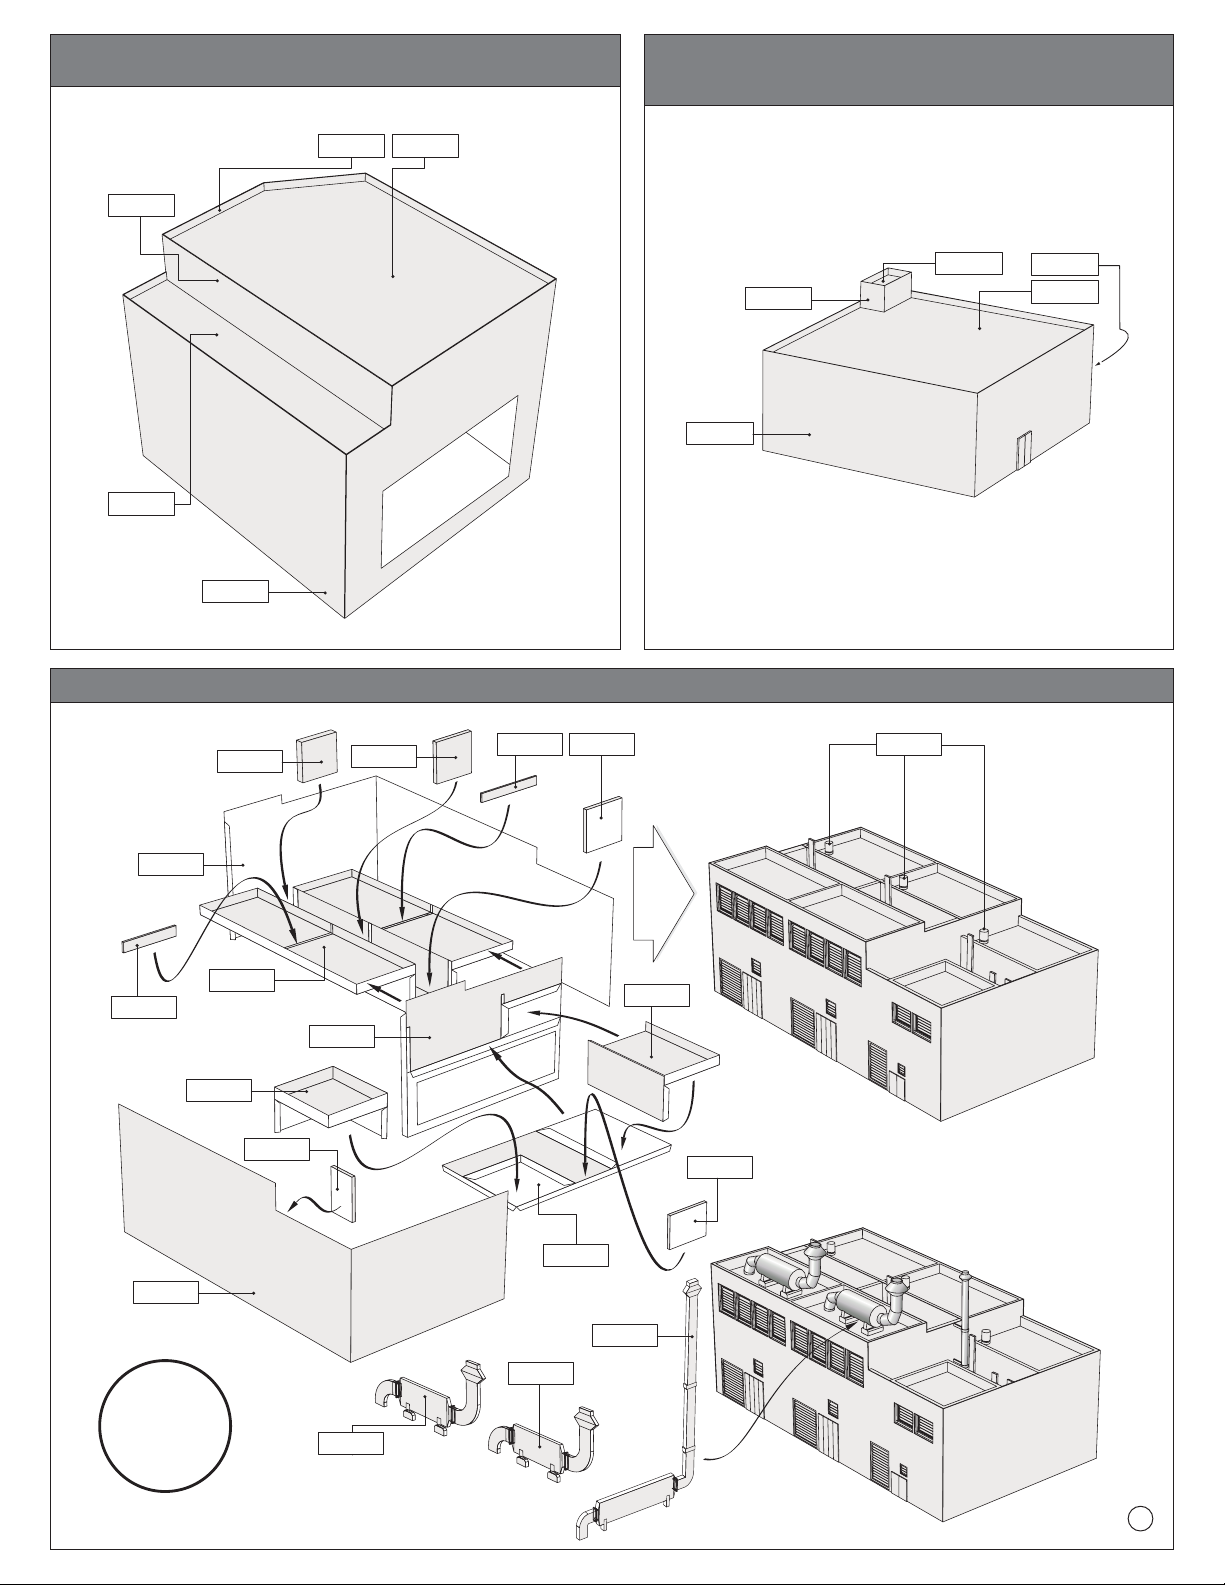
46
46a
46b 46c 46d-f
45a
45
47, 47a 47b 47c
2x
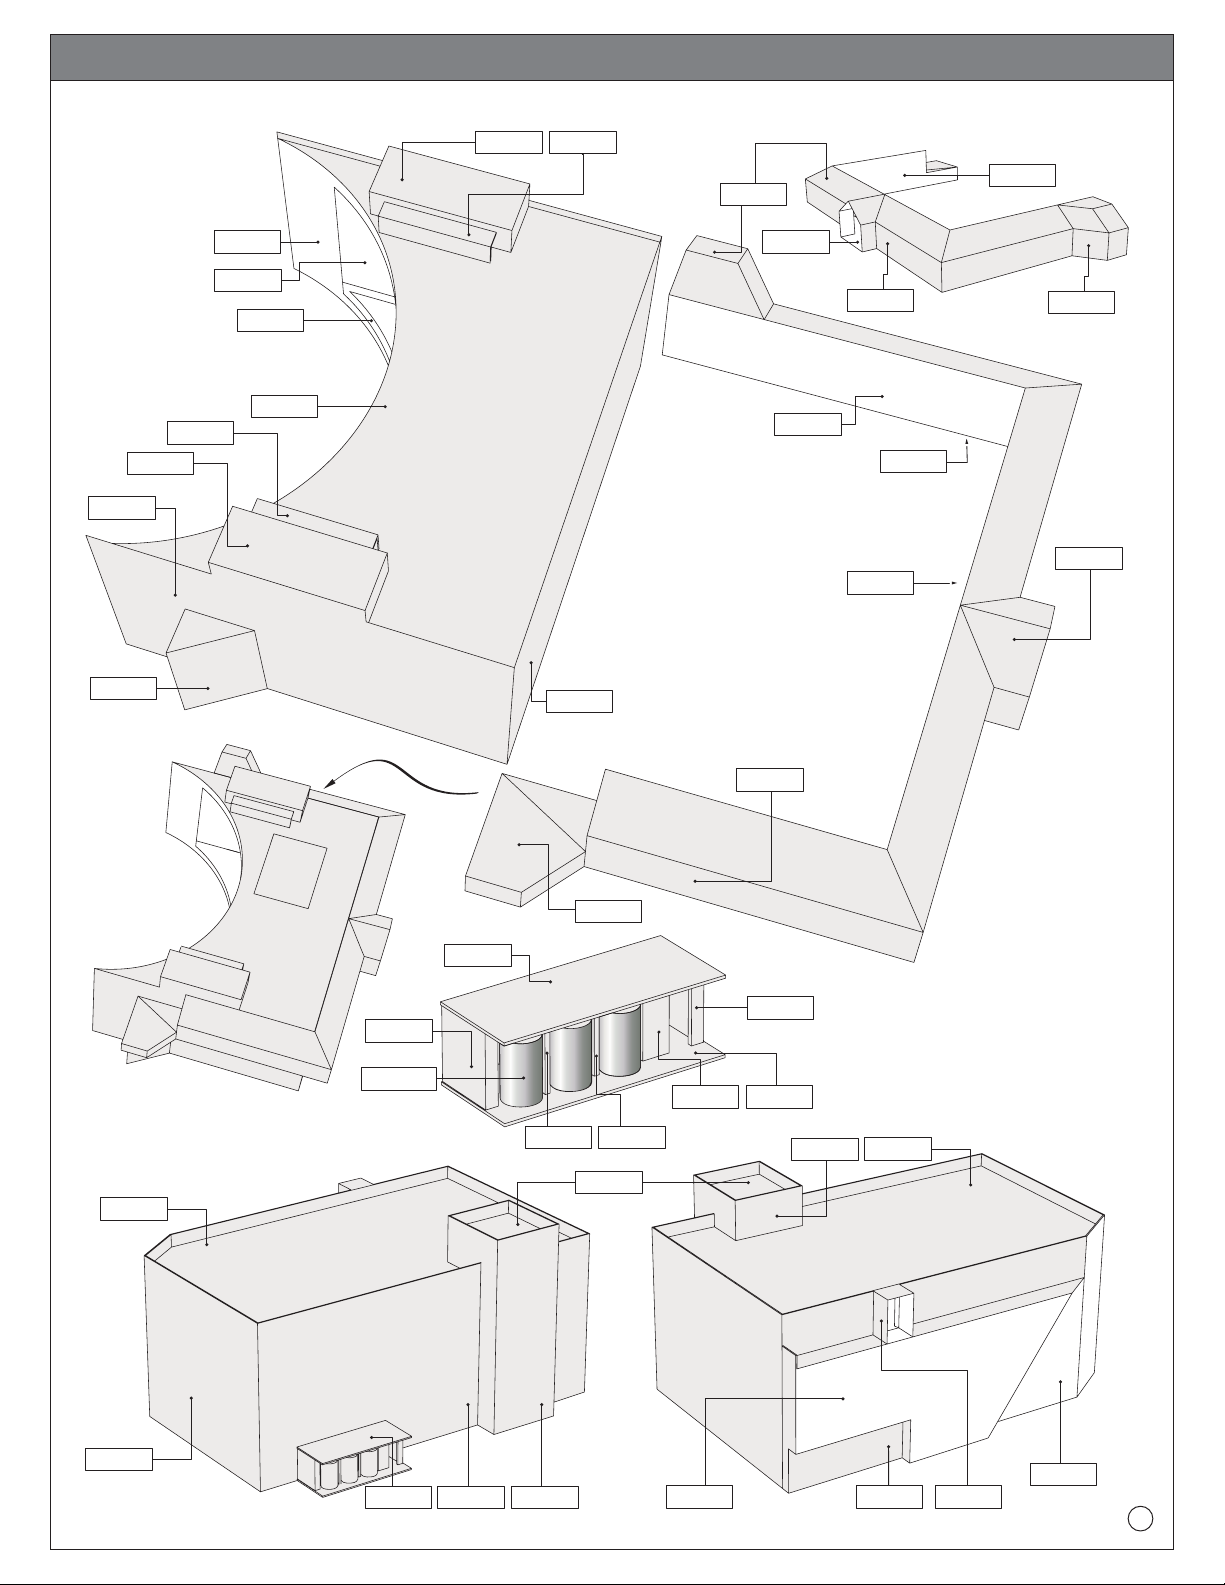
F3 - Auxiliary Boiler Bulding
Hilfsdampferzeugergebäude
Bâtiment chaudière auxiliaire
Apukattilarakennus
48
48a
F5 - Circulating Water Structure
Kühlwasserpumpenbauwerk
Station de pompage principale
Merivesipumppaamo
F2 - Essential Water Pump Building
Nebenkühlwasserpumpenbauwerk
Station de pompage eau brute secourue
Jännöslämmön jäähdytysvesipumppaamo
F1 - »Anti-Icing« Pump Station
»Anti-Icing« Pumpenstation
Station de pompage anti-givrage
Lämminvesipumppaamo (estämään menveden jäätymistä)
2x
49
49d
49e/f
49k/l
49g/h
49i
49c
49m
49a/b
F4 - Demineralized water storage
Deionats-Vorratstank
Reservoir de stockage eau démineralisée
Deminerlisoidun veden varastosäiliö
For best results, the cut-out sheets should be printed on 0.12 mm (approx. 120 g/m²) uncoated offset paper. Do not use
"fit-page-to-paper-size" print option.
Bitte drucken Sie die Ausschneidebögen bevorzugt auf unbeschichtetes Offset-Papier mit 0,12 mm Dicke (~ 120 g/m²).
Bei Wahl der Druckoptionen unbedingt darauf achten, dass die Seiten weder vergrößert noch verkleinert werden.
Pour de meilleurs résultats, il est préférable d’imprimer les feuilles à decouper sur du papier offset non couché 0,12 mm
(environ 120 g/m²). Ne sélectionnez pas l’option d'impression « ajuster la page au format papier ».
Suositelemme tulostusta Offset – paperille, jonka paksuus on 0.12 mm (~120 g/m²). Käytä tulostamiseen muuta
vaihtoehtoa kuin ”Sovita paperikokoon".