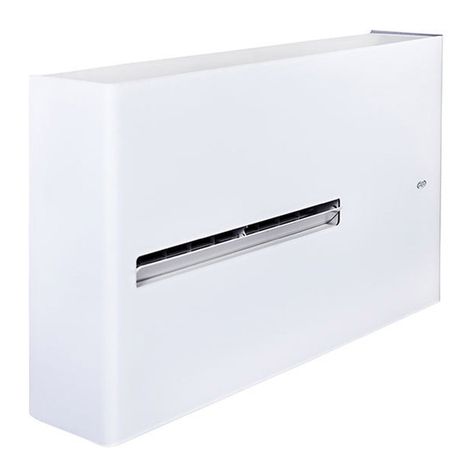
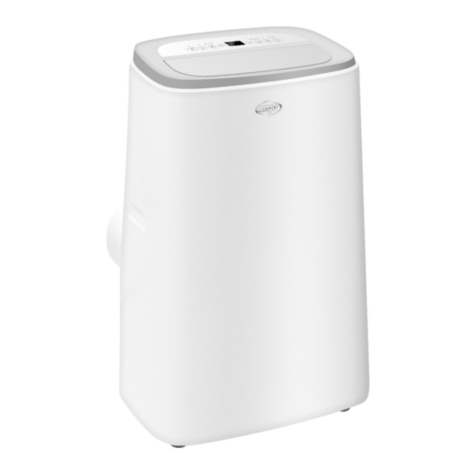
Argo X3I ECO AS45HL Operating manual

3OHDVHUHDGWKLVPDQXDOFDUHIXOO\EHIRUHLQVWDOOLQJDQGXVLQJWKHDLUFRQGLWLRQHUDQGUHWDLQIRUIXWXUH
UHIHU
HQFH
;(&23/86
&$66(77(,1'22581,76)25
08/7,63/,7±5
86(5DQG,167$//$7,210$18$/
,1'22581,76
;,(&2$6+/
;,(&2$6+/
9

1 Safety Precautions .......................................................................................... 1
2 Outline of the Unit and Main Parts...................................................................3
4 Preparative for Installation.............................................................................1 1
4.1 Standard Accessory Parts ........................................................................1 1
4.2 Selection of the Installation Location........................................................1 1
3.5 Operation guide........................................................................................1 0
3.6 Replacement of batteries in remote controller..........................................1 0
4.3 Connection Pipe Requirement .................................................................1 2
4.4 Electrical Requirement .............................................................................1 3
3 Operation of remote controller.........................................................................4
3.1 Buttons on remote controller ...................................................................... 4
3.2 Introduction for icons on display screen..................................................... 4
3.3 Introduction for buttons on remote controller.............................................. 5
3.4 Function introduction for combination buttons............................................ 9
5 Installation of the Unit....................................................................................1 4
5.1 Installation of the Indoor Unit....................................................................1 4
5.2 Installation of the Connection Pipe...........................................................1 6
5.3 Vacuum and Gas Leakage Inspection...................................................... 20
5.4 Installation of the Drain Hose ................................................................... 22
5.5 The Panel Installation ..............................................................................25
5.6 Electrical Wiring........................................................................................27
6 Installation of Controllers............................................................................... 31
7 Test Running.................................................................................................. 31
7.1 Trial Operation and Testing....................................................................... 31
8 Troubleshooting and Maintenance ................................................................ 34
8.1 Troubleshooting........................................................................................ 34
8.2 Routine Maintenance ............................................................................... 35
Contents
This marking indicates that this product should not be disposed with other household wastes
throughout the EU. To prevent possible harm to the environment or human health from un-
controlled waste disposal, recycle it responsibly to promote the sustainable reuse of mate-
rial resources. To return your used device, please use the return and collection systems or
contact the retailer where the product was purchased. They can take this product for envi-
ronmental safe recycling.
R32: 675

The Refrigerant
ƔTo realize the function of the air conditioner unit, a special refrigerant circulates
.
leads to explosion
. It can
ƔCompared to common refrigerants, R32 is a nonpolluting refrigerant with no
lower. R32 has got very good thermodynamic features which lead to a really high
WARNING:
Do not use means to accelerate the defrosting process or to clean, other than
those recommended by the manufacture.Should repair be necessary, contact your
nearest authorized Service Centre.
The appliance shall be stored in a room without continuously operating ignition
electric heater.)
Do not pierce or burn.
than “X”m (see table 1).(only applies to appliances that are not fixed appliances)
Appliance shall be installed, operated and stored in a room with a floor area larger
2
’s
instructions only.
Be aware that refrigrants not contain odour.
Read specialist’s manual.
Please read this operating manual carefully before operating the unit.
to the material objects for reference.

DC Inverter 0XOWLVSOLWCassette Type Unit
1
1 Safety Precautions
WARNING! This mark indicates procedures which, if improperly performed, might lead to the
death or serious injury of the user.
CAUTION! This mark indicates procedures which, if improperly performed, might possibly result
in personal harm to the user, or damage to property.
WARNING!
(1). Installation should be left to the dealer or another professional. Improper installation may cause
ZDWHUOHDNDJHHOHFWULFDOVKRFNRU¿UH
(2). Install the air conditioner according to the instructions given in this manual. Incomplete installation
PD\FDXVHZDWHUOHDNDJHHOHFWULFDOVKRFNRU¿UH
(3). %HVXUHWRXVHWKHVXSSOLHGRUVSHFL¿HGLQVWDOODWLRQSDUWV8VHRIRWKHUSDUWVPD\FDXVHWKHXQLWWR
FRPHWRORVHZDWHUOHDNDJHHOHFWULFDOVKRFNRU¿UH
(4). Install the air conditioner on a solid base that can support the weight of the unit. An inadequate base
or incomplete installation may cause injury in the event the unit falls off the base.
(5). Electrical work should be carried out in accordance with the installation manual and the national
HOHFWULFDOZLULQJUXOHVRUFRGHRISUDFWLFH,QVXI¿FLHQWFDSDFLW\RULQFRPSOHWHHOHFWULFDOZRUNPD\
FDXVHHOHFWULFDOVKRFNRU¿UH
(6). Be sure to use a dedicated power circuit. Never use a power supply shared by another appliance.
(7). For wiring, use a cable length enough to cover the entire distance with no connection. Do not use
an extension cord. Do not put other loads on the power supply, use a dedicated power circuit.
)DLOXUHWRGRVRPD\FDXVHDEQRUPDOKHDWHOHFWULFVKRFNRU¿UH
(8). 8VHWKHVSHFL¿HGW\SHVRI ZLUHV IRU HOHFWULFDO FRQQHFWLRQV EHWZHHQ WKH LQGRRU DQG RXWGRRU XQLWV
Firmly clamp the interconnecting wires so their terminals receive no external stresses. Incomplete
FRQQHFWLRQVRUFODPSLQJPD\FDXVHWHUPLQDORYHUKHDWLQJRU¿UH
(9). After connecting interconnecting and supply wiring be sure to shape the cables so that they do not
put undue force on the electrical covers or panels. Install covers over the wires. Incomplete cover
LQVWDOODWLRQPD\FDXVHWHUPLQDORYHUKHDWLQJHOHFWULFDOVKRFNRU¿UH
(10). If any refrigerant has leaked out during the installation work, ventilate the room. (The refrigerant
SURGXFHVDWR[LFJDVLIH[SRVHGWRÀDPHV
(11).
After all installation is complete, check to make sure that no refrigerant is leaking out. (The
UHIULJHUDQWSURGXFHVDWR[LFJDVLIH[SRVHGWRÀDPHV
(12). When installing or relocating the system, be sure to keep the refrigerant circuit free from
VXEVWDQFHVRWKHUWKDQWKHVSHFL¿HGUHIULJHUDQW5VXFKDVDLU$Q\SUHVHQFHRIDLURURWKHU
foreign substance in the refrigerant circuit causes an abnormal pressure rise or rupture, resulting in
injury.)
(13). During pump-down, stop the compressor before removing the refrigerant piping. If the compressor
is still running and the stop valve is open during pump-down, air will be sucked in when the
refrigerant piping is removed, causing abnormal pressure in the freezer cycle which will lead to
breakage and even injury.

'&,QYHUWHU0XOWLVSOLW&DVVHWWH7\SH8QLW
2
(14). During installation, attach the refrigerant piping securely before running the compressor. If the
compressor is not attached and the stop valve is open during pump-down, air will be sucked in
when the compressor is run, causing abnormal pressure in the freezer cycle which will lead to
breakage and even injury.
(15). Be sure to establish an earth. Do not earth the unit to a utility pipe, arrester, or telephone earth.
sources may cause damage to the air conditioner.
(16).
Be sure to install an earth leakage breaker. Failure to install an earth leakage breaker may result in
(17). This appliance is not intended for use by persons (including children) with reduced physical,
sensory or mental capabilities, or lack of experience and knowledge, unless they have been given
supervision or instruction concerning use of the appliance by a person responsible for their safety.
(18). Children should be supervised to ensure that they do not play with the appliance.
(19). If the supply cord is damaged, it must be replaced by the manufacturer, its service agent or
CAUTION!
(1). Do not install the air conditioner in a place where there
(2). Establish drain piping according to the instructions of this manual. Inadequate piping may cause
(3).
(20). This appliance can be used by children aged from 8 years and above and persons with
reduced physical, sensory or mental capabilities or lack of experience and knowledge if they
have been given supervision or instruction concerning use of the appliance in a safe way and
understand the hazards involved. Children shall not play with the appliance. Cleaning and
user maintenance shall not be made by children without supervision.

'&,QYHUWHU0XOWLVSOLW&DVVHWWH7\SH8QLW
3
2 Outline of the Unit and Main Parts
1. Drainage device
2. Drainage pipe
4. Connection pipe
5. Wired Controller
6. Wireless Controller
7. Big handle
8. Liquid Pipe
9. Gas pipe
10. Drainage pipe
11. Front Board
Indoor
Outdoor
2
3
4
7
5 6
1
8
9
10
11
Air inlet
Air outlet
Fig.1

7
2
1
8
10
12
15
14
13
11
9
6
5
4
3
1ON/OFF button
2MODE button
3+/- button
4FAN button
5I FEEL button
11 X-FAN button
Note: X-FAN is the same with BLOW
12 TEMP button
13 TURBO button
15 LIGHT button
14 SLEEP button
10 TIMER ON/TIMER OFF
button
9CLOCK button
Send signal
Turbo mode
X-fan mode
Set temperature
Set time
TIMER ON / TIMER OFF
Child lock
Up & down swing
Set fan speed
AIR function
I feel
Light
Temp. display type
:Set temp.
:Outdoor ambient temp.
:Indoor ambient temp.
Sleep mode
Clock
Health function
Heat mode
Fan mode
Dry mode
Cool mode
Auto mode
Operation mode
8button
6button
7button
'&,QYHUWHU0XOWLVSOLW&DVVHWWH7\SH8QLW
3 Operation of remote controller
3.1 Buttons on remote controller
3.2 Introduction for icons on display screen
4

Ɣ $IWHUVHOHFWLQJDXWRPRGHDLUFRQGLWLRQHUZLOORSHUDWHDXWRPDWLFDOO\DFFRUGLQJWR
DPELHQWWHPSHUDWXUH6HWWHPSHUDWXUHFDQ¶WEHDGMXVWHGDQGZLOOQRWEHGLVSOD\HG
DVZHOO3UHVVF$1EXWWRQFDQDGMXVWIDQVSHHG3UHVVEXWWRQFDQDGMXVW
IDQEORZLQJDQJOH
Ɣ $IWHUVHOHFWLQJFRROPRGHDLUFRQGLWLRQHUZLOORSHUDWHXQGHUFRROPRGH3UHVV
RUEXWWRQWRDGMXVWVHWWHPSHUDWXUH3UHVV)1EXWWRQWRDGMXVWIDQVSHHG
3UHVVEXWWRQWRDGMXVWIDQEORZLQJDQJOH
Ɣ :KHQVHOHFWLQJGU\PRGHWKHDLUFRQGLWLRQHURSHUDWHVDWORZVSHHGXQGHUGU\
PRGH8QGHUGU\PRGHIDQVSHHGFDQ¶WEHDGMXVWHG3UHVVEXWWRQWRDGMXVW
IDQEORZLQJDQJOH
Ɣ :KHQVHOHFWLQJIDQPRGHWKHDLUFRQGLWLRQHUZLOORQO\EORZIDQQRFRROLQJDQG
QRKHDWLQJ$OOLQGLFDWRUVDUH2)F2SHUDWLRQLQGLFDWRULV213UHVVF$1EXWWRQ
WRDGMXVWIDQVSHHG3UHVV
Ɣ :KHQVHOHFWLQJKHDWLQJPRGHWKHDLUFRQGLWLRQHURSHUDWHVXQGHUKHDWPRGH
3UHVVRUEXWWRQWRDGMXVWVHWWHPSHUDWXUH3UHVV)$1EXWWRQWRDGMXVW
IDQVSHHG3UHVVEXWWRQWRDGMXVWIDQEORZLQJDQJOH&RROLQJRQO\XQLWZRQ¶W
UHFHLYHKHDWLQJPRGHVLJQDO,IVHWWLQJKHDWPRGHZLWKUHPRWHFRQWUROOHUSUHVV
212))EXWWRQFDQ¶WVWDUWXSWKHXQLW
Note:
Ɣ )RUSUHYHQWLQJFROGDLUDIWHUVWDUWLQJXSKHDWLQJPRGHLQGRRUXQLWZLOOGHOD\a
PLQXWHVWREORZDLUDFWXDOGHOD\WLPHLVGHSHQGRQLQGRRUDPELHQWWHPSHUDWXUH
Ɣ 6HWWHPSHUDWXUHUDQJHIURPUHPRWHFRQWUROOHUać)DQVSHHGDXWRORZ
VSHHGPHGLXPVSHHGKLJKVSHHG
Ɣ $IWHUSXWWLQJWKURXJKWKHSRZHUWKHDLUFRQGLWLRQHUZLOOJLYHRXWDVRXQG
$IWHUWKDW\RXFDQRSHUDWHWKHDLUFRQGLWLRQHUE\XVLQJUHPRWHFRQWUROOHU
212))EXWWRQ
02'(EXWWRQ
1
2
3UHVVWKLVEXWWRQFDQWXUQRQRUWXUQRIIWKHDLUFRQGLWLRQHU$IWHUWXUQLQJRQWKHDLU
FRQGLWLRQHURSHUDWLRQLQGLFDWRURQLQGRRUXQLW¶VGLVSOD\LV21JUHHQLQGLFDWRU
7KHFRORXULVGLIIHUHQWIRUGLIIHUHQWPRGHOVDQGLQGRRUXQLWZLOOJLYHRXWDVRXQG
3UHVVWKLVEXWWRQWRVHOHFW\RXUUHTXLUHGRSHUDWLRQPRGH
$8T2 &22/ F$1'RY +($T
EXWWRQWRDGMXVWIDQEORZLQJDQJOH
Ɣ 7KLVLVDJHQHUDOXVHUHPRWHFRQWUROOHULWFRXOGEHXVHGIRUWKHDLUFRQGLWLRQHUV
ZLWKPXOWLIXQFWLRQ)RUVRPHIXQFWLRQZKLFKWKHPRGHOGRHVQWKDYHLISUHVV
WKHFRUUHVSRQGLQJEXWWRQRQWKHUHPRWHFRQWUROOHUWKDWWKHXQLWZLOONHHSWKH
RULJLQDOUXQQLQJVWDWXV
'&,QYHUWHU0XOWLVSOLW&DVVHWWH7\SH8QLW
,QWURGXFWLRQIRUEXWWRQVRQUHPRWHFRQWUROOHU
Note:

FAN button
I FEEL button
4
5
6
7
Pressing this button can set fan speed circularly as: auto (AUTO), low( ) ,medium
( ), high( ).
Note:
Ɣ 8QGHU AUTO Speed,IDU fan motor will adjust the fan speed (high, medium or
low speed) according to ambient temperature.
Ɣ )DQVSHHGXQGHUGU\PRGHLVORZVSHHd.
Press this button to start I FEEL function and " " will be displayed on the remote
controller. After this function is set, the remote controller will send the detected
ambient temperature to the controller and the unit will automatically adjust the
indoor temperature according to the detected temperature. Press this button again
to close I FEEL function and " " will disappear.
Ɣ 3OHDVHSXWWKHUHPRWHFRQWUROOHUQHDUXser when this function is set. Do not put
the remote controller near the object of high temperature or low temperature in
order to avoid detecting inaccurate ambient temperature.
Press this button to set HEALTH function ON or OFF. After the unit is turned on, it
defaults to HEALTH function ON.
Press this button to select AIR function ON or OFF.
button
button
(Only available for some models)
Ɣ 7KLVIXQFWLRQLVDSSOLFDEOHWRSDUWLDORIPRGHOV
Auto
+/- button
3
Ɣ 3UHVVRUEXWWRQRQFHLQFUHDVHRUGHFUHDVHVHWWHPSHUDture 1ć.
Holding "+" or "-" button, 2s later, set temperature on remote controller will
tor on indoor unit will change accordingly. (Temperature can’t be adjusted under
auto mode)
Ɣ :KHQVHWWLQJ TIMER ON, TIMER OFF or CLOCK, press "+" or "-" button to
adjust time. (Refer to CLOCK, TIMER ON, 7,0(52))EXWWRQV:KHQVHWWLQJ
TIMER ON, TIMER OFF or CLOCK, press "+" or "-" button to adjust time. (Refer
to CLOCK, TIMER ON, TIMER OFF buttons)
Ɣ :KHQ,)((/IXQFWLRQLVWXUQHGRQWKHUHPRWHFRQWUROOHUVKRXOGEHSXWZLWKLQWKH
area where indoor unit can receive the signal sent by the remote controller.
6
'&,QYHUWHU0XOWLVSOLW&DVVHWWH7\SH8QLW

Press this button to set clock time. " " icon on remote controller will blink. Press
"+" or "-" button within 5s to set clock time. Each pressing of "+" or "-" button, clock
time will increase or decrease 1 minute. If hold "+" or "-" button, 2s later, time will
change quickly. Release this button when reaching your required time. Press
&/2&.EXWWRQWRFRQ¿UPWKHWLPHLFRQVWRSVEOLQNLQJ
Note:
Ɣ &ORFNWLPHDGRSWVKRXUPRGH
ƔThe interval between two operation can’t exceeds 5s. Otherwise, remote contro-
ller will quit setting status. Operation for TIMER ON/TIMER OFF is the same.
CLOCK button
9
TIMER ON / TIMER OFF button
10
ƔTIMER ON button
"TIMER ON" button can set the time for timer on. After pressing this button, " "
icon disappears and the word "ON" on remote controller blinks. Press "+" or "-"
button to adjust TIMER ON setting. After each pressing "+" or "-" button, TIMER
ON setting will increase or decrease 1min. Hold "+" or "-" button, 2s later, the
time will change quickly until reaching your required time.
3UHVV7,0(521WRFRQ¿UPLW The word "ON" will stop blinking. " " icon
resumes displaying. Cancel TIMER ON: Under the condition that TIMER ON is
8
Press this button can select up&down swing angle. Fan blow angle can be selected
circularly as below:
Ɣ :KHQVHOHFWLQJDLUFRQGLWLRQHULVEORZLQJIDQDXWRPDWLFDOO\. Horizontal
louver will automatically swing up & down at maximum angle.
Ɣ :KHQVHOHFWLQJ ǃǃǃǃ
DLUFRQGLWLRQHULVEORZLQJIDQDW¿[HG
SRVLWLRQ+RUL]RQWDOORXYHUZLOOVWRSDWWKH¿[HGSRVLWLRQ
Ɣ :KHQVHOHFWLQJ ǃǃ
DLUFRQGLWLRQHULVEORZLQJIDQDW¿[HGDQJOH
+RUL]RQWDOORXYHUZLOOVHQGDLUDWWKH¿[HGDQJOH
Ɣ +ROGEXWWRQDERYHVWRVHW\RXUUHTXLUHGVZLQJDQJOH:KHQUHDFKLQJ\RXU
required angle, release the button.
Note:
Ɣ ǃǃ
PD\QRWEHDYDLODEOH:KHQDLUFRQGLWLRQHUUHFHLYHVWKLVVLJQDOWKH
air conditioner will blow fan automatically.
button
no display
(horizontal louvers stops
at current position)
7
'&,QYHUWHU0XOWLVSOLW&DVVHWWH7\SH8QLW

started up, press "TIMER ON" button to cancel it.
ƔTIMER OFF button
"TIMER OFF" button can set the time for timer off. After pressing this button," "
icon disappears and the word "OFF" on remote controller blinks. Press "+" or "-"
button to adjust TIMER OFF setting. After each pressing "+" or "-" button, TIMER
OFF setting will increase or decrease 1min. Hold "+" or "-" button, 2s later, the
time will change quickly until reaching your required time.
Press "TIMER OFF" word "OFF" will stop blinking. " " icon resumes displaying.
Cancel TIMER OFF. Under the condition that TIMER OFF is started up, press
"TIMER OFF" button to cancel it.
Note:
Ɣ 8QGHURQDQGRff status, you can set TIMER OFF or TIMER ON simultaneously.
Ɣ %HIRUHVHWWLQJ TIMER ON or TIMER OFF, please adjust the clock time.
ƔAfter starting up TIMER ON or TIMER OFF, set the constant circulating valid.
After that, air conditioner will be turned on or turned off according to setting time.
ON/OFF button has no effect on setting. If you don’t need this function, please
use remote controller to cancel it.
X-FAN button
11
12
Press this button under cool and dry mode to start up x-fan function, and " " icon
on remote controller will be displayed. Press this button again to cancel x-fan
function, and " "icon will disappear.
Note:
Ɣ :KHQ[IDQIXQFWLRQLVRQLIWKHDLUFRQGLWLRQHULVWXUQHGRIf, indoor fan will still
operate at low speed for a while to blow the residual water inside the air duct.
Ɣ 'XULQJ[IDQRSHUDWLRQSUHVV;FAN button to turn off x-fan function. Indoor fan
will stop operation immediately.
TEMP button
%\SUHVVLQJWKLVEXWWRQ\RXFDQVHHLQGRRUVHWWHPSHUDWXUHLQGRRUDPELHQWWHPS
erature or outdoor ambient temperature on indoor unit’s display. The setting on
remote controlleris selected circularly as below:
no display
Ɣ :KHQVHOHFWLQJRUQRGLVSOD\ZLWKUHPRWHFRQWUROOHr, temperature indicator
on indoor unit displays set temperature.
Ɣ:KHQVHOHFWLQJZLWKUHPRWHFRQWUROOHr, temperature indicator on indoor unit
displays indoor ambient temperature.
8
'&,QYHUWHU0XOWLVSOLW&DVVHWWH7\SH8QLW

TURBO button
13
Under COOL or HEAT mode, press this button to turn to quick COOL or quick
HEAT mode. " " icon is displayed on remote controller. Press this button again
to exit turbo function and " " icon will disappear.
Child lock function
Press "+" and "-" simultaneously to turn on or turn off child lock function. When
child lock function is on, " " icon is displayed on remote controller. If you operate
the remote controller, the " " icon will blink three times without sending signal to
the unit.
Temperature display switchover function
Under OFF status, press "-" and "MODE" buttons simultaneously to switch temp-
erature display between ćand .
Press this button to turn off display light on indoor unit. " " icon on remote
controller disappears. Press this button again to turn on display light. " " icon is
displayed.
SLEEP button
LIGHT button
14
15
Ɣ :KHQVHOHFWLQJ
displays outdoor ambient temperature.
Note:
Ɣ
Outdoor temperature display is not available for some models. At that time, indoor
unit receives " "signal, while it displays indoor set temperature.
Ɣ,W’s defaulted to display set temperature when turning on the unit.There is no
display in the remote controller.
Ɣ 2QO\IRUWKHPRGHOVZKRVHLQGRRUXQLWKDVGXDOGLVSODy.
Ɣ :KHQVHOHFWLQJGLVSOD\LQJRILQGRRURURXWGRRUDPELHQWWHPSHUDWXUHLQGRRU
temperature indicator displays corresponding temperature and automatically turn
Under COOL, HEAT mode, press this button to start up sleep function. " " icon
is displayed on remote controller. Press this button again to cancel sleep function and
" " icon will disappear.
9
'&,QYHUWHU0XOWLVSOLW&DVVHWWH7\SH8QLW
ZLWKUHPRWHFRQWUROOHr, temperature indicator on indoor unit
3.4 Function introduction for combination buttons

1. After putting through the power, press "ON/OFF" button on remote controller to
turn on the air conditioner.
2. Press "MODE" button to select your required mode: AUTO, COOL, DRY, FAN,
HEAT.
3. Press "+" or "-" button to set your required temperature. (Temperature can’t be
adjusted under auto mode).
4. Press "FAN" button to set your required fan speed: auto, low, medium and high
speed.
5. Press " " button to select fan blowing angle.
1. Press the back side of remote controller marked
the cover of battery box along the arrow direction.
2. Replace two 7# (AAA 1.5V) dry batteries, and
make sure the position of "+" polar and "-" polar
are correct.
3. Reinstall the cover of battery box.
signal sender battery
Cover of battery box
remove
reinstall
NOTICE
Ɣ 'XULQJRSHUDWLRQSRLQWWKHUHPRWHFRntrol signal sender at the receiving
window on indoor unit.
ƔThe distance between signal sender and receiving window should be no
more than 8m, and there should be no obstacles between them.
or wireless telephone; remote controller should be close to indoor unit during
operation.
Ɣ 5HSODFHQHZEDWWHULHVRIWKHVDPHPRGHOZKHQUHSODFHPHQWLVUHTXLUHG
Ɣ :KHQ\RXGRQ¶WXVHUHPRWHFRQWUROOHUIRUDORQJWLPHSOHDVHWDNHRXWWKH
batteries.
Ɣ ,IWKHGLVSOD\RQUHPRWHFRQWUROOHULVIX]]\RUWKHUH’s no display, please
replace batteries.
10
'&,QYHUWHU0XOWLVSOLW&DVVHWWH7\SH8QLW
3.5 Operation guide
3.6 Replacement of batteries in remote controller
INFORMATION FOR THE CORRECT DISPOSAL OF BATTERIES IN ACCORDANCE WITH
EUROPEAN DIRECTIVE 2006/66/EC
Replace batteries when they are depleted. At the end of their life, batteries must be disposed of
separately from unsorted waste. They must be taken to designated recycling centres or
returned to a retailer providing this service. Separate disposal of batteries helps to reduce the
potential harmful effects on the environment and human health caused by their improper
disposal and also enables the recovery and recycling of component materials, saving
significant energy and resources. The requirement for separate disposal is indicated by the
crossed-out wheelie bin label affixed to the appliance. Illegal disposal of the product by the user
is subject to administrative penalties as per current regulations.

'&,QYHUWHU0XOWLVSOLW&DVVHWWH7\SH8QLW
Preparative for Installation
.1 Standard Accessory Parts
The standard accessory parts listed below are furnished and should be used as required.
Table 1
Indoor Unit Accessories
No. Name Appearance Q'ty Usage
1 Drain Hose 1To connect with the hard PVC drain
pipe
2 Nut with Washer 4unit.
3 Washer 10 To be used together with the
hanger bolt for installing the unit.
4 installation paperboard 1 used for ceiling drilling
5 Gasket mounting board 4Used to prevent gasket from falling
off
6Wireless Controller
+Battery 1+2 To control the indoor unit
7 sealing plaster 1
8 Fastener 4 To fasten the sponge
9 Insulation 1 To insulate the gas pipe
10 Insulation 1 To insulate the liquid pipe
11 Sponge 4 To insulate the drain pipe
12 Nut 1 To connect gas pipe
13 Nut 1 To connect liquid pipe
14 Enswathement 2
.2 Selection of the Installation Location
WARNING!
,
otherwise the unit would topple or fall off.
CAUTION!
ķ
Do not install where there is the danger of combustible gas leakage.
ĸ
Ĺ
Children under 10 years old must be supervised not to operate the unit.
Decide the installation location with the customer as follows:

'&,QYHUWHU0XOWLVSOLW&DVVHWWH7\SH8QLW
.2.1 Indoor Unit
Select an installation site where the following conditions are fulfilled and that meets your
customer’s approval.
(1). Obstruct should be put away from the intake or outlet vent of the indoor unit so that the
(2). Make sure that the installation meets the requirement of the schematic diagram of
installation spaces.
(3). Select the place where can stand 4 times of the weight of the indoor unit and would not
increase the operating noise and vibration.
(4). The horizontality of the installation place should be guaranteed.
(5). Select the place where is easy to drain out the condensate water, and connect with outdoor
unit.
(6). Make sure that there are enough space for care and maintenance, and the height fall
between the indoor unit and ground is above 1800mm.
(7). When installing the suspension bolt, check if the installation place can stand 4 times of the
weight of the unit. If not, reinforce it before installation.
Note: There will be large amount of greasy dirt accumulated on the fan, heat exchanger and water
pump located in the dinning room and kitchen, which would reduce the capacity of the heater
exchanger, lead to leakage and abnormal operation of the water pump.
Models H(mm)
;,(&2$6+/
255
;,(&2$6+/
Table 2
Fig.2
.3 Connection Pipe Requirement
CAUTION!
The maximum length of the connection pipe is listed in the table below. Do not place the units between
which the distance exceeds the maximum length of the connection pipe.

13
Table 3
Item
Model
Size of Fitting
Pipe(Inch) Max.
Pipe
Length
(m)
Max. Height
Difference between
Indoor Unit and
Outdoor Unit (m)
Drainage
pipe(Outer
Diameter × wall
thickness) (mm)
Liquid Gas
1/4
3/8 20 15
ĭî 1/2 20 15
The connection pipe should be insulated with proper water-proof insulating material.
The pipe wall thickness shall be 0.5-1.0mm and the pipe wall shall be able to withstand the
pressure of 6.0 MPa. The longer the connecting pipe, the lower the cooling and heating effect
performs.
4.4 Electrical Requirement
Electric Wire Size and Fuse Capacity.
Table 4
Indoor Units
Power Supply Fuse Capacity Min. Power Supply Cord
V/Ph/Hz A mm2
12~24k 220-240V~ 50Hz 5 0.75
Notes:
ķ
The fuse is located on the main board.
ĸ
Install the disconnect device with a contact gap of at least 3mm in all poles nearby the units
(Both indoor unit and outdoor unit).The appliance must be positioned so that the plug is
accessible.
Ĺ
based on the maximum power (maximum amps) of the unit.
ĺ
guarded multi-wire copper cable (like, YJV copper cable, consisting of PE insulated wires and
a PVC cable jacket) used at ɋ and resistible to ɋVHH IEC 60364-5-52). If the working
'&,QYHUWHU0XOWLVSOLW&DVVHWWH7\SH8QLW

'&,QYHUWHU0XOWLVSOLW&DVVHWWH7\SH8QLW
Installation of the Unit
.1 Installation of the Indoor Unit
.1.1 Indoor unit dimension
For the units: 12-18k
Table
Item
Model ABCDEFG
GKH(12)BB-K6DNA3A/I
670 666 600 496 145 240 596
GKH(18)BB-K6DNA3A/I
-

'&,QYHUWHU0XOWLVSOLW&DVVHWWH7\SH8QLW
.1.2 Installing the Main Body Unit
Fig.
(1). Install the hoisting stand on the hoisting screw by using nuts and gaskets at both the upper
and lower sides of the hoisting stand. To prevent the gasket from breaking off, a gasket
anchor board can be helpful.
(2). ,QVWDOOWKHSDSHUWHPSODWHRQWKHXQLWDQG¿[WKHGUDLQSLSHDWWKHRXWOHWYHQW
(3). Adjust the unit to the best position.
(4). Check if the unit is installed horizontally at four directions. If not, the water pump and the
ÀRDWVZLWFKZRXOGIXQFWLRQLPSURSHUO\DQGHYHQOHDGWRZDWHUOHDNDJH
(5). Remove the gasket anchor board and tighten the nut remained.
(6). Remove the paper template.
.1.3 Installing the Suspension Bolts
(1). Using the installation template, drill holes for bolts (four holes). (Fig. )
(2). Install the bolts to the ceiling at a place strong enough to hang the unit. Mark the bolt
positions from the installation template. With a concrete drill, drill for 12.7mm (1/2”)
diameter holes. (Fig.)
(3). Insert the anchor bolts into the drilled holes, and drive the pins completely into the anchor
bolts with a hammer. (Fig.)
Fig.Fig.Fig.

'&,QYHUWHU0XOWLVSOLW&DVVHWWH7\SH8QLW
.1.4 Leveling
The water level test must be done after installing the indoor unit to make the unit is horizontal,
as shown below.
Horizontal tester
Fig.8
Fig.9
.2 Installation of the Connection Pipe
.2.1 Flare Processing
(1). Cut the connection pipe with the pipe cutter and remove the burrs.
(2). Hold the pipe downward to prevent cuttings from entering the pipe.
(3). Remove the
(4).
Fig.9

1
.2.2 Bending Pipes
(1). The pipes are shaped by your hands. Be careful not to collapse them.
Fig.10
(2). Do not bend the pipes in an angle more than 90°.
(3). When pipes are repeatedly bent or stretched, the material
will
more. Do not bend or stretch the pipes more than three
times.
(4). When bending the pipe, do not bend it as is. The pipe
will be collapsed. In this case, cut the heat insulating pipe with a sharp cutter as shown in
Fig.11, and bend it after exposing the pipe. After bending the pipe as you want, be sure to
put the heat insulating pipe back on the pipe, and secure it with tape.
Fig.11
Pipe
Cutter
Cutt line
Heat insulating
pipe
CAUTION!
ķ
To prevent breaking of the pipe, avoid sharp bends. Bend the pipe with a radius of curvature of 150
mm or over.
ĸ
If the pipe is bent repeatedly at the same place, it will break.
.2.3 Connecting the Pipe at the Indoor Unit Side
Detach the caps and plugs from the pipes.
CAUTION!
ķ
Be sure to apply the pipe against the port on the indoor unit correctly. If the centering is improper,
the flare nut cannot be tightened smoothly. If the flare nut is forced to turn, the threads will be
damaged.
ĸ
impurities from coming into the pipe system.
When connecting the pipe to the unit or removing it from the unit, please do use both the
spanner and the torque wrench.(Fig.12)
'&,QYHUWHU0XOWLVSOLW&DVVHWWH7\SH8QLW
This manual suits for next models
2
Table of contents
Other Argo Air Conditioner manuals

Argo
Argo AW22AL User manual

Argo
Argo APOLLO User manual

Argo
Argo ADS22MH User manual

Argo
Argo Euro-Line AWR508CL User manual

Argo
Argo AWR222CLE - AER222SC Operating manual

Argo
Argo MAGICO 9.2 AMG26MIR Manual

Argo
Argo AW726CL User manual

Argo
Argo X3I ECO PLUS27 SH LH Operating manual

Argo
Argo Relax User manual

Argo
Argo ALTEA User manual

Argo
Argo Ecolight 9000 UI User manual

Argo
Argo AWIBS9DC User manual

Argo
Argo AEI1G80BEMX User manual

Argo
Argo SDIAS8DC User manual

Argo
Argo CLIMIA CMK 4000 WiFi User manual

Argo
Argo ASR518HL Manual

Argo
Argo CAFM255R5I Manual

Argo
Argo AEI1G50EMX/BB User manual

Argo
Argo AFSI ECO 120HL UI User manual

Argo
Argo X3I 27 User manual