Argos Bush 5 User manual

Quick Start Guide
Bush 5” Android Phone
BUSH_5_Android_cover.indd 1 26/11/2014 12:33:01

Table of contents
For more information, please consult the FAQs on www.argos.co.uk.
Make sure to read them before considering any product return. As we
are often updating and improving our products, your device’s software
may have a slightly dierent appearance or modied functionality than
presented in this Quick Start Guide.
Package contents..........................................................................................................
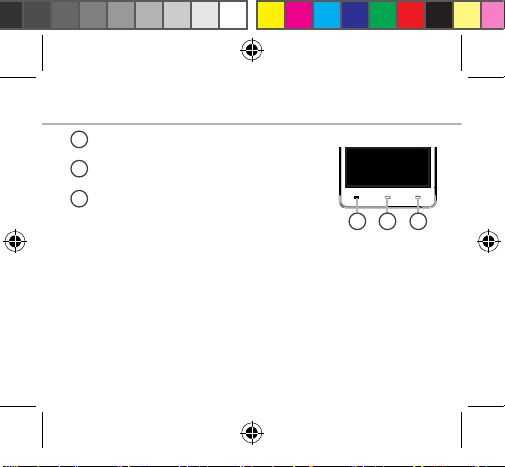
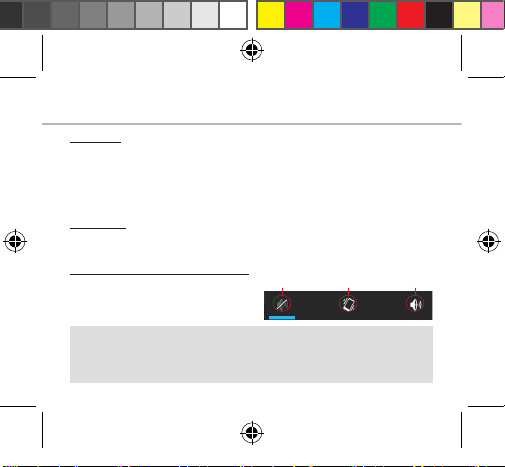
Description of the phone...........................................................................................
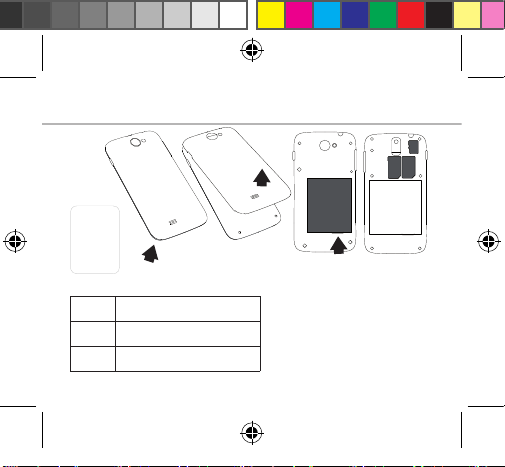
Assembling......................................................................................................................
Getting started...............................................................................................................
3G & WiFi connection...................................................................................................
Google account & Contacts........................................................................................
Hints & tips with AndroidTM................................................................................
Troubleshooting.............................................................................................................
2
3
6
8
10
12
14
16
BUSH_5_Android_book.indd 1 28/11/2014 11:03:24

2
Package Contents
Check your product box for the following items:
-BUSH 5 Android
-Battery
-Headset
-Micro SIM adaptor
-USB cable
-Charger
-Quick start guide
-Warranty Legal & Safety notices
-BUSH Green & Blue back casings
-Translucent protective case
-Screen Protector
The supplied items are designed only for your device and may not be
compatible with other devices. Unapproved accessories may cause your
device to malfunction.
BUSH_5_Android_book.indd 2 28/11/2014 11:03:24

3
27-01-2014
last modification:
AC50B OX
CONFIDENTIAL
DRAWING
Rev
1
scale 1:1 mm
1 2
11-02-2014
last modification:
AC50 NE
CONFIDENTIAL
DRAWING
Rev
2
scale 1:1 mm
5
6
34
7
1Micro-USB port
Headset jack
Loudspeaker
Webcam
Volume buttons
ON/OFF button
Microphone
2
3
4
5
Description of the phone
6
7
BUSH_5_Android_book.indd 3 28/11/2014 11:03:25

4
9
8
10
11-02-2014
last modification:
AC50 NE
CONFIDENTIAL
DRAWING
Rev
2
scale 1:1 mm
Description of the phone
8
10
9
Camera
Flash
Loudspeaker
BUSH_5_Android_book.indd 4 28/11/2014 11:03:25

5
11-02-2014
last modification:
AC50 NE
CONFIDENTIAL
DRAWING
Rev
2
scale 1:1 mm
11 12 13
Menu: open the list of options available on the current screen.
Home/Recent apps/Google NOW: short press to return to the Home
screen; double press to open the list of recent applications; long press to
access Google Now.
Back: return to the previous screen..
Menu
Home/Recent apps/ Google NOW
Back
13
12
11
BUSH_5_Android_book.indd 5 28/11/2014 11:03:25

6
Assembling
Opening
1. Use the notch to remove the back cover.
Do not bend or twist the back cover excessively. Doing so may damage
the cover.
2. Remove the battery.
Inserting SIM cards
For your 3G SIM card, slide it facing downwards in the 2G/3G slot (slot 1)
with the cut corner of the card outermost as shown on page 7.
For your standard SIM card, slide it facing downwards in the 2G slot (slot 2)
with the cut corner of the card outermost as shown on page 7.
Inserting a Memory card
For your Memory card, slide it facing downwards in the slot 3.
Closing
1. Align the battery’s 4 contact points with those of the phone and gently
press the battery down into place.
2. Replace the back cover clicking it back into position.
Tip:
Before using your device for the first time, charge its battery completely.
BUSH_5_Android_book.indd 6 28/11/2014 11:03:25

7
Picture to show how to removed the bottom casing Picture to show how to insert the battery pack Picture to show the scards position
Picture to show how to remove the bottom casing Picture to show how to insert the battery pack Picture to show the scards position
Slot2
Slot3
Slot2
Picture to show how to remove the bottom casing Picture to show how to insert the battery pack Picture to show the scards position
Slot1
Slot3
Picture to show how to removed the bottom casing Picture to show how to insert the battery pack Picture to show the scards position
Assembling
Slot1 2G/3G SIM card
Slot2 2G SIM card
Slot3 Memory card
Lift
the back
cover
using the
notch
BUSH_5_Android_book.indd 7 28/11/2014 11:03:26

8
Turn ON
1. Press and hold the ON/OFF button to turn on the device.
When you turn on your device, a PIN code may be requested.
2. Type the PIN code supplied with your SIM card.
Beware of typing a wrong PIN code.
3. Select ‘OK’.
Turn OFF
To turn o your device, press and hold the ON/OFF button, and then
select Power o > OK.
Sound & Notication proles
Getting started
Tip:
Your device will go into standby mode when you do not use it for a
specified period of time. To wake up your device, press the ON/OFF
button. To set the duration, go to Settings > Display > Sleep.
1. When the device is turned on, press
and hold the ON/OFF button.
2. Select an option.
Silent Vibrate Sound
BUSH_5_Android_book.indd 8 28/11/2014 11:03:26

9
Through the wizard
The rst time you start up your phone, the installation wizard will help
you set up your device:
-Language
-Date & time
-WiFi connection
-Location service options
Touch screen actions:
Tap: touch once to select or launch a menu, option, or application.
Touch and hold: tap an item and hold it for more than 2 seconds to drag,
remove, create folders etc.
Drag: touch and hold an item and move it to a new location.
Flick: briskly scroll up, down, left, or right to move through lists or screens.
Pinch: place two of your ngers far apart, and then pinch them together.
BUSH_5_Android_book.indd 9 28/11/2014 11:03:26

10
3G connection
With your SIM card, you should be connected to the Internet without
any further setup. The phone will only have signal if you are in an area
covered by your provider’s 3G network. When connected to the 3G
network, the 3G icon is displayed in the status bar.
Activating the mobile data
3G & WiFi connection
To be able to access Internet, the mobile data icon
must be activated.
1. Touch and hold the time & battery icons to reveal
the status bar.
2. Pull the white line down to display the status
dashboard.
3. Touch the status dashboard icon .
4. Touch the mobile data icon to activate it.
Tip:
If you encounter connection problem’s, see the FAQs on
www.argos.co.uk. or contact your 3G network connection provider.
BUSH_5_Android_book.indd 10 28/11/2014 11:03:26

11
WiFi connection
WARNING: Make sure that you are in a WiFi zone. You can access the WiFi
settings quickly from the status bar.
1. Touch and hold the time & battery icons to reveal
the status bar.
2. Pull the blue line down to display the status
dashboard.
3. Touch the status dashboard icon .
4. Touch the “Settings” icon to open the settings
menu.
5. In the “Wireless & networks”section, if the WiFi is
o, slide the WiFi switch to the “ON”position. Once
the WiFi is on, the phone will scan for WiFi networks
in range.
6. Touch “WiFi”to display available networks.
7. Touch the name of network you want to connect to.
Private networks are shown with a lock icon and will require you to enter
your password.
BUSH_5_Android_book.indd 11 28/11/2014 11:03:27

12
Adding a Google account
A Google account lets you take full advantage of any Google apps and
services that you may want to use.
1. Go to“Settings” > “Accounts”> “Add account”.
2. Select the account type “Google”to add.
3. Follow the onscreen instructions to enter information about the account.
Once the account is created, you can access Play Store, Gmail, Hangouts,
Maps and many other apps.
Synchronizing info
Information must be sync to be saved. Your data are backed up on
Google servers.
1. Go to“Settings”> “Accounts”> “Google”.
2. Select your account.
The list of information that can be sync are displayed.
3. Check all information in order to sync them.
You can get them back in case of loss of your device or SIM card.
When your Google account is added to a new device, all your saved
information is collected.
Google & Contacts
BUSH_5_Android_book.indd 12 28/11/2014 11:03:27

13
Saving your contacts
When your contacts are saved, they are always available on the web
and can be synced to any Android phone that’s set up with your Google
account.
1. Install the SIM card with your contacts in your phone.
2. From a Home or All Apps screen, select the People app .
3. Touch the Menu button > “Import/Export”.
4. In Import/export contacts, select “Import from SIM card”.
5. Select your Google account.
6. Check contacts to be imported and validate.
7. Once the contacts are imported in the Google account, go to“Settings”>
“Accounts”>“Google”.
8. Select you Google account. Make sure“Contacts”is checked.
9. Select the Menu button, then “Sync now”.
Your contacts are saved to via your Google account.
BUSH_5_Android_book.indd 13 28/11/2014 11:03:27

14
The extended home screen:
Navigate between dierent home screen panels by swiping left and
right.
Home button
Short press the Home button to go back to the main screen.
Double press the Home button to display all the apps you have opened.
Swipe any app left or right to close it.
Moving a home screen item:
Touch and hold your nger on the icon then slide it to the desired
location, and release your nger.
Removing a home screen item:
Touch and hold it, slide your nger towards the top of the screen and
drop it over the "Remove" icon.
Uninstalling an item:
From the "All apps" screens, touch and hold it, slide your nger towards
the top of the screen and drop it over "Uninstall" bin.
Hints & tips with AndroidTM
BUSH_5_Android_book.indd 14 28/11/2014 11:03:27

15
Creating application folders:
Drop one app icon over another on a home screen and the two icons will
be combined.
Widgets:
Touch the “All Apps” icon on your home screen. Touch “Widgets”at the
top of the screen. From the main Widget screen, you can move around
widgets just as you do for app icons.
Changing your wallpaper:
Hold your nger on a home screen at an empty location, then choose
from the list.
Locking the touchscreen:
From the quick settings dashboard in the status bar, touch “Settings”. In
“Settings”, scroll down and touch“Security”. Touch “Screen lock”. Touch
the type of lock you would like to use. After you set a lock, a lock screen
is displayed whenever your screen wakes up, requesting the pattern, pin
or other specied key.
BUSH_5_Android_book.indd 15 28/11/2014 11:03:27

16
Troubleshooting
My phone is frozen or cannot switch on
Check the battery contacts, remove and reinstall your battery, then turn
your phone on. Check the battery power level, charge for at least 20
minutes.
My phone cannot connect to a network or “No service” is displayed
Try connecting in another location. Verify the network coverage with
your operator.
Unable to make outgoing calls
Make sure your phone is connected to a network, and the network is not
overloaded or unavailable.
Unable to receive incoming calls
Make sure your phone is switched on and connected to a network
(check for overloaded or unavailable network).
SIM card PIN locked
Contact your network operator to obtain the PUK code (Personal
Unblocking Key).
To configure a new 3G network:
On your device, tap Settings.
Select Wireless & networks > More... > Mobile networks.
Select Network settings. In Network operators, select your operator. In
Access Point Names, select the correct access point name and enter the
exact connection parameters provided by your 3G provider.
Helpline number: 0207 744 0346
BUSH_5_Android_book.indd 16 28/11/2014 11:03:27

17
National restrictions
This device is intended for home and oce use in all EU countries (and other countries following the EU
directive 1999/5/EC) without any limitation except for the countries mentioned below:
Country Restriction Reason/remark
Bulgaria None General authorization required for outdoor use and public service
France Outdoor use
limited to 10
mW e.i.r.p.
within the
band 2454-
2483.5 MHz
Military Radiolocation use. Refarming of the 2.4 GHz band has been
ongoing in recent years to allow current relaxed regulation. Full
implementation planned 2012
Italy None If used outside of own premises, general authorization is required.
Luxembourg None General authorization required for network and service supply
(not for spectrum)
Norway Implemented This subsection does not apply for the geographical aera within a
radius of 20 km from the centre of Ny-Alesund
Russian
Federation
None Only for indoor applications
Note: Frequency 2454-2483.5MHZ are restricted to indoor use in France.
BUSH_5_Android_book.indd 17 28/11/2014 11:03:28

18
SAR
After the laboratory measurement, this mobile phone SAR value is:
Head 0.357 W/kg
Body 0.392 W/Kg
Argos declares that this device is in compliance with the essential requirements
and other relevant provisions of Directive 1999/5/EC. A copy of the declaration of
conformity can be obtained from: Argos Ltd. 489-499 Avebury Boulevard, Milton
Keynes, MK9 2NW, UK
BUSH_5_Android_book.indd 18 28/11/2014 11:03:28

Argos Limited © 2014. All rights reserved.
P/N: 113513
www.argos.co.uk
BUSH_5_Android_cover.indd 2 26/11/2014 12:33:01
Table of contents
Other Argos Cell Phone manuals