manuals.online logo
Brands
  1. Home
  2. •
  3. Brands
  4. •
  5. Argus
  6. •
  7. Digital Camera
  8. •
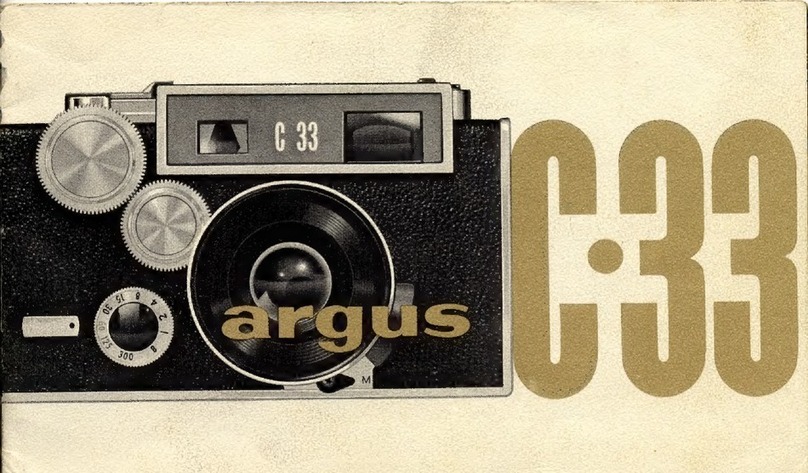
  9. Argus A2F Parts list manual

Argus A2F Parts list manual

INTERNATIONAL RESEARCH
CORPORATION
Ann
Arbor
,
Michigan,
U.S.A.
ARGUS SERVICE POLICY AND GUARANTEE
The
ARGUS
Camera
is guaranteed against
defective material
and
workmanship for
90
days
after
shipment.
Thi
s guarantee
is
lim-
Ited to
th
e re
turn
of the cam
era
to
the
fac
tory
with
tr
ansportation charges prepaid,
where any defects will
be
corrected
and
th
e
camera returned with
tran
sport
at
ion charg
es
prepaid.
In order
that
ARGUS owners may
be
assured
of
low up
ke
ep cost
of
our
cameras,
aft
er
expiration
of
the above guarantee,
th
e
factory
will
put
in
first class condition
any
ARGUS
Camera shipped to
th
em, with
tr
an
sportat
ion charges prepaid, and re
turn
it
pr
epaid
to
the owner for
th
e sum
of
$1.00.
~
-
rhis
poJrcy-
n-e4kctive
for
Qne
year
from
date
of
purchase.
This
does I
lClt
cover
- t -
placement
of
camera cases broken through
mi
su
se
or cameras w
hi
ch ha
ve
been abused.
~
,
I
.
~
NOTICE TO ARGUS CAMERA OWNERS
In
order
that
you
mi
ght
in
sure you r
camera aga
in
st defecti
ve
mate
ri
al and work-
manship for
90
days
after
shipme
nt
, it
is
necessary that you
fill
out
the registr
at
ion
card supp
li
ed with yo
ur
camera
and
return
it to
our
factory
within
15
days
after
pur-
chas
e.
When writing the factory, please men-
tion the model and
se
ri
al number
of
your
camera.
ARGUS INSTRUCTIONS
FIGU
RE
1
1.
Camera
body
II.
Shutter
speed
ind
icator
2.
Counter
dial
1
2.
Diaphragh
plate
3.
Counter
dial
indica
t
or
13.
Tripod
socket
4.
Counter
dial
release 14.
Filter
mount
5.
View
finder
15.
Lens
6. Sliding
ca
l
cu
l
ator
16.
Diaphra
gm
point
er
7.
Speed
plate
17.
Cab
le
release
socket
8.
Windin
g
knob
18.
Shutter
plun
ger
9.
Lockin
g
lu
g 19.
Rewind
knob
10. Lens lo
cking
pl
ate
20.
Focus
indicator
21.
Focusing
ring
IMPORTANT
The
Argus candid camera is a
preCISIOn
,
ins
trum
ent.
The
ultimate success
of
your
pic-
3
tures made with a mIniature camera depend
largely upon
the
intelligent u
se
of
the
camera
and
the
careful handling
of
your
35
mm. negatives.
This
instruction book
shou
ld
be read carefu
ll
y and the
~ser
should
be fami
li
ar
w
ith
every
part
of
the
camera
together with an
und
erstanding of
it
s func-
tion.
It
is
recommended
that
the descriptions
relative
to
exposure calculating and the gen-
eral handling
of
the
camera be
stud
ied care-
fu
ll
y before loading the camera with film.
There
are
many
exce
ll
ent
35
mm.
fi
lms
on the market. Some films are best when
used
outdoors
and
others are more suit
ab
le
for induor
or
night photography.
The
slower
or
medium speed films are noted for fine
grain and full color renditions.
The
faster
Urns
have a slightly larger gra
in
size with
less
colo~o~a.l
use
-..i
n
night
photography
or
whenever
li
ght
con-
ditions are unsatisfactory.
35
mm. film
may
be purchased
either
in
daylight l
oad
ing cartridges,
or
in
bulk
lengths. Film
manufacturers
furnish bulk
film in lengths
from
25
foot
to
100
foot rolls.
Some films are notched
and
cut
into
36
exposure iengths which assists greatly in
darkroom
loading
into
cartridges.
Eastma
n
or
Agfa Cartridges are ideal for loading
with bulk film.
Your
local
photo
fil1lsher
should
be
able to s
upply
these
empty
maga-
zines.
The
ARGUS
camera is so con
structed
that
all
types
of
daylight loading
35
mm.
magazines m
ay
be used.
4
f
I
•1
Daylight
loading cartridges are usually
filled
WIth
36
exposures of
35
mm. double
perforated
film.
The
new Agfa 18 exposure
daylight loading magazine is designed es-
pecially
for
use with the
ARGUS
Camera.
This
film is supp
li
ed with a
paper
leader
ana
trailer
which forms a light
tight
spool
and
eliminates
the
necessity
of
plush lined
lips
found
on
othe
r types
of
magazines.
This
improved construction eliminates
any
possi-
bility
of
film scratches.
The
new
shorter
length
of
film has
many
advantages
and
is
used exclusively
by
many
ARGUS
owners.
The
ARGUS
18
exposure car
tridg
e is loaded
with the very
popular
Agfa Supreme film
and
is available
at
your
local
ARGUS
dealer
or
film .supplier.
he-success
of
miniature negatives depends
largely
Lip
on
fi
ne g
rain
deveiopment and
careful handling. Careful developing in such
solutions as Defender
777
or
East
man
DK-20 will result in beautiful gra
in
less nega-
tives. If fine grain developing is
not
ava
il
ab
le
locally forward
your
films ·to one
of
the
many
laboratories
wh
ich specialize in work
of
this type.
LOADING
THE
ARGUS CAMERA
The
accompany
in
g illu
strat
ion shows the
camera being loaded with a regular
36
ex-
posure daylight load
in
g magazin
e.
The same
general procedure
is
used when loading
ARGUS
Agfa
18
expos
ur
e magazin
es.
De-
tailed loading instructions are furnished with
5
each roll
of
ARGUS
18
exposure films.
The
film in these ARGUS magazines
is
protected
from light by a paper leader
and
trailer,
but
when loading
or
changing the film it
is
always
advisable
to
do so in subdued light. Bright
sunlight should never be allowed
to
reach a
loaded magazine
of
any
type.
FIGURE
2
4.
Film
advance
button
8.
Winding
knob
19.
Rewind
knob
23.
Back
hinge
clip
24.
Film
sprocket
25.
Film
cartridge
26.
Winding
shaft
27.
Film
28.
Cartridge
retainer
29.
Pressure
pad
30.
Back
31. Lock
Catch
I.
Remove camera back (30) by grasping
the camera body
in
left hand and depressing
the lock clip which engages the lock catch
(31)
of
the camera back.
The
lock clip should
6
be
depressed with the left thumb, while. the
clip
is
depressed grasp the leather
tab
of
the
camera back lock clip with the
thumb
and
forefinger of the right hand
and
pull firmly
away from the camera case.
2.
Pull
out
rewind knob (19) as
far
as
it
will go. Drop the film cartridge into this
end
of
the camera body with the film lay-
ing over the toothed sprocket (24). Snap
rewind knob back in place.
3.
Hold the cartridge in place with the
right
thumb
and
draw enough film
or
paper
leader from the cartridge until
it
extends
about
one inch beyond the opposite end of
the camera.
4.
In
sert the free end
of
the film
or
about
one inch of
paper
through the slot
in
wind-
,..,
....-
ing
shaft
(26).
5.
Turn
winding knob (8)
in
direction
of
engraved arrow until the film
or
paper lies
flat on the camera film tracK. When loading
film
it
is
be
st
to
engage the sprocket teeth
(24) befo
re
closing the camera back. When a
paper leader is used be sure
that
the leader
is
centered 'in the film track.
6.
Replace the camera back by first en-
gaging the back hinge clip (23) in the groove
at
· the cartridge end
of
the camera body.
Hold the camera body
in
the left hand
and
depre
ss
the lock cl
ip
with the
thumb
. Care-
fully clo
se
the back by grasping the leather
tab
with the
thumb
and
forefinger of
the
right hand
and
snaping over the depressed
lock clip. Let the clip
ri
se
and
engage the
7
lock (31). A bent
or
twisted back may cause
fi
lm breakage
or
scratching. Never
attempt
to
force
th
e back in place. If difficul
ty
is
encountered check the position of hinge clip
(23); be sure
that
it is properly engaged.
7. After
the
back is in place the film must
be
advanced until a new exposure is
in
cor-
rect place behind the lens.
This
is accomp-
li
shed by turning the winding knob (8)
in
the direction
of
the arrow until a click
is
heard
or
the
fi
lm counter dial (2), figure I
stops
rotating
. Depress the counter dial re-
lease (4) momentarily while advancing the
film
and
advance one fu
ll
rotation
of
the
counter dia
l.
Repeat this operation twice. At
this
point
unexposed film
is
in
correct ex-
pos
ur
e position for the first picture.
The
ounter
dial (2) should now
be
rotated
in
a countef:'cl
oC"kw
is
t:"""'
-eireai.oLl iJh right
thumb until the zero figure is opposite the
count
er
di
al indicator (3).
The
counter dial
is
held
in
pl
ace by a friction arrangement and
a
fi
rm
pr
ess
ur
e is necessary to
se
t
th
e dial.
8.
After
the first
pictur
e is taken the
film should
be
advanced
at
once
to
form a
habit
of
pre
ve
nting double exposure
or
bl
ank
frames. When the film
is
advanced
one frame the counter dial advances nearly
a
~u
ll
.
rev,o
lution and will stop opposite figure
I
Il1d
lcatll1g the number
of
exposures made.
9.
When paper leader film is u
se
d the
following procedure should
be
fo
ll
owed. After
the camera back
is
closed, wind the
fi
lm
about
10
revolutions
of
the winding knob
8
MAKE
YOUR
OWN
PRINTS
FOR
LESS
THAN A CENT EACH
Alb
um
prints
,
in
2% x 41/4
Argus
stan-
da
rd siz
e,
actually
cost
you
but
a
pen
-
ny
apiece
w
hen
you
use
an
Argus
Speed
Printer
and
Argus
Bromex
Paper
.
EASY
,
ECONOMICAL,
FAST
No
focusing
,
no
trimming
of
paper:
mer
e
ly
insert
film
in
glass
slide
and
plac
e
pap
er as s
hown
in
illustration.
Press
handl
e
down
for
desired
expo-
sure.
Paper
is
then
de
veloped
in
the
usual
mann
er.
Se
e
ne
xt
pag
e for
example
of
pic·
t
ur
e
mad
e
with
Argu
s
Speed
Pr
inter.
THE
"AUTOMATIC
"
L
ist
price
. .$
15
.00
ACTUAL
SIZE
OF
STANDARD ARGUS
PRINTS
H ERE
is
the
actual
size
of
pictures
Printer
on
Argus
Bromex
paper.
from
35
mm.
film
with
an
Argus
Speed
Argus
Bromex
paper
comes
in
single
or
double
weight.
glossy,
semi-matt
or
silk
finish.
in
soft,
medium
or
hard.
It
is
cut
to
the
size
illustrated,
with
allowance
for
an
eighth
of
an
inch
border
around
picture.
made
specific:ally
for
use
in
Argus
printers.
Both
the
Argus
"Automatic"
printer
and
the
Argus
"Electromatic"
(illustrated
on
fol-
lowing
page)
operate
on
llO-120
volt
AC
or
DC
and
handle
strip
film
or
single
negatives.
NEW ARGUS ElECTROMATIC
TAKES
All
GUESS-WORK
OUT
OF
PRINT-TIMING
Th
e
"Electromatic
"
Speed
Printer
is
equipp
ed
with
a
photo-electric
"
eye"
which
"re
ads"
the
density
of
your
nega
-
tive
and
giv
es
pr
oper
exposure
or
tim-
ing
in
making
prints_
Merely
set
one
indicator
for
negative
density.
another
for
paper
surface
being
used.
and
flip
the
s
tarting
switch_
When
print
is
cor-
rectly
exposed
.
the
light
go
es
off-
Sav
e
pap
er
by
getting
a
GOOD
PRINT EVERY
TIME;
eliminate
trial
and
error
methods.
List
price
THE
"
ELECTROMA
T
IC
"
.......
$35.00
until
the
counter-button
clicks on
ce.
10.
Press film a
dvan
ce
button
and
turn
th
e
winding knob
unti
l
th
e
counter
dial makes
one fu
ll
revolution before set
ting
the co
unt
er
dial
to
zero.
II.
When
th
e
36
or 18 exposures have
been completed, rewind
the
fi
lm by
turnin
g
th
e rewind
knob
(19) in
the
direction
of
the
e
mb
ossed a
rr
ow
unti
l
the
winding knob
(8)
sto
ps
rotating.
Never
open
the
cam
era
back
unti
l
th
e film has been rewound.
CAUT
I
ON
.-
Wh
en wi
nding
or
rewinding
th
e
fi
lm be s
ur
e
that
it
s
movement
is not
res
tr
ained
by
pressing
the
hand
against the
free moving knob. Do
not
at
t
empt
to
force
the
film
after
th
e
counter
dial has
sto
pp
ed
or
th
e fu
ll
numb
er
of
exposures are reached.
Attempt
in
g
to
ge
t more pic
tur
es
may
pull
the
film
from
the magazine
and
preve
nt
re-
winding. If this should occur it
wi
ll
be
necess
ary
to
remove
th
e
fi
lm in
to
ta
l
dark-
ne
ss.
FOCUSING
Snap
th
e lens assembly from
th
e
carrying
position
to
the
exposing posi
tion
by
turnin
g
the lens
in
e
it
her
dir
ection until
th
e lock
pl
ate
projectio
ns (10) leave
the
locking lugs
(9) on
the
camera
front plate. When
return-
ing the lens to the ca
rr
ying position be s
ur
e
that
th
e focus
in
g ring is at
th
e infinity
setting.
Carefu
l focusing is an
important
factor
in
the success
obtained
with
your
minia
tu
re
camera. Close
up
distances should
not
be
9
guessed. Use a range finder
or
tape measure.
Small diaphragm apertures (f.9
to
f.lS) result
in a
greater
range
of
sharpness
and
should
be used whenever possible. Focusing is ac-
complished
by
rotating
the
knurled ring (21)
with
the
tips
of
the
thumb
and forefinger.
The
figure on scale (21) representing
the
distance between
the
object
to
be
photo-
graphed and the camera
is
brought
in line
with
the
scribed index on focus indicator
(20). Critica
ll
y
sharp
negatives are
obtained
by
measuring
the
distance from
the
front
of
the camera case
to
the
su
bject
of
interest.
CALCULATING EXPOSURE
Hold the camera as shown in
the
accom-
panying
illustration (figure 3)
normal
read-
ing distance.
Point
the
camera
at
the
subject
--OL
interesj:
llnd
be careful
not
to
include more
sky
or
whi1
eb
--acKgfOuITd
-'-'f:
han-necessar
Y-:-
'
The
Argus exposure meter makes a direct
reading
of
the reflected light
from
the
sub-
ject.
If
the
degree of brightness
of
the
subject
varies considerably
or
a render
in
g of shadow
detail
is
desired,
it
is advisab
le
to aim the
camera
at
the shaded
parts
and approach as
near
as possible
to
them.
When photographing
in
bright sunlight,
the
top
of the camera should
be
shaded with
the hand.TO OBTAIN A READING
1.
Hold
the
camera as illustrated (figure 3)
with
the
forefinger
of
the left hand on the
sl
iding calculat
or
(6).
10
FIGURE
3
2. Slide
the
calculator with
the
left fore-
finger
until
the
metal
pointer
on
the
back is
directly in line with
the
last visable
bar
which appears in
the
meter interior. Under
average sunlight conditions
the
3rd
or
4th
bar
from
the
left will be visible.
3.
When
the
calculator
is
in correct posi-
tion hold
the
camera as
it
appears in
the
accompanying illustration (figure 4.)
4.
Set
the
arrow (32)
until
it
is
in the
center
of
the
horizontal column on plate (7)
which corresponds
to
the
general light condi-
tion. In the illustrated case
the
arrow (12) is
in correct location for an average bright
day
.
II
FIGURE
4
~
5.
Move
t
he
iaphragl1T"-plate (34)
un
til- - -I
.c:.
::...
th
e
plate
uncovers
the
Weston
Speed
of
the
film used. In
the
illu
st
ration
a film
with
a
Weston
speed
of
40 is being u
se
d.
6.
Now
th
e
diaphragm
and
s
hutter
speeds
appear
in
correct
rela
tion
on
th
e
plate
(34)
and
th
e first vertical
column
on
plate
(7)
to
the
Zeit
of
the
sliding calc
ulator.
Any
combination
of
s
hutt
er
and
diaphragm
set-
tings which a
pp
ear
may
be used. In
the
case
of
the
light
condition
illu
st
rat
ed,
only
two
combinations
may
be used,
namely
a
shutter
speea
of
1/
100
with
a
diaphragm
se
tting
of
f:
18
or
a speed of 1/ 200
at
f:
12.7
.
Reading
the
speed
column
s
from
top
to
b
ot
tom
the
figures which
appear
repre
se
nt
the follow-
12
~
-
ing fr
act
ion
of
seco
nd
s 1/ 200, 1/
100
, 1/
50
,
1/
25
1/ 5 1/ 2
and
I second.
An
exposure
of
1/ 5
~r
1/ 2 a seco
nd
m
ay
be accomplished by
using
the
bulb
s
etting
on
the
s
hutter.
Of
course, a
tripod
must be u
se
d
to
steady
th
e
camera
for
an
expos
ur
e of 1/ 5
of
a second
or
slower.
Learn
to
depend
upon
you
r ex-
posure
m
ete
r reading
s.
In general,
manufac-
turers
Weston
ratings
of
film,
change
fre-
quently
a
nd
it
is
ad
vis
ab
le
to
notice closely
all films
for
changes in rating. If a
ll
negatives
are
s
li
g
htly
overexpo
se
d, u
se
the next
fa
s
ter
We
ston setting.
If
und
erexposed u
se
th
e
next
slower Weston rating.
Daylight
Tungsten
Agfa
Fine
Grain
Plenac
hrome
20
12
Finop
an
20
16
Ultr
a Speed
Pan
120
60
Supreme
Superpa
n
60
40
DuPont
XL
Pan
64 40
F. G. P
arpa
n
10
8
Superior
Pan 40
24
Eastman
Plus
X 40
24
Panatomic
X 24
16
Super
XX
80
50
Gevaert
Expr
ess
Superchrome
6 3
Panchromosa
20
12
Perutz
F'ernomnia Film
16
10
13
The
preceding table lists
popular
films
and
their
current
Weston ratings. If the ratings
do
not
coinside with the Weston markings on
the Argus Exposure meter use the closest
setting which does appear.
Col
or
films with a Weston rating
of
6
may
be
set on the exposure meter by lowering
slide (34) until the finger
tab
is in direct
contact with the finger
tab
on slide (33)
and
arrow (
12)
is
covered by the top slide.
The
Argus meter
and
the above film rat-
ings result
in
a correctly exposed
35
mm.
negative suitable for enlarging.
SETTING
THE
SHUTTER SPEEDS
Shutter
speeds are set by
turning
the
knurled ring
(II)
until the indicator
mark
is directly above
th
e desired spee
d.
A setting
midway between marked speeds
wi
ll
res
ult
in
tnal
fr
a
CTion
of- SC
GoR
4......F
Gr
_example-witb - _
......
_
the indicator between 1/
50
and
1/
100
the
shutter
will
operate
at
1/
75
of a second.
The
shutter
speeds are as follows 1/
25
, 1/
50
,
1/ 1
00
, 1/
200
,
"8
"
and
"T"
.
The
"T"
is
the
proper
setting for time ex-
pos
ur
es.
When the .
shutter
is
set for "
Time"
one
strok
e
of
the plunger (18) will cau
se
the
shutter
to
open
and
remain open until
a second stroke
of
the plunger
is
made.
When the
shutter
speed ring
is
set opposite
"8"
the
shutter
will remain open as long
as the plunger (18) is depressed
and
closes as
the pressure
is
released. When either a
"8"
or
"T"
setting
is
used
the
camera
must
be
held on a
tripod
.
14
SETTING
THE
DIAPHRAGM
The
iris diaphragm regulates the
amount
of
light passing through the lens
and
is as
im
p<jr
tant
an
adjustment
as the shutter.
The
diaphragm
is
regulated by the
pointer
le
ve
r
(16).
The
diaphragm size
is
found on the
diaphragm plate (12)
and
they
are indicated
as follows: f :
4.5
, f:
6.3,
f:9
, f:12.7
and
f:18.
The
f
:4.5
is the greatest aperture po
ss
ible
and
admit
s the most
li
ght
to the film. Each
sma
ll
er
stop
admit
s approximately one half
as much light
th
e preceding one.
The
shutt
er and diaphragm settings are,
of
cour
se,
tak
en directly from the Argus
meter.
Th
e f
as
ter s
hutter
speeds with larger
diaphragm openings should
be
used when it
is desirable to stop action
of
the subject.
Smaller diaphragm openings with slower
shutt
er
sp.ee
ds should b US€-:I
w
h
e
n
~
a-g
reat
e
r
de
pth
of
focus is desired for pictur
es
s
ll
ch as
landscapes.
AIM AND
SHOOT
The
camera is aimed
at
the subject by
holding
the
. back
of
the camera firmly
against
th
e face
or
forehead
and
sighting
through
the
rear view finder (5) figure I.
The
view finder shows the subject as it
will
appear
when photographed.
The
view
finder
is
purposely designed
to
cover slight-
ly less
of
the
subject
than
that
actually
photographed.
This
difference provides a
safety factor
and
prevents
cutting
off
part
s
of
interesting subjects.
15
When
the
subject has been correctly cen-
tered and composed in
the
view finder you
are ready
to
make the actual exposure.
The
shutter
should be
operated
'w
it
p a
steady squeezing action on
the
plunger (.
,8)
while the camera is held firmly against
the
face..
The
entire
lens barrel
may
be
rot
ated
to
bring the
shutter
plunger in a convenient
position when using the camera in an
inverted
or
verticaI position.
After
the
first
picture
has oeen taken advance the film
to
the next
exposure
at
once.
ARGUS ACCESSORIES
The
shutte
r plunger (18) may be removed
....
j~
f.r.0~j~
f'
'7''
I~ns
barrel
by
!JOscrewin d
knurled sectIOn
rom
Ie
reiea' e socket
(17).
An.
Argus wire cable release
may
be
.,....
substituted. A cable release is desirable when
making
time exposures
or
using a slow
shutter
speed.
Argus filters
of
the
slip on
type
will fit
the filter
mount
(14)
of
all Argus Cameras.
Your
local Argus Dealer handles a com-
plete line of accessories for the Argus
Camera.
INTERNAT
,J
ONAL
RESEARCH
CORP
0
RAT
ION
Ann Arbol,
Michigan,
U.
S. A.
ABM.t5
PRINTED
IN
U.S.A.
/

Other Argus Digital Camera manuals

Argus DC-6340 User manual

Argus

Argus DC-6340 User manual

Argus QuickClix 1730 User manual

Argus

Argus QuickClix 1730 User manual

Argus QuickClix QC-3185 User manual

Argus

Argus QuickClix QC-3185 User manual

Argus DC1620 User manual

Argus

Argus DC1620 User manual

Argus C3 User manual

Argus

Argus C3 User manual

Argus QC-5340 User manual

Argus

Argus QC-5340 User manual

Argus QC-2185 User manual

Argus

Argus QC-2185 User manual

Argus Argus DC-2185 User manual

Argus

Argus Argus DC-2185 User manual

Argus DC-3195 User manual

Argus

Argus DC-3195 User manual

Argus DC 1600 User manual

Argus

Argus DC 1600 User manual

Argus Argus DC-1512E User manual

Argus

Argus Argus DC-1512E User manual

Argus DC-6340 User manual

Argus

Argus DC-6340 User manual

Argus DC1540 User manual

Argus

Argus DC1540 User manual

Argus Argus DC-5195 User manual

Argus

Argus Argus DC-5195 User manual

Argus DC2250 User manual

Argus

Argus DC2250 User manual

Argus Quick Click QC-5340 Specification sheet

Argus

Argus Quick Click QC-5340 Specification sheet

Argus DC1512 User manual

Argus

Argus DC1512 User manual

Argus Argus DC-5190 User manual

Argus

Argus Argus DC-5190 User manual

Argus Bean Bean - Carabiner User manual

Argus

Argus Bean Bean - Carabiner User manual

Argus Quick Clix QCM-099 User manual

Argus

Argus Quick Clix QCM-099 User manual

Argus cosina 704 User manual

Argus

Argus cosina 704 User manual

Argus QuickClix 3640 User manual

Argus

Argus QuickClix 3640 User manual

Argus DC-3185 User manual

Argus

Argus DC-3185 User manual

Argus DC-2185 User manual

Argus

Argus DC-2185 User manual

Popular Digital Camera manuals by other brands

Samsung WB350F user manual

Samsung

Samsung WB350F user manual

Guilin Feiyu Technology SUMMON+ user manual

Guilin Feiyu Technology

Guilin Feiyu Technology SUMMON+ user manual

Canon POWERSHOT A1300 Getting started

Canon

Canon POWERSHOT A1300 Getting started

Canon EOS-1 DX Mark III Advanced user's guide

Canon

Canon EOS-1 DX Mark III Advanced user's guide

TechVision HBE2L3WZ user manual

TechVision

TechVision HBE2L3WZ user manual

Olympus E-PL5 instruction manual

Olympus

Olympus E-PL5 instruction manual

Sony Cyber-shot DSC-RX0 instruction manual

Sony

Sony Cyber-shot DSC-RX0 instruction manual

Toshiba PDR-M500 Service manual

Toshiba

Toshiba PDR-M500 Service manual

Panasonic Lumix DMC-LX100 owner's manual

Panasonic

Panasonic Lumix DMC-LX100 owner's manual

Samsung SAMSUNG L700 user manual

Samsung

Samsung SAMSUNG L700 user manual

AIDA UHD-100 Operation guide

AIDA

AIDA UHD-100 Operation guide

FujiFilm FinePix F460 Brochure & specs

FujiFilm

FujiFilm FinePix F460 Brochure & specs

Sony Cyber-shot DSCW80B Specifications

Sony

Sony Cyber-shot DSCW80B Specifications

Sony A 7 R IV quick start guide

Sony

Sony A 7 R IV quick start guide

Sony DSC-G3 Cyber-shot® Handbook

Sony

Sony DSC-G3 Cyber-shot® Handbook

Minolta X-500 manual

Minolta

Minolta X-500 manual

Polaroid MiniPortrait 206 user manual

Polaroid

Polaroid MiniPortrait 206 user manual

Nikon COOLPIX AW120 user manual

Nikon

Nikon COOLPIX AW120 user manual

manuals.online logo
manuals.online logoBrands
  • About & Mission
  • Contact us
  • Privacy Policy
  • Terms and Conditions

Copyright 2025 Manuals.Online. All Rights Reserved.