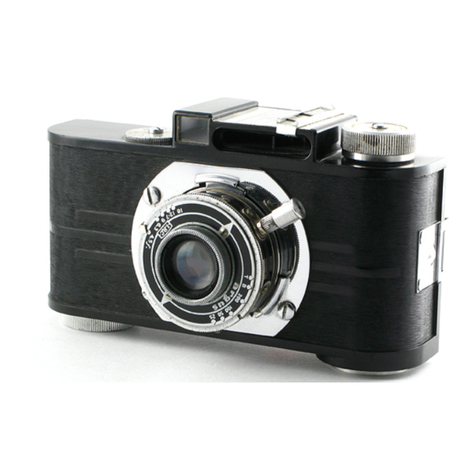
Argus C-33 User manual

a

contents
Functional
Parts.......
3,4
What
Makes
a
Picture....
5
Color-Matic
Settings...
. .
6
Setting
the
Shutter......
7
Setting
the
Lens........
8
Outdoor
Exposures......
9
Using
the
Rangefinder.
.
.10
Loading
Your
Camera.
.11,
12
Unloading
ei
ees
12
Using
the
Flash Unit.
.13,
14
Flash
Exposure
Guide...
.15
Changing
Lenses.......
16
Range
of
Sharpness.....
Specifications
.........
Service
Information...
..
Care
and
Cleaning...
..
.4

r
Argus
C33
is
a
fine,
precision
instrument
-easy
to
set
and
use
for
quick
picture-taking
ret
it
has
all
of
the
features
necessary
for
even
the
most
unusual
subject
and
lighting.
will
want
to
read
this
instruction
book
over
carefully
before
you
load
the
first
roll
o
f
film
so
you
will
not
miss
an
important
|
“picture
because
you
are
not
familiar
with
the
operation
of
the
camera.
If
you’re
planning
a
trip
or
pictures
of
a
special
mt,
it
is
wise
to
expose
a
practice
roll
first.
illustrations
i
in
this
book
may
not
show
the
latest
minor
_
changes
in
product
appearance,
_

ae
functional
<clp
parts
Lens
Opening
Scale
Filter
Retainer
Lens
Lock
Release
Range
of
Sharpness
Scale
Distance
Scale
Range
-Viewfinder
Windows
Rewind
Crank
Accessory
Shoe

i
ar
ie
ee
eee
Bs
aS
ee
Oe
Tc
bee
area
ca
<<,
et
re
These
are
the
important
functional
parts
of
your
C33.
Familiarize
yourself
with
them,
as
they
are
referred
to
throughout
this
book.
Shutter
Speed
Dial
Meter
Mounting
Foot
Film
Take-up
Drum
Rangefinder
Dial
Exposure
Counter
Int
Exposure
Counter
Window
Exposure
Counter
Shutter
Release
Sprocket
Wheel
Cable
Release
Socket
+
|
Back
Lock
Release
Film
Wind
Lever
Range
-Viewfinder
Ey

what
makes
a
picture?
First
there
is
the
lens
focusing
which
gives
a
clear,
sharp
image
on
the
film.
Line
up
the
rangefinder
images
by
turn-
ing
the
rangefinder
dial,
and
the
lens
is
automatically
focused
for
you.
The
next
adjustment
is
the
controls
the
amount
of
light
—
;
passing
through
the
,-._
lens.
The
largest
opening
has
the
|
smallest
number.
If
this
is
your
first
adjustable
cam-
era,
it
may
help
you
to
first
under-
stand
the
camera’s
three
simple
ad-
jJustments
which
assure
good
pictures.
Last
is
the
shutter
speed
adjustment
which
controls
the
length
of
time
that
light
can
pass
through
the
lens.
You
will
use
fast
speeds
(like
300)
for
ac-
tion,
alow
speeds
ve
30)
‘ec

color-matic
settings
Your
C33
has
a
complete
range
of
adjustments
for
all
types
of
pictures,
but
if
you
like,
it
can
be
pre-set
and
used
as
easily
as
a
box
camera.
The
Color-matic
settings
on
lens
opening,
shutter,
and
distance
scales
will
give
you
correct
outdoor
ex-
posures
for
average
subjects
in
bright
sunlight.
YELLOW
MARKINGS
are
used
with
Kodachrome.
RED
MARKINGS
are
used
with
Anscochrome
or
Ektachrome
Daylight
Color
Films,
Kodacolor,
or
Panatomic-X,
Supreme,
or
similar
black-and-
white
films
(ASA
25-50).
The
Color-matic
lens
setting
is
at
15
ft.,
but
subjects
between
9
and
50
ft.
will
be
in
focus.
For
subjects
outside
this
range
focus
with
the
rangefinder
(see
page
10).

Turn
the
shutter
speed
dial
until
the
desired
number
is
exactly
opposite
the
index
mark,
not
in-between.
The
illustration
shows
a
setting
of
60
(1/60).
The
numbers
are
fractions
of
a
second.
For
action
pictures,
use
1/125
or
1/300
second.
For
average
pictures,
use
1/60
or
1/125
second.
For
low-light
scenes,
use
1/30
second
or
lower.
B
is
used
for
exposures
longer
than
1
second.
When
the
shutter
is
on
B,
it
will
remain
open
as
long
as
the
release
is
held
down.
Use
a
cable
release
and
tripod
with
shutter
speeds
lower
than
1/30
and
when
taking
time
exposures.

You
set
the
lens
opening
by
turning
the
front
of
the
lens
to
the
right
or
left
until
the
desired
number
is
opposite
the
index
mark.
Lens
openings
may
be
set
on
or
between
the
numbers.
The
correct
lens
opening
to
use
may
be
obtained
by
(1)
using
the
Color-matic
setting,
(2)
using
the
Outdoor
Exposure
Guide
on
the
next
page
or
the
flash
information
on
pages
13-15,
(3)
using
the
data
packed
with
your
film
or
flashbulbs,
or
(4),
the
simplest
of
all
for
outdoor
pictures,
use
the
Argus
Coupled
Exposure
Meter
shown
on
page
22.
Bright
lighting
calls
for
small
lens
openings,
while
dim
lighting
usually
needs
large
lens
openings.
~
AVERAGE
setting
the
len:

OUTDOOR
EXPOSURE
GUIDE
SHUTTER
Bright
Hazy
CJoudy
Cloudy
coe
EM
SPEED
Sun
Sun
__
Bright
Dull
Anscochrome
Daylight
Ektachrome
Daylight
60
f/1l
£/8
£/5.6
£/4
Kodacolor
ee
Om
BRR
eB
gn)
lee
Ektachrome
Type
F*
60
8-1]
5.6-8
4-5.6
3.5
Super
Anscochrome
Day.
125
16
11
8
5.6
BLACK
AND
WHITE
Kodak
Panatomic-X
60
ll
8
5.6
4
Kodak
Plus-X
Pan 125
16
11
8
5.6
Ansco
Supreme
125
11
8
5.6
4
Ansco
Super
Hypan
300
22
16
11
8
Kodak
Tri-X
300
16
ll
8
5.6
*Filters
are
needed
when
using
indoor-type
color
film
outdoors.
See
the
instructions
packed
with
these
films.
Close
lens
one
stop
(dis-
tance
between
numbers)
from
chart
setting
for
light
subjects
(beach
and
snow
scenes).
Open
lens
one
stop
for
dark
subjects
(foliage,
dark
flowers,
animals.)
It
is
not
always
neces-
sary
to
use
speeds
in
this
chart.
For
instance,
the
chart
may
recommend
1/60
at
f/8.
To
use
1/125,
open
the
lens
one
stop
to
£/5.6
to
compensate
for
the
faster
speed.
If
you
wanted
a
speed
half
as
fast
(1/30),
close
the
lens
one
stop
(to
f/11).

The
combined
viewfinder-
rangefinder
on
the
C33
makes
focusing
easy.
Just
sight
through
the
viewfinder
and
turn
the
rangefinder
dial
with
your
finger
until
the
images
are
aligned
as
shown
in
the
illustrations
below.
A.
picture
can
be
taken,
as
well
as
focused,
with
the
camera
in
either
a
horizontal
or
vertical
position.
Hold
the
camera
so
that
the
framing
best
suits
the
subject.

1
To
open
for
loading,
push
up
back
lock
and
pull
back
open
from
top.
Re-
lease
rewind
crank
by
sliding
red
but-
ton
away
from
arrow.
Pull
crank
up
until
knob
lifts
out
of
recess.
Place
film
magazine
in
camera
(long
end
of
spool
down).
Push
down
on
knob,
turning
if
necessary,
until
it
snaps
back
into
place.
Push
crank
back
in.
2
Pull
rewind
lever
(on
bottom)
down
and
turn
film
take-up
drum
until
metal
hook
is
on
top.
Push
rewind
lever
back
up.
Place
film
leader
over
ol=Tobbet=4
drum
so
one
of
the
perforations
on
end
engages
hook.
Keeping
tension
on
film,
move
film
wind
lever
through
a
full
stroke,
then
press
shutter
release.
3
Film
should
now
lie
flat
and
end
should
be
securely
fastened.
Set
counter
dial
(see
illustration
3)
until
‘‘set
20”
or
‘‘set
36’?
(depending
on
exposures
on
your
roll)
appears.
Close
camera
back.
(Back
will
not
close
unless
counter
has
been
set.)
4
Move
film
wind
lever
through
another
full
stroke,
press
shutter
re-

lease,
wind
film
once
more,
and
again
press
shutter
release.
Counter
will
now
read
20
(or
36).
You
are
now
ready
to
wind
for
your
first
picture.
Counter
tells
how
many
pictures
re-
main
on
roll,
and
also
shows
that
film
is
transporting
properly.
Accidentally
moving
wind
lever
more
than
once
will
do
no
harm,
as
film
will
only
advance
one
frame
between
exposures.
To
in-
tentionally
double-expose,
pull
rewind
lever
down
while
you
move
wind
lever
full
stroke.
Push
rewind
lever
back
up.
peut
te
b
aS
When
exposure
counter
reads
0
and
you
have
taken
that
last
picture,
do
not
try
to
wind
film
any
farther
or
you
may
double
expose
the
last
picture.
Before
camera
is
opened,
film
must
be
rewound.
Pull
down
rewind
lever
on
bottom
of
camera,
release
rewind
crank,
then
rewind
film
until
counter
stops
moving.
Open
back,
pull
rewind
knob
up,
remove
film,
and
take
it
to
dealer
for
processing.
Reset
counter
dial
before
attempting
to
close
back,
and
push
re-
wind
lever,
knob,
and
crank
back
in.

13
oO
To
install
battery,
pull
metal
cover
down
and
lift
up
on
black
inner
cover.
Remove
top
of
battery
compartment
and
install
22.5V
battery
with
(+)
positive
end
up.
(see
specifications,
page
18).
Push
battery
in
to
seat,
replace
compartment
cover.
With
inner
cover
(which
holds
reflec-
tor)
straight
up,
close
metal
cover
to
lock
reflector
support
in
place.
Open
using
the
flash
unit
reflector
by
turning
top
blade
clock-
wise—other
blades
will
follow.
Place
tab
on
edge
of
top
blade
into
slot
in
bottom
blade.
(Reverse
procedure
to
fold).
Plug
unit
into
camera.
Align
pins
on
bayonet-base
bulbs
with
slots
in
socket.
Push
bulb
in,
do
not
twist.
Socket
holds
bayonet-base
or
M-
base
bulbs
without
adjustment.
Do
not
have
flashbulb
in
place
when
plugging
unit
into
camera.

TESTING
THE
FLASH
CIRCUIT—
With
flashbulb
in
place,
you
can
test
entire
flash
unit
circuit
and
bulb
with Test
Light
button.
If
everything
is
working
properly,
the
button
will
flash
briefly
as
it
is
pressed.
THE
FLASH
CALCULATOR—Calculator
a
on
back
of
unit
shows
lens
opening
to
use.
I
Turn
calculator
dial
to
guide
number
i
(see
page
15)
for
your
film
and
flashbulb.
Ags
2
Focus
with
rangefinder
to
find
subject
distance,
=
Mer
5
3
look
opposite
this
distance
on
dial
to
find
lens
opening.
Set
this
on
lens.
There
is
a
different
opening
for
every
distance.
Illustration
shows
guide
number
setting
of
100.
EJECTING
A
USED
FLASH
BULB—Push
round
metal
button
on
back
of
reflector
support
to
eject
used
flashbulb.

FLASH
EXPOSURE
GUIDE
Sylvania
Sylvania
FILM
FLASHBULBS)
M25
M2
ot
Use
X
sync.
setting
Sylvania
Press
25
and
Press
MO
Use
M
sync.
setting
SHUTTER
SPEEDS)
to
1/30
to
1/30
to
1/60
1/125
1/300
Ektachrome
Type
F
Kodacolor
130
80
TBO
Vet00)
5780
Ss
Type
F
100
65
100
75
60
?
7
vse
hes
flashbulbs
with
daylight
color
film
Pam
OBi
as
pe
Roan
5
ra
55
‘
scochrome
Day.
170160"
Kodak
Trex
320
220
320
250
190
‘t
Kodak
Plus-X
Pan
230
145
230
175
130
Kodak
Panatomic-X
125
85
125
100
75
Ansco
Super
Hypan
490
340 490
380
240
Ansco
Supreme
160 100 160
125
95
a
*Use
this
flashbulb
(M2B)
for
outdoor
fill-in
flash
only.
Flashbulbs
occasionally
shat-
ter,
and
to
avoid
any
possible
damage,
a
translucent
shield
may
be
used
over
the
reflec-
tor.
Never
use
flash
in
an
explosive
atmosphere.
Set
the
camera’s
M-X
syn-
chronization
selector
for
the
flashbulb
you
are
using.
See
chart.
Guide
numbers
are
in-
tended
as
guides
only,
and
may
be
adjusted
up
or
down.
Remember
to
reset
calculator
to
new
guide
number
when-
ever
you
change
shutter
speeds,
film,
or
flashbulbs.
Guide
numbers
for
electronic
flash
units
are
furnished
by
the
manufacturer
of
the
unit.

To
remove
lens,
set
to
any
distance
greater
than
4’.
Grasp
lens
as
shown
with
right
fore-
finger
on
lens
lock
release.
Press
up
on
release,
and
rotate
lens
counter-clockwise,
allowing
rangefinder
dial
and
lens
mount
ring
to
turn.
After
about
%
turn,
lens
will
lift
out.
To
install
any
lens,
align
red
dots
on
camera
body
and
lens
mount
ring
by
turning
range-
finder.
Align
red
dots
on
rear
of
lens.
Insert
lens
so
notch
in
lens’
distance
scale
ring
fits
Over
projection
on
lens
mount
ring.
When
|
seated,
rotate
the
lens
clockwise
until
locked.
Never
leave
camera
without
lens
installed.
Avoid
changing
lenses
in
direct
sunlight.

17
range
of
sharpness
Even
though
you
focus
on
a
single
subject
in
your
picture,
more
than
that
subject
will
be
sharp
due
to
the
“range
of
sharpness’’
or
depth
of
field
of
your
camera
lens.
The
sharpness
range
extends
both
in
front
of
and
beyond
the
point
focused
upon.
It
depends
on
the
lens
opening
and
the
focusing
distance
used.
To
find
the
range
in
a
picture,
first
focus
on
the
principal
subject
(with
the
rangefinder).
Now
look
on
both
sides
of
the
distance
scale
index
mark
for
the
lens
opening
you
are
using.
Directly
below
these
numbers
are
the
near
and
far
points
of
sharp
focus.
Example:
Illustration
shows
lens
opening
of
f/8
and
focusing
distance
of
15
feet.
Below
f/8
on
each
side
of
the
scale
are
near
and
far
points
of
sharp
focus—approximately
81%’
to
50’.

specifications
LENS:
50mm
f/3.5
Argus
Cintar,
color-cor-
rected,
coated
anastigmat;
click-stop
lens
openings
from
f/3.5
to
f/22;
rangefinder-
coupled
focusing;
hyperfocal
distance:
46/2”
at
£/3.5;
field:
27°
x
40°
angular
at
infinity.
SHUTTER:
Behind-the-lens
type,
9
speeds
from
1
second
to
1/300
second,
plus
B;
click-stop
settings;
cocking
action
coupled
with
the
film
wind;
full
M-X
synchronization.
OTHER
FEATURES:
Rugged,
molded
body
with
brushed
chrome
trim;
hinged
metal
back;
automatic
exposure
counter
with
back
interlock;
single-stroke
film
wind;
double-
exposure
prevention
with
intentional
release.
18
FILM
SIZE:
35mm
cartridge
(size 135),
20
or
36
exposure,
color
or
black-and-
white
film.
LENS
ACCESSORIES:
Standard
lens
has
built-in
retainer
which
unscrews
to
hold
Series
V
(1%6”)
filters
and
supple-
mentary
lens;
Series
VI
(154)
filters
can
be
placed
on
outside
of
retainer
and
held
on
with
a
standard
Series
VI
sunshade.
FLASH:
Plugs
into
side
of
the
camera,
no
wires
to
connect;
folding
reflector
accepts
bayonet-base
or
M-base
flash-
bulbs;
battery-capacitor
type
with
test
light
and
flash
calculator;
accepts
one
22.5V
battery—Ray-0-Vac
221,
Eveready
505,
Burgess
Y15,
Bright
Star
22P,
or
equiv.
Push-button
flashbulb
ejection.

DENTIFICATION
CARD”
Carefully
cut
this
card
from
the
page
and
keep
it
in
your
wallet
or
other
safe
place
for
future
reference.
For
service,
replacement
parts,
or
further
information
on
the
operation
of
your
camera,
see
your
local
Argus
dealer
or
write
to:
CUSTOMER
SERVICE
DEPARTMENT
ARGUS
CAMERAS,
ANN
ARBOR,
MICHIGAN
Division
of
Sylvania
Electric
Products
Inc.
In
Canada,
write
to:
ARGUS
CAMERAS
OF
CANADA,
LTD.
REXDALE,
P.0.,
TORONTO,
ONTARIO
When
writing
about
your
camera,
always
mention
the
camera
model
number
and
serial
number
(found
on
the
bottom).
'
fic
nut
7)
of
Lu
woe
SSH
ee
He
ee
ae
|
\
$B2
se
ze
fe
ge
=Zo>
So)
Se
an
a
19
|
a
ES
BB
rhe
a5
p
|
One
esrs
2.
us
se
Table of contents
Other Argus Digital Camera manuals

Argus
Argus DC2200 User manual

Argus
Argus DC1730 User manual

Argus
Argus cosina 704 User manual

Argus
Argus DC-6340 User manual

Argus
Argus DC3550 User manual

Argus
Argus Argus DC-1512E User manual

Argus
Argus DC-2185 User manual

Argus
Argus QC-3195B User manual

Argus
Argus Argus DC-2185 User manual

Argus
Argus QC-3195B User manual

Argus
Argus Quick Clix QCM-099 User manual

Argus
Argus DCV-011 User manual

Argus
Argus DC1500 User manual

Argus
Argus DC1620 User manual

Argus
Argus DC1540 User manual

Argus
Argus DC-3190 User manual

Argus
Argus DC1510 User manual

Argus
Argus QC-3185 User manual

Argus
Argus 803 User manual
Argus
Argus DCM-098 User manual