In this camera the dia
phr
agm
wi
ll
usua
ll
y
be
se
t by
th
e u
se
of
the
exposure meter
as
described above. However, s
hutt
er sp
ee
ds
should be
se
lected which will let the meter
stop the diaphragm at openings which give
th
e requi
re
d de
pth
of
fie
ld.
FOCUSING
T he lens is fo
cu
se
d by turning of ring
(5, Fig. 1). T he lens is
se
t to focus on an
obj
ec
t at the distan
ce
fr
om the camera which
appea rs on
th
e ring opposite the arrow on
the core. For q
ui
ck focusing on candid sh
ots
the focusing scale is
di
vided up i
nt
o "zones"
of d
iff
erent color
s.
T
he
zone from in
fi
ni
ty to
18 feet be
in
g for dista
nt
and landscape work,
the 18 to 6 foot zone for nearby groups and
object
s,
and the close up zone from 6 feet
to
3.5
feet is for po
rtr
a
itur
e and very
cl
ose
objects. T he de
pth
of fo
cu
s of the Argus lens
is
so
great that very good results can be o
b-
tained by just focus
in
g to
th
e
pr
oper zone
an.d shootin
g.
T
hi
s permits
of
gr
eat speed in
uS
In
g the camer
a.
Wh
ere critical sharpness of
a certain obj
ec
t and where maximum e
n-
lar
ge
me
nt
is d
es
ire
d.
se
t
th
e scale to
th
e
exact foota
ge
.
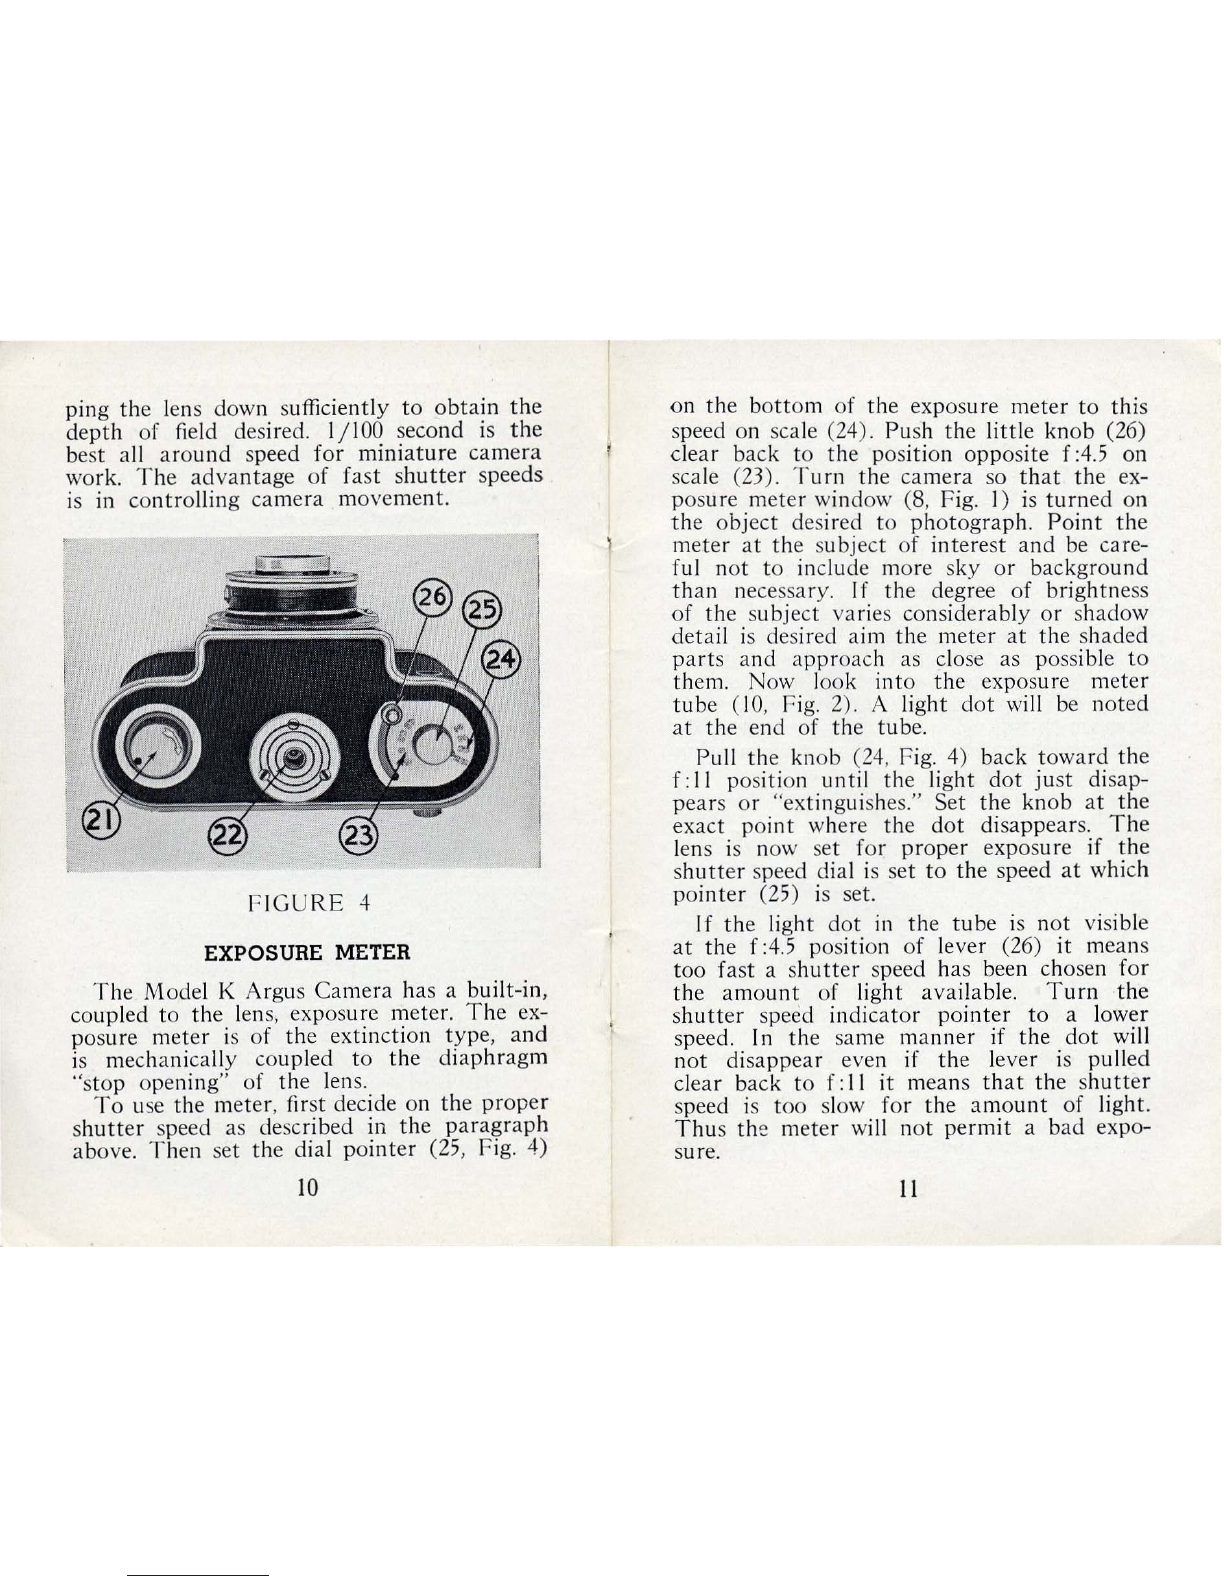
TRIPOD SOCKET
. T he tripod socket (2
2,
Fi
g.
4) is tapped
with the standard Ame
ri
can
thr
ead. Any Am-
e
ri
can or Argus
tr
ipod wi
ll
fit Argus Cameras.
14
AIM AND SHOOT
Th
e camera is aimed at the subje
ct
by
hold
lI1
g
th
e back of the camera firmly against
the face or fo rehead and sighting
throu
gh
the rear vI
ew
finder ( 1I, Fig. 2).
Th
e vi
ew
fin
der sh
ow
s the subj
ec
t as
it
will appear
when photographed.
Th
e view
fin
der is pur-
posely d
es
igned to cover s
li
ghtly less of the
subj
ec
t
th
an that actually photographed.
Thi
s di
ffe
ren
ce
pr
ovides a safety factor and
jJreve
nt
s c
uttin
g o
ff
parts
of
i
nt
er
es
ting sub-
Jects.
Wh
en
th
e subject has b
ee
n corr
ec
tly
ce
n-
tered and composed
in
th
e view finder you
are ready to make the actual
ex
pos
ur
e.
T he s
hut
ter sho
ul
d be operated with a
steady squeezing action on the
le
ver,
(2,
Fi
g.
1) while the camera is held
fi
rmly against
the face.
INTERNATIONAL INDUSTRIES. INC.
Ann
Arbor.
Michigan
.
U.
S. A.
CD"47
Printed in U.S.A.
15