Aries Acrylic Aries Spas User manual

ARIES SPAS
BY ARIES ACRYLIC MFG., INC.
OWNER'S MANUAL

BY ARIES ACRYLIC MANUFACTURING, INC. 4176 I-30 EAST ROCKWALL, TEXAS 75087
ARIES SPAS
ARIES SPAS
OWNER'S MANUAL
Copyright © 2001 Aries Acrylic Mfg., Inc.
4176 I-30 East
Rockwall, Texas 75087 • (972) 771-6286
Printed in the USA

Aries Spas • User Manual
ii
IMPORTANT SAFETY INSTRUCTIONS
READ AND FOLLOW ALL INSTRUCTIONS
• WARNING-Toreducetheriskofinjury,donotpermit
childrentousethisproductunlesstheyarecloselysupervised
atalltimes.
• Awireconnectorisprovidedonthisunittoconnectamini-
mumNo.8AWG(8.4mm2)solidcopperconductorbetween
thisunitandanymetalequipment,metalenclosuresofelectri-
calequipment,metalwaterpipe,orconduitwithin5feet(1.5
m)oftheunit.
• WARNING-Thisproductisprovidedwithaground-fault
circuit-interrupteronthesideofthecontrolbox(beneaththe
spa).TheGFCImustbetestedbeforeeachuse.Withtheprod-
uctoperating,opentheservicedoor.Iftheproductstopsoper-
ating,thismerelyindicatesthatthedoorisequippedwithan
electricalinterlock.Next,pushthetestbuttonontheGFCIand
closetheservicedoor.Theproductshouldnotoperate.Now,
opentheservicedoor,pushtheresetbuttonontheGFCIand
closetheservicedoor.Theproductshouldnowoperatenor-
mally.Iftheproductfailstooperateinthismanner,thereisa
groundcurrentowingindicatingthepossibilityofanelectric
shock.Disconnectthepoweruntilthefaulthasbeenidentied
andcorrected.

Aries Spas • User Manual
• DANGER-RiskofAccidentalDrowning.Extremecaution
mustbeexercisedtopreventunauthorizedaccessbychildren.
Toavoidaccidents,ensurethatchildrencannotusethisspaun-
lesstheyaresupervisedatalltimes.
• DANGER-Riskofinjury.Thesuctionttingsinthisspa
aresizedtomatchthespecicwaterowcreatedbythepump.
Shouldtheneedarisetoreplacethesuctionttingsorthe
pump,besurethattheowratesarecompatible.
• DANGER-RiskofElectricShock.Installatleast5feet
(1.5m)fromallmetalsurfaces.Asanalternative,aspamaybe
installedwithin5feetofmetalsurfacesifeachmetalsurfaceis
permanentlyconnectedbyaminimumNo.8AWG(8.4mm2)
solidcopperconductortothewireconnectorontheterminal
boxthatisprovidedforthispurpose.
• DANGER-RiskofElectricShock.Donotpermitanyelec-
tricappliance,suchasalight,telephone,radio,television,
within5feet(1.5M)ofaspa.
• WARNING-Toreducetheriskofinjury:
• Thewaterinthespashouldneverexceed40˚C(104˚
F).Watertemperaturesbetween38˚C(100˚F)and40˚C
areconsideredsafeforahealthyadult.Lowerwatertem-
peraturesarerecommendedforyoungchildrenandwhen
spauseexceeds10minutes.

Aries Spas • User Manual
iv
• Sinceexcessivewatertemperatureshaveahighpo-
tentialforcausingfetaldamageduringtheearlymonthsof
pregnancy,pregnantorpossiblypregnantwomenshouldn't
limitspawatertemperaturesto38˚C(100˚F).
• Beforeenteringaspa,theusershouldmeasurethe
watertemperaturewithanaccuratethermometersincethe
toleranceofwatertemperature-regulatingdevicesvaries.
• Theuseofalcohol,drugs,ormedicationbeforeor
duringspausemayleadtounconsciousnesswiththepos-
sibilityofdrowning.
• Personssufferingfromobesityorwithamedicalhis-
toryofheartdisease,loworhighbloodpressure,circulato-
rysystemproblems,ordiabetesshouldconsultaphysician
beforeusingaspa.
• Personsusingmedicationshouldconsultaphysician
beforeusingaspasincesomemedicationsmayaffectheart
rate,bloodpressure,andcirculation.
SAVE THESE INSTRUCTIONS.

Aries Spas • User Manual
About this manual
Thisbookletwasdesignedtobeanaidinunderstanding
theoperation,functions,andmaintenanceofyourAries
Spa.
ToreceivemaximumpleasurefromyourAriesSpa,itis
helpfultounderstandhowthespaoperatesandtohave
knowledgeofpropermaintenanceprocedures.
Differentapplicationsandinstallationsrequirevarious
typesofequipment.Ifyourequipmentisdifferentfrom
thatdescribedinthismanual,itmaybenecessarytorefer
toanymanualssuppliedbyyourequipmentmanufacturer
forspecicoperatingandinstallationinformation.
Wehopethatthismanualwillgiveyoualltheinformation
neededtounderstandthebasicsofoperationandmain-
tenanceofyourspa.Ifyouhavequestionsthatwerenot
answeredinthisbooklet,pleasegiveusacall.
Enjoy,
ThestaffatAriesSpas

Aries Spas • User Manual
vi
Contents
Important Safety Instructions ............................................ii
About this manual ........................................................... v
Installation ...................................................................... 1
Electrical Hookup........................................................ 1
Replacement of Controls ............................................ 2
Location..................................................................... 2
Operation ....................................................................... 3
Initial Start-up ............................................................ 3
Filling your Spa .......................................................... 3
Starting your Circulating Pump .................................... 3
Equipment Pack .............................................................. 5
Power Switch (GFCI)................................................... 5
GFCI Breaker “Test” and “Reset” Buttons..................... 5
Spa-Side Controls............................................................ 6
Digital Temperature Readout ....................................... 7
Increase / Decrease Arrows......................................... 7
Function Buttons........................................................ 7
Air Button............................................................... 7
Light Button ............................................................ 8
Jet Button .............................................................. 8
L.E.D Indicator Lights .................................................. 8
Set Light................................................................. 9
Jets Lights .............................................................. 9
Air Light.................................................................. 9
Heat Light ............................................................... 9
Special Features.............................................................. 9

Aries Spas • User Manual
L.E.D. Display Inversion............................................... 9
"Good Night" Function............................................... 10
Auto-Purge Cleansing ............................................... 10
Internal Clock ........................................................... 10
24 Hour / 12 Hour Circulation Mode ........................... 10
Freeze Protection ..................................................... 12
Internal High Limit Switch.......................................... 12
Interior Fittings.............................................................. 12
Venturi Controls (Air Controls)................................... 12
Circulation Fittings.................................................... 13
Suction Fittings ..................................................... 14
Hydrotherapy / Massage Jets.................................. 14
Standard Jets........................................................ 15
Circular Jets.......................................................... 15
RotoJet ................................................................ 16
Neck Jets ............................................................. 16
Circulation & Recovery Jets ................................... 17
Air Injectors ............................................................. 18
Maintenance ................................................................. 18
Filter ....................................................................... 18
Cleaning Your Filter................................................ 18
Water Treatment....................................................... 21
Disinfectants......................................................... 21
Bromine Products.............................................. 21
Ozone Generator............................................... 22
Adjusting pH ......................................................... 22
Preventing Hard Water or Stain Damage .................. 23
Preventing Algae................................................... 23
Caring For Your Spa's Surface.................................... 24

Aries Spas • User Manual
viii
Deep-Cleaning of Plumbing Lines............................... 24
Draining Your Spa ..................................................... 25
Troubleshooting Guide ................................................... 26
Appendix A - Electrical Connections................................ 33
Electrical Diagram for Electronic Controls ................... 33
Electrical Connections for Electronic Controls ............. 33

Page 1
Aries Spas • User Manual
Installation of Portable Spa
HAVEYOURELECTRICIANREADBEFOREINSTALLATIONBE-
GINS!
(SeeappendixAforwiringdiagram)
Pleasecontactaqualiedelectriciantowireyourspa.
AllAriesSpashaveaHighcurrentGFCI(ground-faultcurrentinterrupt-
er)builtin.Astandardcircuitbreakerisrequiredinyourcircuitsupply
panel.Do not use a GFCI-type breaker in your supply panel.
AllAriesSpasrequirea220voltsupplycircuitconsistingoffourwires.
Use#6AWGwire(copperconductorsonly).
Allmetalcomponentsoftheequipmentassembyhavebondinglugs.
Theselugsshouldbeconnectedtogetherwithaminimum#6AWGcop-
perconductor.
Allspaequipmentpacksrequireadedicatedbreaker.Thebreakershould
be50amp,(60ampfordouble-jetpumpsystem)singlephase,220volt
service,consistingoffourwires;twohotwires,aneutralwireanda
groundwire.Wiresizeisdeterminedbylengthofrun,butgenerally#8
wirefor0-50feetand#6wirefor51+feetisrecommended.Thismight
vary,dependingonlengthofrunorotherunforeseenfactors.Any varia-
tion from this service will void warranty.
Thecontrolenclosureshouldbeinstalledsuchthattheheaterhousingis
inalevel,horizontalpositionandthebottomoftheenclosureisapproxi-
matelyfourinchesabovegroundlevel.
AllAriesSpasaredesignedtobepermanentlyconnectedunits,consisting
ofpumps,heater,lightxtureandSpa-SideControl.

Page 2
Aries Spas • User Manual
Itistheresponsibilityofthespaownertoinsurethatelectricalconnec-
tionsaremadebyaqualiedelectricianinaccordancewiththeNational
ElectricCodeandanylocalandStateElectricalCodesinforceatthetime
ofinstallation.Theseconnectionsmustbemadeinaccordancewiththe
wiringdiagramsfoundinsidethecontrolboxandthewiringdiagrams
withinthismanual.Thisequipmenthasbeendesignedtooperateon60
Hzalternatingcurrentonlyandat240Volts.Makesurethatpowerisnot
appliedwhileperforminganyelectricalinstallation.Acopperbondinglug
hasbeenprovidedontheelectricalequipmentpacktoallowconnection
tolocalgroundedpoints.Thegroundwiremustbeatleast8guagesolid
copperandmustbeconnectedsecurelytoagroudedmetalstructure.
Replacement of an existing control
Follow the instructions above for the control installation so tht the
proper settings are made for current and voltage that the spa was
connected to. The replacement electronic control was shipped with
the temperature sensor mounted in the heater housing and does
not require the connection of the temperature sensor mounted in
the spa.
Location
It is very important that your spa be located on a solid, level
foundation.
Alledspaisveryheavy(upto5000lbs.),withmostoftheweightrest-
ingonthecenterportion.Withoutrmsupportforthebottomofthespa,
settlingcanoccur,causingtheoutsideedgeor“lip”ofthespatocarrythe
weight-load,pullingthespaoutofshape.Cement blocks are not accept-
able, unless they are concreted into place.
A4"thickconcretepadisthedesiredfoundation.Ifabalconyordeckis
use,theymustsupportatleast75poundspersquarefoot.
Aries Spas will not be responsible for damages incurred on spas
placed on other than level, solid surfaces.

Page 3
Aries Spas • User Manual
Ifyourspaislocatednearwatersprinklers,adjustorrelocatethemsothat
waterwillnothitthesidingofthespa.
Gatesgivingaccesstothespashouldbeself-closingandself-lockingfor
safety.
Operation
Initial Start-up
Please read this section fully before attempting initial start-up of
your spa.
Always turn the thermostat(s) and electric power off when lling or
draining the spa, and always fully open any valves that could restrict
water ow to and from the heater element.
Filling your Spa
Yourspashouldbelledwithwatertoapproximatelythebottomslitin
theskimmer(toidentify,seepictureofskimmerinthe“SuctionsFittings”
sectionofthismanual).Thewaterlevelshouldneverbebelowtheregu-
larorwhirlingjets,butshouldnevercoveranyneckjets,therecoveryjet
(see“Jets”sectionforpicture)orbuilt-inpillows.Do not overll spa.
Starting your Circulating Pump
Turnonyourhomecircuitbreakerandservicedisconnect(ifapplicable).
Pushthered“reset”buttonontheGFCI,locatedontherightsideofthe
blackequipmentbox.Within5seconds,thecontinuousrunningcircula-
tionpumpshouldcomeonandstart
movingwater.
If,withinafewseconds,waterisnot
observedowingfromReturnJets
(see“Jets”sectionfordescription),
lifttheacryliclidthatcoversyour
TopLoadingPressureFilter,and
Equipment Box

Page 4
Aries Spas • User Manual
releaseanytrappedairbyturningtheBleedValve(thesmallvalvelo-
catedonthelterlid)counterclockwiseuntilyouhearareleaseofair.Do
not totally unscrew or remove the Bleed Valve. Do not remove the black
locking ring of the lter lid at this time or serious damage could occur.
OpeningtheBleedValve
willallowanytrappedair
tobepurgedandsome
gurglingorbubblesmay
comefromtheReturn
Jets.Onceasteadystream
ofwaterstartsspurting
fromtheBleedValve,
retightenbyturningina
clockwisedirectionuntil
hand-tight.(Formore
informationontheBleedValve,seethe“TopLoadingPressureFilter”
sectionofthismanual.)
OncetheCirculatingPumpmotorisrunningandwateriscirculating
properly,youshouldbeabletoobservewaterand/orbubblescoming
fromthetwoCirculationJets(oneregular-sized,onesmall)usually
locatednearyourstepsand/orthelight.Thisindicatesthatthewateris
circulatingproperly.
Ifnowaterowisobserved,dothefollowing:
1. ListentomakesurethattheCirculatingPumpmotorisrun-
ning.
2. MakesurethattheKnife(“T”shaped)Valvesareopen.These
valvesarelocatedoneithersideoftheblackcontrolbox.They
areopenedifthehandlesareextendedasfaroutastheywill
go.Whenopened,youshouldbeabletoseeeithertheexposed
silverrodoraredretainerclip.
3. RechecktheBleedValveonthelterlidtomakesureyouhave
GFCI

Page 5
Aries Spas • User Manual
releasedalltrappedair.Sometimesdrainingasmallamountof
waterfromtheHoseBib(locatedbytheEquipmentPack)is
alsohelpfulforreleasinganairlock.
Ifyouhavetriedalltheabove,andthereisstillnovisiblewaterow
comingfromtheCirculationJets,STOP! Pushtheblack“Test”buttonon
theGFCItoturnspaoffandcalltheAriesSpasFactoryimmediately!Do
notgoontothenextsteporseriousdamagemayoccurtoyourspaequip-
mentpack.
OnceyouaresurethattheCirculatingPumpmotoriscirculatingthewa-
ter,proceedtothenextsection.
Controls
Power Switch (GFCI)
YourAriesSpaEquipmentPackisprovidedwithaground-faultcir-
cuitinterrupter(GFCI).ThisGFCImaylookand/oroperatesimilarto
oneyoumayhaveinyourhome,butknowthatitisahighlyspecial-
izeddeviceexclusivetoyourAriesSpa.Itislocatedontherightsideof
theEquipmentPack(notonthefaceoftheequipmentpack).Electrical
problemswithinthespaequipmentaremonitoredbythisdevice.Ifany
potentialshocksituationdoesoccur,thisdevicewillinterruptthepower
supply,therebyremovingthepotentialofdangertoequipmentand/orhu-
manoccupants.
YoucanusethisGFCIasasystem“On-Off”switch.
GFCI Breaker (Test) and (Reset) Buttons
TomakesurethattheGFCIbreakerisoperatingproperly,presstheblack
buttonlabeled“Test”.Ifoperatingnormally,theEquipmentPackwill
shutoff,andtheblackbuttonwillpopoutandrequireresetting.Thesame
willhappenifwatercomesintocontactwiththecomponents.
Toreset,pushthered“Reset”button.Iftheequipmenthasbeenwet,and
theblackbuttonimmediatelypopsoutagain,waitasufcientamountof

Page 6
Aries Spas • User Manual
timeforallmoisturetoevaporate,andtrytoresetagain.Ifitcontinuesto
popout,callyourspadealerorAriesFactory.
Spa-Side Controls
YourAriesSpaequipmentiscomposedofstate-of-the-artmicroproces-
sorcircuitry,similartothatofahomecomputer.Alluser-functionsand
operationalchangesaredoneviatheTopSidespacontrol.
Setting the Desired Temperature
TheThermostatcanbesettotemperatureswithinarangefrom80˚
through106˚asdescribedbelow.Ifyoutrytoadjustlowerthan80˚,the
displaywillcyclebacktothehighestdegree,106˚.Ifyoutrytoadjust
above106˚,thedisplaywillcirclebackto80˚.
Usethedigitalreadoutandyourpersonalpreferencesasaguideinadjust-
ingthethermostat.
IMPORTANT: At
no time should the
temperature be set
or left at 81˚. This
is a programming
setting, and
you could
unintentionally permanently alter the operational system.
Permanent damage to internal programming can occur and will
not be warranted.
WARNING: Prolonged immersion in hot water may
induce hyperthermia. The causes, symptoms and effects of
hyperthermia may be described as follows: Hyperthermia
occurs when the internal temperature of the body reaches
a level several degrees above the normal body temperature
of 37˚C (98.6˚F). The symptoms of hyperthermia include
drowsiness, lethargy and an increase in the internal
Spa-Side Controls

Page 7
Aries Spas • User Manual
temperature of the body. The effects of hyperthermia include:
◊ Unawareness of impending hazard
◊ Failure to perceive heat
◊ Failure to recognize the need to exit the spa
◊ Physical inability to exit the spa
◊ Fetal damage in pregnant women
◊ Unconsciousness and danger of drowning
WARNING-Theuseofalcohol,drugsormedicationcangreatlyincrease
theriskoffatalhyperthermia.
Digital Temperature Readout / Adjustment Readout
TheSpa-SideControlhasadigitalreadoutofthespa'swatertemperature.
(Itisnotuncommonforthetemperatureshowntovaryfromtheactual
watertemperaturebyafewdegrees.)Thisreadoutalsodisplaysthede-
siredtemperatureasyoureset(seebelow).
Increase (Up) and Decrease (Down) Arrows
Toincreasethewatertemperature,pushthe“uparrow”button(shaped
likeatriangle).Todecreasethetemperature,pushthe“downarrow”but-
ton.Asyoumakeadjustments,thedigitaltemperaturereadout,whichpre-
viouslyshowedtheactualwatertemperature,willtemporarilyshowthe
"desiredtemperature"youareadjustingto.Oncethedesiredtemperature
isdisplayed,releasetheadjustmentarrow.
Function Buttons
“Air” Button
ThisbuttonoperatestheAirBlowerPump.ItforcesairthroughtheAir
Injectors(ttingsinthespaseatsthatintroduceairintothespaunder
pressure.Theyresemblesaltshakertops).PushtheairbuttonandtheAir
Blowerwillcomeon.PushitagainandtheBlowerwillshutoff.Ifthe
AirBloweristurnedonandleftrunning,itwillautomaticallyturnoff
after30minutes.
Formoreinformation,pleasereferto"AirInjectorFittings"sectionin

Page 8
Aries Spas • User Manual
thismanual.
“Light” Button
ThisbuttonoperatestheSpaLight,whichisusuallylocatedinthestep
areaofyourspa.Pushthebuttononceandthelightwillturnon.Pushit
againandthelightwillturnoff.
Aspecial"GoodNight"functionofthe"Light"ButtonturnsoffallJet
andBlowerpumpswhenthelightisturnedoff.Thisallowstheuserto
leavethespafortheeveningwithouthavingtoturnoffseveralcompo-
nents.
“Jets” Button
Thisbuttonoperatestheallthedifferenttypesofhydrotherapymassage
jetsinyourspa.PressthebuttonandtheJetPumpwillturnon.Press
againandtheJetPumpwillturnoff.
Onspasequippedwith2JetPumps,eachpressofthebuttonputsthespa
throughonestepofthefollowingcycle:
1)JetPumpAturnson
2)JetPumpBturnson(bothpumpsarenowrunning)
3)JetPumpAturnsoff(JetPumpBwillstillberunning)
4)BothPumpsturnoff
Ifleftrunning,theJetPumpwillturnoffautomaticallyafter30minutes.
L.E.D. Indicator Lights
ThereareseveralIndicatorLightsonyourSpa-sideControl.Theywill
lightatcertaintimes,asdescribedbelow:
"Set" Indicator Light
Function Buttons

Page 9
Aries Spas • User Manual
Asyouadjusttoyourdesiredtemperaturesettingsusingtheadjustment
arrows,the"Set"lightwillilluminate.Afewsecondsafterreleasingthe
arrows,the"SET"lightwillgooffandthedigitalreadoutwillagainshow
theactualwatertemperature.
“Jets B” Light
ThislightwillilluminatewhenthesecondJetPumpisactivated.(This
appliesonlytospasequippedwithtwoJetPumps.)
“Jets A” Light
ThislightwillilluminatewhentheJetPumpisactivated.(Thisappliesto
allAriesSpas.)
“Air” Light
ThislightwillilluminatewhentheAirBlowerPumpisactivated.
“Heat” Light
Thislightwillilluminateanytimetheheaterisoperating.Whenthewater
reachesthedesiredtemperaturepreviouslyset,thislightgoesout.
An exception to this is if the spa is operating in the optional 12
hour operational mode (described later). In this mode, the light
may be on, but the heater is not heating the water because the
Circulating Pump is not moving any water through the heater.
(By design)
Special Features
LED Display Inversion
Thisfeatureallowsthetemperaturetoreadright-side-facingwhenlook-
ingatitfrominsidethespa.Normally,thetemperaturedisplayreads
right-side-facingwhenviewingfromoutsidethespa.
Toinvertthedisplay,pressandholdthelightbutton,thenpressthetem-
peratureuparrow.Releasethelightbutton.Thedisplayisnowinverted.

Page 10
Aries Spas • User Manual
Tochangeback,performthisprocedureagain.
"Good Night" Function
Afteryouhaveusedthespa,youmayturnoffthespalightbydepressing
the"Light"ButtonandturnoffalltheJetandAirBlowerPumpssimul-
taneously.Ifyoudidn'thavethespalightonandwanttousethisfeature,
simplypushthe"Light"Buttononcetoturnonlight,thenpushitagainto
shutoffthelight,andallJetandBlowerPumpssimultaneously.
Auto-Purge Cleansing
YourAriesSpaisequippedwithanAuto-PurgeSystemthatautomatically
turnsonallpumpsforafewsecondseachday.Thisdailyushingoflines
isimportanttotheoverallsanitizationofthewater,eliminatingstagnant
waterinunusedjetlines.
Thisisanautomaticfeatureandtakesnoeffortonyourpart.Ittakes
placedailyatthemomenttheinternalclockwaslastreset(seebelow).
Internal Clock
Intheefforttoimproveandsimplifytheoperationsofspas,wehave
eliminatedthetraditionalhard-to-settimeclockandreplaceditwitha
muchsimpler-to-usedesign.
Starttimeoftheclockismostlyinsignicantexceptfortheauto-purge
or12hourcirculationmodes.Thestarttimeisreseteverytimethepower
isresetafterbeingturnedoff,regardlessofmethodofdisconnect.When
changingfromthe24hourto12hourcirculationmode,theclockisreset
atthetimeyouinitiatethechange.
24 Hour / 12 Hour Circulation Modes
AriesrecommendsleavingtheCirculationModesetin24HourMode,
exceptduringseverelyhotweatherconditions.Inareasthathavehot
summertemperatures,heatcanaccumulateinthespawater.Sunlightand
hotambientairtemperaturescansendspawatertemperaturessoaring.To

Page 11
Aries Spas • User Manual
combatthisproblemaspecial12HourCirculationModeisavailable.
Warning: Never use the 12 Hour Mode in Wintertime or
when freezing weather could occur. This disables the Freeze
Protection and could cause water in your equipment or lines to
freeze, causing serious damage. Aries will not warranty against
freeze damage caused when spa has been left in the 12 Hour
Mode.
Toconvertfrom24houroperationto12houroperationoftheCircula-
tion,pushthe“Light”buttonandwhiledepressingit,pushthe“Jets”but-
ton.“24H”willappearintheLEDareaofthetopside.Thisstandsfor24
hourorcontinuousrunningoftheCirculationsystem.(Thisisthemode
thespaissetinwhenitleavesthefactoryanditshouldremainthisway
atalltimesunlessanexcessiveheatbuildupoccurs.)Releasethe“Light”
buttonandimmediatelypushthe“Jets”buttonagain.“12H”shouldnow
appearintheLEDscreen.After5secondsthe“SET”lightwillgooffand
thecirculationpumpwillshutdown.Toreturntothe24HourMode,use
thesamemethoddescribedabove,until"24H"isdisplayed.
Initially,aftersettingtothe12HourMode,theCirculationPumpwill
stayofffor24hours.ThentheCirculatingPumpwillcomeonandrun
for12hours,thenshutofffor12hours.Thiswillrepeatuntilthemodeis
changedbackto24HourMode.
Duringthe“off”period,jetandblowerfunctionsarestillavailabletobe
used,buttheheaterwillnotoperate.
It is recommended that when you initially set to the 12 Hour
Mode that you do this in the late evening. This will cause the
Pumps to start 24 hours later, and its running time will be
during the night, in the cooler period.
Freeze Protection
InanAriesContinuousCirculatingSpa,thepotentialforfreezedam-
Table of contents
Popular Hot Tub manuals by other brands

Jacuzzi
Jacuzzi Allusion 7242 Specification sheet
avenli
avenli SPA3 user manual
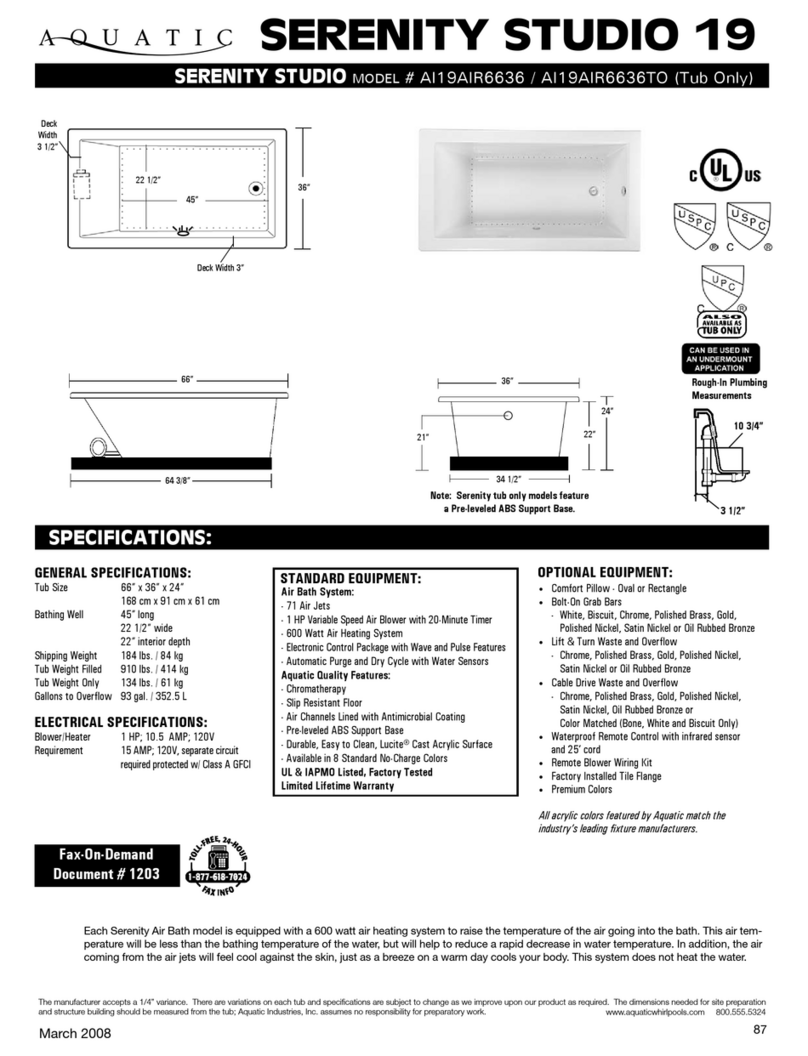
Aquatic
Aquatic Serenity Studio 19 AI19AIR6636 Specification sheet
American Standard
American Standard Lifetime 7236L Specification sheet
Jacuzzi
Jacuzzi Experience ALIMIA Instructions for preinstallation

Comfort Line Products
Comfort Line Products STG-1 owner's manual

Whirlpool
Whirlpool 11-0086-11 owner's manual

albatros
albatros ACDPL-S Instructions for operation
Wellis
Wellis PEAKLIFE user manual
American Standard
American Standard Cadet Corner Whirlpool and Bathing Pool... Specification sheet
Strong Pools and Spas
Strong Pools and Spas The Cyprus owner's manual

Maya Group
Maya Group Orbeez Instruction guide
