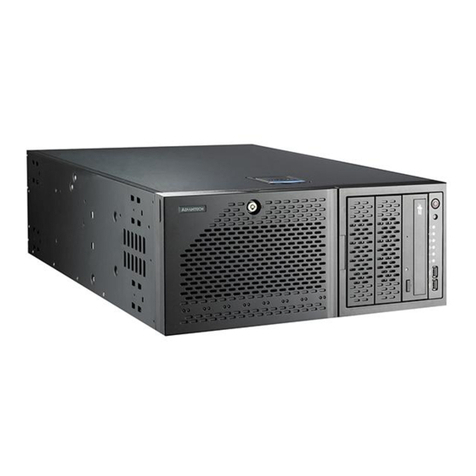
Ariesys ARX 308-15USP Assembly instructions

ARX 308 User Reference Manual

2
Specifications
Model No ARX308
Backplane 3U-size, 8-slot PXI backplane
Compliant with PXI specification Rev2.0 (PICMG 2.8)
Accepts both PXI and CompactPCI 3U module
Accessible Slots 1 system slot & 7 Peripheral slots
Display 15", 1024x 768 TFT LCD Monitor with touch screen
Drive bay One slim DVD-ROM
KB/MS Integrated keyboard and touchpad, RJ-45 connector
Operating Life of Keys: 8 million cycles
Keyboard Layout: CH, FR, GR, KR, RU, SP, UK, US
Power Supply PS2, 400W, Power supply, Auto switch
Option: Dual 300W mini-redundant, hot-swappable power supply
Option: 2x 95W Li-ION battery packs, 100W, 90~264 VAC adapter
Construction Rugged Aluminum Construction with shock absorbing rubber corners
Dimension 412Wx 308Hx 228D mm
Weight 12 kgs
Carrying Case Padded carrying case with wheels
Environmental Factors
Operating Non-Operating
Temperature 0°C~50°C -20°C~60°C
Relative Humidity 10%~90% 10%~95%
Approval CE, FCC, RoHS

3
ARX308-15USP:
PS2, 400W Power Supply
ARX308-15USR:
Dual 300W Mini-Redundant Power Supply
ARX308-15USB:
2x 95W Li-ION Battery Packs

4
ARX 308
Model Accessory Kit SKD
Qty
ARX 308
1
ARX308 Portable Computer Chassis 1
2
Carrying Case with wheels 1
3
User’s Manual 1
4
Power Cord 1
5
VGA to VGA cable (180mm) 1
6
DVI-D to DVI-D cable (180mm) 1
7
USB to USB cable (180mm) 1
8
Anti-Static Bag 1
9
Standard Accessory Kits
Carrying Case with Wheels

5
Version: 2013.08
ARX 308 features:
●Designed for portable instrument applications
●Accepts both 3U PXI and CompactPCI Modules
●3U, 8-slot Portable Instrument
●Built-in 15” LCD display with touch screen, 1024x 768, 16.2M, 250 nits brightness
●One system slot and 7 PXI peripheral slots
●Aluminum Alloy Housing design
●Integrated keyboard and touchpad
●PS2 400W power supply
Option: Dual hot swapping 300W mini-redundant power supply
Option: 2x 95W Li-ION battery packs, 100W, 90~264 VAC adapter
●Built-in slim DVD-ROM device
●Carrying case to manage portable PC with ease
The ARX308 is an 8-slot 3U PXI/Compact PCI portable computer chassis. It supports one system
slot and 7 PXI/Compact PCI Peripheral slots. Both PXI and Compact PCI could be used in the
portable chassis. The ARX308 provides 15” high brightness TFT LCD display with touch screen,
allows users to fully enjoy the beauty of true colors and easy to control. ARX308 integrates 104
keys multi-languages keyboard and touchpad. Dual hot-swappable ATX 300W mini-redundant
power supply makes the ARX308 ideal for critical applications. ARX308 is a powerful and versatile
portable chassis that allows users develop the test and measurement applications, and capable of
a wide range of applications, such as power industry applications, military applications, and
telecommunication applications.
1.0 Introduction

6
2.0 Getting Started
1. Releasing Keyboard from main unit by pushing up the 2 taps located on both side of the
chassis to release the locking mechanism, and then pull out the keyboard.
2. You have the option of leaving the keyboard attached to the chassis or they can be release
independently from the chassis by pushing the two levers inward to release the lock.
3. Connect the RJ-45 keyboard/touchpad cable to the front bottom right corner of the chassis.
Make sure the pin direction is correct when inserting.
2.0 Operation
Press to release
Lift up
Lift up

7
4. You can flip the 2 feet located underneath the chassis outward to help create an angle for the
chassis for viewing comfort.
5. Access the available 1 system slot for PXI/ CompactPCI controller and 7 peripheral slots on the
left side of the chassis.
6. There are USB, DVI-D and VGA connectors on the left side under the system slot
2 feet
USB connecto
r
3U PXI/ CompactPCI controller
7 peripheral slots
DVI-D connecto
r
V
GA connecto
r

8
7. Connect the portable computer USB connector to controller VGA or DVI-D
Connect the portable computer VGA or DVI-D connector to controller VGA or DVI-D
DVI-D to DVI-D cable
8. Connect the power cable outlet into the power supply unit or adapter to power DC jack
(ARX308-15USB)
Insert Power CordInsert Power Cord
Power DC Jack

9
9. Press the power switch located on the front panel of the chassis to power up the unit.
There have indicator LED lights for Power and LCD OSD and DVD-ROM in the right side
10. Keyboard and touchpad surface act as input for the system.
Keyboard LED
Touchpad + Button
Press Once to Power On
Power LED light
LCD OSD
DVD ROM

10
1. Battery Pack
The lithium ion battery pack is on the right side of the computer.
2. AC Operation / Battery Charging
Insert the adapter cord into the Power DC jack for recharging
3. LCD panel for battery capacity
The LCD display shows battery array fuel gauge, power, current, charge/ discharge
state, time to fully charged, time to empty.
3.0 Battery Pack (ARX308-15USB)
Power DC jack

11
1. Installation problem:
1. Normally problem with a fail start up is due to installation problem.
2. Double check all the peripheral cards or items you have added to the ARX.
3. Are all the items seated properly?
4. Are all the cables connected back to its original or correct position?
5. Are the items you have added compatible?
6. Before you check for these, turn the computer off and unplug the power cord.
7. Check for 1 thru 5 and then re-power up the computer.
8. Remove all items that were added and re-try system power up.
9. If the system starts now, try inserting 1 new item in at a time and try powering up.
10. Repeat this step until you get the desired result.
2. System Fails to power up:
1. Check you power connection first.
2. Check the main power switch is in the ON positions (I) *If cold switch is available.
3. Press the power button located on the machine.
3. No display (LCD):
1. Check all the proper power up procedure has been taken.
2. Hook up an external LCD to the VGA port, to check if video is present.
3. If video is present on external LCD, check the internal LCD cable connection.
4. Or check your VGA setting to make sure LCD video is enabled.
5. If there is no video on external, check your system to make sure everything is seated
properly.
6. If everything is seated properly and still no video, call us for further assistance.
4. External LCD no display:
1. Check to see if you have internal LCD video.
2. Check if your LCD is functioning properly.
3. Check your VGA setting to make sure external video is enabled.
5.0 Troubleshooting
This manual suits for next models
3
Table of contents
Other Ariesys Chassis manuals