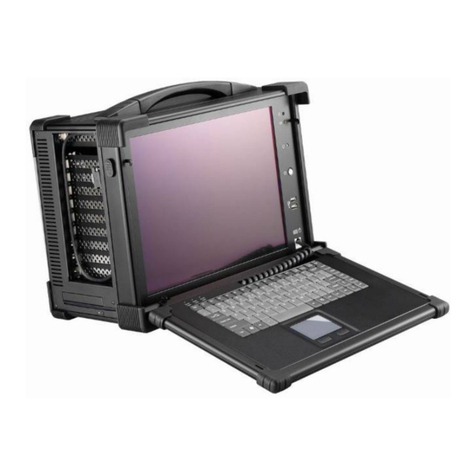
Ariesys ARP980 Assembly instructions

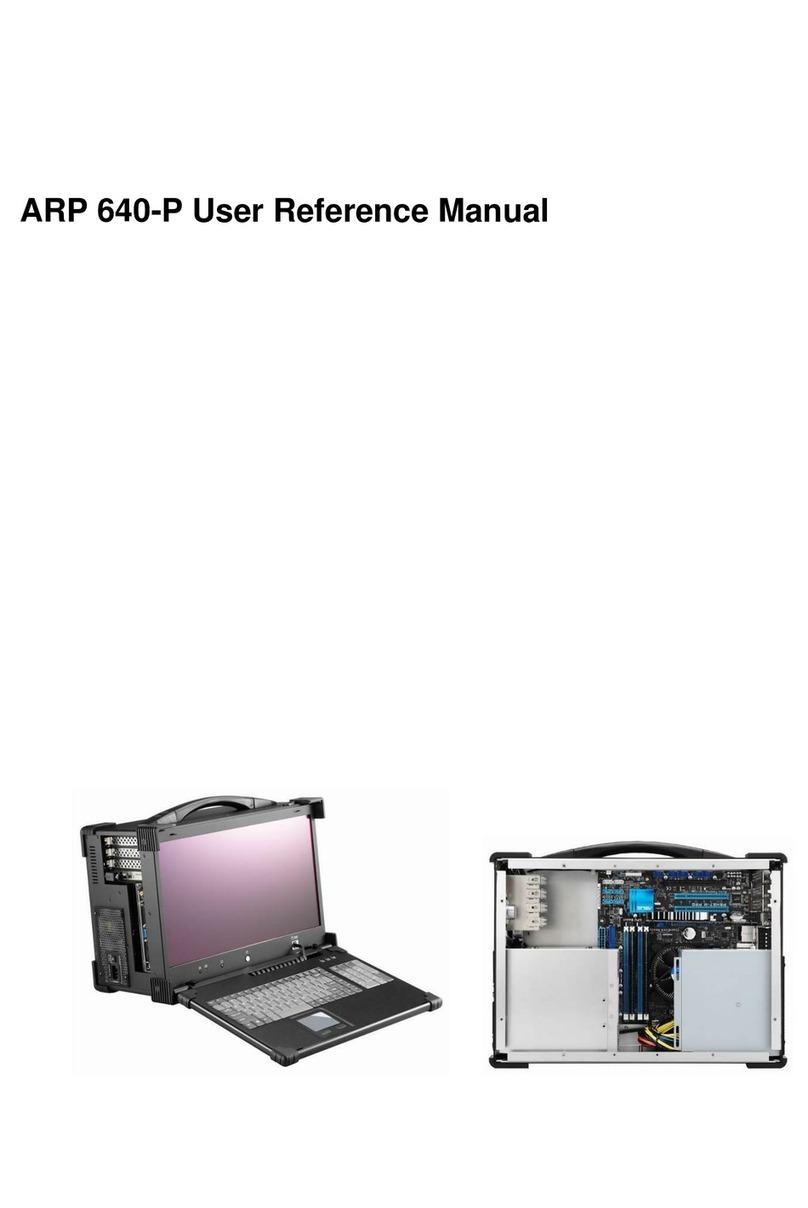
ARP980/ ARP980-B User Reference Manual

2
Specifications
Model No ARP980 ARP980-B
CPU Intel Core i5-4400E, 2.70GHz Processors
Option: Intel Core i7-4700EQ, 2.40 GHz
Chipset Intel QM87 PCH mobile Platform
Slot
2x PCI, 1PCI-E (x16) full-size expansion slots
Option: 3x PCI-E (x16, x1, x1) full-size expansion slots
Option: 3x PCI-E (x8, x8, x1) full-size expansion slots
Display 17.3" LCD display, 1920x 1080
VGA
LVDS (Thru eDP, via NXP PTN3460)
Intel® 4th Generation Core mobile processor integrated HD Gfx, supports 3
independent displays, Direct X 11.1, OpenGL 3.2, Open CL 1.2
Memory 2x 8GB DDR3
HDD 1x 240GB SSD
Support 2x 2.5" removable SATA
CDROM 1x Slim DVD-RW
Interfaces
2x DB9 for COM1, COM2, DVI-D + DVI-I, DP connector,
4x USB 3.0 connector, 2x USB 2.0 connector,
2x Gbit LAN RJ-45, RCA Jack 3x1 for HD audio
LAN Intel® Clarkville I217LM GbE PHY
Intel® Pearsonville I211AT as 2nd GbE
Audio Intel® Mobile QM87 PCH built-in High Definition Audio controller with
Realtek ALC892 w/ 7.1 channels
Speaker Built-in amplified 2x 3W speakers
KB/MS Industrial keyboard with touchpad
Keyboard layout: CH, FR, GR, KR, RU, SP, UK, US
Power Supply 400W, 100~240 VAC,
Auto switch
2x 95W Li-ION battery Packs (Hot-
Swappable), 100W AC Adapter, up to 4
hours battery life
Construction Rugged Aluminum Construction with shock absorbing rubber corners
Dimension 418x 352x 166 mm (Wx Hx D)
Weight 7.6 kgs
Carrying Case Padded carrying case with wheels
Environmental Factors
Operating Non-Operating
Temperature 0°C~50°C -20°C~60°C
Relative Humidity 10%~90% 10%~95%
Shock 10g, 11ms, half-Sine 30g, 11ms, half-Sine
Vibration 10-500Hz (0.4 Grms) 10-500Hz (1.12 Grms)
Approval CE, FCC, RoHS
Options
Power Supply
ARP980: 400W, 100~240 VAC, Auto switch
ARP980-B: 2x 95W Li-ION battery Packs (Hot-Swappable)
Processor
●Intel Core i5-4400E, 2.70 GHz Processors
Intel Core i7-4700EQ, 2.40 GHz Processors
Expansion slot
●2x PCI, 1PCI-E (x16) full-size slots
3x PCI-E (x16, x1, x1) full-size slots
3x PCI-E (x8, x8, x1) full-size slots
Touch Screen
●None
Touch Screen
3
ARP 980
Model Accessory Kit SKD
Qty
ARP 980
1
ARP980 Portable Computer system 1
2
Carrying Case with wheels 1
3
Driver CD 1
4
User’s Manual 1
5
Power Cord 1
6
Anti-Static Bag 1
7
Screw Pack (stabilizer) 1
8
Stabilizer Supports Pack 1
9
Standard Accessory Kits
Carrying Case with Wheels

4
Version: 2018.07
ARP 980 features:
●All-in-one design rugged portable computer
●Rugged Aluminum Construction with shock absorbing rubber corners
●Compact Size Lightweight Design
●Built-in 17.3" LCD display, 1920x 1080 (Option: 17.3”, 1600x 900 resolution)
●Intel QM87 (Gen4), Intel core i7/ i5/ i3 Processors
●400W PSU or 2x 95W Li-ion battery packs, up to 4 hours battery life
●Mini-ITX MB, Intel Core i5-4400E or i7-4700EQ Processors
●2 PCI, 1x PCI-E (x16) full-length expansion slots
Option1: 3x PCI-E (x16, x1, x1) full-length expansion slots
Option2: 3x PCI-E (x8, x8, x1) full-length expansion slots
●Built-in 240GB SSD, Support 2x 2.5" removable SATA
●Dual Gigabit Ethernet Support
●Industrial Keyboard multi-language with touchpad
●Keyboard is integrated with the portable to allow closing against the portable for both convenience and
protection in transportation
●Large handle provide convenience transportation of the portable with comfort and ease
●Carrying case to manage portable PC with ease
The ARP980 is a light weights portable systems, ARP980-B with integrated battery packs, are robust field
portable with 2x PCI, 1PCI-E (x16) or option: 3x PCI-E (x16, x1, x1) or option: 3x PCI-E (x8, x8, x1) slots
platform built using heavy duty metal to provide tough, go-anywhere unit ideally suitable for harsh/severe
environments and mission critical applications.
ARP980 is designed for harsh environment operations; Every ARP980 is constructed with easy access to its
expansion ports for immediate system upgrade or maintenance. Functional practicality combined with the
simple and polished design, the ARP980 with its extra-rugged construction to sustain bumps and impacted
blows, is the most cost-effective, durable and efficient portable solution for your mission critical applications.
Applications: Military, Industrial automation, Digital TV test & analysis, Mobile Computing,
Outdoor Computers, video conferencing, E-learning, Speech Technologies,
Portable Workstation, Telemedicine, Multimedia, Mission Critical Computing
1.0 Introduction

5
2.0 Getting Started
1. Releasing Keyboard by pushing the 2 taps located on top side of the chassis to release the
locking mechanism, and then pull out the keyboard.
2. You have the option of leaving the keyboard attached to the chassis or they can be release
independently from the chassis by pushing the two levers inward to release the lock.
3. Connect the RJ-45 keyboard/touchpad cable to the front bottom right corner of the computer.
Make sure the pin direction is correct when inserting.
2.0 Operation
Press to releasePress to release

6
4. You can flip the 2 feet located underneath the computer outward to help create an angle for the
computer for viewing comfort.
5. Connect the power cable outlet into the AC power supply unit or insert the adapter cord into
power DC jack for recharging
6. Press the power switch located on the front panel of the computer to power up the unit.
There are indicator HDD LED light, brightness adjustment and sound adjustment located on the
front panel
Insert Power Cord
Press Once to Power On
HDD LED light
2 feet
Insert adapter cord
Brightness adjustment
Sound adjustment

7
7. Access the available expansion slots on the left side of the computer.
ARP980 provides the system I/O port, include: 2x DB9 for COM1, COM2, DVI-D + DVI-I connector,
4x USB 3.0 connector, 2x USB 2.0 connector, DP connector, 2x Gbit LAN RJ-45, RCA Jack 3x1
for HD audio
8. Slim DVD-RW and 2x removable 2.5” drive bay on the right side of the computer.
Slim DVD-R
W
2x removable 2.5” drive ba
y
2x RS232
DVI-D, DVI-I
Dis
p
la
y
Port
2 Gbit Ethernet LAN
RCA Jack 3x1
2x USB 2.0
4x USB 3.0
Slim DVD-R
W
2x removable 2.5” d
r
ive ba
y
2 Gbit Ethernet LAN
2x RS232

8
Be sure power cable is not connected to the system before proceeding
1. Unscrew the top 4 thumb screws to release the top computer cover.
2. Remove the top cover, and 2x card stabilizer bars, install add-in card
into the slot.
3. Install 2x card stabilizer bars, and close the top cover.
3.0 Internal Hardware Access
Unscrew
UnscrewUnscrew
Unscrew
Card stabilizer barCard stabilizer bar
Install add-in cardsInstall add-in cardsInstall add-in cards
ScrewScrew
ScrewScrew

9
1. Battery Pack
The lithium ion battery pack is on the right side of the computer.
2. AC Operation / Battery Charging
Insert the adapter cord into the Power DC jack for recharging
3. LCD panel for battery capacity
The LCD display shows battery array fuel gauge, power, current, charge/ discharge
state, time to fully charged, time to empty.
4.0 Battery Pack (ARP980-B)
Power DC jack

10
4. Replacing the battery
4.1 Release the thumb screw of the battery cover
4.2 Pull out the battery connector from the slot and replacing new batteries into slots
Thumb screw

11
You can use the built-in DVD-RW to load operating system and additional applications
software into the system. Available medium from USB or download can also be possible.
DOS Boot up: DOS boot up requires you to have a version of the DOS installed on hard
disk drive or floppy. Depending on the execution sequence you have set in the batch file,
you will usually get a DOS prompt after loading.
Window Boot up: Windows boot up requires you to have Windows installed in the hard disk
drive. During Windows boot up, you will see a sequence of access to your hard disk drive
which will eventually take you into a graphical user interface environment.
Other O/S description: Many other operating systems are available in the market, such as
Linux, Windows, Solaris and DOS. These operating systems will behave differently and you
should react accordingly.
5.0 Software Installation

12
1. Installation problem:
1. Normally problem with a fail start up is due to installation problem.
2. Double check all the peripheral cards or items you have added to the ARP.
3. Are all the items seated properly?
4. Are all the cables connected back to its original or correct position?
5. Are the items you have added compatible?
6. Before you check for these, turn the computer off and unplug the power cord.
7. Check for 1 thru 5 and then re-power up the computer.
8. Remove all items that were added and re-try system power up.
9. If the system starts now, try inserting 1 new item in at a time and try powering up.
10. Repeat this step until you get the desired result.
2. BIOS Beep Code:
The BIOS beep code indicates error in system initialization. The BIOS of the system board
will associate with video and memory error. Please check your video card is properly
seated and your memory is installed properly.
3. System Fails to power up:
1. Check you power connection first.
2. Check the main power switch is in the ON positions (I) *If cold switch is available.
3. Press the power button located on the machine.
4. No display (LCD):
1. Check all the proper power up procedure has been taken.
2. Hook up an external LCD to the VGA port, to check if video is present.
3. If video is present on external LCD, check the internal LCD cable connection.
4. Or check your VGA setting to make sure LCD video is enabled.
5. If there is no video on external, check your system to make sure everything is seated
properly.
6. If everything is seated properly and still no video, call us for further assistance.
5. External LCD no display:
1. Check to see if you have internal LCD video.
2. Check if your LCD is functioning properly.
3. Check your VGA setting to make sure external video is enabled.
6. Keyboard fails:
1. Make sure the keyboard plug is inserted completely into the portable.
2. Make sure you do not have another keyboard connected to the side I/O PS/2 port.
7. TOUCHPAD fails:
1. Make sure the keyboard plug is inserted completely into the portable.
2. If you have an external PS/2 mouse hook up on the side I/O PS/2 port, the touch pad
will not function simultaneously.
3. If your operating system requires and does not load the mouse driver automatically,
make sure you have the proper mouse driver loaded.
8. DVD-RW fails:
1. Make sure the CD/DVD is readable.
2. If DVD-RW fails to be recognized during POST, check internal cable fit.
6.0 Troubleshooting
This manual suits for next models
1
Table of contents
Other Ariesys Laptop manuals

Ariesys
Ariesys ARP 880 Assembly instructions

Ariesys
Ariesys ARL970 Assembly instructions

Ariesys
Ariesys ARP 650 Assembly instructions

Ariesys
Ariesys ARP945 Assembly instructions

Ariesys
Ariesys ARL 980 Assembly instructions

Ariesys
Ariesys ARL 945 Assembly instructions

Ariesys
Ariesys ARP 970 Product information sheet

Ariesys
Ariesys ARP 890 Assembly instructions

Ariesys
Ariesys ARP 640-P Assembly instructions

Ariesys
Ariesys ARP 640 Assembly instructions