Armodilo ALUR User manual

D
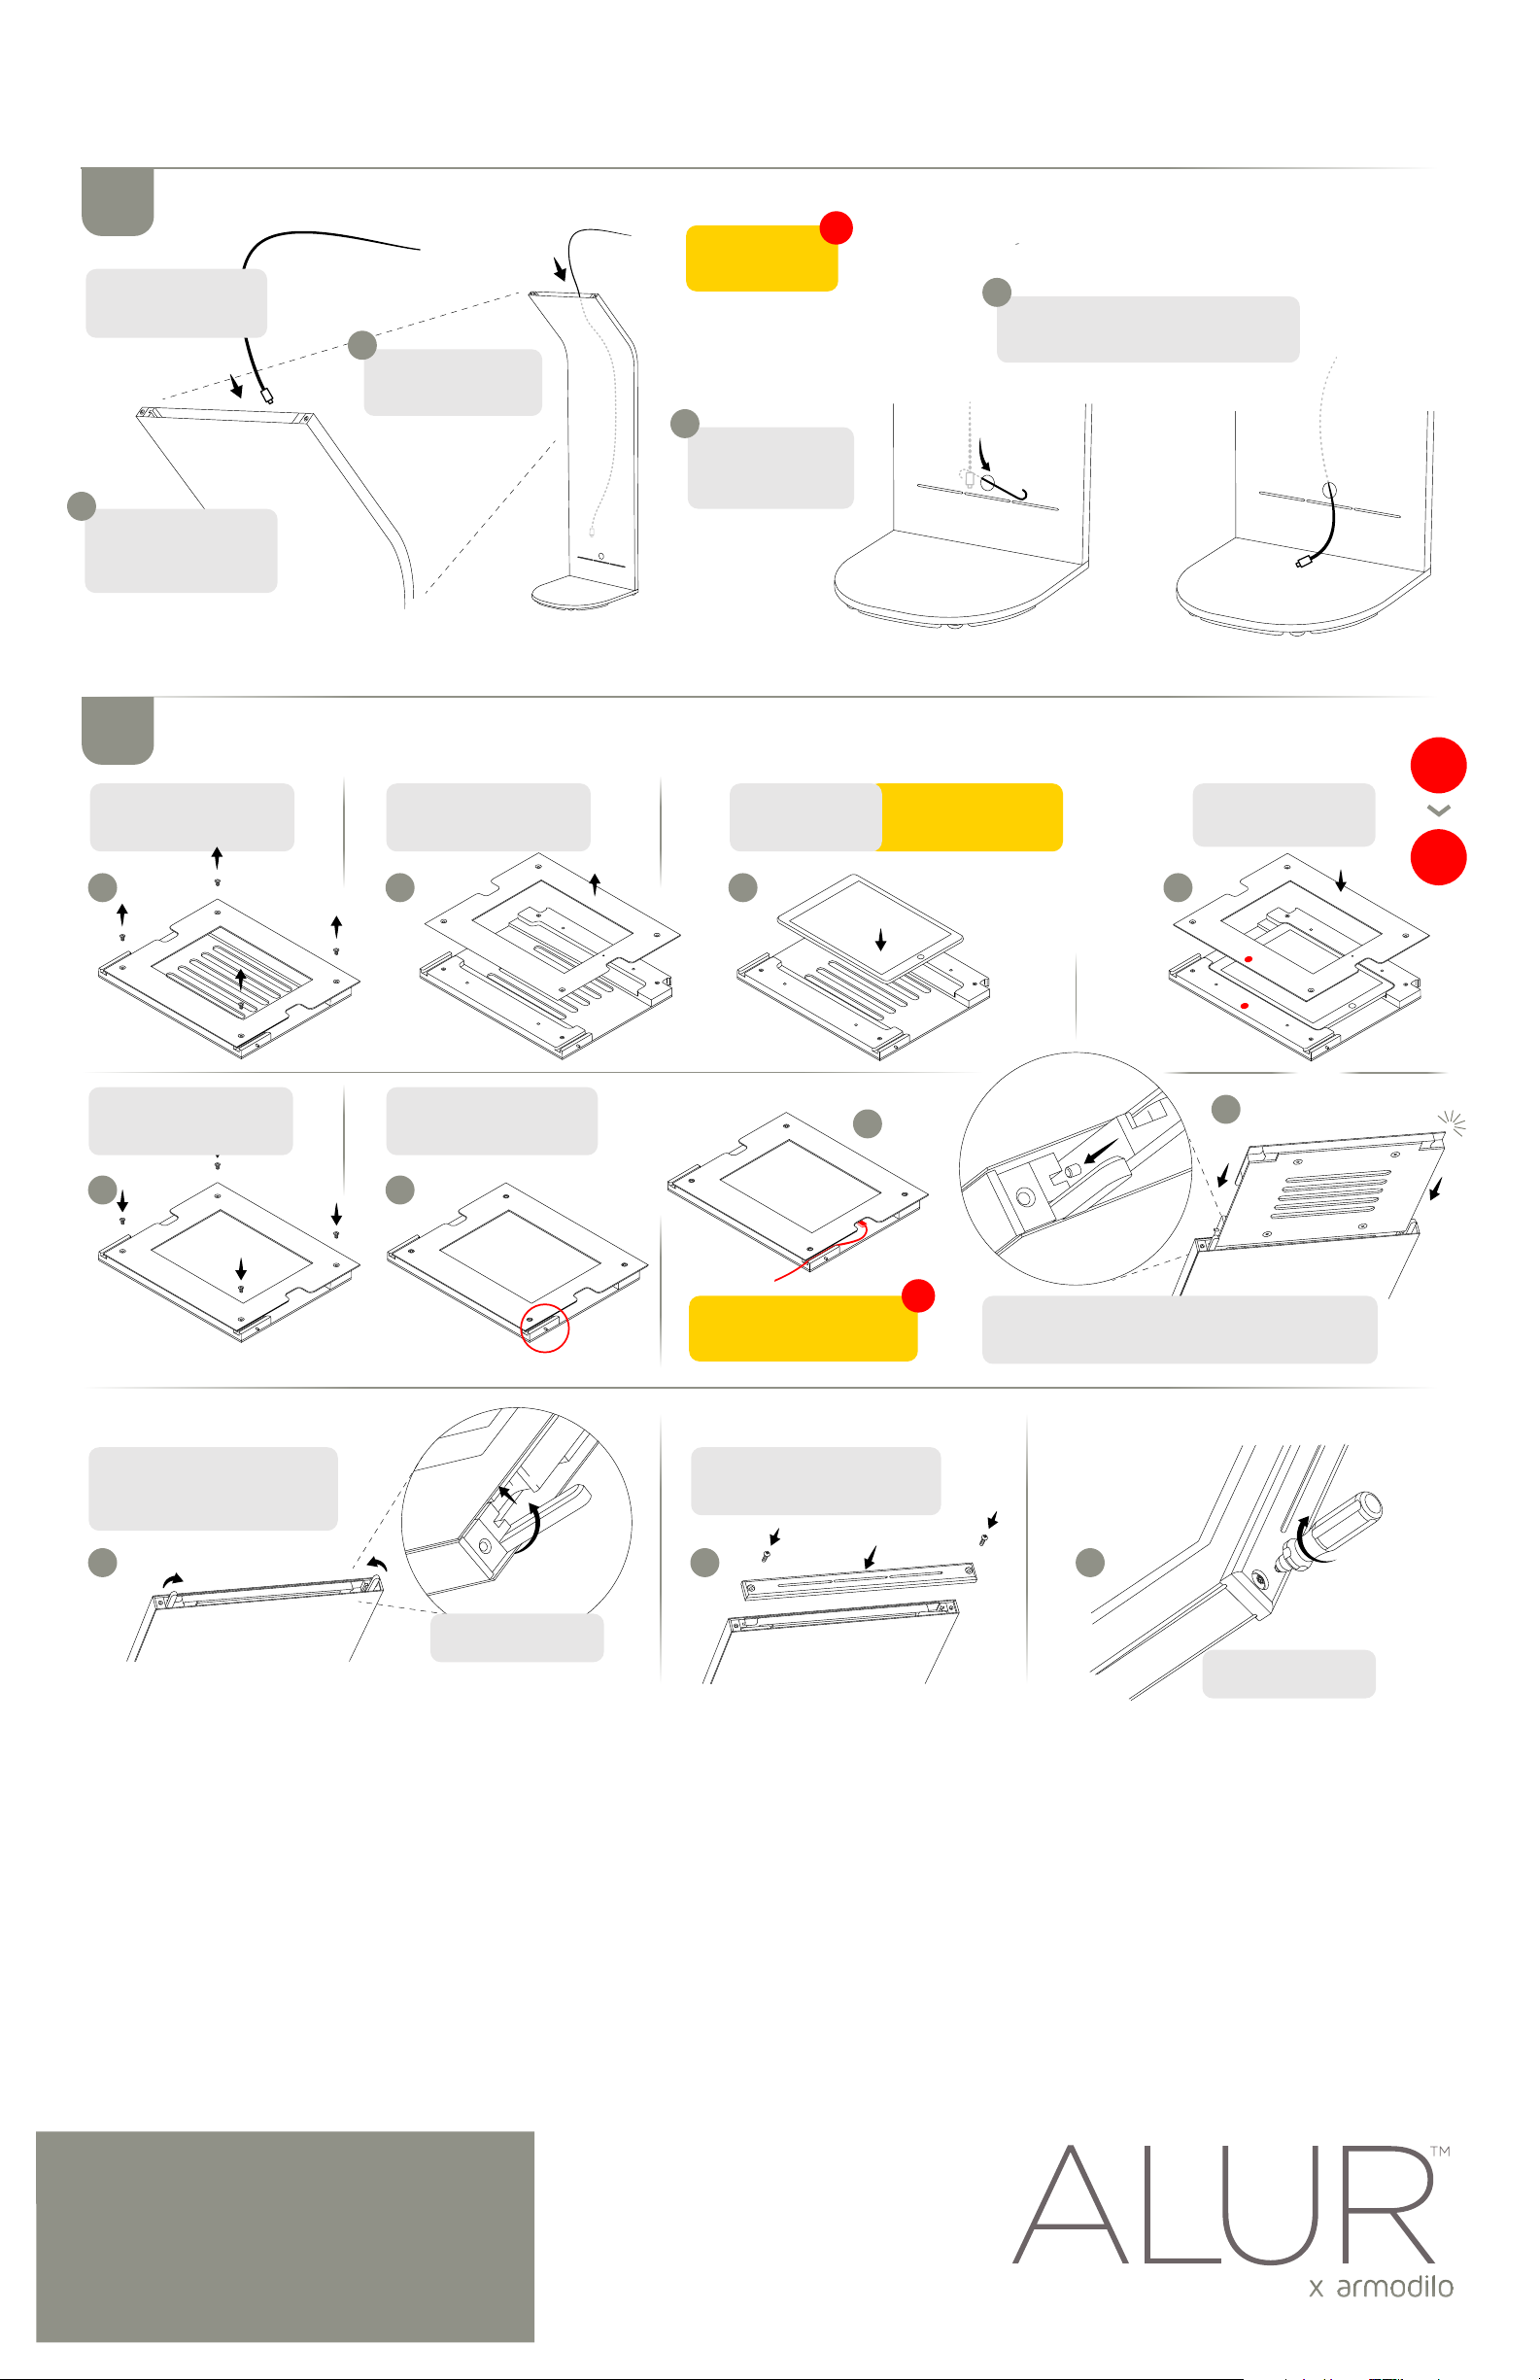
1Unpacking the kiosk
Attaching the baseplate
Set the kiosk on the floor
Removing the tablet carrier
2
Setup & assembly
B C D
Using two people,
remove kiosk from box.
Remove base from
side panel. Remove
protective bag and
store for future use
Remove foam blocks
and store for future use.
Open the box
A
A Phillips head screwdriver is required for installation
1. Set the kiosk onto a sturdy work
surface - front down (See yellow note)
2. Set the baseplate along the
bottom of the kiosk as shown.
3. Secure three 1/4-20 x 1” screws
through the baseplate and into the
kiosk using the supplied Allen key
4. Ensure these screws are tight
!
To ensure the kiosk doesn’t get scratched:
leave the kiosk in the supplied plastic bag
and place a soft material on the work surface
such as cardboard, a blanket or towels
For ease of installation,
ensure the baseplate is
angled at 90˚ to the kiosk.
Tighten the three 1/4-20
x 1” long screws using
the supplied Allen key
This part is
easier with
two people
3
A
E
B
A
B
C
Turn tabs out
Remove ArmoLock™
screws on both sides
Set the carrier
onto a work
surface
Turn the two tabs securing
the tablet carrier out so
they are vertical
Remove the top bar
and security screws
Hold onto the bar
so it doesn’t drop
Warranty & other
information available
at: armodilo.com
90˚
Slide the tablet carrier out of the kiosk –
grabbing the two finger insets on either side,
slightly wiggle the carrier to get it started
Please retain packaging
material for future use.
If you cannot access the
power button, rotate
the tablet 180˚
Cables are not included by default due to the
large numbers of tablets we typically support
Remove the tablet frame
from the tablet carrier
and set aside
Remove the four 8-32
Phillips head screws to
remove the tablet frame
Final tablet carrier assembly.
Note the pin location for
the next step
Warranty & other
information available
at: armodilo.com
5Adding the tablet
4Routing the power cable
Setup & assembly
A
E
I J K
F
H
G
B C D
Lift tablet carrier &
turn tabs in and under
Secure ArmoLock™
screws on both sides
Insert the tablet
ensuring the power
button is accessible
Slide the tablet carrier into the kiosk pin first as shown.
Align pins with guides on both sides – make sure the
tablet carrier is seated all the way down, give it a push
Align tablet frame as
shown ensuring the red
dots align to each other
Insert the four 8-32
Phillips head screws to
secure the tablet
Once the tablet carrier is inserted
into the kiosk, push the carrier
towards the front of the unit
and turn in both side tabs
Align the top bar, ensuring the
slots in the bottom of the bar slide
over the front and rear panels
Remove the top and
tablet carrier following
steps A to E in Section 3
Route the cable into the
kiosk starting at the
top of the unit*
Cable options differ and although we suggest routing from the top of the kiosk – some cables will require routing from the bottom > up due to their design and size.
Insert the supplied hook into the hole on
the back of the kiosk, hooking the cable*
and pulling it out.
It may take a few tries
and trial and error to
get the cable close
to the hole
Ensure the cable
doesn’t fall into the
kiosk from the top
!
Click!
At this step: plug the power
cable into the tablet and route
it through the cable channel
!
Straighten the cable as
much as possible to make
it easier to push through
the kiosk
B
A
C
D
Please retain packaging
material for future use.
Other Armodilo Tablet Accessories manuals


