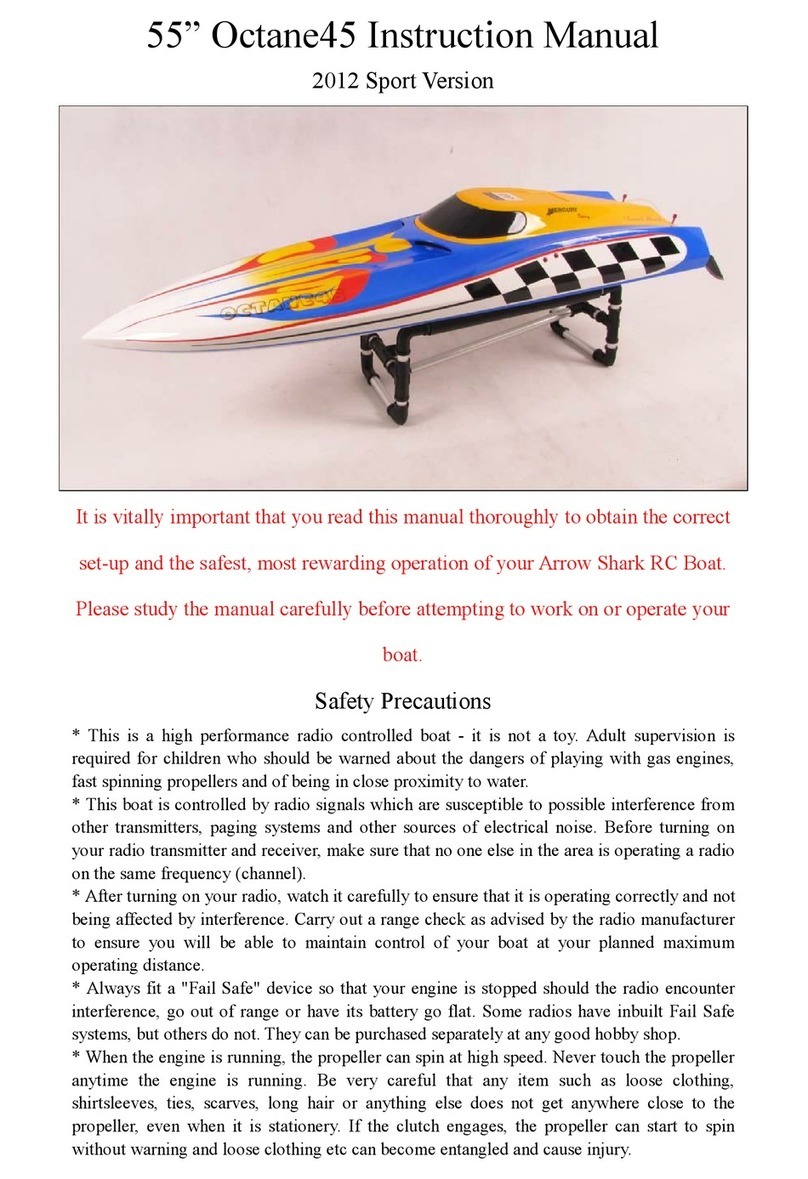
Arrow Shark X-Hydro User manual

XHydroInstruction Manual
Itisvitallyimportantthatyoureadthismanual
thoroughly toobtainthecorrectsetupandthesafest,
mostrewarding operationofyourArrowSharkRCBoat.
Pleasestudythemanualcarefullybeforeattemptingto
workonoroperateyourboat.
Safety Precautions
*Thisisahighperformanceradiocontrolledboat itisnotatoy.Adultsupervisionis
required for children who should be warned about the dangers of playing with gas
engines,fastspinningpropellersandofbeingincloseproximitytowater.
* This boat is controlled by radio signals which are susceptible to possible
interference from other transmitters, paging systems and other sources ofelectrical
noise. Before turning on your radio transmitter and receiver, make sure that noone
elseintheareaisoperatingaradioonthesamefrequency(channel).
*Afterturningonyourradio,watchitcarefullytoensurethatitisoperatingcorrectly
and not being affected by interference. Carry out a range check as advised by the
radiomanufacturertoensureyouwillbeabletomaintaincontrolofyourboatatyour
plannedmaximumoperatingdistance.
* Always fit a "Fail Safe" device so that your engine is stopped should the radio
encounterinterference,gooutofrangeorhaveitsbatterygoflat.Someradioshave
inbuiltFailSafesystems,butothersdonot.Theycanbepurchasedseparatelyatany
goodhobbyshop.
*Whentheengineisrunning,thepropellercanspinathighspeed.Nevertouchthe
propelleranytimetheengineisrunning.Beverycarefulthatanyitemsuchasloose
clothing,shirtsleeves,ties,scarves,longhairoranythingelsedoesnotgetanywhere
closetothepropeller,evenwhenit isstationery. Iftheclutchengages,thepropeller
can start to spin without warning and loose clothing etc can become entangled and
causeinjury.
* The speed and mass of this boat can inflict property damage and severe personal
injuryifacollisionoccurs.Neverrunthisboatinthepresenceofswimmersorwhere
thepossibilityofcollisionwithpeopleorpropertyexists.
* Model engines generate considerable heat. Do not touch any part of your engine
untilithascooled.Touchingthecylinderheadoranypartoftheexhaustsystemmay

resultinaseriousburn.
*Gasolineispoisonous.Donotallowittocomeintocontactwiththeeyesormouth.
Alwaysstorefuelinaclearlymarkedcontainerandoutofthereachofchildren.
*Gasolineisextremelyvolatile.Neverallow nakedflameoranypossiblesourceof
ignitionnearyourboat.Beverycarefulwhenrefuellingyourboat.
*Thisboatissetuptoracingstandards.Ifyouarestartingfromscratchatdrivinga
fastboat,getamoreexperienceddrivertotakeyourboatoutforthefirstfewtimes.
Whenyouareinitiallygoingfaster,dosoonclearwatersawayfromotherboatsand
withyourmoreexperienceddriverclose bytogiveadviceandsupport.Ifyoudon't
know an experienced driver, find an RC Boat Club in your area and join up. Most
clubs welcome new members and nearly always have experienced drivers who will
helpyou.It'smorefunrunningyourboatswithotherstoo.
Step1:AccessoriesCheck
Inordertoavoidyourboatbeingdamagedduringtransportation,we
removedtheflexibleshaft,turnfins,rudder,propellerandsomeother
itemsofthehardware.Whenyoureceivetheboat,pleasefirstcheckthe
accessorybagfortheseitemsasshowninthephotobelow.You willneed
toinstallthem (aswe'llexplaininthefollowingsteps)beforeyouareable
tooperateyourboat.
Youraccessorybagshouldcontainthefollowingitems:

#1:FlexibleShaft(precuttotherightlengthtofitindirectlytoyourboat).
#2:RudderAssemblyandBolts.
#3:7016/2Prop(factorysharpened,balancedandpolished).
#4:6717/3Prop(factorysharpened,balancedandpolished).
#5:HydroCurvedTurnFinandBolts.
#6:BoatDisplay Stand.
#7:15kgMetal GearHiTorqueServo(forrudderoperation).
#8:CNCDualServoMountandBolts.
#9:PropNut.
#10:ReceiverSwitchCover.
#11:Antenna Tubewith BlackCap
#12:ShaftDriveDog
ToolsRequired
Youwillneedthefollowingtoolsanditemstocompletetheinstallation:
#1:PhillipsScrewdriver
#2:Scissors
#3:WireCutter
#4:HexWrench(1.5mm,2mm,4mm)
#5:Spanner(7mm,8mm,16mmx2)
#6:Spark PlugSpanner
#7:Loctite
#8:ShaftGrease
#9:LubricatingOil
#10:Zip Ties
#11:SmallHoleOpener
#12:4mm RoundFile(withhandle)
Step 2:BoatDisplay StandAssembly

*Therearefourplywoodboatstandpiecestwonarrowerpiecesthatformthesides,
and two taller pieces that form the ends to support the bottom of your boat on
rubberpaddedsections.Matchtheangledslotsinthebottomofoneoftheendpieces
to similar slots in the top of the side pieces, and slip them together. Repeat for the
other end piece. Optionally, for a more secure stand, you could apply CA glue or
epoxytothejointsofthestand.
Note:Thisboatstandisintendedfordisplayingyourboatatyourhomeoroffice.Itis
notforfielduse.You shouldcustommakeastrongerboatstandfrom PVCorstainless
steelpipeforfielduse.
Step 3:RudderAssembly
* Take out the rudder assembly from the accessory bag along with its installation
bolts.
*Usinga4mmhexwrench,securetherudderarmwiththetwoboltstothemounting
bracketthathasbeen preinstalledonthetransom (ieonthebackoftheboat).Applya
littleLoctite totheboltsbeforescrewingthemintothebracket.

* Use the pushrod connector supplied in the accessory bag to join the section of
pushrod that came with therudder tothe end ofthe pushrod projecting through the
transomviatheblackrubberpushrodsealinthecenteroftherudderbracket.
Note: You might still need to adjust the length of the pushrod after you install the
steeringservo(we'lldothatlater)inordertocentertherudderforpropercontrolwhen
runningyourboat.
*Connectthewater coolingtubethat projects throughthetransomtothenippleon
the topoftherudderblade.
Step 4:TurnFinInstallation AndPerformanceTip
*A curvedhydroturnfinissuppliedintheaccessorybagalongwithmountingbolts
andnuts.
*Onthebackofthestarboardsponsonisapreinstalledbracket.(Thestarboardside
is the righthand side when looking at the boat from behind it; the sponson is the
lowestpartofthehullthatridesonthesurfaceofthewater.)Slipbothofthesupplied
boltsthroughthebracketandthroughtheturnfin.Startthenutontothetopboltthen
usea7mmspannertoholdthenutanda4mmhexwrench toscrewinthebolt.Repeat
forthelowerbolt.Beforefinallytighteningthebolts,positiontheturnfinasshownin
theaboverightphoto.

PerformanceTips For Turn Fins
Turnfinshelpyourboatrunquicklyandsmoothlythroughaturn.Withhydroplanes
likeyourXHydro, theturnfingivesextragripinthewaterastheboatchanges
direction.
It'sveryimportantthatthefinbemountedsothatitisexactlyparallelwiththe
centerlineoftheboat.
Anglingthefinbackorforwardalittlecanhelpcorrectanytendencyoftheboatto
pull totherightorleft,andcanhelptoimprovetherideangleoftheboat.
Onlyverysmalladjustmentsshouldbemadeatatime.
Tiltingthebottomofthefintowardthefrontofthehydrowilltendtomaketheboat
tracktotheleftandwilltendtoliftthesponsonandthefrontoftheboat.
Tiltingthebottomofthefintowardthebackofthehydrowilltendtomaketheboat
tracktotherightandwilltendtodropdownthesponsonandthefrontoftheboat.
Step 5:FlexibleShaftInstallation
*Theflexibleshaftthatcomeswiththepackagehasbeenpregreasedandprecutto
the right length to fit your boat. It is best though to regrease the shaft with
lightweight marinegreasebeforeyouinsertitintothestrutdriveunitthathasbeen
preinstalledonthebackoftheboat.
*Slidethetopendoftheflexshaftthroughthestrutdriveunitonthetransomofthe
boatandeaseitupthroughthestuffingtubeuntilitemergesjustbehindtheclutchon
yourengine.
*Astheendoftheshaftcomesintoview,usearagtowipeoffanygreasesothatthe
shaftiscleanasyouslipitintothedrivecolletontheclutch.
*Ensuretheendoftheshaftissecurelyinsidethecollet,andthencheckthepropeller
end of the shaft for correct clearance from the strut as explained in the following
importanttip.
* With the correct clearance set between the strut and the thrust washer, use two
16mmspannerstotightenthecolletontheclutchandsosecurethetopendoftheflex
shaft.Whenrunningyourboat,frequentlycheckthatthecolletistighttoavoidyour
flexshaftbecominglooseandpossiblybeinglostinthewater.

Very Important TipForShaftInstallation
*Wheninsertingtheflexibleshaftthroughthestrutandupintothecollet,makesure
youleavea23mmgapbetweenthebackof strutandthefaceofthethrustwasheron
yourpropshaft.Thisiscriticalfortheproperworkingandlonglifeofyourflexshaft.
Whenthecrankshaftacceleratesfromlowtohighspeed,itwillcausetheclutchbell
tostretchoutanddrawbackabit,takingtheflexshaftwithit.Ifthereisnofreespace
left on thepropshaft, whentheclutchbelldraws back it willcreate astrainon the
flexshaftthatcouldcauseittofail inaveryshorttime.
Step 6:PropInstallation And Strut Adjustment Tip
* There are two propellers provided with your boat the 3blade 6717/3 and the
2blade7016/2. Bothprops have been factorysharpened, balanced andpolished for
optimum performance. Each prop has its own advantage to suit difference water
conditions. Generally, the 6717/3willgive you faster speed inastraight line, while

the7016/2propoffersquickeracceleration.Tryeachpropatdifferenttimesuntilyou
become familiar with which prop gives you the best results depending on your
preferencesandwaterconditions.
*Wesuggesttryingthe6717/3tostartwith,buteitherpropisfine.Sliptheproponto
theendofthepropellershaftandturnitsothattheslotsengageintothelugsofthe
drivedogthathasbeenpreinstalledontheshaft.
* Apply a littleLoctite tothethreadonthe end oftheshaft andscrew thepropnut
ontothepropshaft.UseanAllenkeyorsimilarsmalldiametermetalrodthroughthe
holeinthenuttotightenitinplace.
Note:Thepropissharp,somakesureyouwearaglove,oruseapieceofcleanrag
whenholdingthepropasyou tightenthepropnut.
PerformanceTip
Adjustingtheangleofyourstrutdriveispartofthefunofdrivingyourboat,andyou
canfinetuneitforbestperformanceinvaryingconditions.Theobjectiveistohave
yourboatrunningwiththeleastamountofhulltouchingthewaterbutstillretaining
stability.

Thelessofyourhullthattouchesthewater,thelessdragandthehigherspeed.But
withtoolittlehullinthewater,theboatwillbecomelessstableandcouldoverturn.If
thereistoomuchhullinthewatersothebow(iethefront)isrunninglow,theboatis
saidtoberunning"wet".Iftheboatistoolightonthewaterwithonlyasmalllength
atthebackinthewater,itissaidtoberunning"loose".
Anglingthepropupwillliftthefrontofyourboatgenerallyresultinginlesshullin
thewaterandfasterspeed.Anglingtheproptoohighthoughwillcauseinstabilityand
thepropmay"ventilate"orspinwithoutgrippingbecauseit'stooclosetothesurface.
Anglingthepropdownwillliftthebackoftheboatandkeepmorehullinthewater
generallygivingmorestablerunningbutwithlessspeed.
Tryingdifferentpropangleswillfindtheonethatworksbestforyourboatin different
waterconditions. Tostartwith,runastraightedgealongthebottomoftheboat
projectingouttheback,andsetthestrutdriveunitsothepropshaftisparallelwith
thestraightedge.
Whenadjustingthestrut,youmayneedtoalsoslightlychangetheangleofthe
stuffingtube.Ifyoudoneedtoslightlyrebendthat,dosoverycarefullywiththeflex
shaftinsidethetubetominimisethechanceofmakingtoosharpabend.
Step 7:TunedPipe Performance Tip
Tunedpipesboostenginepowerbyusingthepressurewavesgeneratedby exhaust
gasestoliterallypullmorefuelintothecylinder.However,toachievethis,itis
criticaltohavetherightlengthfortheexhaustgasesastheytravelfrom theexhaust
flangetothe"belly"ofthetunedpipe(that'swherethepipeisatitswidestdiameter).
ForourbilletXP254Mengine,thisdistanceisbetween370and390mmwhichneeds
tobemeasuredalongthecentrelineoftheexhaustincludingtheheaderpipe,as
showninthediagram.Havingeitheralongerorshorterlengthwillreducethe
engine'sperformance.

Adjusting The TunedPipeLength
Youcanalwaysadjustthelength of thetunedpipetoseetheeffectithasonyour
engine.Itisalsointerestingtofindoutwhatarelengthsotherpeopleareusingand
comparetheperformancetheyachievewithyourownboat.
Toadjustthelength,simplyloosen theboltonthepipestopcollarandslidethepipe
andthecollarbackwardorforwardtothelengthyouwanttotry seethediagram
below.Beforemakinganychangethough,note(ormark)thepositionofthepipeas
deliveredfromthefactory.Ourtestingshows thatthebestperformanceisaround
370390mmbetweentheflangeto thebellyofthepipe.Ifyouchangethepipelength
andfindyourenginenolongerperformsproperly,justresetthepipetoitsoriginal
factorysetting.
Step 8:ServoInstallation
PleasenotethatwedonotincluderadiosystemsinourRTRboatsasmostmodelers
alreadyhavetheirownpreferredRCsystem. Thisapproachalsosavestheextracost
that theradiowouldincur.However,wedoincludea15kgHiTorqueMetal Gear
Servoinall ourRTRpackagesfortherudder. Thisservoisof thestandardservosize,
yetithasallthepoweryouneedforprecisecontroloftherudderathighspeeds.To
attainthislevelof servopower inthepastrequiredalarger1/4scaleservoand
modifyingtheservotraytofititin.Ournewrudderservofitsthestandardservotray
withoutanymodification.
However,youstillneedtoprovidethefollowingitemstocompletethis
installation.

#1:RadioTransmitter.
#2:Rechargeablebattery (ordrycellbatteries)foryourtransmitter.
#3:Rechargeablebatteryforyourreceiver.
#4:Standardservoforcontrollingthethrottle.
#5:15kghitorqueservoforyourrudder(thisisincludedwithyourboat).
#6:Servoarms.
#7:Receiverpowerswitch.
#8:Receiver.
Note:Notshownintheabovephotobutstronglyrecommendedisa"FailSafe"unit
thatwillclosethethrottleandstoptheengineinthecaseofaradiofailure.Some
radiocontrolsystemshaveabuiltinfailsafe,butothersdonot.Askanexperienced
driverforadviceifyouarenotsureonthispoint.
Note:Beforeproceedingtoinstall theservosintotheboat,connectthemtoyour
receiveralongwithabatteryandswitch.Turnonyourradioandcheckforcorrect
operationofyourservos.Havetheservoscenteredandturnoffyourreceiverbefore
youturnoffyourtransmitter.Thiswill leavetheservosatthecorrectpositionfor
connectingtheservoarmsandpushrodsinyourboat.
Note:Whenoperatingyourradio,alwaysturnonyourtransmitterbeforeyouturnon
thereceiver,andalwaysturnoffthereceiverbeforeturningoffthetransmitter.Ifthe
receiverisonwhenthetransmitterisnot,itcanoperatewithunpredictableresults.
InstallationDiagrams

*Unscrewthe6screwsonthemaincoverandliftitoff alongwiththeservobox
cover.
*Unscrewthepushrodadaptersandremovethemfromthepushrods.
*Usinga4mmroundfilemodifytheservomountingholebiggerinordertofitthe
servototheCNCservomountproperly (themountisprovidedintheservobox).
*InstallbothservosintotheCNCservomountusingthescrewsprovided.Theservos
mustbemountedsothatthespindles forthearmsareinthecenter,asshowninthe
above left photo, andthe supplied 15kg metalgear servo should be mounted at the
backoftheservobox readyforconnectiontotherudderpushrod.
*Preparetwosinglearmservoarmstoacceptthepushrodadaptors.Usethesecond
hole from the end on the servo arm for this installation in order to get the proper
controlfromthepushrod.

*Usingasmallholeopener,enlargethesecondholeoftheservoarm to2.5mmin
ordertogetthepushrodadaptorscrew tofitthrough.
*Install both pushrodadaptors ontotheservoarms.
*Installbothservoarmson totheservosandtightenthemwiththescrewsthatcame
with theservos. Thearmsshouldbefittedat90degreestotheservobodies,andso
thattheywillbefacingupwheninstalledintotheservobox.
*FittheCNCservomountandservosintotheservobox rememberthatthe15kg
metalgearservogoesatthebackofthebox.Connectboththrottleandsteering
pushrodsintotheiradapters. Then,screwtheservomountintothebox.
Note:Inthisapplication,donotuseascrewthathaslongerthan a10mmthreadonit
asalongerscrewcouldpossibly penetratethrough thebottom ofthehull.
*Usingasmallholeopeneropena2mmholeinthecorneroftheservobox(seethe
leftpictureabove)forthereceiverantennawiretogothrough.

*Installtheswitch,withthewaterproofcoversupplied,intotheprovidedcutoutin
theservoboxcover.
*Threadthereceiverantennawirethroughthe2mmholeintheservobox andinto
thebackcompartment.Sealwherethewiregoesthroughtheservoboxwithasmall
amountof silicone.
*Connecttheservosandreceiverbattery/switch wirestothecorrectpositionsinthe
receiver.Neatlyarrangeandsecurethewireswithaziptie.
Note: A5cell inlinerechargeablebatteryisrequiredforthisapplication.
*Checkthattheradioandservosareoperatingcorrectly.
*Fittheservoboxcoverinplaceandsecureandsealitwith waterprooftape.
*Threadthereceiverwirethroughtheantennamountonthemaincover.
*Screwthemaincoverbacktotheboatby usingthe6screwsyouremovedearlier.
*Threadthereceiverantennawirethroughtheantennaplastictubeandsecuretheend

oftheantennawiththeblackcapsupplied.
Step 9:BeforeOperating YourBoat
Pleasecompletethefollowinstructionbeforestartingyourengine
Fill TheGasTank
Thecapacity ofthisgastankis900cc.Opentheblackcap
andcarefullyfillthetankwithyourgasoilmixture.Wipe
awayanyexcessgasthatmayhavespilledintotheboat.
Werecommendusing87or90octaneregularpumpgas.
Mixthatwith 100%synthetichighqualitytwostrokeoilata
ratioof16:1(6%ofoil). Agoodqualityoutboardengineoil
isadvisableasitcontainsanticorrosionadditives.
FillTheShaftLubrication OilCup
Your boatisfittedwithalubrication oilcupon the Tbarthat
supportsthetopendoftheflexshaft.Itprovidesfulltime
lubricationfortheshaftwhichisespeciallybeneficialduring
longhighspeedruns.Fillthecupwithagoodquality
lubricatingoil youcanusethesameoilthatyouusetomix
thegas.
Trimming YourThrottleFunction
Adjustthepushrodsothatthecarburetorisfullyopenat
fullthrottleandatareliableidlewhenthethrottleisat
neutral.Youcanadjustyourthrottlelinkagewiththe
pushrodconnector or,ifnecessary,cutthepushrodshorter.
Youmayneedtoadjustthislinkagewhenyoufirststart
yourengine.
Note: Itmaytakesometrialanderrorwithboththepushrodandyourradiotrimand
"EPA"(EndPointAdjustment)functions,butyouneedtoendupwiththethrottle
linkagesetsothat:
1.Theengineidlesreliably,butnottoofast,whenthetransmittertriggerisatits
neutralposition.
2.Whenyoupullthetriggerfullyopenforhighspeed,theservomovementshould
fullyopenthecarburetor butterflyvalve.
3.Whenyoupushthetriggerfullyclosed,theenginemuststop.

Note:Foryourfirstrunswerecommendthatyousetthethrottlebutterfly toopenno
morethanabout3/4 ofthewayratherthanfullyopen evenwhenyourtransmitter
triggerisatitsfullspeedposition.Thiswillhelpyoucorrectlyruninyourhigh
performanceXP254Mengine.Afterhavingsetupthethrottlelinkageasdescribed
above,usethe"EPA"functioninyourtransmitter torestrictthethrottlefromopening
morethan3/4ofitsfullmovement.Aftertheenginehasbeenfully runin,youcan
resetthe"EPA"forthethrottlebutterfly tofullyopenfortopspeed.
TrimmingYourSteeringFunction
Similarly,youneedtoadjustyoursteeringlinkageviathe
pushrodconnector toobtain thecorrectrudder operation.First
makesureyoursteeringservoisinitsneutralposition,then
adjustthelength ofthepushrodsothattherudderiscentered.
Ifnecessary,cutthepushrodshorter.
Note:Werecommendusingthe"EPA"functiononyourradiotosettheruddersothat
itturnsabout2025degreeseitherway forbothleftandrightturning. Thiswillgive
reliableandstableturnsathighspeed.
ConnectionCheck
Beforeyoustarttheengine,pleasecheckallconnectionsand
ensuretheyarefullytightenedandsecured.Ifanyofthem are
loose,itmightcausetheboattooperateincorrectly.In
particular,checktheenginemountbolts, therudderblade
bolts,boththrottleandsteeringpushrodconnectors, theprop
nut,exhaustboltsandtheclutchsystembolts.Beforerunning
andbetweenruns,frequentlycheckthattheflexshaftcolletis
tight otherwisetheshaftcouldflyoutofthecolletathigh
enginerpm andcausedamage.
WaterCoolingLineCheck
Lackofcoolingwatercanquicklycausetheenginetooverheat
andbedamaged.Alwayswatchforleaksinthecooling
system.Becomefamiliarwiththecoolingsystemasshownin
thefollowingdiagramandconfirm thatallthewaterlinesare
correctlyconnectedbeforestartingyourengine.
XHydroCoolingLineDiagram

Line#1:Waterintakelinefromtherudderintowaterpump.
Line#2:Waterintakelinefromwaterpickupdirectlytoengine.
Line#3: Thewateroutletfromthewaterpumptotheengine.
Line#4:Thepressuretubefromthecarburetorblocktothewaterpump.
Line#5:Water outlet fromthenippleontheenginecylinder(undertheexhaust flange)to
thepipe.
Line#6:Wateroutletfromthepipeoutoftheboat.
Line#7:Water outlet fromthenippleontheenginecylinder(undertheexhaust flange)to
flange.
Line#8:Wateroutletfromflangeoutofboat.
Step 10:Starting The Engine
The billet XP254M comes with a Walbro WT257 big bore carburetor which does not have a
primerbulb,chokeorreturngaslinelikethemorecommonWT644orWT711carbsasusually
fitted to stock Zenoah or CY engines. The WT257 carb gives higher performance but does
requireadifferentstartingprocedure.Pleasefollowthebelowstepsforeasystarting.

*Manuallychoketheenginebyblockingthecarbintakeventuriwithyourthumborfingerand
slowlypullingthestarterropeafewtimes.
*Checkthatfuelisbeingsuckedalongthegaslineuptothecarb;continueslowlypullingthe
starter rope until the gas line is clear of bubbles and you can feel fuel wetting your thumb or
finger.
*Removeyourthumborfingerfromthecarbandopenthethrottleabitlessthanhalfway.
*Slowlypullthestarterropeonemoretimetochecktheengineisnotflooded(seebelow).
*Smartlypullthestarterropeintheusualwayuntiltheenginestarts.
*Bringthethrottlebacktoasteadyidle.Donotallowtheenginetooverrevasthiscancause
damage.Youmayfindthatyouneedtofinetuneyourthrottleservotrimorthethrottlelinkage
sothattheXP254Midles reliably but nottoo fast whenthetransmittertrigger is at itsneutral
position.Youmayfinditbesttoincreasetheservotrimsettingforaslightlyfasteridlewhenthe
engineiscold,thenreturnthetrimtoitsnormalsettingoncetheenginewarmsup.
Note:Iftoomuchfuelissuckedintotheengineasyouchokeit,theenginewillbefloodedand
willnotstart.Itmaybehardertopulloveronthestarterastheexcessfuelincreasecompression.
Ifthishappens:
*Removethesparkplugandcarefullywipedrytheelectrodewithacleanragbeforesettingthe
plugsafelyaside.
*Holdacleanragjustabovetheplugholeandpullthestarterropesmartlyafewtimestoclear
theexcessfuel (theragstopsthefuelsprayingoveryouandtheboat).
*Reinstallthesparkplugandopenthethrottleabitlessthanhalfway
*Slowlypullthestarterropetochecktheengineisnolongerflooded.Ifitis,repeattheabove3
steps.
*Smartlypullthestarterropeintheusualwayuntiltheenginestarts.
*Bringthethrottlebacktoasteadyidleposition.

For"hotrestarts"youmaynotneedtochoketheengine.Checkthatthefuellineisfullofgas
withoutanybubblesandsmartlypullthestarterrope.Iftheenginedoesn'tstartafterafewpulls,
thenmanuallychoketheengineasaboveandslowlypullthestarterropeuntilyoucanfeelfuel
wetting your thumb or finger before removing it from thecarb venturi. Slowlypull thestarter
onemoretimetochecktheengineisclear,andthenpullsmartlyuntiltheenginestarts.
Never run the engine with the boat on its stand for more than a minute or so without water
circulatingthroughthecoolingsystem.Thisislongenoughtostarttheengineandtocheckthe
idleas above, or when preparing to launchthe boat in the water. To run the engine for longer
withtheboatonitsstand,youneedtoarrangeasupplyofwater.Onewaytodothisistomake
oradaptafittingforyourgardenhosewithtwonipplesoroutletsoverwhichyoucanslidethe
water lines from therudder and transompickup. Simplyremovethe lines from those fittings,
connect them to your garden hose adapter and turn on the hose at low pressure so that water
flows freelythroughtheoutletsonyourboat.Becarefultokeepthelinesandhoseawayfrom
your prop although you shouldkeeptheengine revs low enough not to actuatetheclutch as
muchaspossible.
Formoreinformationontheenginebreakinprocedure,carburetorsetting,performancetipsand
enginemaintenance,pleasereadtheseparateXP254Menginemanualthatcomeswiththisboat.
Step 12: StoppingThe Engine
For safety purpose, your boat comes equipped with a kill
switch that will instantly stop the engine. Simply press the
button and hold it momentarily until the engine stops.
However, you should also set your throttle linkage so that
youcanstoptheenginebypushingthetransmittertrigger.
Note: When bringing your boat backtotheshore after eachrun, judge the distance
correctly and push the transmitter trigger to stop the engine so that the boat glides
safelytoastopbeforehittingtheshore.
Note:Beforerunningforthefirsttimeeachday,checkthatyour"FailSafe"stopsthe
enginecorrectly. Withtheboatonitsfieldstandandtheenginerunningatidle,turn
offyourtransmitter.TheFailSafeshouldimmediatelyclosethethrottleandstopthe
engine.YourradioorFailSafedevicewillhaveinstructionsonhowtosetthisup.
Step 13: Launching AndRunningYourBoat
*Beforethefirstruneachday:
a)Carefullycheckovertheboatasexplainedinpreviousstepstoensurenothingislooseandthat
allthecoolinglinesarecorrectlyattached.

b)Ifthereareotherradiocontrolmodelsinthevicinity,checkwiththeoperatorsthatyourradio
isnotonthesamefrequency.Ifitis, makearrangementstorunyourmodelsatdifferenttimes.
This step does not apply if your radio is onthe 2.4GHz band as this automatically selects an
availablefrequency.
c) Turn on your radio and check that it is operating correctly; carry out a range check as
explainedinyourradioinstructionmanual.
d)CheckthatyourFailSafeisworkingcorrectly.
e)Lookaroundandensurethattheareawhereyouwillbeoperatingtheboatisclearandthere
arenopeople,otherboats(modelsorfullsize)ordebrisinthewater.
f) Study the area where you plan to put the boat in the water and check that there are no
obstructionsorweed,andthatthewaterisdeepenough.
g)IfotherRCboatsarerunning,especiallyifitisanRCBoatClubarea,findoutanyrulesabout
inwhichdirectiontheboatsrun.Inmostcases,boatsruninaclockwisecircuit(ieturningtothe
right).Donotrunyourboatinadifferentdirectiontotheothers,andkeeptoanydefinedcircuit.
h)Ifotherpeopleareclosebywhereyouarestartingyourengine,makesuretheykeepclearof
theboat especiallykeepthemwellawayfromtheprop.
i)ReviewallthesafetyproceduresmentionedatthestartofthisManual.
j)Makesureyouhavesomemethodofretrievingyourboatshoulditstoponthewaterforany
reason.Neverswimouttoretrieveaboat.Somepeoplehaveasmallinflatabledinghytheyuse
asa"rescueboat".Ifyourlakeorpondisnottoobig,youcanuseatennisballonalonglength
of light line.Throwtheball overthestalled boat and gentlypull onthe lineto bring back the
boat.Ifindoubtaboutrescuemethods,checkwithyourlocalRCBoatClub.
* Fill the gas tank and start the engine as explainedearlier. Wait a few seconds to ensure the
engineisrunningcorrectly.Momentarilyadvancethethrottleandcheckthattheclutchengages
tospintheprop.
*Fittheenginehatchtotheboat,ensuringthelatchesaresecure.
*Whilst youcanlaunchtheboatyourself, itisbesttohaveafriendtaketheboattothewater
while you hold the transmitter. If you do launch yourself, practice first without the engine
runningsoyoucansafelyputtheboatinthewater.Itmaybebesttofirstputthetransmitterina
safespotnearthewater'sedgebeforeputtingtheboatinthewater,ratherthanriskdroppingit
whilecarryingbothitandtheboat.
*Whencarryingtheboat,alwayswatchthatnothingisclosetothepropandthatyoukeepclear
ofotherpeople.
*Gentlyplacetheboatinthewaterwiththefrontpointingoutintoacleararea.
* If other RC boats are running, make sure they are well clear before slowly pulling the
transmittertriggerandacceleratingyourboatawayfromtheshore.
* Allow the boat to rise on plane but keep to around half throttle and check the steering by
operatingtherudder.
*Assoonasyoucan,whilstallowingforanyotherboatsorcircuitkeepingrequirements,bring
yourboatbackpastwhereyouarestandingandcheckthatwaterisflowingthroughbothoutlets.
Getintothehabitofcheckingforwaterfloweverytimetheboatgoespast.Weedordebrisinthe
watercanblockpickupsatanytimeandquicklycauseoverheatinganddamagetoyourengine.
* Enjoy running your boat, gradually increasing speeds(but remembering to properly breakin
the engine) and becoming familiar with how your boat turns and handles in different water
Table of contents
Other Arrow Shark Toy manuals
Popular Toy manuals by other brands

Phoenix Model
Phoenix Model Extra 300 S instruction manual

Hangar 9
Hangar 9 Twist 60 ARF Assembly manual

Mega Bloks
Mega Bloks Collector Series instructions

Horizon Hobby
Horizon Hobby BLADE TRIO 180 CFX instruction manual

Eduard
Eduard Swordfish Mk.II bomb and rockets Assembly instructions

Fisher-Price
Fisher-Price K7682 Consumer information