manuals.online logo
Brands
  1. Home
  2. •
  3. Brands
  4. •
  5. Artec
  6. •
  7. Toy
  8. •
  9. Artec Hands-on Lab Science 2-Way Car Circuit Kit User manual

Artec Hands-on Lab Science 2-Way Car Circuit Kit User manual

Q
P
Q
P
Q
P
Q
P
Q
P
Q
Learnaboutelectriccircuitsbycomparing
thewayseriesandparallelcircuitswork!
Learnaboutelectriccircuitsbycomparing
thewayseriesandparallelcircuitswork!
196453
7H7H Electricity
Scienceseries
2-Way
ypg
y
g
ycomparing
CarCircuitKit
inside!
inside!
s
e
CHOKINGHAZARD -Smallparts.
Notforchildrenunder3yrs.Keepoutofreachofsmallchildrento
preventaccidentalswallowing.
PUNCTUREHAZARD-Partswithsharppoints.
Onlyforusebychildrenaged8yrsandolder.
Tobeusedunderthedirectsupervisionofanadult.
1
①
②
③
④
⑤⑥
⑦⑧
⑨
Action
Analysis
Planning
Improvement
Thinking
Accomplishment
Focusing
Aspiration
Inquisitive
learning
approach
Inquisitive
learning
approach
Inquisitive
learning
approach
Inquisitive
learning
approach
Experiential
learning
approach
Experiential
learning
approach
Experiential
learning
approach
Experiential
learning
approach
Twocyclesforturning
achildintoasciencelover
Twocyclesforturning
achildintoasciencelover
①
Planning…Lookaheadbyyourself
②
Action…Puttheplanintopractice
③
Analysis…Self-examinetheresult
oftheaction
④
Improvement…Improvetheresults
basedontheanalysis
Inquisitivelearningapproach
nurturestheabilitiesof...
Experientiallearningapproach
nurturestheabilitiesof...
①

Focusing…Directattentiontowhatisfun
②
Thinking…Focusandthinkhardwhile
experiencing
③

Accomplishment…Senseofaccomplishment
byfiguringoutsomething
afterthinking
④
Aspiration…Gainastrongdesirefor
achievementafterthe
accomplishment
Theinquisitivelearningandexperiential
learningapproachesofArtec'sScienceSeries
willturnchildrenintogreatloversofscience!
Theinquisitivelearningandexperiential
learningapproachesofArtec'sScienceSeries
willturnchildrenintogreatloversofscience!
WARNING
Make sure to read these carefully before use. (Parents/guardians, read these instructions carefully.)
● IInstructionsforparentsareincludedandmustbeobserved.
● 2x1.5VxAA/LR6(notincluded)
● Readtheinstructionscarefullyandcheckthewiring.Ifwiringisincorrect,ashort
circuitmayoccur.
Thiscouldcauseoverheatingordamagetotheequipment.
● Takecaretoavoidthefollowingsituations,whichmaycausethebatteryleakage,
overheating,orotherdamage.
1.Short-circuitingofbatteries
2.Incorrectlyattachingtheconnectingplugs
3.Installingbatterieswiththepolarityreversed
4.Continuingoperatingwhilethemotorisstalled
● Thetoyisnottobeconnectedtomorethan
therecommendednumberofpowersupplies
● Storethisproductawayfromhigh
temperatures,humidity,anddirectsunlight.
CHOKING HAZARD - Small parts.
Not for children under 3 yrs. Keep out of reach of small
children to prevent accidental swallowing.
PUNCTURE HAZARD - Parts with sharp points.
Only for use by children aged 8 yrs and older.
To be used under the direct supervision of an adult.
7H7H
ご使用前に必ずお読みください。(保護者の方も必ずお読みください。)
警告 小さな部品があります。3歳未満の子供には適当ではありません。
小さなお子様が誤って飲み込まないように注意し、手の届く所には置かないでください。
この玩具は8歳以上を対象としています。
大人の方の直接監督のもとでご使用ください。
●電池のプラスとマイナスを間違えないように入れてください。
●古い電池と新しい電池、いろいろな種類の電池をまぜて使わないでください。
●電極が短絡しないよう、プラスとマイナスの電極を近づけないようにしてください。
●古くなった電池は速やかに取り外してください。
●対応電池:単3型乾電池(1.5V)×2 本 (付属していません)
●長期間使用しない場合は電池を抜いて保管してください。
●組立説明をよく読み、配線や電池の入れ方を間違えないようにしてください。
 間違えて組み立てた場合、回路がショートし発熱や破損の原因となります。
●パッケージには重要な情報が記載されているため、捨てないでください。
●仕様と異なる豆電球を使わないでくだ さい。豆電球仕様:2.2V 0.11A
●車を走らせる場合、安全が確認できる場所で行ってください。
●直射日光や高温になる場所をさけて保管してください。
「学習ブック」と「体験キット」
によりどんどん科学好きな子どもに育ちます!
「学習ブック」と「体験キット」
によりどんどん科学好きな子どもに育ちます!
分析力
計画力
改善力
①計画力…自ら手順を考える力
②行動力…計画したことを実践する力
③分析力…行動した結果を振り返る力
④改善力…分析してよりよくする力
ブックで身につく探究心!
①集中力…楽しいことに熱中する力
②
思考力…集中し遊ぶことで身につく思考力
③
達成感…思考することで得られる満足感
④向上心…達成することで上を目指す心
キットで楽しく科学体験!
ブックで納得
ブックで納得
ブックで納得ブックで納得 キットで実感
キットで実感
キットで実感キットで実感
子どもを科学好きにさせる子どもを科学好きにさせる
サイエンスシリーズ
のの
行動力
達成感
集中力
向上心
思考力
2
Science Series
Electricity
Contents:
What you need:
Car Body(1)
Connector plug(6)
Propeller clasp(1)
Pulley(1)
Motor platform(1)
2 size AA
batteries
Scissors
Let's start the
fun
experiment!
Support brace(1)
Motor holder(1)
Coated wire(1) Rubber band(2)
Battery clips(6)
Motor(1)
Miniature bulb
with socket
(1) Axle(2)
Propeller(1) Wheels(3)
Wheel with
attached
pulley
2-Way
Car Circuit Kit
3
Preparation for the experiment!
Assemble
the
propeller
Attach the
motor
Instructions:
Instructions:
What you will use:
What you will use:
Propeller(1)
Connector
plug(2)
Propeller
clasp(1)
Pulley(1)
Motor holder(1)
Motor platform(1) Motor(1)
◎Refer to page 6 for how to attach the connector plug (5)
Remove the propeller
from the cardboard.
Bend each of the three
wings back slightly.
The
propeller
The
propeller
Motor with
propeller
attached.
Assemble the parts as shown.
Complete
Complete
4
Preparation for the experiment!
Assemble
the car
body
Attaching
the
propeller
Instructions:
What you need
What you need:
Instructions:
Car body(1)
Support brace(1)
Car body with
clips attached.
Motor with propeller
attached.
Battery clips(6)
Car body with
clips attached.
Car body with
propeller attached.
Attach the clips to the car body.
Make sure you push the battery clips rmly into place.
Connect the support brace
to the car body and then
connect the propeller.
Push the motor down with
your nger and point the
propeller upwards.
Complete
Complete
18 cm
10 cm4cm 4cm
10 cm4cm 4cm
0123456789101112131415161718
5
Strip both ends
of the coated
wire
What you need:
Instructions:
How to remove
the plastic coating
Coated wire(1)
scissors(1)
Pinch it between
your nails Pull it o󱐯
Tip:
Cut an 18 cm length of coated wire.
You can use the ruler on this page to measure the length.
Strip o󱐯 about 4 cm of the plastic coating from each end.
Use your nails to pinch the plastic and it should peel o󱐯 easily.
Create two more like this.
Stripped coated
wire
Complete
Preparation for the experiment!
18 cm
10 cm4cm 4cm
10 cm4cm 4cm
0123456789101112131415161718
6
Attach the
connector
plugs
What you need:
How to wrap
the coated
wires
Instructions:
The stripped
coated wires. Connector
plugs (4)
Danger!!
Warning!!
Cord A
Cord B
Wrap the
coated wire
securely
around the
plug.
Do not
connect the
battery
directly to
the coated
wire.
It will
become
very hot!!
Tip:
Put the coated wire through the hole and wrap it around the plug.
Then, wind the end back on itself as shown.
Wrap it tightly so that the coated wire cannot come loose.
Make Cord A (with two connector plugs attached).
Attach a connector plug to both sides of the coated wire.
Make Cord B (with one connector plug attached).
Connect one end of the coated wire to the connector plug.
Complete
Complete
Preparation for the experiment!
7
The ow of electric current
Let's rotate the propeller!
Release the propeller and let it y!
What you need:
1 size AA battery
Car body with propeller attached.
Experiment and observe!
Plug the
connector
plugs into the
metal clasps
and let the
electricity
ow!
Turn on the
battery power and
the propeller will
begin to spin.
Remove the
propeller
clasp!
If you turn
the electricity
on and power
the motor it
will...
The propeller
ies up!
Keep the propeller away from your face and hands while it is spinning.
Point the propeller away from your face and other people.
Which way is the
propeller spinning?
What happens when you switch
the placement of the plugs?
Watch it
from the
side.
Observe its movement and
check the correct answer.
Observe carefully and
check the correct answer.
Spinning
clockwise
Spinning
counterclockwise
Spinning
clockwise
Spinning
counterclockwise
★ Adjust the angle of the propeller wings if it does not take o󱐯 properly.
8
The ow of electric current
Attach the wheels and set the propeller spinning!
The ow of electric current
What you need
Wheels (3)
Axles (2)
Wheel with attached pulley (1)
Propeller clasp (1)
Experiment and observe!
Think about it!
Put the axles
through the car
body and attach
the wheels.
Don't forget the
propeller clasp.
Tilt the propeller.
Turn it on
and let it run!
Be careful not to poke your hand with the axle stick.
Keep the propeller away from your hands and face while it is spinning.
Which way is the car
moving?
What do you think will happen
if we reverse the plugs?
Observe it carefully and
check the answer.
Observe it carefully and
check the answer.
Forward
Backward
Forward
Backward
Forward
Backward
Spinning
clockwise
Spinning
counterclockwise
The way the plugs are
connected will change
the way the propeller
spins and the way the
car moves.
Electricity has a current
and connecting the plug
the opposite way
reverses the electric
current, which causes
the motor to spin in the
opposite direction.
Electricity ows from the
+ terminal to the
– terminal.
9
Series and parallel circuits
Attach the miniature bulb!
Add another battery.
Change the way the batteries are aligned!
What you need:
What you need:
What you need:
Experiment and observe!
Connect Cord
B to the plug
of the
miniature bulb.
Tighten the bulb in the
socket if it is loose!
Unplug the plugs
from the motor
before attaching the
bulb.
Connect the
two batteries
with Cord A.
Connect it to a single battery.
Connected to two batteries.
A series circuit
Connected to two batteries
A parallel circuit
Miniature
bulb with
socket (1)
Cord A.
Cord B
★ Insert all four connector plugs into the sockets.
10
Series and parallel circuits
Series and parallel circuits Think about it!
Directly
connecting two
batteries together
makes it brighter!
Connecting the
same batteries in a
di󱐯erent way
makes a big
di󱐯erence!
Connecting
the batteries in a parallel
circuit doesn't make the
bulb any brighter than
when it was connected
to one battery!
It's called a
series circuit!
♦ When the miniature bulb is powered by a single battery.
♦ When one miniature bulb is powered by two batteries:
♦
When a miniature bulb is powered by two batteries in a parallel circuit.
With a single battery and a miniature
bulb, the miniature bulb is powered by
one battery.
When a miniature bulb is powered
by two batteries (using a series
circuit), it receives electricity from
both batteries.
It becomes twice as bright.
When a miniature bulb is powered by two batteries
(using a parallel circuit), it uses two batteries but
receives only one battery's worth of electricity.
But the batteries will power the bulb for twice as long.
It is
brighter.
The brightness is
the same.
The bulb stays on
as if only one
battery is used.
The bulb will stay on
for twice as long.
11
Connect the bulb and propeller in a series circuit.
Connect the bulb and propeller in a parallel circuit
Experiment and observe!
Connect the plug from the
light bulb (blue) to the
propeller (red).
Connect the blue coated wire from
the miniature bulb and propeller to
the same plug. Do the same with the
red coated wires.
Twist the coated
wires together.
Keep the propeller away from your face and hands while it is spinning.
Does the bulb light up?
Does the propeller spin?
Observe the bulb and
propeller carefully and
check the answer.
Observe the result and
check the answer.
The bulb
The
propeller
The bulb
The
propeller
Voltage and current
12
Voltage and current
Think about it!
Electricity has
both "voltage"
and "current".
There's an
explanation on
the next page.
♦
When the miniature bulb and motor are connected to a single battery in a series circuit:
♦
When the miniature bulb and motor are connected to a single battery in a parallel circuit:
Only the miniature bulb works when the
miniature bulb and motor are connected in
series.
The electricity from the single battery is
distributed as it travels and there isn't
enough voltage to power the motor.
The miniature bulb and the propeller both
function normally when connected in a
parallel circuit.
Electricity from the battery is evenly
distributed and both receive su󱐰cient
voltage.
However, it uses more electricity than the
series circuit and will drain the battery faster.
“Voltage” is the force used to move the electricity.
It pushes the electricity from the
battery to the miniature bulb and the motor
(propeller).
“Current” is the amount of electricity that ows.
The greater the current, the brighter
the bulb will shine and the faster
the motor will spin.
The battery
drains faster
Bulb lights
up.
Bulb lights
up.
Propeller
rotates.
Propeller does
not rotate.
Voltage and current
Voltageistheheightfromwhichwaterisdropped  ,currentistheamountofrunningwater,abatteryisthepumpthatdrawswater,
theminiaturebulbandmotorwillbethewaterwheelsthatarepoweredbywater.
bright.
13
Let's learn more about it!
Batteries
connected in a
series
circuit.
(Basic)
Batteries
connected in a
parallel
circuit.
The
water
current is
stronger and
turns the
wheel
faster.
Each one only
needs to
produce half
the energy.
♦
When a single battery is used to power a single miniature bulb:
♦
When one miniature bulb is powered by two batteries in a series circuit:
♦
When a miniature bulb is powered by two batteries in a parallel circuit.
There is a limit to how high
a single pump can
pump water.
Two pumps are stacked up and pump the water twice as
When two pumps are lined up they last longer as they
each provide only half the water needed. The water
doesn't need to be pumped up high so
the voltage remains unchanged.
high, which doubles the current
and increases the force of the
water that hits the water wheel.
The amount of running water
remains the same.
It is
brighter.
The brightness
is the same.
It is the
same
as if only
one battery is used.
It will stay on for
twice as long.
Voltageistheheightfromwhichwaterisdropped  ,currentistheamountofrunningwater,abatteryisthepumpthatdrawswater,
theminiaturebulbandmotorwillbethewaterwheelsthatarepoweredbywater.
14
“Voltage” is the force used to move the electricity and the “current” is
the amount of electricity that ows. We'll use owing water as an
analogy.
Let's learn more about it!
Think about it!
The miniature bulb and
propeller are connected in a
series
circuit.
The miniature bulb and
propeller are connected in a
parallel
circuit.
♦
When the miniature bulb and motor are connected to a single battery in a series circuit.
♦
A miniature bulb and motor powered by a single battery in a parallel circuit.
The two water wheels must run on the same current and
since the current grows weaker with each wheel it powers,
the bulb becomes dim and
the motor doesn't spin
properly.
Each wheel receives one battery's worth of electrical
current so the miniature bulb shines and the motor rotates
normally. The battery will run out quicker, as water has to
be pumped out twice
as fast to power the two
wheels.
Bulb lights up
but is dim.
Bulb lights up.
The battery
gets drained
faster.
The water
isn't powerful
enough to
turn it fully.
This wheel is
bigger so it's
even harder
to turn.
It must pump
a lot of water.
Propeller does
not rotate.
Propeller
rotates.
15
Let's make it!
Let's make a motor car!
Let's make it!
Attach the pulley
directly to the
motor! Place the motor
on the car body
and fasten it with
the motor clasp.
Insert the battery
and plug and it is
ready to run!
Change
the number of
batteries and
switch around the
wiring to see if it
a󱐯ects the car's
performance.
How did
your car turn
out?
Cool!
Use a rubber band to
connect the motor pulley
and the wheel with an
attached pulley, as shown.
Wrap the cords
that are
connected to the
miniature bulb
around a pencil or
stick to give them
a coiled shape.
Please play with car in a safe, automobile-free area.
★ Check the placement of the rubber band and
  the wiring if the car doesn't run properly.
Wiring diagram
K1213B196839
196453

This manual suits for next models

1

Other Artec Toy manuals

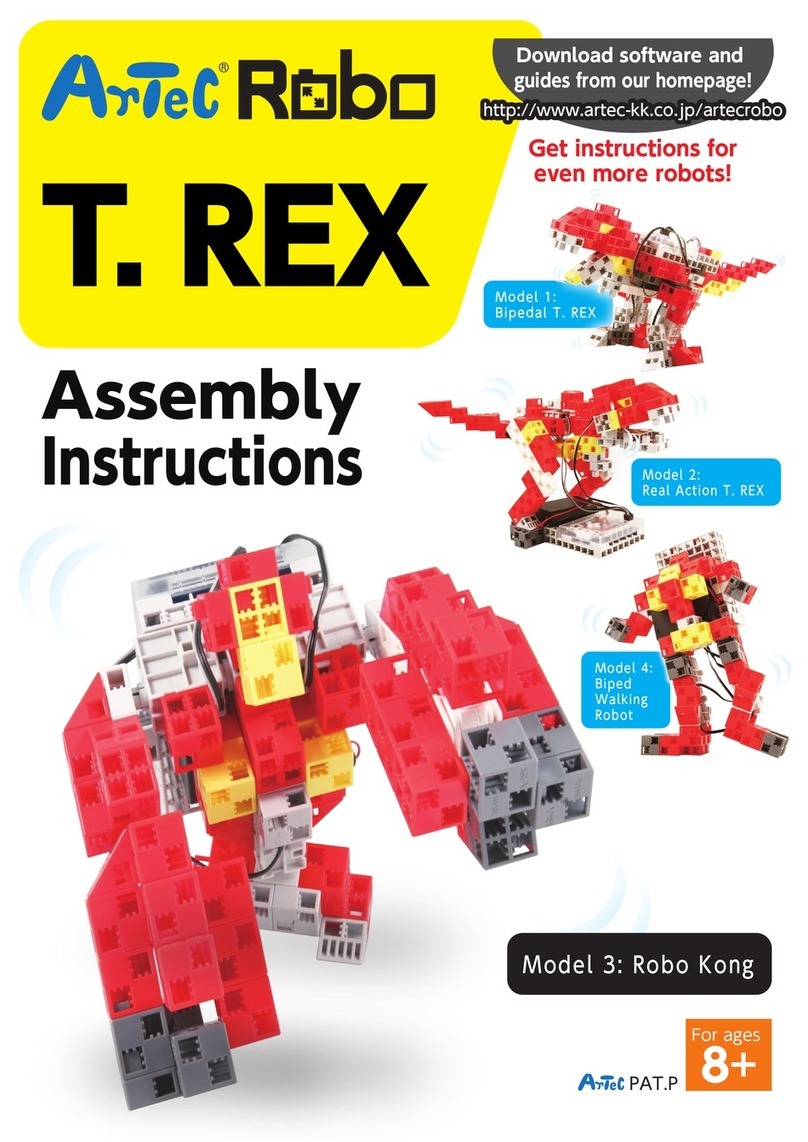
Artec Robo Bipedal T. REX User manual

Artec

Artec Robo Bipedal T. REX User manual

Artec Light Tower User manual

Artec

Artec Light Tower User manual

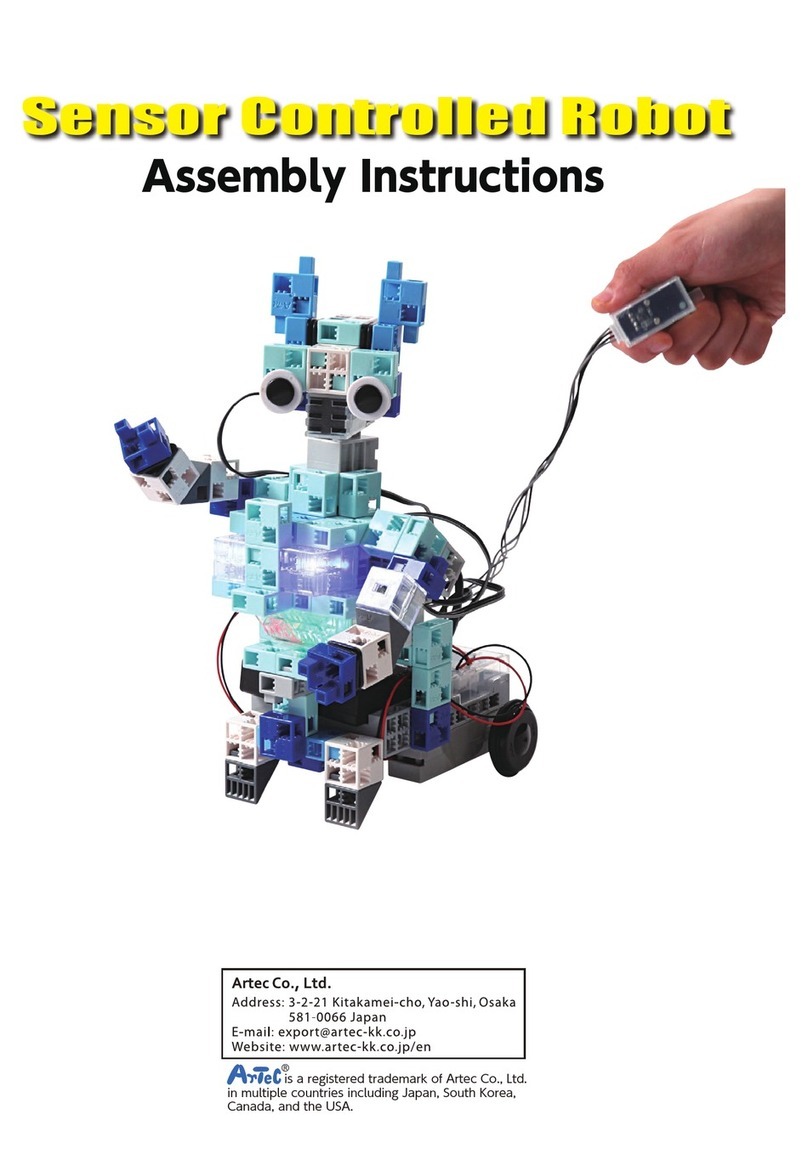
Artec Sensor Controlled Robot User manual

Artec

Artec Sensor Controlled Robot User manual

Popular Toy manuals by other brands

Cloud B Twilight Ladybug manual

Cloud B

Cloud B Twilight Ladybug manual

Little Tikes Little Baby Bum 5 Little Ducks Water Table manual

Little Tikes

Little Tikes Little Baby Bum 5 Little Ducks Water Table manual

Accucraft trains AL97-372 instruction manual

Accucraft trains

Accucraft trains AL97-372 instruction manual

THUNDER TIGER mini Titan 3325 instruction manual

THUNDER TIGER

THUNDER TIGER mini Titan 3325 instruction manual

GRAUPNER PILOT Building instructions

GRAUPNER

GRAUPNER PILOT Building instructions

Eduard MiG-23BN exterior quick start guide

Eduard

Eduard MiG-23BN exterior quick start guide

REVELL Supermarine SPITFIRE Mk.I Assembly manual

REVELL

REVELL Supermarine SPITFIRE Mk.I Assembly manual

marklin 29481 user manual

marklin

marklin 29481 user manual

Hasbro Bop It! Maker quick start guide

Hasbro

Hasbro Bop It! Maker quick start guide

BIG Bobby-Trolley quick start guide

BIG

BIG Bobby-Trolley quick start guide

Crash Test Hobby Grim Reaper XL Building instructions

Crash Test Hobby

Crash Test Hobby Grim Reaper XL Building instructions

POLA G 331084 quick start guide

POLA G

POLA G 331084 quick start guide

Beyblade Galaxy Pegasus instructions

Beyblade

Beyblade Galaxy Pegasus instructions

Timberkits Stephenson's Rocket manual

Timberkits

Timberkits Stephenson's Rocket manual

BLOTZ 28mm Old West Store 2 B28-OW-109 Assembly instructions

BLOTZ

BLOTZ 28mm Old West Store 2 B28-OW-109 Assembly instructions

T R Knapp Model Engineering SEARAILS RR-Series Assembly manual

T R Knapp Model Engineering

T R Knapp Model Engineering SEARAILS RR-Series Assembly manual

Dynam PBY Catalina instruction manual

Dynam

Dynam PBY Catalina instruction manual

Fisher-Price Nick Jr The Backyardigans L2176 manual

Fisher-Price

Fisher-Price Nick Jr The Backyardigans L2176 manual

manuals.online logo
manuals.online logoBrands
  • About & Mission
  • Contact us
  • Privacy Policy
  • Terms and Conditions

Copyright 2025 Manuals.Online. All Rights Reserved.