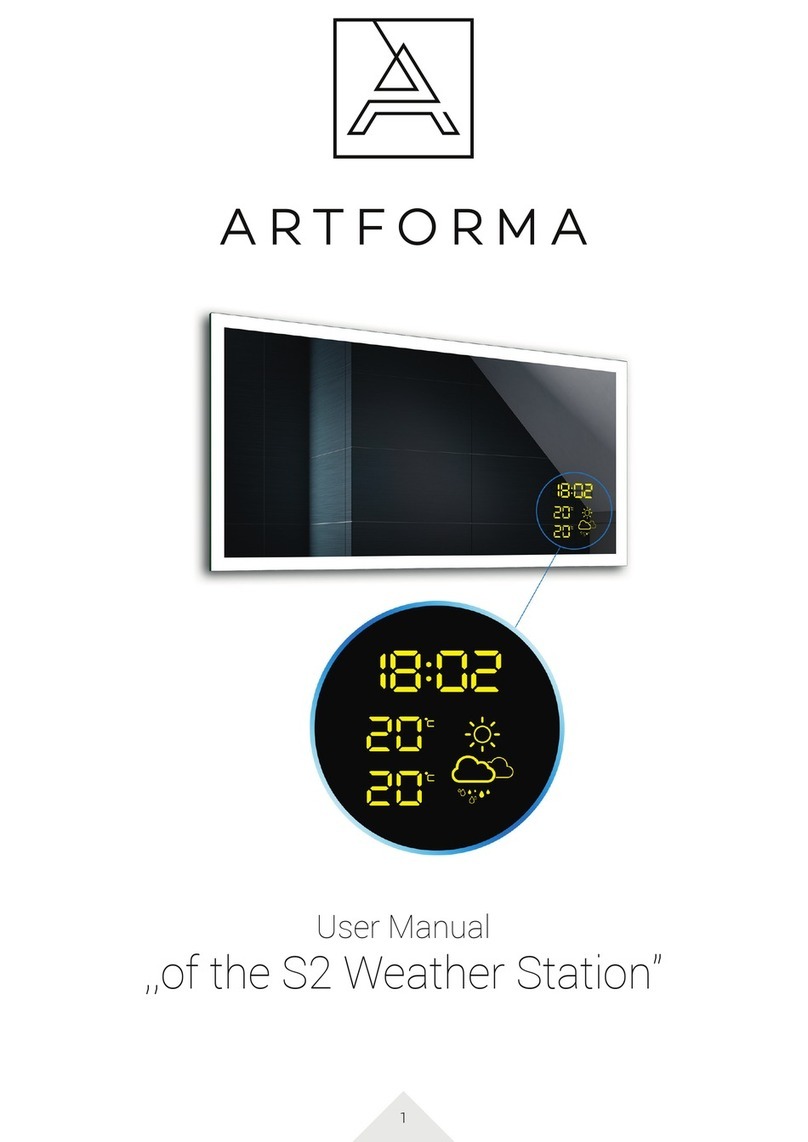
Artforma S1 User manual

1
User Manual
,,of the S1 Weather Station”

Obsługa włącznika
Description of the device
2

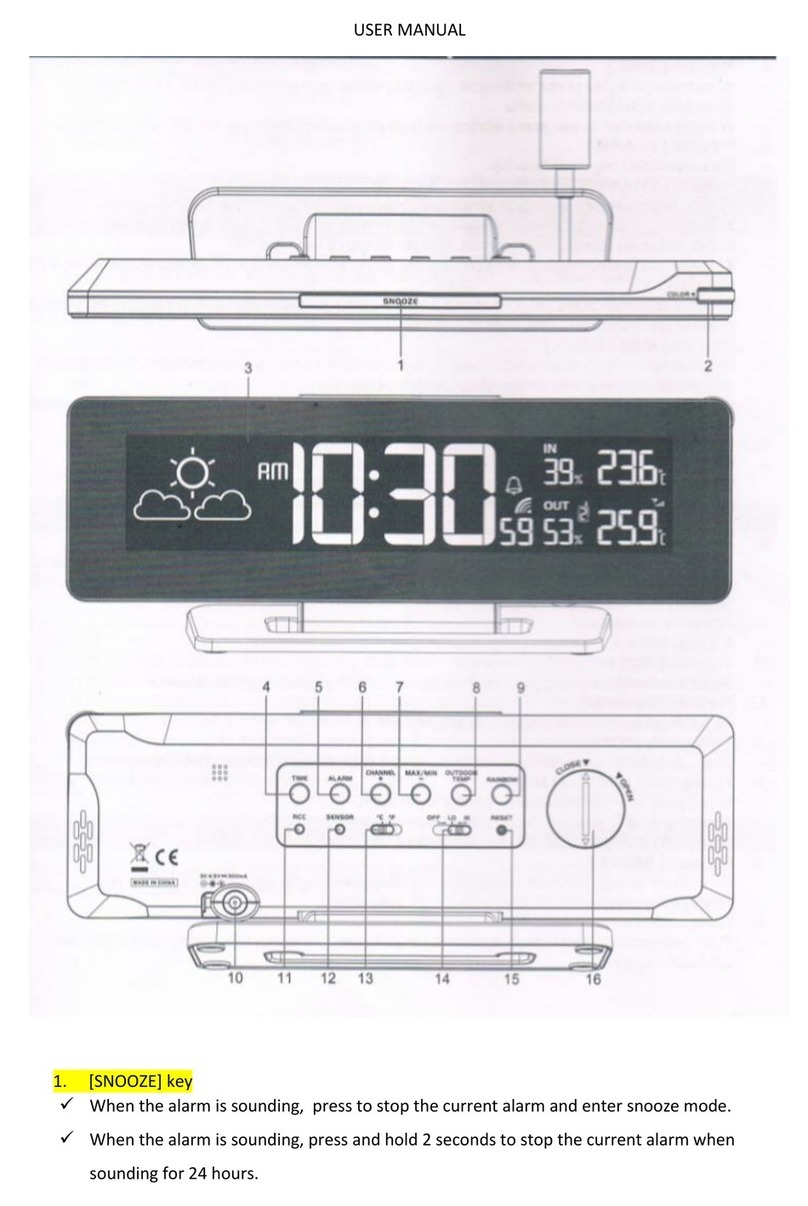
Press this button in order to interrupt the alarm and activate the snooze function.
Press it and hold for 2 seconds in order to switch off the alarm clock for 24 hours.
1. [SNOOZE] button
Turn the regulator right or left to choose the colour of the light (from 256 available colo-
urs).
Press the [Colour] regulator to turn on/off the light colour change
2. [Colour] regulator to set the lighting colour
3. LCD screen
In the normal mode, press the button and hold it for 2 seconds to open the time setting
mode.
In the time setting mode, press the button once again to proceed to further settings.
4. [TIME] button
In the normal mode, the button serves for switching between channels 1-3 of external
sensors.
In the normal mode, press and hold the button for 2 seconds in order to activate the auto-
matic switch-over mode for reading of the data form channels 1-3.
In the automatic switch-over mode, press the button once in order to go back to the
normal mode.
In the setting mode, press the button in order to raise values of specified parameters.
Holding the button down will allow you to set the values quicker.
6. (CHANNEL/ +) button
The button serves for setting of alarm clock parameters.
5. [ALARM] button
3
Description of the device

In the normal mode, use the button to read the minimum and maximum registered
temperature and humidity values.
In the setting mode, press the button to reduce values of specifies parameters. Holding
the button down will allow you to set the values quicker.
7. [MAX./MIN. /-] values
Press the button to specify the colour of the temperature mode. You can choose from 17
colours of the light and assign them to a chosen temperature range. The colour will be
changing depending on the outdoor temperature. The data on the temperature are
collected from wireless sensors.
8. [OUTDOOR TEMP] button
When the light is switched off, use the button to change its colour. The colours will
appear in the following order: white, red, orange, yellow, green, azure, blue, purple.
Press the button in order to switch to manual reception of time signal.
9. [RAINBOW] button
10. Power connector
11. [RCC] button
Use the button to receive the data from transmitter.
12. [SENSOR] button
The switch serves to select in which scale the temperature data should be displayed: in
Celsius degrees or Fahrenheit degrees.
13. [C / F] switch
In [OFF] position, the light will be switched off.
In [LO] position, the light will be dimmed.
In the [LO] position, the light will be bright.
14. [OFF/LO/HI] switch
4
Description of the device

Press the button to reset parameters to default parameters.
Use the button only when the station does not work properly.
15. [RESET] button
A CR2032-type battery that allows for making a back-up copy of settings and parame-
ters of the clock should be put in the compartment.
16. Cover of the battery compartment
5
Description of the device

The indicator flashes when the peripheral unit sends the data.
1. LED Indicator
The screen shows temperature and air humidity that were measured by the sensor.
2. LCD screen
3. A holder to be fixed on the wall
Press the button to reset the sensor.
4. [RESET] button
The switch serves to set the sensor to channel 1-3.
5. [CHANNEL] Switch
Two AA-type batteries should be put in the compartment.
6. Compartment for batteries
6
Description of the external sensor

Temperature range during operation
Temperature resolution
Environment humidity range
Displayed humidity range
Humidity resolution
Time signal format
-5 °C -50 °C
0.1 °C
20% ~ 90%
1 % ~ 99%
1%
DCF or MSF
Central unit
Central unit
Peripheral sensor 1,5 V, AA x2 (not included)
5V, CR2032 lithium battery for back-up copies (not included)
Power supply
Central unit
Peripheral sensor
198 x 48 mm
65 x 100 x 35 mm
Dimensions
Temperature range during operation
Temperature resolution
Environment humidity range
Displayed humidity range
Humidity resolution
Transfer frequency
Number of peripheral sensors
Maximum range of the transmitter
-20 °C -60 °C
0.1 °C
20% ~ 90%
1 % ~ 99%
1%
433 MHz
max 3 units
30 meters
Wireless sensor
7
Technical data

1. First, remove the cover of the battery compartment.
2. Then put two AA batteries in the compartment. Remember to keep the polarity of batteries
while putting them into the compartment according to the markings inside.
3. In the end, place the battery compartment cover back in place.
Warning!
The external transmitter handles transmissions in an open space without obstac-
les, for a distance up to 30 m. The actual transmission range may vary depending
on the signal route. Each obstacle (roof, walls, floors, ceilings, high trees etc.)
reduces the transmission range by half.
Once a channel is assigned to a sensor, you can change it only by removal
of batteries or the use of the RESET button. Then, press the [SENSOR]
button to pair it with the station.
Remember to place the sensor to protect it against direct sunlight, rain
and snow.
Preparation of the external sensor to operation
8
s1 weather station configuration

1. First, connect the power adaptor to a permanent power supply.
2. Then press [RESET] button to restart the clock and to start an automatic synchronisation
with time signal transmitter.
3. To pair the station properly with the sensor, first power sensor on and then press the
[RESET] button on the station (the sensor does not have to be reset now).
Warning!
The material of the building, as well as the location of the receiver and transmitter one
to another can affect the range of the device. Try to place them in different places to
achieve the best range.
In order to limit the impact of interferences, place both units away from metal items and
electric devices. The station and sensor should be at a distance necessary to reach an
effective range: the distance an open space should be 30 at maximum.
Preparation for the use of the station
9
s1 weather station configuration

Reception of the radio time signal
The date and time are controlled with a time signal. The current time is synchronises automa-
tically with the time transmitter signal.
Press the [RCC] button to start automatic synchronisation.
Press and hold the [RCC] button for 8 seconds to switch off the automatic synchronisa-
tion.
10
s1 weather station configuration

The station will try to capture the time signal in the morning at 2:00 AM and at 8:00 AM,
then in the afternoon at 2:00 PM and 8:00 PM.
Place the station beyond the range of possible sources of interferences, for example
TVs or computers.
Do not place the station near metal partitions.
It is recommended to use the station in enclosed spaces, such as airport, production
sites etc.
Signal quality indicator
No signal within the range
or
Sufficient signal
Weak signal
Excellent signal
11
The indicator indicates the signal intensity at 4 levels. Flashing of those indicator means the
time signal is being received. The signal quality is assessed at 4 levels:
s1 weather station configuration

1. In the normal time mode, press the [TIME] button and hold it for 2 seconds to switch the
time format to 12- or 24-hours.
4. Press the [TIME] button to save the settings and to close the setting mode. If you do not
press any button within 60 seconds, the station will close the setting mode automatically.
3. Press the [TIME] button again to switch the parameter that you set. Parameters appear in
the following order: time format 12/24 hours minutes seconds
time zone +- 23 hours summer time AUTO/Switched off
2. With the use of [Channel/ +] and[MAX./MIN./-], set the desired format of time display
(holding the button down will speed up the setting process).
Time settings
12
If you are beyond the reach of the time signal transmitter or if the format of the signal is
wrong, you can set time manually. Once the station receives the time signal from the trans-
mitter once again, the clock will synchronise automatically with the received data.
s1 weather station configuration

Alarm Clock settings
In the normal time display mode, press the [ALARM] button to check alarm clock
settings.
Press the button once again to turn on/off the alarm clock function. A bell icon will
appear or disappear on the screen then.
1. Turning on or off the alarm clock
In the normal time display mode, press the [Alarm] button and hold it for 2 seconds. The
digits corresponding to the hours of alarm clock will start flashing which means that you
can go to the settings.
Use [Channel / +] and [Max./min./-] buttons to change the hour value (holding the button
down will speed up the setting process).
The above-described alarm clock setting process should be one in the following order:
Hours Minutes.
Press the [Alarm] button to save settings and to close the setting mode. If you do not
press any button within 60 seconds, the station will end the setting mode automatically.
When you set the wake-up time with displayed icon, the alarm clock will turn on
automatically.
Press the [SNOOZE] button to turn off the alarm clock signal and to turn on the snooze
(the alarm clock icon will be flashing then). The alarm clock signal activates again after
5 minutes and the snooze function will be activated constantly for 24 h.
If you do not press any button within 2 minutes, the alarm clock signal will turn off auto-
matically.
You can also press and hold the [SNOOZE] for 2 seconds or press the [Alarm] button to
tun off the alarm clock sound. The alarm will ring again on the next day at the same time.
2. Setting the wake-up time
Warning!
13
s1 weather station configuration

WARNING!
In case of inconsistencies between the weather forecast from the local
meteorological station and the forecast from this device, the priority should
be given to the local meteorological station. The manufacturer will not be
liable for any problems resulting from inaccuracy of the weather forecast of
the device.
Snowfalls are forecast when the outdoor temperature is below -3 °C.
Warning of low temperature
Weather forecast
14
The weather station is equipped with an air pressure sensor serving for generating a weather
forecast for the next 12-14 hours.
When the outdoor temperature is 3°C - -2°C,
the icon will appear on the screen.
Sunny Moderate clouds Full clouds Rain Snowfalls
s1 weather station configuration

Displaying and removal of max/min temperature and humidity records
1.
2.
In the normal operation mode, press the [max./min./-] button to display the maximum
temperature and humidity record. Press the button twice to display the minimum values
record. When you press the button once again, the display of the record will stop.
During the display of the record, press the [Max./min./-] button and hold it for 3 seconds to
remove the record of the maximum and minimum temperature and humidity (you will hear
a signal then).
Colourful illumination of the screen
1.
2.
3.
4.
Slide the [OFF/LO/HI] switch to the [OFF] position to turn on the screen illumination. The
illumination will be dimmed in the [LO] position. It will be bright in the [HI] position.
When the light is turned on, press the [RAINBOW] button in order to change its colour. The
available light colours will appear in the following order: white red orange yellow green
azure blue purple.
Turn the [COLOUR] regulator to the right or to the left to set the light colour (from 256
available colours).
Press the [COLOUR] regulator in order to turn on/off the light colour change.
15
s1 weather station configuration

16
Colourful light of the display screen depending on the temperature
Use the [OUTDOOR TEMP] button to activate the “colour according to the temperature” mode
and to set the colour depending on the temperature measured by a wireless sensor. You can
choose from 17 light colours and assign them to the selected temperature range.
Navy blue
Temperature Range Colour
Dark blue
Light cyan
Light blue
White
Sharp green
Green
Yellow
Light yellow
Light orange
Orange
Light red
Red
Pink
Light pink
Purple
Grey
s1 weather station configuration

If the battery discharge indicator appears near the outdoor temperature data, it
means that the batteries of the external sensor are discharged and they should be replaced
immediately with 2 new AA-type batteries.
If the battery discharge indicator appears near the time data, it means that the
battery of the station is discharged it should be replaced immediately with a new CR2032-
-type battery.
WARNING!
If the transmitter battery power is low, put 2 AA-type batteries and press
the [RESET] button of the transmitter and then the [SENSOR] button on
the main unit in order to pair the sensor once again.
Please dispose of the used batteries in an environmentally friendly
manner.
17
External sensor battery discharge indicator
Central unit battery discharge indicator
The battery discharge indicator
s1 weather station configuration

18
The main unit is intended only for indoor use.
Do not expose the unit to any excessive force nor impacts.
Do not expose the unit to extreme temperatures, sunlight, fluids or humidity.
Remember not to immerse the unit into the water.
Protect the device against contact with corrosive materials.
Do not throw the unit into the fire since it may explode.
Do not open the housing and do not tamper with the parts of the unit.
Please dispose of the used device or batteries in an environmentally friendly manner.
Remarks
s1 weather station configuration

Karpicko, ul. Podgórna 16, 64-200 Wolsztyn
Mail EU: [email protected]; Mail PL: [email protected]
+48 68 422 73 65
We work from Monday to Friday from: 9: 00 AM to 3. 00 PM
FORAM Sp. z o.o. sp. k.
NIP 923-172-93-78, REGON 381749814
Other manuals for S1
1
Table of contents
Other Artforma Weather Station manuals
Popular Weather Station manuals by other brands

La Crosse Technology
La Crosse Technology 308-1425BV3 Faqs

TFA
TFA ZENO 35.1163.01 operating instructions

Oregon Scientific
Oregon Scientific BAR122HGLA user manual

Bresser
Bresser WIFI ClearView Weather Station 7in1 instruction manual

METEOTRACKER
METEOTRACKER MT01 user manual

Auriol
Auriol H13726 Operation and safety notes