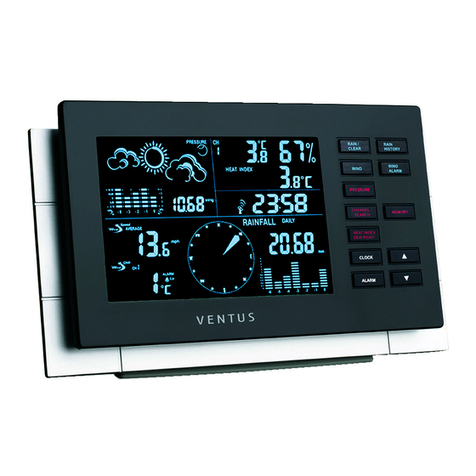
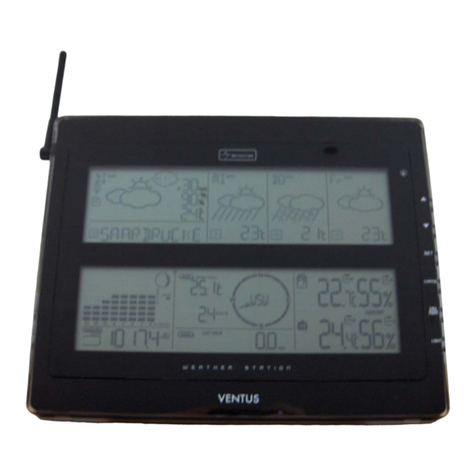
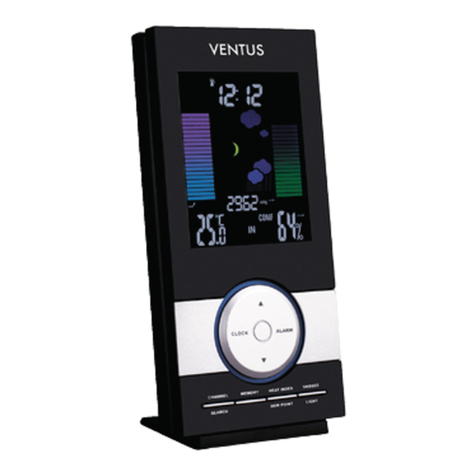
Ventus W838 User manual

Manual | Bedienungsanleitung | Brugsanvisning
Weather station
Wetterstation
Vejrstation
Art. no. W838
EAN 5705858718910
Size: 130 x 112 x 28 mm Imported by / Importeret af
NSH NORDIC A/S
Virkefeltet 4
DK-8740 Braedstrup
Made in PRC

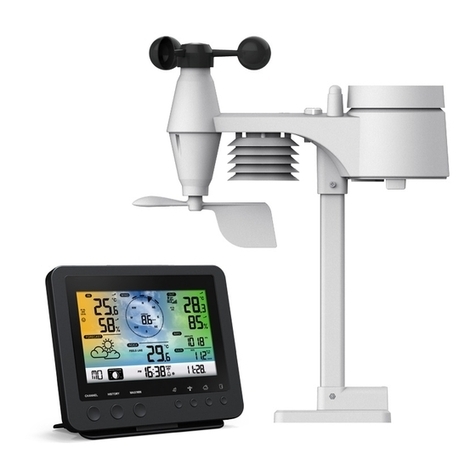
Smart 7-in-1 weather station
with professional sensor
Model: W838
User Manual
*
*Smart phone not included
1

TABLE OF CONTENT
PRECAUTION. . . . . . . . . . . . . . . . . . . . . . . . . . . . . . . . . . . . . . . . . . . . . . . . 3
1. INTRODUCTION . . . . . . . . . . . . . . . . . . . . . . . . . . . . . . . . . . . . . . . . . . . . . 4
1.1 QUICK START . . . . . . . . . . . . . . . . . . . . . . . . . . . . . . . . . . . . . . . . . . . 4
1.2 OVERVIEW . . . . . . . . . . . . . . . . . . . . . . . . . . . . . . . . . . . . . . . . . . . . . 5
2. PRE-INSTALLATION . . . . . . . . . . . . . . . . . . . . . . . . . . . . . . . . . . . . . . . . . . . 5
2.1 CHECKOUT. . . . . . . . . . . . . . . . . . . . . . . . . . . . . . . . . . . . . . . . . . . . . 5
2.2 SITE SELECTION. . . . . . . . . . . . . . . . . . . . . . . . . . . . . . . . . . . . . . . . . . 5
3. INSTALLATION AND GETTING STARTED . . . . . . . . . . . . . . . . . . . . . . . . . . . . . . . 6
3.1 WIRELESS 7-IN-1 SENSOR ARRAY . . . . . . . . . . . . . . . . . . . . . . . . . . . . . . . 6
3.1.1 INSTALL BATTERIES. . . . . . . . . . . . . . . . . . . . . . . . . . . . . . . . . . . . . . 6
3.1.2 INSTALL MOUNTING POLE . . . . . . . . . . . . . . . . . . . . . . . . . . . . . . . . . . 6
3.1.3 SENSOR ALIGNMENT . . . . . . . . . . . . . . . . . . . . . . . . . . . . . . . . . . . . . 8
3.2 ADDITIONAL SENSOR (OPTIONAL) . . . . . . . . . . . . . . . . . . . . . . . . . . . . . . . 8
3.3 RECOMMENDATION FOR BEST WIRELESS COMMUNICATION . . . . . . . . . . . . . . . . 9
3.4 DISPLAY CONSOLE . . . . . . . . . . . . . . . . . . . . . . . . . . . . . . . . . . . . . . . 10
3.4.1 INSTALL BACKUP BATTERY AND POWER UP. . . . . . . . . . . . . . . . . . . . . . . 10
4. SMART LIFE APP . . . . . . . . . . . . . . . . . . . . . . . . . . . . . . . . . . . . . . . . . . . 11
4.1 ACCOUNT REGISTRATION . . . . . . . . . . . . . . . . . . . . . . . . . . . . . . . . . . . 11
4.2 CONNECT WEATHER STATION TO WI-FI NETWORK . . . . . . . . . . . . . . . . . . . . . 11
4.3 DEVICE HOME SCREEN OVERVIEW . . . . . . . . . . . . . . . . . . . . . . . . . . . . . . 13
4.4 TO VIEW MAX / MIN RECORDS . . . . . . . . . . . . . . . . . . . . . . . . . . . . . . . . . 14
4.5 TO VIEW HISTORY GRAPH . . . . . . . . . . . . . . . . . . . . . . . . . . . . . . . . . . . 14
4.6 TO SET THE DISPLAY UNIT . . . . . . . . . . . . . . . . . . . . . . . . . . . . . . . . . . . 15
4.7 AUTOMATION WITH OTHER DEVICE USING SMART LIFE . . . . . . . . . . . . . . . . . . 15
4.8 IOT APPLICATIONS . . . . . . . . . . . . . . . . . . . . . . . . . . . . . . . . . . . . . . . 16
4.9 OTHER FEATURE IN SMART LIFE APP . . . . . . . . . . . . . . . . . . . . . . . . . . . . 16
4.10 FIRMWARE UPDATE . . . . . . . . . . . . . . . . . . . . . . . . . . . . . . . . . . . . . . 17
5. SETTING & FUNCTIONS OF THE CONSOLE . . . . . . . . . . . . . . . . . . . . . . . . . . . . 17
5.1 SETTING MODE . . . . . . . . . . . . . . . . . . . . . . . . . . . . . . . . . . . . . . . . . 17
5.2 ABOUT THE LOCAL TIME . . . . . . . . . . . . . . . . . . . . . . . . . . . . . . . . . . . . 18
5.3 SETTING ALARM TIME . . . . . . . . . . . . . . . . . . . . . . . . . . . . . . . . . . . . . 18
5.4 ACTIVATING ALARM FUNCTION . . . . . . . . . . . . . . . . . . . . . . . . . . . . . . . . 18
5.5 WIRELESS SENSOR SIGNAL RECEIVING . . . . . . . . . . . . . . . . . . . . . . . . . . . 19
5.6 TEMPERATURE / HUMIDITY. . . . . . . . . . . . . . . . . . . . . . . . . . . . . . . . . . . 19
5.7 FEELS LIKE, HEAT INDEX, WIND CHILL & DEW POINT. . . . . . . . . . . . . . . . . . . . 19
5.8 FEELS LIKE . . . . . . . . . . . . . . . . . . . . . . . . . . . . . . . . . . . . . . . . . . . 19
5.9 DEW POINT. . . . . . . . . . . . . . . . . . . . . . . . . . . . . . . . . . . . . . . . . . . . 20
5.10 HEAT INDEX. . . . . . . . . . . . . . . . . . . . . . . . . . . . . . . . . . . . . . . . . . . 20
5.11 WIND CHILL . . . . . . . . . . . . . . . . . . . . . . . . . . . . . . . . . . . . . . . . . . . 20
5.12 WIND. . . . . . . . . . . . . . . . . . . . . . . . . . . . . . . . . . . . . . . . . . . . . . . 20
5.12.1 TO SELECT THE WIND DISPLAY MODE. . . . . . . . . . . . . . . . . . . . . . . . . . 20
5.12.2 BEAUFORT SCALE TABLE. . . . . . . . . . . . . . . . . . . . . . . . . . . . . . . . . 20
5.13 WEATHER FORECAST . . . . . . . . . . . . . . . . . . . . . . . . . . . . . . . . . . . . . 21
5.14 BAROMETRIC PRESSURE. . . . . . . . . . . . . . . . . . . . . . . . . . . . . . . . . . . 22
5.15 RAIN . . . . . . . . . . . . . . . . . . . . . . . . . . . . . . . . . . . . . . . . . . . . . . . 22
5.16 LIGHT INTENSITY & UV INDEX . . . . . . . . . . . . . . . . . . . . . . . . . . . . . . . . 22
5.17 MAX / MIN RECORDS. . . . . . . . . . . . . . . . . . . . . . . . . . . . . . . . . . . . . . 23
6. CALIBRATION . . . . . . . . . . . . . . . . . . . . . . . . . . . . . . . . . . . . . . . . . . . . . 23
7. MAINTENANCE . . . . . . . . . . . . . . . . . . . . . . . . . . . . . . . . . . . . . . . . . . . . 24
8. TROUBLESHOOT . . . . . . . . . . . . . . . . . . . . . . . . . . . . . . . . . . . . . . . . . . . 24
9. SPECIFICATIONS . . . . . . . . . . . . . . . . . . . . . . . . . . . . . . . . . . . . . . . . . . . 25
9.1 CONSOLE . . . . . . . . . . . . . . . . . . . . . . . . . . . . . . . . . . . . . . . . . . . . 25
9.2 WIRELESS 7-IN-1 SENSOR . . . . . . . . . . . . . . . . . . . . . . . . . . . . . . . . . . . 27
2

ABOUT THIS USER’S MANUAL
This symbol represents a warning. To ensure safe use, always adhere to the
instructions described in this documentation.
This symbol is followed by a user’s tip.
PRECAUTION
- Keeping and reading the “User manual” is highly recommended. The manufacturer and supplier
cannot accept any responsibility for any incorrect readings, export data lost and any consequences
that occur should an inaccurate reading take place.
- Images shown in this manual may differ from the actual display.
- The contents of this manual may not be reproduced without the permission of the manufacturer.
- Technical specications and user manual contents for this product are subject to change without
notice.
- This product is not to be used for medical purposes or for public information
- Do not subject the unit to excessive force, shock, dust, temperature or humidity.
- Do not cover the ventilation holes with any items such as newspapers, curtains etc.
- Do not immerse the unit in water. If you spill liquid over it, dry it immediately with a soft, lint-free
cloth.
- Do not clean the unit with abrasive or corrosive materials.
- Do not tamper with the unit’s internal components. This invalidates the warranty.
- Placement of this product on certain types of wood may result in damage to its nishing for which
manufacturer will not be responsible. Consult the furniture manufacturer’s care instructions for
information.
- Only use attachments / accessories specied by the manufacturer.
- This product is intended for use only with the adaptor provided: Manufacturer: DONGGUAN SHIJIE
- The socket-outlet shall be installed near the equipment and easily be accessible.
- When replacement parts are required, be sure the service technician uses replacement parts
specied by the manufacturer that have the same characteristics as the original parts. Unauthorized
substitutions may result in re, electric shock, or other hazards.
- This product is not a toy. Keep out of reach of children.
- The console is intended to be used only indoors.
- Place the console at least 20cm from nearby persons.
- This device is only suitable for mounting at height < 2m.
- When disposing of this product, ensure it is collected separately for special treatment.
- CAUTION! Risk of explosion if battery is replaced by an incorrect type.
- Battery cannot be subjected to high or low extreme temperatures, low air pressure at high altitude
during use, storage or transportation, if not, it may result in an explosion or the leakage of ammable
liquid or gas.
- Disposal of a battery into re or a hot oven, or mechanically crushing or cutting of a battery, that can
result in an explosion.
- Do not ingest the battery, Chemical Burn Hazard.
- This product contains a coin/button cell battery. If the coin/button cell battery is swallowed, it can
cause severe internal burns in just 2 hours and can lead to death.
- Keep new and used batteries away from children.
- If the battery compartment does not close securely, stop using the product and keep it away from
children.
- If you think batteries might have been allowed or placed inside any part of the body, seek immediate
medical attention.
- Only use fresh batteries. Do not mix new and old batteries.
- Dispose of used batteries according to the instructions.
HUAXU ELECTRONICS FACTORY, Model: HX075-0501000-AG
3

- Replacement of a battery with an incorrect type that can result in an explosion or the leakage of
ammable liquid or gas.
1. INTRODUCTION
Thank you for selecting Smart 7-in-1 weather station. The console has WI-FI module built-in
and through its smart system is compatible with Tuya IoT platform. Through the Smart Life APP,
you can view the IN / OUT temperature and humidity, wind, rain, UV and light live data of main
console and 7-in-1 professional sensor(s), you can also check history records, set high / low
alarm and trigger tasks in anywhere.
This system come with a wireless 7-in-1 professional sensor and also support up to 3 additional
thermo-hygro sensors(optional). User can monitor and set multi trigger task to control other Tuya
compatible device(s) according to the specic weather condition(s).
The colorful LCD display shows the readings clearly and tidy, this system is a truly IoT system
for you and your home.
NOTE:
This instruction manual contains useful information on the proper use and care of this product.
Please read this manual through to fully understand and enjoy its features, and keep it handy for
future use.
1.1 QUICK START
The following Quick Start Guide provides the necessary steps to install and operate the weather
station, and upload to the internet, along with references to the pertinent sections.
STEP DESCRIPTION SECTION
1 Power up the 7-in-1 sensor array 3.1.1
2 Power up the display console and link with sensor array & sensor 3.4.1
3Set date and time on display console 5
5 Add device to SMART LIFE APP 4
6Congure WiFi 4.2
4

1.2 OVERVIEW
CONSOLE
1
2
3
4
5
6
7
8
9
10
11
12
13
14
15
16
17
1. [ SNOOZE/CONTRAST ]
key
2. LCD display
3. [ MEM ] key
4. [ RAIN ] key
5. [ BARO ] key
6. Wall mounting hole
7. [ WIND / + ] key
8. [ NDX / - ] key
9. Table stand
10. Power jack
11. [ ON / AUTO ] slide switch
12. [ CH / SET ] key
13. [ ALARM ] key
14. [ CAL ] key
15. [ SENSOR / WI-FI ] key
16. [ RESET ] key
17. Battery door
2. PRE-INSTALLATION
2.1 CHECKOUT
Before permanently install your weather station, we recommend the user to operate the weather
station at a location which is easy to access to. This will allow you to get familiar with the
weather station functions and calibration procedures, to ensure proper operation before installing
it permanently.
2.2 SITE SELECTION
Before installing the sensor array, please consider the followings:
1. Rain-gauge must be clean every few months
2. Batteries must be changed about every 1.5 years
3. Avoid radiant heat reected from any adjacent buildings and structures. Ideally, the sensor
array should be installed at 1.5m (5’) from any building, structure, ground or roof top.
4. Choose an area of open space in direct sunlight without any obstruction of rain, wind, and
sunlight.
5. Transmission range between sensor array and display console could reach a distance of
150m (or 450 feet) at line of sight, providing there are no interfering obstacles in between
or nearby such as trees, towers, or high voltage line. Check the reception signal quality to
ensure good reception.
6. Household appliance such as fridge, lighting, dimmers may pose Electro-magnetic
interference (EMI), while Radio Frequency Interference (RFI) from devices operating in the
same frequency range may cause signal intermittent. Choose a location at least 1-2 meter
(3-5 feet) away from these interference sources to ensure best reception.
5

3. INSTALLATION AND GETTING STARTED
3.1 WIRELESS 7-IN-1 SENSOR ARRAY
1. Antenna
2. Rain collector
3. UVI / light sensor
4. Mounting pole
5. Mounting base
6. Balance indicator
7. Wind cup
8. Radiation shield
9. Wind vane
10. Red LED indicator
11. [ RESET ] key
12. Battery door
13. Mounting clamp
14. Rain sensor
15. Tipping bucket
16. Drain holes
2
36
1
4
5
7
9
8
12
13
14
11
15
16
10
3.1.1 INSTALL BATTERIES
Unscrew the battery door at bottom of unit and insert the
batteries according to the +/- polarity indicated.
Screw the battery door compartment on tightly.
NOTE:
- Ensure the water tight O-ring is properly aligned in place to
ensure water resistant.
- The red LED will begin ashing every 12 seconds.
3.1.2 INSTALL MOUNTING POLE
Step 1
Insert the top side of the pole to the square hole of the
weather sensor.
NOTE:
Ensure the pole and sensor's indicator align.
Step 2
Place the nut in the hexagon hole on the sensor, then
insert the screw in other side and tighten it by the
screw driver.
6

Step 3
Insert the other side of the pole to the square hole of
the plastic stand.
NOTE:
Align the pole and stand marking.
Step 4
Place the nut in the hexagon hole of the stand, then
insert the screw in other side and then tighten it by
the screw driver.
Step 5
Mount the wireless 7-IN-1 sensor with the wind meter end pointing to the North to correctly
orient direction of the wind vane.
A. Mounting on pole (Pole Diameter 1"~1.3")
(25~33mm)
B. Mounting on the railing
NOTE:
1. Install the wireless 7-IN-1 sensor at least 1.5m off the ground for better and more accurate
wind measurements.
2. Choose an open area within 150 meters from the LCD console.
3. Install the wireless 7-IN-1 sensor as level as possible to achieve accurate rain and wind
measurements.
7

3.1.3 SENSOR ALIGNMENT
Install the wireless 7-IN-1 sensor in
an open location with no obstructions
above properly orient the wind
direction vane.
Secure the mounting stand and
clamps (included) to a post or pole,
and allow minimum 1.5m off the
ground.
1.5 meter off
the ground
Point to
NORTH
Add rubber
pads before
mount on the
pole
3.2 ADDITIONAL SENSOR (OPTIONAL)
The console can support up to 3 wireless sensors.
MODEL C3110B C3127A C3107B
NO OF CHANNEL 3
DESCRIPTION High Precision
Thermo-Hygrometer
sensor
Soil Moisture and
Temperature Sensor
Pool Sensor
IMAGE
868MHz
SOIL SENSOR
1. In the new wireless sensor, slide the Channel switch to a new CH number
2. Press the [ RESET ] key on the new sensor.
3. At the back of the console, press the [ SENSOR / WI-FI ] key enter sensor synchronization
mode
4. Wait for the new sensor(s) to pair up with the console. (About 1 minute)
5. Once the new sensor(s) are connected to the console successfully, their temperature and
humidity will be shown in "Indoor / CH" display section.
NOTE:
- Channel number of the sensor must not be duplicated among the sensors. Please refer to “INSTALL
Wireless thermo-hygro SENSOR” for details
- This console can support different type of additional wireless sensor(s), e.g. soil moisture. If you
would like to pair up additional sensors, please check with your retailer for more detail.
8

SENSOR(S) RESYNCHRONIZATION
Press the [ SENSOR / WI-FI ] key once for the console to enter sensor Synchronization mode
(channel number blinking), and the console will re-register all the sensors that have already
been paired to it before.
REMOVE WIRELESS SENSOR(S) CONNECTION
In order to remove the sensor(s) connection, please follow below steps:
1. Remove sensor batteries.
2. Press [ SENSOR / WI-FI ] key once to clear the sensor history.
3.3 RECOMMENDATION FOR BEST WIRELESS COMMUNICATION
Effective wireless communication is susceptible to noise interference in the environment, and
distance and barriers between the sensor transmitter and the display console.
1. Electromagnetic interference (EMI) – these may be generated by machinery, appliances,
lighting, dimmers and computers, etc. So please keep your display console 1 or 2 meters
away from these items.
2. Radio-frequency interference (RFI) – if you have other devices operating on 868 / 915 / 917
MHz, you might experience communication intermittent. Please re-located your transmitter or
display console to avoid signal intermittent problem.
3. Distance. Path loss occurs naturally with distance. This device is rated to 100m (300 feet)
by line of sight (in interference free environment and without barriers). However, typically
you will get 30m (100 feet) maximum in real life installation, which includes passing through
barriers.
4. Barriers. Radio signal are blocked by metal barriers such as aluminum cladding. Please align
the sensor array and display console to get them in clear line of sight through window if you
have metal cladding.
The table below show a typical level of reduction in signal strength each time the signal passed
through these building materials.
MATERIALS SIGNAL STRENGTH REDUCTION
Glass (untreated) 10 ~ 20%
Wood 10 ~ 30%
Plasterboard / drywall 20 ~ 40%
Brick 30 ~ 50%
Foil insulation 60 ~ 70%
Concrete wall 80 ~ 90%
Aluminum siding 100%
Metal wall 100%
Remarks: RF signal reduction for reference.
9

3.4 DISPLAY CONSOLE
1. Time & Date
2. Indoor / CH temperature & humidity
3. Outdoor temperature & humidity
4. WIND, BARO, RAIN, UV and Light
intensity
1
2
4
3
3.4.1 INSTALL BACKUP BATTERY AND POWER UP
Backup battery provides power to the console to retain clock time and date, max/min records
and calibration value.
Step 1 Step 2 Step 3
Remove the console
battery door with coin
Insert a new CR2032
button cell battery
Replace the battery door.
NOTE:
- The backup battery can back up: Time & Date, Max/Min records and calibration value.
- The built-in memory can back up: connection settings.
- Please always remove the back-up battery if the device is not going to be used for a while. Please
keep in mind that even when the device is not in use, certain settings, such as the clock, calibration
and records in its memory, will still drain the back-up battery.
POWER UP THE CONSOLE
1. Plug in the power adapter to power up the console.
2. Once the console is power up, all the segments of the LCD will be shown.
3. The console will automatically enter AP mode and sensor synchronization mode
automatically.
Blinking:
Trying to connect to router
Stable:
Connected to router
Stable:
Connected to router and
synchronized to local time
Flashing:
Console currently in Access
Point (AP) mode
Blinking:
Sensor synchronization
process
4. The wireless sensor will automatically pair up with console (about 1 minute). Upon successful
synchronization, display will change from "- -.-°C, - -%" to actual reading.
10

NOTE:
If no display appears when power up the console. You can press [ RESET ] key by using a
pointed object. If this process still not work, you can remove the backup battery and unplug the
adaptor then re-power up the console again.
RESET AND FACTORY HARD RESET
To reset the console and start again, press the [ RESET ] key once or remove the backup battery
and then unplug the adapter. To resume factory settings and remove all data, press and hold the
[ RESET ] key for 6 seconds.
CHANGING BATTERIES AND MANUAL PAIRING OF SENSOR
Whenever you changed the batteries of the wireless sensor, re-synchronization must be done
manually.
1. Change all the batteries to new ones in the sensor.
2. Press [ SENSOR / WI-FI ] key on the console to enter sensor Synchronization mode.
3. Console will re-register the sensor after its batteries are changed (about 1 minute).
4. SMART LIFE APP
4.1 ACCOUNT REGISTRATION
The console works with Smart Life APP for Android and iOS smart phone.
1. Scan the QR code to go to the Smart Life download page.
2. Download Smart Life from Google Play or Apple APP store.
3. Install the Smart Life APP.
4. Follow the instruction to create your own account using phone
number or email.
5. Once the account registration is completed, the Home Screen
will be shown. Smart Life for
Android /iPhone
NOTE:
- There is no Registration code needed if email method is chosen.
- The APP may be subject to change without notice.
- You may be prompted to allow the APP to have access to your location. This will allow the APP to give you
general weather information in your area. The APP will still work if you don' t allow access to that.
4.2 CONNECT WEATHER STATION TO WI-FI NETWORK
1. Press and hold the [ SENSOR / WI-FI ] key for 6 seconds to enter AP mode manually,
indicated by blinking AP and . When the console is power up for the rst time, the console
will automatically enter and stay at AP mode.
11

2. Open Smart Life APP and follow the in-APP instructions to connect weather station to your
Wi-Fi network.
Step 1:
At the home screen , tap the on the
top right corner to add your console.
Step 5:
There will auto scan and register
your device.
Step 6:
Once it success, the console icon will shown,
and you can customize its information.
Step 4:
Conrm your device is in "AP mode"
and tap "Next".
Step 3:
Make sure you select the 2.4G network
and enter your Wi-Fi password then
tap the "Next".
Step 7:
The console will appear on your Home
Screen. Tap to see the readings.
Step 2:
On "Add Manually" screen, choose
"Sensors" in the left menu bar
and then select "Temperature and
Humidity Sensor(Wi-Fi)".
12

3. The console will automatically exit AP mode and return to normal operation once it's connected
to Wi-Fi router.
NOTE :
-Smart weather station can only connect to 2.4G WI-FI network
-Enable the location information in your mobile when you add your console to APP.
4.3 DEVICE HOME SCREEN OVERVIEW
The device home screen can show the IN, OUT and (CH) Channel's readings, also you can tap
the top and bottom's icon to access other functions.
1. Back icon for back to APP home page.
2. Device management icon for advance feature and
rmware update .
3. OUTDOOR readings section.
4. INDOOR readings section.
5. CH1 ~ CH3 readings section.
6. MAX / MIN icon, tap to display the MAX / MIN
page.
7. History graph icon.
8. Setting icon.
4
5
2
68
7
3
1
13

4.4 TO VIEW MAX / MIN RECORDS
Tap the MAX / MIN icon to enter the max / min records page.
4.5 TO VIEW HISTORY GRAPH
Tap the HISTORY GRAPH icon to enter the history graph page.
Select the period
Download
data by email
History graph
Select the
start day
Tap to select the type of graph
14

4.6 TO SET THE DISPLAY UNIT
Tap the SETTING icon and then tap the unit row to set the display unit in this device pages of
the APP
Temperature unit
Wind speed unit
Barometric
pressure unit
Rainfall / rate unit
Light intensity unit
4.7 AUTOMATION WITH OTHER DEVICE USING SMART LIFE
Console
7-in-1 Wireless
Sensor
Smart Sockets
Smart Switch Devices
Heater
Humidi er
Fans
Dehumidi er
Bulbs
Smart Life
15

4.8 IOT APPLICATIONS
Through the Smart life APP, you can create the temperature and humidity trigger conditions to
control other Smart Life compatible device(s) automatically.
Step 1:
Tap the " Smart" icon on Home
screen, and follow the instruction
to set condition and task..
Step 2:
Tap the " " icon.
Step 3:
Tap one of below tag to set different
trigger condition.
NOTE :
-Any tasks required or performed by third party devices are at user's own choice and risk.
-Please note no guarantee can be assumed regarding the correctness, accuracy, uptodateness, reliability
and completeness of IoT APPlications.
4.9 OTHER FEATURE IN SMART LIFE APP
Smart Life have many advance features, please check the FAQ in the APP to know more about
Smart Life. Tap "Me" in home page then tap the FAQ & Feedback for more detail.
Step 2
Step 1
16

4.10 FIRMWARE UPDATE
The console can be updated through your WI-FI network. If new rmware is available, a
notication or pop up message will be shown on your mobile when you open the APP. Follow the
instruction in the APP to do the update.
During the update process, the console will show the progress status percentage at the middle
of the screen. Once the update complete, the console screen will reset and back to normal
mode. Please ignore APP update fail message, if the console can restart and show the
normal screen after the update process completed.
IMPORTANT NOTE:
- Please keep connecting the power during the rmware update process.
- Please make sure your console WI-FI connection is stable.
- When the update process start, do not operate the console until the update is nished.
- Settings and data maybe lost during update.
- During rmware update the console will stop upload data to the cloud server. It will reconnect to your
WI-FI router and upload the data again once the rmware update succeed. If the console cannot
connect to your router, please enter the SETUP page to setup again.
- Firmware update process have potential risk, which cannot guarantee 100% success. If the update
fail, please redo the above step to update again.
- If rmware update fail, press and hold the [ ALARM ] and [ CAL ] key at the same time with 10
seconds to back to original version, then redo the update procedure again.
Display console function and operation
5. SETTING & FUNCTIONS OF THE CONSOLE
5.1 SETTING MODE
The setting mode can set the time, date, unit of measure and other functions.
Below is the operation step:
- Press and hold [ CH / SET ] key for 2 seconds to enter the setting Mode.
- Short press [ CH / SET ] key to proceed to the next setting step.
- Press [ WIND / + ] or [ NDX / - ] key to change the value. Press and hold the key for quick-
adjust.
- Press and hold [ CH / SET ] key for 2 seconds to exit the SET mode at any time.
Setting items table:
Step Mode Setting procedure
1 12/24 hour format Press [ WIND / + ] or [ NDX / - ] key to select 12 or 24 hour
format
2Hour Press [ WIND / + ] or [ NDX / - ] key to adjust the hour
3 Minute Press [ WIND / + ] or [ NDX / - ] key to adjust the minute
4 Year Press [ WIND / + ] or [ NDX / - ] key to adjust the year
5 M-D/D-M format Press [ WIND / + ] or [ NDX / - ] key to select "Month / Day" or
"Day / Month" display format
6Month Press [ WIND / + ] or [ NDX / - ] key to adjust the month
7Day Press [ WIND / + ] or [ NDX / - ] key to adjust the day
17

8Time sync ON/OFF Press [ WIND / + ] or [ NDX / - ] key to enable or disable time
sync function
If you want to set the time manually, you should set time sync
OFF
9Weekday Language Press [ WIND / + ] or [ NDX / - ] key to select weekday display
language
10 Temperature unit Press [ WIND / + ] or [ NDX / - ] key to change the rain display
unit between ˚C or ˚F
11 Wind speed unit Press [ WIND / + ] or [ NDX / - ] key to change the unit in
sequence: m/s km/h knots mph
12 Baro unit Press [ WIND / + ] or [ NDX / - ] key to change the unit in
sequence: hPa inHg mmHg
13 Rain unit Press [ WIND / + ] or [ NDX / - ] key to change the rain display
unit between mm or in
14 Light intensity unit Press [ WIND / + ] or [ NDX / - ] key to change the Light
intensity unit in sequence: Klux Kfc W/m².
15 Channel auto loop Press [ WIND / + ] or [ NDX / - ] key to enable or disable
channel auto loop function
16 7-in-1 sensor point to Press [ WIND / + ] or [ NDX / - ] key to select the sensor
located hemisphere (e.g. US and EU countries are also "N",
Australia is "S")
NOTE:
Console will exit setting mode automatically, if no operation after 60 seconds.
5.2 ABOUT THE LOCAL TIME
This console is designed to automatically obtain the local time by synchronizing with your local
time. If you want to use it off line, you can set the time and date manually.
5.3 SETTING ALARM TIME
1. In normal time mode, press and hold [ ALARM ] key for 2 seconds until the alarm hour digit
ashes to enter alarm time setting mode.
2. Press [ WIND / + ] or [ NDX / - ] key to change the value. Press and hold the key for quick-
adjust.
3. Press [ ALARM ] key again to step the setting value to Minute with the Minute digit ashing.
4. Press [ WIND / + ] or [ NDX / - ] key to adjust the value of the ashing digit.
5. Press [ ALARM ] key to save and exit the setting.
NOTE:
- In alarm mode, the “ ” icon will display on the LCD.
- The alarm function will turn on automatically once you set the alarm time.
5.4 ACTIVATING ALARM FUNCTION
1. In normal mode, press [ ALARM ] key to show the alarm time for
5 seconds.
2. When the alarm time displays, press [ ALARM ] key again to
activate the alarm function. Alarm off Alarm on
When clock reach the alarm time, alarm sound will start.
Where it can be stopped by following operation:
- Auto-stop after 2 minutes alarming if without any operation and the alarm will activate again in the
next day.
18

- By pressing [SNOOZE / CONTRAST] key to enter snooze that the alarm will sound again after 5
minutes.
- By pressing and hold [SNOOZE / CONTRAST] key for 2 seconds to stop the alarm and will activate
again in the next day
- By pressing [ ALARM ] key to stop the alarm and the alarm will activate again in the next day.
NOTE:
- The snooze could be used continuously in 24 hours.
- During the snooze, the alarm icon “ ” will keep ashing.
5.5 WIRELESS SENSOR SIGNAL RECEIVING
1. The console display signal strength for the wireless sensor(s), as per table below:
Signal strength of outdoor 7-in-1
sensor
Signal strength of wireless sensor
channel
No signal Weak signal Good signal
2. If the signal has discontinued and does not recover within 15 minutes, the signal icon will
disappear. The temperature and humidity will display “Er” for the corresponding channel.
3. If the signal does not recover within 48 hours, the “Er” display will become permanent. You
need to replace the batteries and then press [ SENSOR / WI-FI] key to pair up the sensor
again.
VIEW THE OTHER CHANNELS (OPTIONAL FEATURE WITH ADD ON EXTRA SENSORS)
This console is capable to pair with 3 wireless sensors. If you have 1 or more wireless sensors,
you can press [ CH / SET ] key to switch between different wireless channels in normal mode,
or enable the auto-cycle mode in setting mode to display the connected channels at 4 seconds
interval.
During auto-cycle mode, the icon will show in Indoor / CH section on the display of console.
5.6 TEMPERATURE / HUMIDITY
- The temperature and humidity reading are display on the outdoor and indoor / CH section.
- If the reading is below the measurement range, it will show “LO”. If reading is above the
measurement range, it will show “HI”.
5.7 FEELS LIKE, HEAT INDEX, WIND CHILL & DEW POINT
Feels like, Heat index, Wind chill & Dew point can display on OUT temperature section.
During normal model, press [ NDX / - ] key to switch the OUT temperature as below sequence:
OUT temperature Feels like Heat index Wind chill Dew point
5.8 FEELS LIKE
Feels Like Temperature shows what the outdoor temperature will feel like. It’s a collective
mixture of Wind Chill factor (18°C or below) and the Heat Index (26°C or above). For
temperatures in the region between 18.1°C to 25.9°C where both wind and humidity are less
signicant in affecting the temperature, the device will show the actual outdoor measured
temperature as Feels Like Temperature.
19
This manual suits for next models
1
Table of contents
Languages:
Other Ventus Weather Station manuals

Ventus
Ventus W154 User manual

Ventus
Ventus W820 User manual

Ventus
Ventus lonobox User manual

Ventus
Ventus W850 User manual

Ventus
Ventus W928-ULTIMATE User manual

Ventus
Ventus W177 User manual

Ventus
Ventus w160 User manual

Ventus
Ventus AOK-5005E User manual

Ventus
Ventus C6070A User manual

Ventus
Ventus W193-5 User manual
Popular Weather Station manuals by other brands

Oregon Scientific
Oregon Scientific BAR386 user manual

Sainlogic
Sainlogic FT-0310 user manual

Thommen
Thommen HM30 operating instructions

Gill
Gill MaxiMet GMX200 user manual

La Crosse Technology
La Crosse Technology WS-9611U-IT instruction manual

La Crosse Technology
La Crosse Technology S81120v2 Setup guide