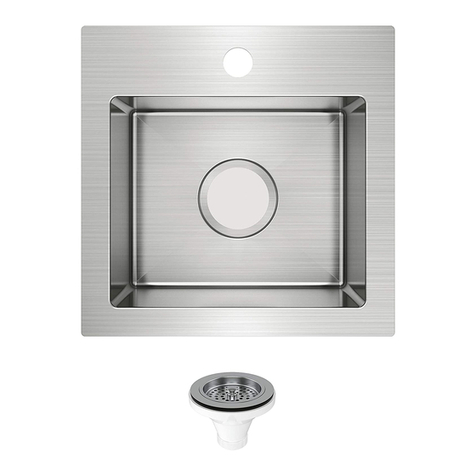
Artika Granite Fusion F11 User manual

Granite Fusion
TM/MC F11
Installation manual
Questions? 1-866-661-9606
rev. 24-12-2014
Drop-in Installation
Undermount Installation

Tools and required materials
Drill Screwdriver
Tape measure
Jigsaw
with suitable blade
(if cutting the counter
is required)
Safety glasses Silicone based sealant
(for the kitchen)
Diamond 32mm hole saw
(for faucet hole trimming)
HammerMasking tape

Hardware (included)
Important
· The instructions may vary depending on the counter material.
Read the instructions carefully and ensure that they are compatible with the sink
installation before proceeding.
· Follow the plumber's code and builder's code eective in your area.
· Shut water valves prior installation.
· Open the sink packaging and verify that the sink is in perfect condition. Put the sink
back in its packaging to protect it until time of installation.
· To replace a previous sink, ensure that the hole in the counter is adequate.
Kit for
Undermount
Installation
Kit for
Drop-In
Installation

Option A
DROP-IN INSTALLATION
1. Trace the opening
· Locate the drop-in template in the box.
· Cut carefully along the dotted lines. Keep the inside portion of the template. It
contains important information concerning the care and maintenance for your new
sink.
· Place the template on the counter where you would like your sink to be. When
installing the template, note the location of the doors and panels of the cabinetry to
ensure that they will be compatible with the sink installation. Ensure that there is
enough space for the water supply installation. Identify the location of the faucet entry
and soap dispenser.
· Fix the template on the counter using masking tape.
· Trace meticulously the inside of the template with a pencil. Remove the template.
OR
· Turn the sink upside down and place it on top of the counter.
Note the location of the doors and panels of the cabinetry to ensure that they will be
compatible with the sink installation.
Ensure that there is enough space for the water supply installation. Identify the
location of the faucet entry and soap dispenser.
· Trace the outer edge of the sink with a pencil, then remove the sink.
· Measure 7mm from the initial sink measurement and trace another line on the inside
of the drawing.
This second line will be the cutting line.

2. Cut the opening
· Using the drill, make a small starting hole of about 1/2’’ on the inside of the cutting
line.
· Drill a second time in this same hole with a larger bit so the jigsaw can be inserted
properly.
· Put masking tape on the outer side of the cutting line. This will protect the counter
from scratches and shattered fragments caused by the jigsaw.
· Using the jigsaw, trim the inside of the cutting line.
· Insert the sink and adjust the opening if required.

3. Add an additional faucet hole
(optional)
· Determine the location of the desired holes.
· Place the sink upside down on a at and adequate surface.
· Using the 32 mm diamond hole saw at high power (1500tr. per min.), break through
in the desired location.
CAUTION: This procedure will cause the metal to be very hot. Please handle with
caution

Sink
Sink
Counter
4. Sink installation
· Clean and dry the surface around the opening of the sink.
· Verify that the sink ts perfectly in the opening. The edge of the sink must sit on the
counter.
· Turn the unit upside down to apply sealant. Apply silicone based sealant (non-includ-
ed) underneath the edges of the sink.
· Underneath the sink, ensure that the plastic ap holding the screw is partially opened
as shown.
· Insert the sink in the opening.
· Fix the sink to the counter by swiveling the mounting brackets as shown.
· Tighten the screws in the front of the sink, following with the ones in the back and on
the sides of the sink.
· Remove excess siliocone based sealant.
Silicone
based sealant

5. Drains installation
· Insert the metal strainer into the rubber seal, and then into the straining hole.
· Install the rubber gasket and the main drain body underneath the sink.
· Using the screw, tighten the main drain body and the metal strainer into place.
· Install the basket on top of the drain installation.
· Repeat the same procedure for the installation of the second draining hole.
Note : Plumber putty is not required for the installation of these drains.
Basket
Metal strainer
Screw
Rubber seal
Rubber gasket
Main body

6. Pipes installation
· Install the faucet following the manufacturer's instructions.
· Make proper water and waste pipe connections.

Option B
UNDERMOUNT INSTALLATION
1. Trace the opening
· Locate the Undermount template in the box.
· Cut carefully along the dotted lines. Keep the inside portion of the template. It
contains important information concerning the care and maintenance for your new
sink.
· Place the template on the counter where you would like your sink to be. When
installing the template, note the location of the doors and panels of the cabinetry to
ensure that they will be compatible with the sink installation. Ensure that there is
enough space for the water supply installation. Identify the location of the faucet entry
and soap dispenser.
· Fix the template on the counter using masking tape.
· Trace meticulously the inside of the template with a pencil.
Remove the template.

2. Cut the opening
· Using the drill, make a small starting hole of about 1/2’’ on the inside of the cutting
line.
· Drill a second time in this same hole with a larger bit so the jigsaw can be inserted
properly.
· Put masking tape on the outer side of the cutting line. This will protect the counter
from scratches and shattered fragments caused by the jigsaw.
· Using the jigsaw, trim the inside of the cutting line.
Ensure to complete the cut with proper nition.

3. Add an additional faucet hole
(optional)
· Determine the location of the desired holes.
· Place the sink upside down on a at and adequate surface.
· Using the 32 mm diamond hole saw at high power (1500tr. per min.), break through
in the desired location.
CAUTION: This procedure will cause the metal to be very hot.
Please handle with caution.

4. Sink installation
· Turn the sink upside down. Align the sink on the counter following the cutting line.
· Mark 8 spots around the frame, at about 1'' (25,4mm) away from the edge of the sink
using a pencil.
For a solid installation, it is recommended that the 8 mounting clips are used.
· Drill 8 one quarter inch xation holes with 3/8'' depth at the
indicated location.
· Insert the brass inserts by tapping them into the holes, splitted end rst.
· Facing the sink, clean throughly the top portion of the edges of the unit. Also clean
underneath the counter and aroud the cutting line using denatured alcohol.
· Apply a small quantity of silicone based sealant (non included) around the cutting
line, 1/8'' away from the edge of the counter.
· Align the sink and x the mounting clips as shown. Firmly tighten the screw into the
brass insert.
· Once the sink is correctly installed, tighten the wing nuts to x into place.
· Complete the installation of the counter.
· Remove the excess of sealant on the inside of the bowls.
Underneath the counter

1/4 po
Diameter
Depth
stop
3/8’’
Sink
Counter
Sealant
Brass insert
Support
Ring
Wing nut
Underneath
the
counter
Hexagon screw
(Metal screws)

5. Drains installation
· Insert the metal strainer into the rubber seal, and then into the straining hole.
· Install the rubber gasket and the main drain body underneath the sink.
· Using the screw, tighten the main drain body and the metal strainer into place.
· Install the basket on top of the drain installation.
· Repeat the same procedure for the installation of the second draining hole.
Note : Plumber putty is not required for the installation of these drains.
Basket
Metal strainer
Screw
Rubber seal
Rubber gasket
Main body

Replacement parts
Item #
1
2
3
Artika Part #
GS150BM/P1
GS150BM/P2
GS150BM/P3
Description
Kit for Drop-in Installation
Strainer kit
Kit for Undermount
Installation
1 2 3
6. Pipes installation
· Install the faucet following the manufacturer's instructions.
· Make proper water and waste pipe connections.

Maintenance
Clean your sink on a regular basis with soapy warm water. Rinse the sink after using
cleaning products. Wipe the surface of the sink with a gentle cloth to remove any
liquid residue. Do not cut food directly on the surface of the sink. Do not leave sharp
objects on the surface of the sink for an extended period of time. Do not use abrasive
cleaning products, sanding tools, steel wool or bleaching products.
Warranty
Artika for Living inc. is proud to oer you a 1-year warranty.
We warrant it to be free of manufacturing defects in material and workmanship for a
period of 1 year from the date of purchase. Should a defect arise within a warrant
period, Artika will provide a replacement free of charge.
Please call 1-866-661-9606 for more details.
Our warranty does not cover sinks that have been installed
incorrectly, or subjected to abnormal use. Our sink is intended for residential use only,
and not commercial. The warranty does not cover shipping costs, labor costs or any
other cost associated with the installation or replacement of the sink, and is extended
to the original consumer.
The maximal value of the warranty cannot exceed the retail price of the product.
Artika for Living inc. is not liable for indirect or consequential damages arising from
improper use or installation of this sink.

Granite Fusion
TM/MC F11
Guide d’installation
Questions? 1-866-661-9606
Montage en surface
Montage sous plan

Outils et matériaux requis
Perceuse Tournevis
Ruban à mesurer
Scie sauteuse
avec lame adéquate
(si le découpage de la
surface de travail est requis)
Lunettes de
sécurité
Agent d’étanchéité
à base de silicone
(pour la cuisine)
Scie emporte-pièce
en diamand 32mm
(pour tailer le trou du robinet)
MarteauRuban à masquer

Quicaillerie (incluse)
Important
· Les instructions peuvent varier selon le matériau du comptoir.
Lisez les instructions et vériez si elles s’appliquent avant de procéder à l’installation.
La quincallerie peut varier selon le matériau du comptoir et pourrait ne pas être
incluse.
· Suivez le code de plomberie et du bâtiment régional.
· Fermez votre alimentation d’eau.
· Déballez votre évier et vériez qu’il soit en parfaite condition. Remettez l’évier dans
l’emballage pour le protéger jusqu’à ce que vous l’installiez.
· Si vous remplacez un évier, assurez-vous que le trou dans le
comptoir est adéquat.
Ensemble
de
montage
sous plan
Ensemble
de
montage
en surface
Table of contents
Languages:
Other Artika Plumbing Product manuals
Popular Plumbing Product manuals by other brands

SUMERAIN
SUMERAIN S1394CI-LH installation guide

Tylo
Tylo Panacea 1309 t user guide

Besco
Besco VEO BU-VS-CH installation manual

Franke
Franke F5SM1007 Installation and operating instructions

Axor
Axor Starck Fixfit Deluxe 27451 Series Assembly instruction

Hans Grohe
Hans Grohe Focus M41 160 Eco 1jet Instructions for use/assembly instructions

Omnires
Omnires SYSY36BL Installation and Maintenance

PROCASA
PROCASA 10273816 quick start guide

Whale
Whale INSTANT MATCH SDS263T Installation guidelines

American Standard
American Standard 2921 installation instructions

leisurecraft
leisurecraft Canadian Timber Granby Assembly instructions

Helvex
Helvex TV-120 installation guide