Ash Technologies Liberty Scholar 2 User manual

Page 1
2
User Manual

Page 2
Table of Contents
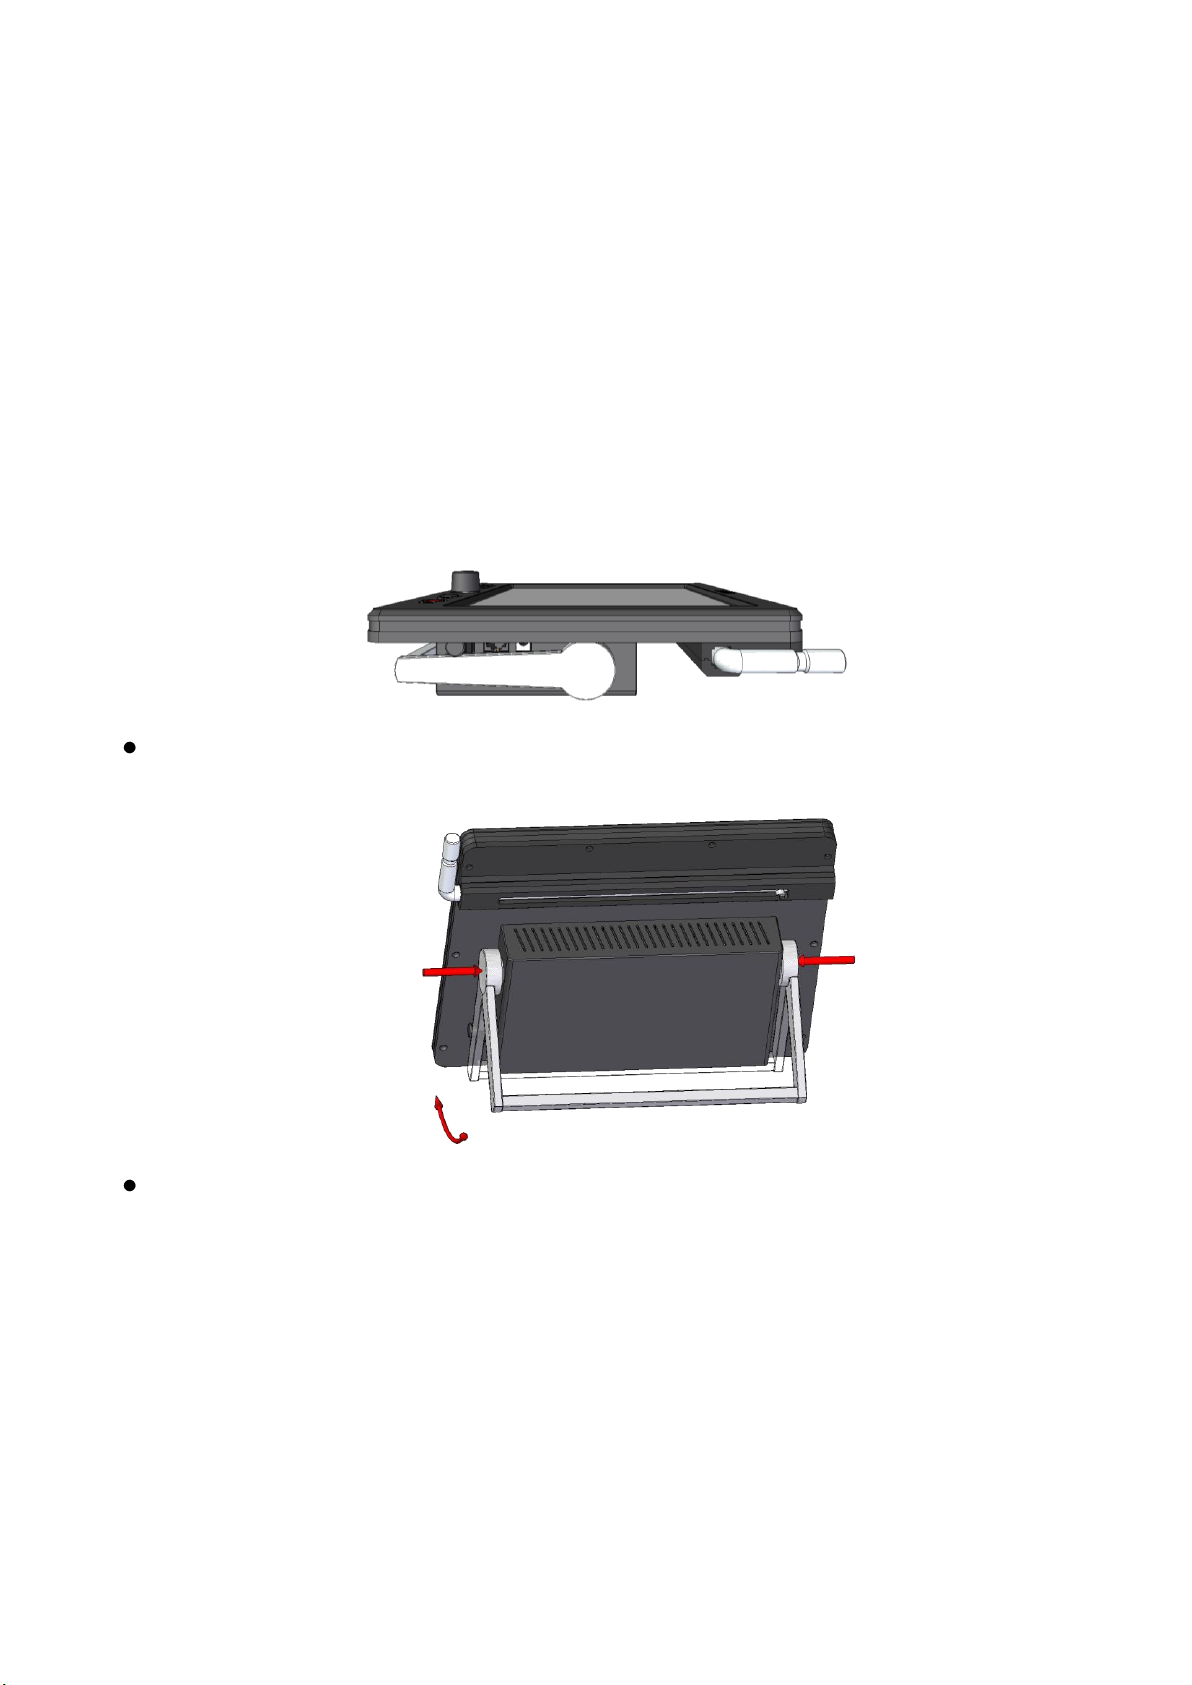
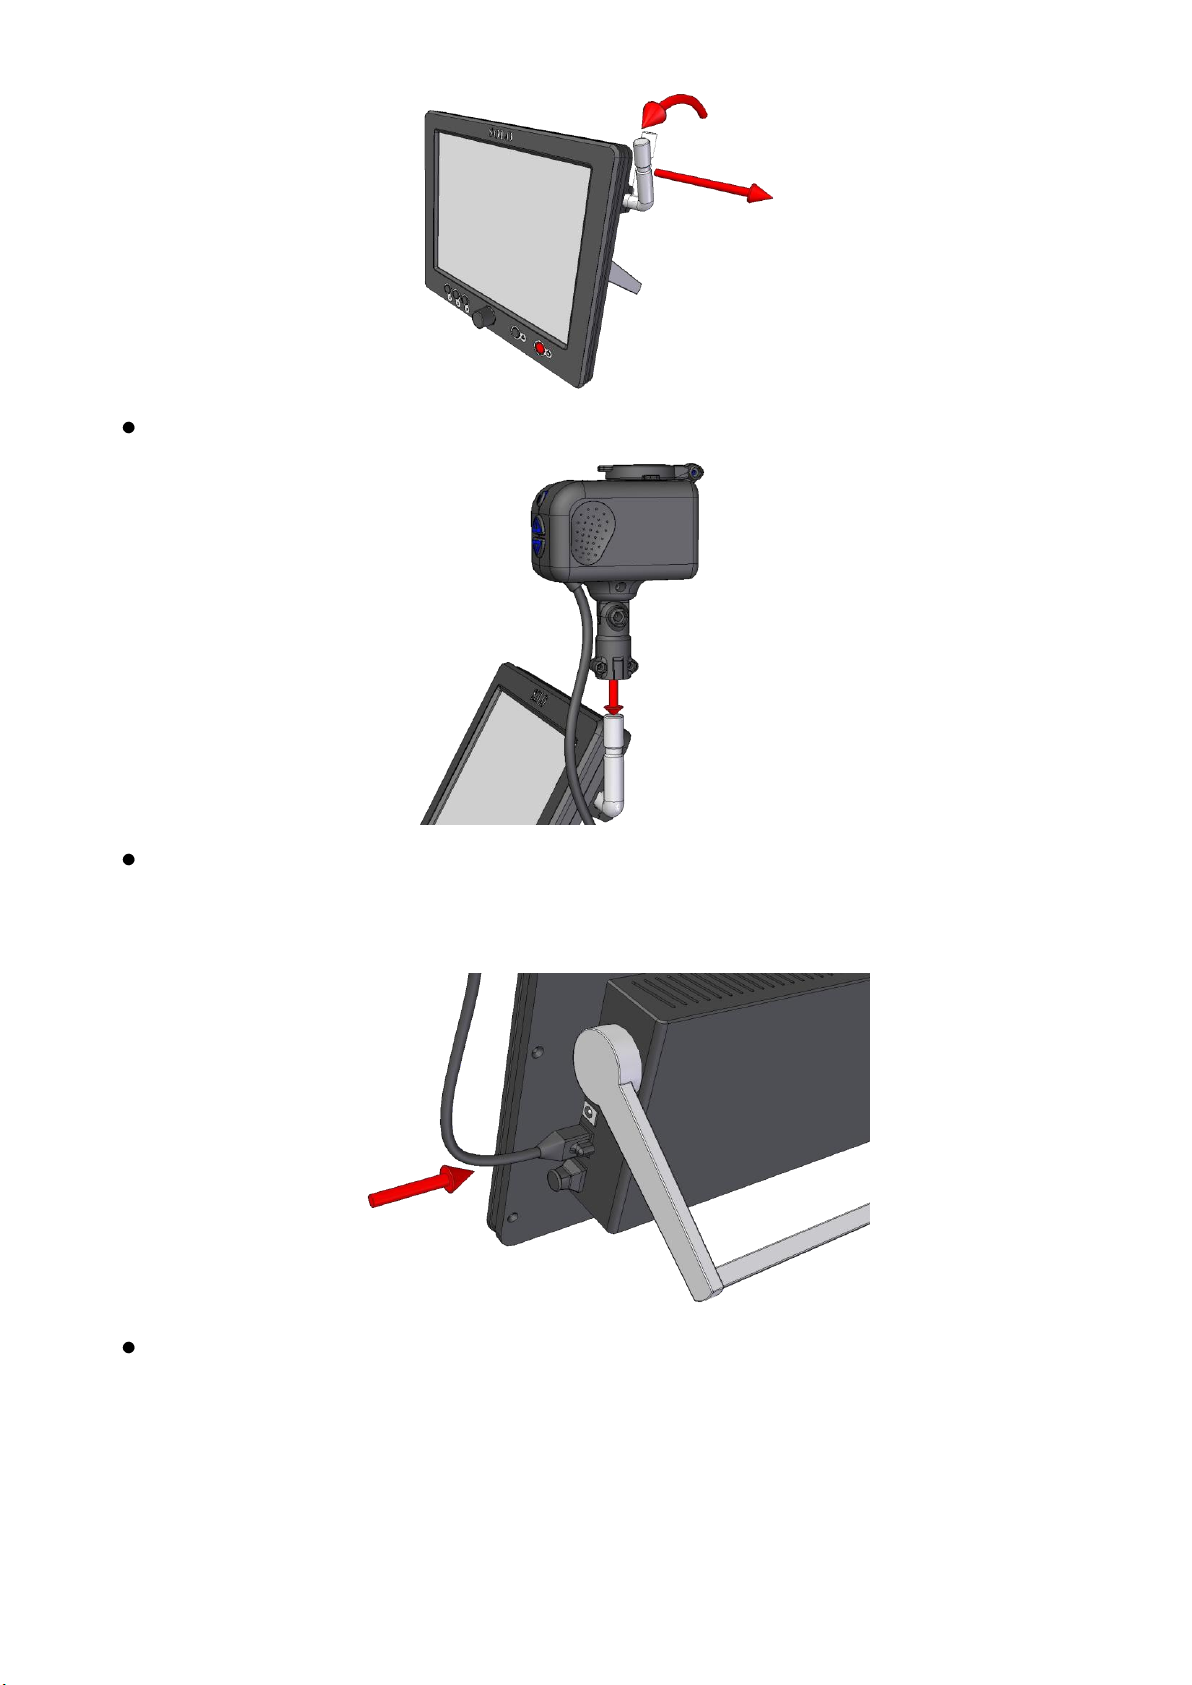
Installation..........................................................................................................3
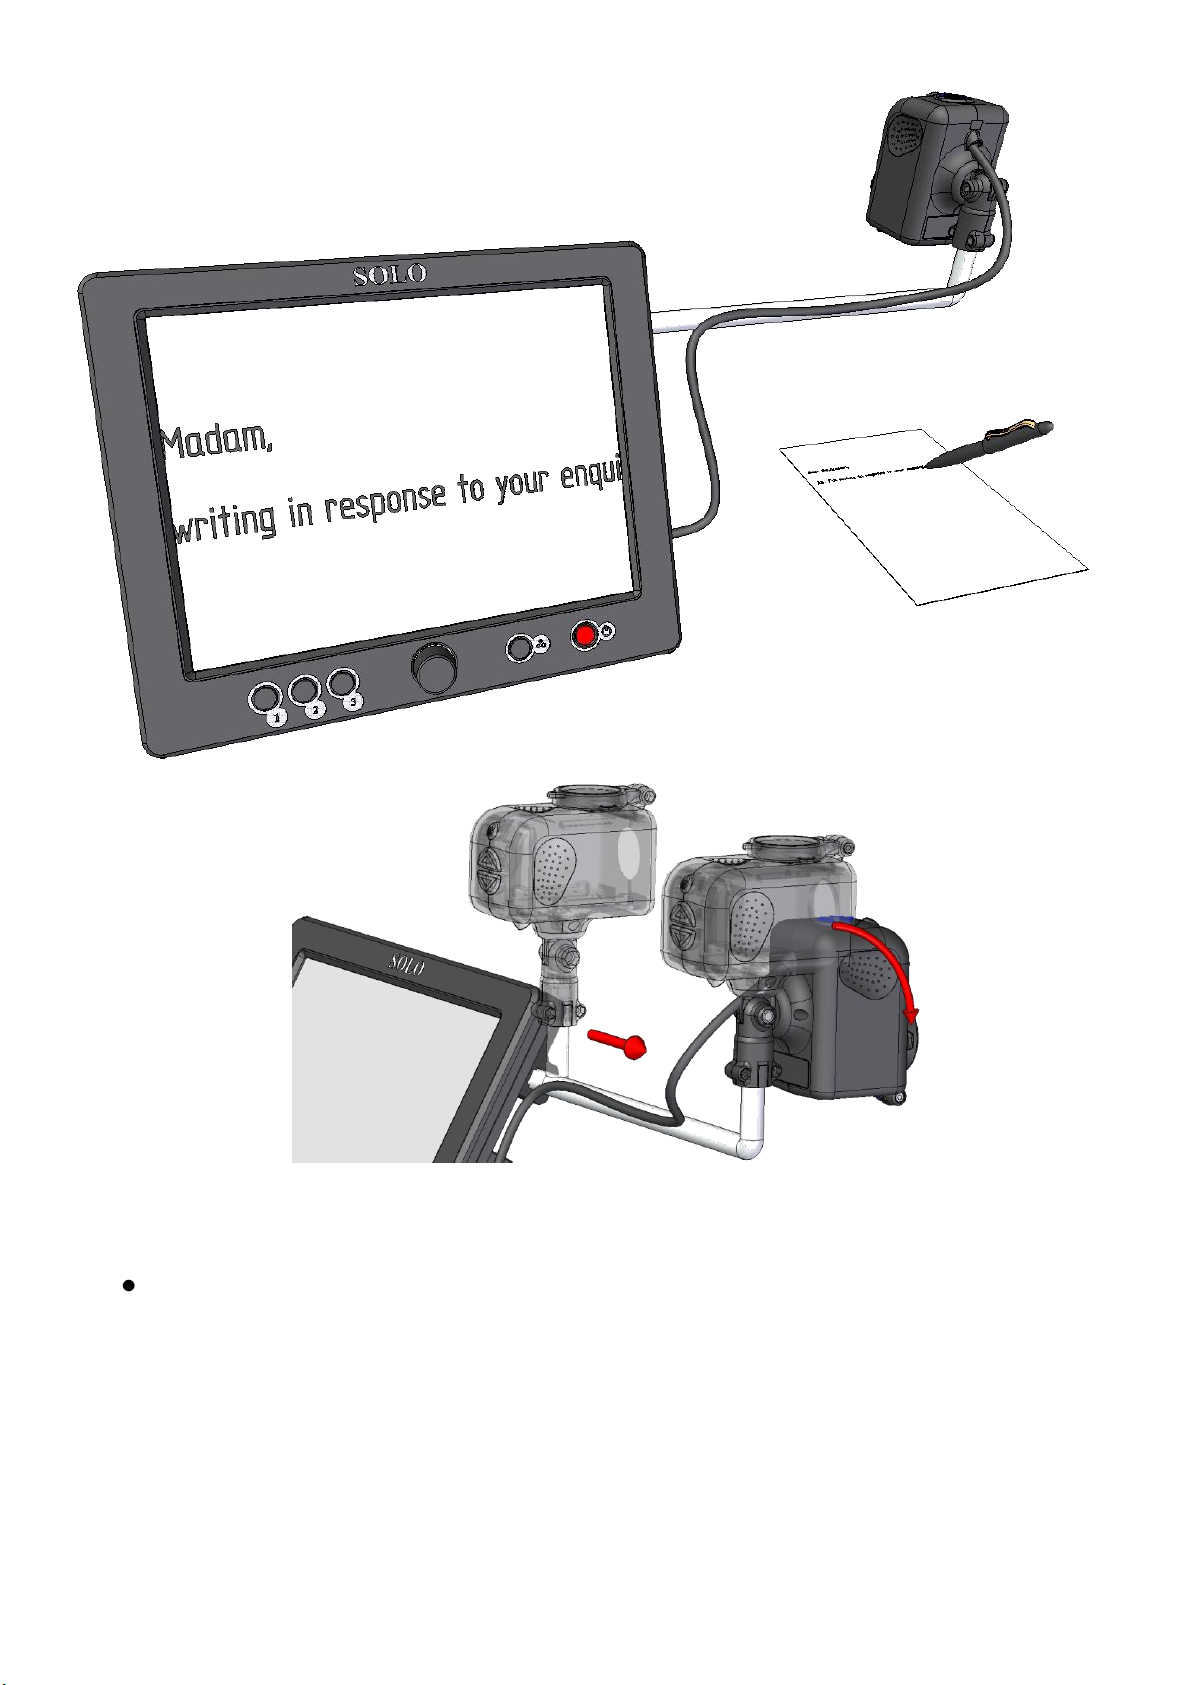
Writing with the Liberty Scholar 2 ..................................................................6
Operating the Camera.......................................................................................7
Reading Lens ..............................................................................................8
Mode Button ...............................................................................................8
Zoom-In Button ..........................................................................................8
Zoom-Out Button........................................................................................8
Camera Customization Menu...........................................................................8
Menu Structure ..............................................................................................9
Button Function .........................................................................................9
Overview.....................................................................................................9
Freeze Image...............................................................................................9
Focus Mode.................................................................................................9
Full Auto Focus ..........................................................................................9
Push To Focus...........................................................................................10
Orientation ................................................................................................10
Factory Defaults........................................................................................10
Main Unit Controls..........................................................................................11
Power Button..................................................................................................11
Mode Select Button........................................................................................11
Scroll Knob.....................................................................................................12
Function Buttons ............................................................................................12
Menu..................................................................................................................12
Main Menu .....................................................................................................13
Display Settings Menu...................................................................................14
Configuration Menu.......................................................................................14
Battery...............................................................................................................15
Maintenance .....................................................................................................15
Warranty ..........................................................................................................16
Specifications....................................................................................................17
Important Instructions for Use ......................................................................18
Before using this product, refer to page 18 for the
Important Instructions for Use.

Page 3
Installation
The Liberty Scholar 2 is supplied the following components:
oMain Unit
oEX2 Distance Camera
oPower supply adapter
oMains cable
oCarry case
When setting up, it is important to choose your workplace carefully to avoid an
uncomfortable or awkward position. The monitor should be below eye level to
avoid strain.
Remove the Liberty Scholar 2 main unit from its case and place on the
work surface.
Depress both handle release buttons and rotate the handle by two clicks
to allow you to look onto or slightly down on the display.
IMPORTANT! If the handle is set back too far, the camera will not be
able to focus on the reading material at high levels of zoom.
The camera can focus on material up to about 25mm / 1-inch tall. If
you wish to look at objects taller than this, tilt the camera slightly and
move the object appropriately to increase the distance between the
object and the camera.

Page 4
Rotate the slide bar out of the stowed position and slide the bar outward.
Connect the Ex2 Camera firmly onto the slide bar and plug the camera
lead into the topmost socket at the right hand side of the main unit
As the unit is supplied with the battery partially charged, we recommend
that you initially operate the Liberty Scholar 2 from the power supply.
Plug the power supply into a wall socket and insert the connector into the
right hand side of the unit above the Camera cable.

Page 5
Power up the Liberty Scholar 2 by pressing the red power button (the
right-most button on the front panel).
When you aim the distance camera at anything of interest you should see
the magnified image on the screen.

Page 6
Writing with the Liberty Scholar 2
Slide the camera away from the Scholar unit as preferred and rotate the
camera head down to look at the object of interest.

Page 7
Flip the lens down and fully into place over the camera.
The unit will automatically restore the last-used settings for both distance
viewing and close-up mode.
Operating the Camera
Zoom
In/Out
Buttons
Reading
Lens
Function Button

Page 8
Reading Lens
The reading lens should be flipped up and onto the back of the camera
when viewing into the distance. It should be placed firmly down and
over the camera lens when looking at closer items.
There is a mirror mode available. If the camera is looking out
horizontally and the reading lens is down over the camera, it will
automatically mirror the image. In this mode the Liberty Scholar can
operate in a similar manner to a magnifying mirror.
Mode Button
Press the small round button for overview mode or to freeze the
image. The operation performed depends on how the button function
has been programmed. Refer below to the next section –“Menu”.
Zoom-In Button
Press to zoom in (magnify). At high zoom levels, the camera cannot
focus on objects closer than 1 meter with the reading lens up or closer
than 16cm with the reading lens in place. Objects closer than this may
or may not focus correctly depending on the level of zoom –this is
not a fault in the camera.
Zoom-Out Button
Press to Zoom out.
Camera Customization Menu
Certain aspects of the camera’s operation can be customized through
its menu. The camera’s menu can be accessed by keeping the
Function (top) button pressed for three seconds. Move up or down
through the menu by using the up (zoom-in) or down (zoom-out)
buttons. Press the Function button to select the function.

Page 9
Menu Structure
BUTTON FUNCTION...
OVERVIEW
FREEZE IMAGE
EXIT SUBMENU
FOCUS MODE...
FULL AUTO FOCUS
PUSH TO FOCUS
EXIT SUBMENU
ORIENTATION
ORIENT NEAR
ORIENT AWAY
FACTORY SETTINGS
EXIT MENU
Button Function ...
Selects the function of the top button:
Overview
Pressing the top button brings the camera into a low zoom
position, allowing you to see where the camera is looking in the
scene. Press any button to restore previous zoom level.
Freeze Image
Pressing the top button freezes the image being displayed. Press
any button to cancel.
Focus Mode...
This allows you to choose between full automatic and camera auto
focus only when the zoom position has been adjusted.
Full Auto Focus
When selected the camera will constantly monitor and adjust its
focus without the user’s intervention.

Page 10
Push To Focus
When selected the camera will only adjust the focus position
when Zoom In or Zoom Out buttons are pressed.
Orientation
By default the camera is orientated away from the user. This
orientation makes it easier to flip up for distance viewing and down
for close-up work. But the camera can also be orientated towards the
user, reducing the distance to the user has to stretch when writing.
In the orientation menu you can choose from Orient Away or Orient
Near.
Camera Orientated “Away” Camera orientated “Near”
Factory Defaults
Restores the factory settings (for the camera only)

Page 11
Main Unit Controls
The Liberty Scholar 2 has the following controls. Refer to the diagram for the
position of the controls.
Power Button
Press to power up the unit. Press again to power off. The Liberty Scholar will
not operate without the camera attached; this is to prevent accidental discharge
of the battery. The unit will power off if the camera is unplugged. The
icon indicates that no camera was found and the unit will now power-off.
The last-used settings are stored at power off and are restored when the unit is
switched on again. Removing the power cord with the unit powered on may
corrupt the saved settings.
Mode Select Button
There are three modes of operation:
Full-color mode for viewing photographs, images, etc.
Positive mode, an enhanced reading mode where the foreground “ink” is
darker than the background “paper”.
Negative mode, an enhanced reading mode where the foreground “ink”
is brighter than the background “paper”.

Page 12
The Mode button will toggle between the last reading mode and full-color
mode if a few seconds elapse between presses. Repeated pressing of the Mode
button will cycle through all three modes.
Scroll Knob
The central control knob can be rotated freely and can also be pressed.
Rotating it controls the camera’s zoom.
Press and rotate to adjust the image brightness.
Press and hold the knob for 8 seconds (without rotating) to bring up the
menu for extended functionality.
Function Buttons
There are three functions buttons, labeled 1, 2 and 3. These perform the
following functions:
1: Linemarker/Blinds (operates in Positive/Negative modes only)
2: Semi-color (operates in Positive/Negative modes only)
3: Overview (or Image freeze if programmed into the camera).
Menu
Press and hold the scroll knob for eight seconds to access the menu. By
rotating the scroll knob, you can navigate through the menu, pressing to accept
an option.
An overview of the menu system appears overleaf. Each sub-menu is
explained in the subsequent sections.
Many sub-menus have an exit icon, , select it to exit the menu.
Some menus offer an on/off choice. Select or as appropriate to
confirm your selection.

Page 13
Main Menu
Configuration Menu
Information Panel (incl. battery status)
Reset to factory default settings
Camera orientation
Orientate the camera towards the user
Orientate the camera away from the user
Sounds on/off
Display Setting Menu
The Menu Structure
Main Menu
Opens Display Settings menu, to alter the brightness, contrast, etc., of
the image.
Opens the Configuration menu to set various options.
Exits the menu.

Page 14
Display Settings Menu
All options below bring up a scale on the bottom of the screen to allow
adjustment of the particular attribute. Each setting is unique to the mode and
camera currently being displayed and will be used when that mode and camera
are displayed again. The exception to this rule is the backlight level, which is
common to all modes.
Adjusts the image brightness.
Adjusts the contrast level of the image.
Adjusts the color saturation. This is only available when displaying a
full-color image.
Sets the backlight level. Note that lower levels of backlight significantly
improve battery life when operating with battery power.
Configuration Menu
Turn the sounds on or off.
Camera orientation. Choose the orientation of the camera that suits you,
either rotated towards the back or front of the unit. Note
there is a short delay before the settings take effect.
Reset to Factory Defaults. If you choose settings that render the unit
unusable, you can restore the settings to a known set of values that
produce an image. All previous settings are replaced with the factory
default values.
Information display. This screen displays a symbol indicating that the
unit is operating on mains power or on battery. It also displays which
camera socket is in use and the type of signal received.

Page 15
Battery
The Liberty Scholar 2 contains a rechargeable battery that can provide power
for mobile use. A low battery warning icon will appear briefly on the screen, in
addition to warning beeps, when the battery is running low or when powered-
on with a dying battery. The Liberty Scholar 2 will only power up very
briefly, or not at all, when the battery is dead.
Low Battery Warning Power Adapter Detected
The battery will power the unit for over 5 hours depending on the backlight
brightness. So, to extend battery time, use the lowest backlight level you can
comfortably read with.
A full recharge takes approximately 5 hours. The Liberty Scholar 2 will
charge when the power cable is inserted; it does not have to be switched on and
it will also recharge during normal use with the power cable attached. The
battery cannot “overcharge” and does not have to be fully discharged before
recharging. An icon will appear briefly on the screen when the power cable is
attached, showing that the battery is now being charged.
Maintenance
When the Liberty Scholar 2 becomes dirty it can be cleaned with a damp cloth
and mild detergent. Do not use solvents or abrasive cleaning agents as they
can mark the display area. The camera’s lens and the reading lens should be
cleaned with a clean, dry cloth.
If the tilting of the camera becomes too loose with use, we have supplied an
allen key with this manual to enable you to tighten the movement. Do not over
tighten the screw!

Page 16
Warranty
Ash Technologies warrants the equipment, when purchased new, to be free from defects in
material and workmanship and will repair or replace at Ash Technologies' discretion, any
equipment which exhibits such defects, provided that the equipment has been operated
under the proper conditions of installation and has not been tampered with by any persons
not authorized by Ash Technologies or its agents and that it is solely serviced by Ash
Technologies or its agents. This warranty shall be voided in the event of damage or abuse
to the unit caused, in the opinion of Ash Technologies or its agents, by general wear and
tear, abuse, neglect, failure to observe stated precautions or by dropping the unit.
Batteries and backlighting are warranted for failure within a period of one year. Pixel
failures, cracks, scratches or similar damage to the display are specifically excluded from
warranty. Non-electrical accessories are specifically excluded from warranty.
In no event shall Ash Technologies, or its agents, be liable for special, indirect, incidental
or consequential damages; the original user's remedies being limited to repair or
replacement.
Ash Technologies makes no other or further warranty, express or implied, including and
warranty of fitness for a specific purpose or warranty of merchantability.
This warranty is valid for a period of TWO YEARS effective from the date of delivery to
the customer.
Depending on the country of sale, the warranty conditions may differ. Contact your
distributor for details.

Page 17
Specifications
Display unit:
Camera:
302 x 252 x 62mm, 2.66 kg (11.9”x 9.9”x2.5”, 5 lb 13oz)
105 x 65 x 105mm, 340g (4.2”x2.6”x4.2”, 12.5oz)
Power consumption:
15W operating, 35W recharging and operating.
Mains voltage: 100-240V AC, 50/60Hz.
Input: 12V dc center positive 5A
Battery:
Custom Li-Ion rechargeable battery
Battery life is 5 hours but will vary depending on the
backlight brightness.
Screen:
High brightness 12” (30cm) diagonal TFT display.
Magnification:
1.5x to 50x continuous zoom in close-up mode.
Temperature:
Storage: -10°C to +40°C. (15°F to 100°F)
Operating: +5°C to +40°C (40°F to 100°F)
As we strive to constantly improve our products, this information is subject to change without notice.
DECLARATION OF CONFORMITY
We, Ash Technologies Ltd., declare under our sole responsibility that this product, Liberty
Scholar 2, of the brand Ash Technologies to which this declaration relates, is in conformity with
the following standards or other normative documents:
EN60601-1-2:2001 - Medical Electrical Equipment
EN 50081-1:1992 CENELEC Generic Emission Standard
Part 1:Residential, commercial and light industry
EN 50082-1:1997 Generic Immunity Standard
Part 1: Residential, commercial and light industry.
following the provisions of EMC directive 89/336/EEC and Low Voltage directive 73/23/EEC and the Medical Directive
93/42/EEC
Signed, for and on behalf of Ash Technologies Ltd,
Alan Johnston,
Engineering Director
Naas, Ireland. October 16, 2009

Page 18
Important Instructions for Use
The following instructions and warnings must be observed:
Remove the Liberty Scholar 2 and its power supply adapter from the carry
case during use.
Use only the power supply adapter provided.
Do not use the Liberty Scholar 2 in a bathroom, near water or other damp
conditions.
Do not open the Liberty Scholar 2 - there are no user serviceable parts
inside and opening it will invalidate your warranty.
The camera must be plugged in prior to powering the unit on or the unit
may fail to operate correctly.
● The unit is designed to be used in the Residential Commercial & Light
Industry.
● Use near other non-light industrial transmitters is not a foreseen use of the
product
For warranty claims or service during or after warranty period please
contact your distributor.

Page 19
This page is deliberately blank

Page 20
© Ash Technologies Limited 2012
Ash Technologies Ltd.
B5, M7 Business Park,
Naas, Ireland.
Made in Ireland
+353-45-88 22 12
+353-45-88 22 14
email: info@ashlowvision.com
web: www.ashlowvision.com
Liberty Scholar User Manual EN Rev B, 08/04/13
Table of contents
Other Ash Technologies Magnifier manuals