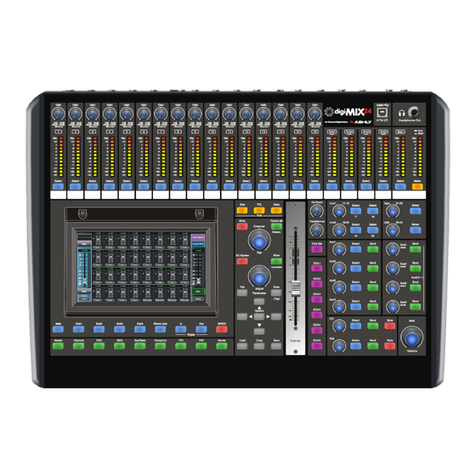
Ashly digiMix24 User manual

ASHLY AUDIO INC.
847 Holt Road Webster, NY 14580-9103 Phone: (585) 872-0010
Toll-Free: (800) 828-6308 Fax: (585) 872-0739 ashly.com
All Trademarks referred to herein are the property of their respective owners
2016 Ashly Audio, Inc. • All rights reserved worldwide
Operating Manual
24 Channel Digital Mixer

Operating Manual - digiMIX24 Digital Mixer
2
Important Safety Instructions
Consignes de sécurité à lire attentivement
The lightning ash with arrowhead symbol, within an equilateral triangle,
is intended to alert the user to the presence of uninsulated "dangerous
voltage" within the product's enclosure that may be of sufcient magnitude
to constitute a risk of electric shock to persons. The exclamation point
within an equilateral triangle is intended to alert the user to the presence
of important operating and maintenance instructions in the literature ac-
companying the device.
Le symbole de la èche dans un triangle équilateral symbolisant la foudre
est prévu pour sensibiliser l’utilisateur à la présence de tension de voltage
non isolée à l’intérieur de l’appareil. Elle pourrait constituer un danger de
risque de décharge électrique pour les utilisateurs. Le point d’exclamation
dans le triangle équilatérale alerte l’utilisateur de la présence de consignes
qu’il doit d’abord consulter avant d’utiliser l’appareil.
1. Read these instructions.
2. Keep these instructions.
3. Heed all warnings.
4. Follow all instructions.
5. To reduce the risk of re or electric shock, do not expose this
apparatus to rain or moisture.
6. Do not use this apparatus near water.
7. Clean only with dry cloth.
8. Do not block any ventilation openings. Install in accordance with
the manufacturer’s instructions.
9. Do not install near any heat sources such as radiators, heat
registers, stoves, or other apparatus.
10. Do not defeat the safety purpose of the polarized or grounding-
type plug. A polarized plug has two blades with one wider than the
other. A grounding type plug has two blades and a third ground-
ing prong. The wide blade or the third prong are provided for your
safety. If the provided plug does not t into your outlet, consult an
electrician for replacement of the obsolete outlet.
11. Protect the power cord from being walked on or pinched par-
ticularly at plugs, convenience receptacles, and the point where they
exit from the apparatus.
12. Only use attachments/accessories specied by the manufac-
turer.
13. Use only with the cart, stand, tripod, bracket, or table specied
by the manufacturer, or sold with the apparatus. When a cart is
used, use caution when moving the cart/apparatus combination to
avoid injury from tip-over.
14. Unplug this apparatus during lightning storms or when unused
for long periods of time.
15. Refer all servicing to qualied service personnel. Servicing is
required when the apparatus has been damaged in any way, such as
power-supply cord or plug is damaged, liquid has been spilled or ob-
jects have fallen into the apparatus, the apparatus has been exposed
to rain or moisture, does not operate normally, or has been dropped.
1. Lisez ces instructions.
2. Conservez ces instructions.
3. Observez les avertissements.
4. Suivez ces instructions.
5. Pour réduire le risque de feu ou la décharge électrique, ne pas
exposer cet appareil pour pleuvoir ou l'humidité.
6. Ne pas utiliser l’appareil près de l’eau.
7. Le nettoyer à l’aide d’un tissus sec.
8. Ne pas bloquer les ouvertures de ventilation, installer selon les
consignes du fabricant.
9. Eloigner des sources de chaleur tel: radiateurs, fourneaux ou
autres appareils qui produisent de la chaleur.
10. Ne pas modier ou amputer le système de la mise à terre. Une
prise avec mise à terre comprend deux lames dont une plus large
ainsi qu’une mise à terre: ne pas la couper ou la modier. Si la prise
murale n’accepte pas la che, consulter un électricien pour qu’il
remplace la prise désuète.
11. Protéger le cordon de secteur contre tous bris ou pincement qui
pourraient l’endommager, soit à la che murale ou à l’appareil.
12. N’employer que les accessoires recommandés par le fabricant.
13. N’utiliser qu’avec les systèmes de xation,chariots, trépied ou
autres, approuvés par le fabricant ou vendus avec l’appareil.
14. Débrancher l’appareil lors des orages électriques ou si inutilisé
pendant une longue période de temps.
15. Un entretient effectué par un centre de service accrédité est
exigé si l’appareil a été endommagé de quelque façon: si il a été
exposé à la pluie,, l’humidité ou s’il ne fonctionne pas normalement
ou qu’il a été échappé.

3
Operating Manual - digiMIX24 Digital Mixer
Unpacking
As a part of our system of quality control, every Ashly product is carefully inspected before leaving the factory to ensure awless appearance.
After unpacking, please inspect for any physical damage. Save the shipping carton and all packing materials, as they were carefully designed
to reduce to a minimum the possibility of transportation damage should the unit again require packing and shipping. In the event that damage
has occurred, immediately notify your dealer so that a written claim to cover the damages can be initiated.
The right to any claim against a public carrier can be forfeited if the carrier is not notied promptly and if the shipping carton and packing
materials are not available for inspection by the carrier. Save all packing materials until the claim has been settled.
About Ashly
Ashly Audio was founded in 1974 by a group of recording engineers, concert sound professionals, and electronics designers. The rst products were
elaborate custom consoles for friends and associates, but business quickly spread to new clients and the business grew. The philosophy we established
from the very beginning holds true today: to offer only the highest quality audio tools at an affordable cost to the professional user – ensuring reli-
ability and long life. Many years later, Ashly remains committed to these principles.
Ashly’s exclusive Five Year, Worry- Free Warranty (three years on touchscreen and motorized faders) remains one of the most generous policies
available on any commercial- grade product. The warranty covers every product with the Ashly brand name and is offered at no extra cost.
Please read this entire manual to fully understand the features and capabilities of this product.
FCC Compliance
This device complies with part 15 of the FCC Rules. Operation is subject to the following two conditions:
1. This device may not cause harmful interference
2. This device must accept any interference received, including interference that may cause undesired operation
Note: This equipment has been tested and found to comply with the limits for a Class B digital device, pursuant to part 15 of the FCC Rules. These limits are designed
to provide reasonable protection against harmful interference in both a commercial and residential installation. This equipment generates, uses and can radiate
radio frequency energy and, if not installed and used in accordance with the instructions, may cause harmful interference to radio communications. However,
there is no guarantee that interference will not occur in a particular installation. If this equipment does cause harmful interference to radio or television reception,
which can be determined by turning the equipment off and on, the user is encouraged to try to correct the interference by one or more of the following measures:
- Reorient or relocate the receiving antenna.
- Increase the separation between the equipment and receiver.
- Connect the equipment into an outlet on a circuit different from that to which the receiver is connected.
- Consult the dealer or an experienced radio/TV technician for help..
Table of Contents
1 Introduction.........................................4
2 MixerControls .......................................5
3 RearPanelFeatures..................................12
4 GettingStarted......................................14
5 SystemFunctions....................................19
6 EZ-Mode...........................................21
7 Dante-32 Digital Audio Module (optional) . . . . . . . . . . . . . . . . . 22
8 USB-32 Digital Audio Module (optional) . . . . . . . . . . . . . . . . . . 23
9 iPadControl........................................24
10 Troubleshooting....................................25
11 Specications ......................................26
12 Dimensions........................................28
13 BlockDiagram .....................................29
14 Warranty .........................................30

Operating Manual - digiMIX24 Digital Mixer
4
1 INTRODUCTION
Thank you for purchasing the Ashly digiMIX24 digital and networkable 24 input x 14 bus mixer.
With 16 high performance discrete mic/line preampliers, 4 additional line-level inputs, stereo tape inputs, stereo USB audio
input, DSP processing with parametric and graphic EQ, compressor/limiter, expander/gate, delay, invert polarity, two built in
stereo effects buses, four aux buses, four subgroups which can switch to four additional aux outputs, six powerful DCA groups,
sensitive LED metering, load/save/copy user preset control, password security, iPad® remote control via network connection,
and much more, the compact and powerful digiMIX24 offers all the right tools to manage your sound job with condence.
In order to quickly understand the features of the digiMIX24, please read this entire manual as you explore the controls, touch-
screen, and network capabilities of your mixer.
Standard Features
• 16 low noise microphone preamps with dedicated trim controls, +48V phantom power, phase invert
• 4 dedicated line-level inputs
• Stereo tape/CD inputs and outputs on RCA connectors
• USB 2-track audio stereo record and playback
• TRS inserts on channels 1-8
• 4 aux sends and 4 subgroup outputs, switchable to 8 aux sends
• 6 DCA for fader or mute groups
• 2 internal stereo FX with fully editable reverbs, delay with tap tempo, tremolo, anger, and chorus.
• 7 inch color LCD touch screen for graphical viewing, assign, and setup
• EZ-Mode for secure, simplied touchscreen or iPad®control
• 100mm precision Alps®motorized fader
• Pan control
• High resolution delay (0.2mS) on every input, subgroup, aux, or FX
• Expander/noise gate on every input and FX channel
• Compressor/limiter on every input, subgroup, output, and FX channel
• 4-band parametric/shelving EQ lters plus HPF/LPF on every input, subgroup, output, and FX channel
• 31-band graphic EQ on main, aux, and sub outputs
• Stereo link for adjacent inputs, subgroups, and aux outputs
• Solo/PFL on every input, output, subgroup, aux, or FX
• Stereo main outputs on XLR and phone jack with dedicated level control
• Headphone and control room outputs with dedicated level controls
• User presets for DSP channel, GEQ, FX, or scene settings, plus channel copy function
• 32-bit A/D and D/A converters, 32-bit DSP processing, 48KHz sampling rate
• Password security
• Wired network interface for iPad remote control, preset save/load and rmware update using Windows® or Mac®
• Internal 100-240VAC universal power supply
• Safety/compliance: cTUVus, CE, FCC, RoHs
Optional Features
• Dante-32 network audio interface
• USB-32 multi-track audio interface

5
Operating Manual - digiMIX24 Digital Mixer
2 MIXER CONTROLS
2.1 Input Trim
This controls the gain of the analog mic or line input preamplier. For analog inputs, this is the most important control for set-
ting up proper gain structure in the mixer. Properly set, it helps to avoid clipping and maintains low noise. A good rule is that
with typical input signal present on a channel, adjust the trim control to allow 20dB headroom between the expected signal's
peak level and when it clips. In other words, normal signal peaks should be around "0" on the meter. Set this control rst and
then leave it alone unless the input source changes. Do not use the trim control to adjust mix volume later on, use the channel's
fader control instead.
2.2 Input/Output LEDs
Input LEDs indicate the signal level of each input in dBu, after its preamplier but pre-fader. Output LEDs (Sub & Main)
indicate signal level at the output. They can alternately indicate every channel's current fader position by pressing the Faders/
Meters button (sec. 2.23).
2.3 Select Button
Each input, subgroup, main output, aux, and effect (FX) has its own select button. Press any select button to navigate to that
channel's control interface. Any time a select button is pressed, the motorized fader controls that input or output level.
2.4 USB 2-Trk I/O Port
This is used to connect with a USB stereo audio device for playback or recording. It is not for software control of the mixer.
USB audio input is adjusted using the USB 23-24 control (sec. 2.9). When recording from the USB port, the main L/R output
signal is used.
2.5 Headphone Out
Plug in headphones here for monitoring the main outputs or selected solo channels. Use the Headphones Level control to adjust
volume
2.6 Meter/Solo Button
Press this button to toggle the two LED bars directly above it from indicating either the Stereo Main signal level, or the Stereo
Solo level.

Operating Manual - digiMIX24 Digital Mixer
6
2.7 Line 1 & 2 Level Control
Line1 and line2 level controls adjust the level of inputs 17-
18 and 19-20 to the main mix. Line inputs can be assigned
to the main, aux, sub, and FX bus using the Assign button
and touchscreen (sec. 2.38). For stereo line inputs, press the
Stereo Link button (sec. 2.34) so that settings of the selected
line input will track with its adjacent channel. Movement of
a selected line level control also moves the motorized fader
and corresponding touchscreen fader, as all three controls
work together.
2.8 Tape Level Control
Tape inputs 21-22 come from the RCA inputs, and can be
assigned to the main, aux, sub, and FX bus using the assign
button and touchscreen. This control only adjusts the tape
input level to the main mix, working together with the motor-
ized fader and the corresponding touchscreen fader.
2.9 USB Level Control
USB stereo inputs 23-24 come from the USB audio input
(sec. 2.4). They can be assigned to the main, aux, sub, and
FX bus using the assign button and touchscreen. This control
only adjusts the USB input level to the main mix, working
together with the motorized fader and the corresponding
touchscreen fader.
2.10 Aux 1-4 Level Controls and Send Button
Aux outputs are typically used for secondary mixes such as monitors, video feed, assistive listening devices, subwoofers, etc. Each
aux level control, when selected, determines the overall output level for that aux output.
Input channels are assigned to an aux mix pre or post-fader using one of two methods: The rst method is to select an input chan-
nel, then press the <Assign> button. Use the touchscreen to select the aux outputs you wish to send that input channel to, then
adjust the level sent to that aux mix by adjusting either the touchscreen <Parameter Adjust> control or the Adjust Parameter knob.
The second method is to press the <Send> button associated with each aux level control to quickly view and adjust all input chan-
nels sent to that aux mix. Use the touchscreen to select each input and assign it pre/post, and use either the touchscreen <Parameter
Adjust> control or the Adjust Parameter knob to adjust the level sent to the aux mix.
2.11 Subgroup 1-4 Level Control (or Aux 5-8)
Subgroups are typically used for a user-selected group of inputs to be controlled together using one fader, or to send grouped
signals to their own dedicated output for recording or processing. Typical grouped inputs include drum sets, choirs, orchestral
sections, background vocals, etc. FX can be included in a subgroup. Subgroups are somewhat similar to DCA and aux groups, but
each have advantages. Subgroups in this mixer are always post-fader. Inputs can be assigned to multiple subgroups. To create a
stereo subgroup, SUB1-2 or SUB3-4 can be linked using the stereo link button (sec. 2.34).
To assign inputs to a subgroup, rst select an input or FX channel, then press the desired SUB (1-4) button below the touchscreen
(sec. 2.33), or similarly press the Assign button for touchscreen control. All inputs and FX assigned to a subgroup will be controlled
by their respective SUB (1-4) level control. Subgroups can only be routed back to the main L/R outputs or to their dedicated sub-
group output jacks. Subgroups can use onboard processing including polarity, delay time, compression, PEQ, and GEQ.
When assigning an input to a subgroup for live mixing, you should leave its assignment to the Main output unselected, otherwise
the input will still be heard in the main mix even with its subgroup level control turned all the way down.
Aux(5-8) Mode: All four subgroups can be switched as a group to work instead as Aux5-8 outputs that function the same as Aux1-4.
To switch their function from subgroup to aux, press the system button (sec. 2.30) and press the touchscreen button that says Aux/
Sub Mode and press "Yes" when the display prompts to change settings.

7
Operating Manual - digiMIX24 Digital Mixer
2.12 FX 1 &2 Level Controls, Send, and Mute Button
This mixer has built-in effects including reverbs, delay, chorus, anger, tremolo, plus various combinations. Up to 104 effects can
be custom congured, saved, and loaded from mixer memory (sec. 2.44). Only two effects can be used at a time.
Press the FX1 or FX2 button beneath the touchscreen to dene or load the currently available effects (sec. 2.44). Then press the FX1
or FX2 Send button and use the touchscreen Parameter Adjust fader or the Adjust Parameter knob (sec. 2.27) to set the level of each
input that you want sent to each effect. Pre/Post effect send status is also assigned here. An alternate method of applying effect to
an input channel is to select an input, press the Assign button, then select and adjust the resulting touchscreen FX1 or FX2 controls.
Once FX1 and FX2 have been dened and desired input channel sends have been adjusted, each FX bus must be routed to the
main, aux, or subgroup outputs as desired. Press the FX1 or FX2 Select button, then press the Assign button, then select the main
or sub outputs using the touchscreen or with the buttons below the touchscreen. Similarly assign and adjust the FX level sent to
Aux outputs using the touchscreen parameter adjust control for each aux.
The master FX1 and FX2 knobs, when selected, work along with the motorized fader to control the FX level sent to the stereo
main and four subgroup outputs as assigned. FX level sent to the aux outputs is adjusted by using the touchscreen assign window
or the aux level controls, again while FX1 or FX2 is selected. Press the FX1 or FX2 mute button to silence the effect or compare
the sound with/without effect.
2.13 Main Volume Control
This control adjusts the stereo output level to the main L/R outputs, nothing else. When the main select button is pressed (sec 2.3),
this control works together with the motorized fader and touchscreen.
2.14 Ctrl Room Level Control
This adjusts the level of the control room outputs. Control room outputs always use
the post-fader signal from the main L/R outputs.
2.15 Headphones Level Control
This adjusts the headphone output level. The headphones default to L/R post-fader signal
unless an input, output, subgroup, FX, or DCA group is assigned to the solo bus. (sec 2.19)
2.16 DCA Set Button
Digital controlled ampliers (DCA1-6) are used to combine multiple inputs, aux or
sub outputs, or FX outputs into one group for easier control. DCA groups allow the
relative fader position of each member to be preserved while adjusting their level as a
group. It also allows the group to be instantly muted. This is typically used for group-
ing vocals, drums, choir or orchestral sections, etc. DCA groups must rst be dened
before using EZ-Mode (see section 6).
To set a DCA group, rst press the DCA Set button so that it ashes, then select any
DCA button on the mixer or touchscreen, then select the channels to group together
for that DCA. When nished, press DCA Set again to store settings. Channels can be
assigned to multiple DCA groups. To clear a DCA group, press the DCA set button,
then press DCA clear on the touchscreen.
2.17 DCA Buttons
These six buttons are used to select a pre-dened DCA group for main fader, mute, or
solo control. If the DCA group is not dened, a touchscreen message appears requir-
ing a response before proceeding.
2.18 Motorized Fader
This is the primary level control for all inputs, main output, aux and sub outputs, effects master, and DCA control. Press the select
button on any input or output, and the motorized fader will control its level. The fader works together with other level controls
used for the same selected signal. Motorized fader speed can be adjusted in the system screen (see section 5.2).

Operating Manual - digiMIX24 Digital Mixer
8
2.19 Solo Button
Use the solo button for listening to one or more isolated signals in the headphones.
Select an input, output, subgroup, FX, or DCA group, then press the solo button to
include that signal in the solo bus. The default solo setting is post-fader, meaning
the solo signal level depends on the solo channel's fader position.
Press the solo clear button to clear all solo selected channels. With no channels
selected for solo, the headphone output defaults to the main L/R output, post fader.
Solo status can also be viewed and set from the touchscreen display.
The solo feature is in stereo, so that any stereo linked channels or FX are heard in stereo.
2.20 PFL Button
As part of the solo function, PFL is used to monitor selected solo channels at their
pre-fader level, meaning the selected solo channel(s) will still be heard even if its
fader is turned down.
2.21 Clear Button
This button clears all solo selections and returns the headphones to main L/R.
2.22 Mute Button
The mute button is used to silence the selected input, output, aux or sub output, FX, or
DCA group. Mute status can also be seen or controlled using the touchscreen display.
2.23 LED Faders/Meters Select Button
This button is used to toggle the input LEDs (sec. 2.2) between indicating the current
signal levels across all channels, or indicating the current fader position of all channels.
2.24 Pan Control
The pan control is dedicated to fading signals from left to right in the mix. It's position for a channel is displayed in the touchscreen.
2.25 EQ Bypass Button
Press the EQ bypass button to disable the PEQ or GEQ on the selected channel. This is useful for comparing signal with and without EQ.
2.26 Mixer/Long Faders Select Button
This button toggles between the two main mixer displays, one showing every mixer input and output at once, the other showing
groups of eight channels with longer faders. Channel names can only be edited in long fader mode. To edit a channel name, press
and hold the channel number at the bottom of any channel in long fader mode, then use the pop-up touchscreen keyboard.
2.27 Parameter Adjust Control
This control is typically used to adjust the currently active or highlighted DSP parameter within the touchscreen display. It may
work together with other level controls.
2.28 Flat Button
Press this button to atten the PEQ or GEQ settings on the currently selected input or output.
2.29 Enter (Tap) Button
This button has two functions. The rst is to offer a "Yes" response any time the touchscreen prompts for yes or no input, for
example selecting a DCA that has not yet been dened.

9
Operating Manual - digiMIX24 Digital Mixer
The second function is to manually set an FX delay time to match the beat of the music, also referred to as "tap delay". Press the FX1
or FX2 button and select Delay as the effect type. Set the delay time by pressing the TAP button at the start and again at the end of
the desired delay time. Maximum tap delay is 1200ms.
2.30 System Buttons
The middle system button opens the touchscreen display for a variety of utility controls such as LCD brightness, aux/sub mode, pass-
word/security functions, default settings reset, and more (sec. 4). The up/down/left/right buttons are used to select and adjust controls
shown on the touchscreen, their role depending on the currently open function. For example, with the GEQ function open, the two
L/R system buttons move to select one of the 31 EQ bands, while the U/D buttons adjust the selected EQ lter level. The buttons work
together with touch controls on the the screen, but for smaller touchscreen controls it is easier to use the system buttons.
2.31 Save, Load, and Copy Buttons
There are four different types of user presets that can be saved/loaded on the digiMIX24.
1)
Scene - Scene presets are the most inclusive, capturing all audio settings in the mixer. Up to 24 scene presets are available.
2) DSP Channel - The DSP channel preset is used on inputs, outputs, aux, and subgroups. It saves/loads a single channel's
assignments, channel settings, gate, comp, and PEQ/GEQ settings. Up to 48 different DSP channel presets can be saved.
3) FX - FX presets are used to save/load up to 104 different user dened FX1 and FX2 effects.
4) GEQ - The 48 GEQ presets are only used to save/load graphic equalizer settings, which are only used on outputs.
SAVE: To save a user preset, rst press the save button, then use the touchscreen to select one of the four preset types. Next, select
a preset number to use, then press the preset name box, type in a preset name, press enter, then press Save on the touchscreen to
write to memory. Use UpPage and DownPage to navigate to the next available group of presets.
LOAD: To load a user preset, press the load button, then in the touchscreen window select the type of preset to load, then select
one of the available presets and press the touchscreen load button.
To delete a user preset, press the load button, select a preset to delete, then press the touchscreen delete button.
COPY: To copy current settings from one channel to another, press the Copy Channel button on the touchscreen system page.
The touchscreen window will display all inputs and outputs, with the currently selected channel ashing. This is the channel that
will be copied from, and it can be changed by selecting any other channel using the touchscreen or control surface select buttons.
Channel DSP functions are individually listed across the bottom of the touchscreen. Each function can be checked or unchecked
to include or exclude from being copied. In other words, only the checked parameters will be copied to the next channel. Press the
Copy To button on the touchscreen, then select the channel(s) you want settings to be copied onto using either the touchscreen or
the control surface select buttons. Press the touchscreen copy button to complete the copying process.

Operating Manual - digiMIX24 Digital Mixer
10
2.32 Touchscreen Display
Most mixer functions can be adjusted
using either the touchscreen or the
physical controls. A limited number
of functions can only be adjusted
using the touchscreen.
Level and fader controls are adjusted
by either dragging the control, or by
rst selecting it then turning the
adjust parameter knob (sec. 2.27).
In Mixer Mode, all inputs and outputs
are shown. Touch any channel to
select it for control. The selected input,
FX, aux, or subgroup output appears
on the left side. Channel parameters
include channel name and number,
mute status, level, pan, and solo. The
Main output is always shown on the
right side, with graphic EQ and pan
control using the Pan knob.
An unlabeled touch-box above the
solo function shows the current
PEQ curve for the selected channel.
Touch this box to access all DSP
functions for the selected channel.
Above the PEQ box is a smaller
unlabeled box which turns bright green when the mixer is connected on the network to an iPad running the digiMIX24 app.
It turns black when the connection is lost.
A channel name can be edited by pressing and holding the name box until the keyboard appears. Type in the new name and press
enter to complete. To escape out of the keyboard without changing anything, press the keyboard icon in the lower right corner.
2.33 Main
The Main button is used to assign the currently selected input channel, subgroup, or FX to the main mix, and becomes lit when
assigned. Assignment status can also be edited using the touchscreen assign window (sec. 2.38).
2.34 Sub 1-4
The sub(1-4) buttons are used to assign the currently selected input channel or FX to a subgroup (sec. 2.11).
2.35 Stereo Link
The stereo link button is used to link two adjacent input channels, subgroups, or aux outputs together so that all level, DSP, and
assignment parameters will be equally applied to both channels. Channel pairs can only be linked where the odd numbered
channel is rst, ie 1-2, 15-16, sub1-sub2, aux1-aux2, etc. When stereo linking a pair of channels, the mixer automatically routes
the odd numbered channel to the left output and the even numbered channel to the right output, and they will be heard in stereo.
2.36 Digital In/Out
The optional Dante-32 or USB-32 multi-track audio module must be installed to use this feature. Press these buttons to open
the input or output digital audio assignment window on the touchscreen. See section 7 for details on using Dante-32 or USB-32.
2.37 48VDC Phantom Power
Press the 48VDC button to assign +48Vphantom power to any of input channels 1-16.
2.38 Assign
This is one of the most important mixer functions, and should be the starting point for conguring every input channel. Press the
assign button to view or change where the currently selected input or FX is routed to in the mixer. The selected channel is always
shown on the left side of the display. Inputs can be assigned or sent to main, sub1-4 (or aux5-8, see sec. 2.11), aux1-4, and FX1-2.

11
Operating Manual - digiMIX24 Digital Mixer
Assigned routing paths turn blue when pressed. Signal level sent to Aux and FX buses must be adjusted individually using the
touchscreen parameter adjust fader on the right side of the display, or by using the adjust parameter knob (sec. 2.27). There are
many quick links to other mixer functions from within the assign window.
2.39 Channel
Press the channel button to view and access all DSP settings for the currently selected input channel, subgroup, main output, FX,
or aux output. The currently selected channel is always shown on the left side of the touchscreen display.
Every DSP function has a dedicated On/Off button on the touchscreen.
Input channel DSP functions include stereo pan, polarity invert, channel delay up to 300ms, stereo link, expander/gate, PEQ, and
compressor/limiter. Subgroups and aux outputs do not have expander/gate function.
Channel DSP settings can be saved or loaded
as a DSP channel preset (sec. 2.31).
2.40 PEQ
Press the PEQ button to engage the 6-band EQ for the currently selected input channel, subgroup, main output, FX, or aux ouput.
The PEQ has four parametric lters with adjustable frequency, bandwidth (Q), and gain. Any of these four can also be set as shelv-
ing lters by pressing their <Type> icon on the touchscreen. Two additional lters complete the PEQ section, a tuneable hi-pass
(HPF) and low-pass (LPF), each offering 20 different slope types. For tips on using the PEQ see section 4.2.
Press the EQ Bypass button (sec. 2.25), or the touchscreen ON button to compare signal with and without PEQ.
Press the Flat but-
ton (sec. 2.28) or the touchscreen Flat EQ button to return all PEQ lters to their 0dB gain and default starting parameters
2.41 GEQ
The GEQ 31-band graphic equalizer is only available on the main, subgroup, and aux outputs. It is not available on inputs or FX.
Select and drag individual lter faders up/down on the touchscreen, or use the left-right buttons on the touchscreen or on the top
panel (sec. 2.30) to select frequency, then use the system up/down buttons to adjust lter level. Up to 48 different GEQ presets
can be saved to memory and loaded later for use with specic rooms or loudspeakers.
Press the EQ bypass button (sec. 2.25), or the touchscreen ON button to compare signal with and without GEQ. Press the at but-
ton (sec. 2.28) or the touchscreen at EQ button to return all GEQ lters to 0dB.
2.42 Exp/Gate
Press this button to engage the noise gate/expander for the selected channel. This function will silence or reduce the level of an
input or FX signal when it is below a user dened threshold. Controls include on/off, threshold, attack time, release time, and
ratio. Innite ratio silences all signal below the threshold (noise gate), while using a lower ratio allows some signal below the
threshold to pass (downward expansion). Press the at button to return the expander/gate parameters to their default settings.
See sec. 4.3 for tips on using an expander/gate.
2.43 Comp/Lim
Press the Comp/Lim button to engage the compressor/limiter function on a selected input, subgroup, main output, FX, or aux ouput.
Use this feature to reduce the dynamic range of a signal (compressor) or to limit how loud a signal can go (limiter). Touchscreen
controls include on/off, threshold, attack time, release time, ratio, and post gain. See sec. 4.4 for tips on using a compressor/limiter.
2.44 FX 1 &2
Two digital effect buses are available. Customized effects can be assigned to each bus and include three types of reverb, delay,
tremolo, anger, chorus, or combinations (sec. 4.5). User dened effects can be saved to 104 different DFX presets (sec. 2.31).
2.45 Sends
Main, Subgroup Send: Press this Send button followed by the Main Select button to quickly assign inputs or FX channels to the
main output using the touchscreen. Likewise, press this button followed by any Sub 1-4 Send button to quickly assign inputs or
FX to each subgroup. The touchscreen will display all inputs and FX channels as On or Off, tap to change status.
Aux, FX Send: Press this Send button followed by Aux 1-4 Send (Aux 5-8 if enabled) or FX 1-2 Send button to quickly view
and adjust the pre/post status and level of all inputs as sent to an Aux or FX bus. Set an input's pre/post send status, then adjust
it's send level to the currently active Aux or FX bus using the touchscreen Parameter Adjust fader or the Adjust Parameter knob.

Operating Manual - digiMIX24 Digital Mixer
12
3 REAR PANEL FEATURES
3.1 Combo Jack Inputs, Channel 1-16
There are 16 mic/line channels that use a combo jack. The female XLR connector is for a balanced mic input, and the TRS (tip-
ring-sleeve) phone jack is for balanced line level input. See the illustration for proper balanced or unbalanced wiring of XLR and
phone jacks. The mic preamp circuit is overridden when the phone jack is inserted. Avoid plugging or unplugging connectors when
the volume is turned up, as the resulting loud pops can damage loudspeakers.
3.2 TRS Insert, Channel 1-8
Channels 1-8 are each equipped with a single TRS jack insert point
for use with external processors. Tip=send, and ring=return. The
outgoing signal is taken right after the analog trim control, and the
return signal goes directly to the digital bus for DSP processing.
3.3 Channel 17-18, 19-20 Stereo Line Inputs
These inputs function as two stereo line level inputs or as four
mono inputs (sec. 2.7). There is no adjustable preamp on these
inputs, so a strong input signal level (0dBu) is recommended.
Plugging in only the left inputs (channels 17 or 19) sends a mono
signal to both left and right inputs.
3.4 Tape Inputs
These two RCA inputs are controlled by the tape (21-22) level
control (sec. 2.8)
3.5 Main Outputs
The left and right main outputs on balanced XLR male connectors are controlled by the main volume control (sec. 2.13). They are
wired in parallel with the main phone jack outputs
3.6 Main Phone Jack Outputs
The left and right main outputs on TRS phone jack connectors are wired in parallel with the main XLR outputs.
3.7 Aux 1-4 Outputs
These four phone jacks are pseudo-balanced outputs for aux1-4 (sec. 2.10). They have single-ended signal with balanced impedance.
3.1 - Balanced and Unbalanced connector wiring

13
Operating Manual - digiMIX24 Digital Mixer
3.8 Subgroup 1-4 (or Aux 5-8) Outputs
These four phone jacks are pseudo-balanced outputs for sub1-4, or can be switched over for use as aux5-8 (sec. 2.11)
3.9 Control Room Output
The stereo control room output uses the same signal as the main outputs and is wired using balanced phone jacks.
3.10 Tape Outputs
The main stereo bus is routed post-main-fader to the RCA tape outputs.
3.11 AC Inlet
This is used to connect the mixer to AC mains using the detachable AC cord provided with the unit.
3.12 Power Switch
This switch turns on power to the mixer. Turn-on time is about 15 seconds.
3.13 Ethernet Control Jack
This Ethernet port is for the save/load preset or rmware update utility, or for connecting to a network for remote iPad control.
See section 5.9 for details.
3.14 USB Control Jack
This USB port is used for the save/load preset software utility or for rmware update. See section 5.9 for details
3.15 Digital Audio Module Option
Ashly offers optional eld-installable Dante or multi-track USB audio modules for the
digiMIX24
mixer. To install the module,
rst remove the mixer from power, then remove the two screws holding the blank plate to the back panel option slot, then care-
fully seat the Dante-32 or USB-32 module into the two card-edge guides on either side of the module slot as shown before nally
pressing the module fully into the internal card-edge connector. Re-fasten with the two screws. See section 7-8 for operating details.
3.15 - Dante-32 or USB-32 installation on digiMIX24

Operating Manual - digiMIX24 Digital Mixer
14
4 GETTING STARTED
4.1 Typical Application
The above illustration shows a typical band setup with instrument and vocal inputs, four separate monitor mixes, stereo main speakers,
and remote control from a laptop. Use the following procedure to safely and quickly set up the system.
1) Plug in all inputs, outputs, and speaker cables. Leave power ampliers turned down at rst.
2) One input at a time, set input trim controls so their loudest signal peaks are around 0dBu on the input meters (sec. 2.1)
3) Assign all used inputs to the main output using the assign button. (sec. 2.38)
4) Select the main output and turn its level all the way down (sec. 2.3)
5)
Turn up power ampliers, then slowly turn up the main fader or volume control (sec. 2.13) until reaching a comfortable level.
6)
Verify that all inputs can be heard in the main speakers or use the solo function (sec. 2.19). Select an input before adjusting.

15
Operating Manual - digiMIX24 Digital Mixer
7) Adjust PEQ (sec. 2.40), expander/gate (sec. 2.42), and compressor/limiter (sec. 2.43) on each input channel as needed. For
greater details and examples of how to use these functions, see sections 4.2, 4.3, and 4.4.
8) Assign the aux output(s) for all used input channels, adjusting their level to each monitor mix. (sec. 2.10 or 2.38)
9) Use the master aux level controls to set each overall monitor level (sec. 2.10)
10) Apply effects to input channels if desired. See sections 2.12, 2.44, and 4.5 for details and examples.
11) Adjust GEQ graphic equalizer for main, aux, or subgroup outputs. (sec. 2.41)
12) To create a vocal or other subgroup, follow the instructions in section 2.11, then select the subgoup to adjust the group
level using the main fader.
13) To create a DCA level or mute group for all vocals or other groups, follow instruction in section 2.16, then select the DCA
group before using the main fader or mute button.
14) Save settings as scene presets, DSP channel presets,
FX presets, or GEQ presets (sec. 2.31).
4.2 PEQ Parametric EQ
Press the PEQ button to engage the parametric EQ for the
currently selected input channel, subgroup, main output, FX,
or aux ouput. The four lters EQ1-EQ4 can be shelving or
parametric, with additional hipass and lowpass lters.
Shelving Filters: EQ1-EQ4 can be set as tuneable shelving
lters, typically used as the high and low boost/cut controls.
Press the lter <Type> image on the touchscreen to toggle
between low shelf, high shelf, or parametric peak lter.
Parametric Filters can adjust frequency, bandwidth (Q),
and lter gain/cut. Think of one band of parametric EQ as a
single graphic equalizer fader where the frequency is variable,
and the bandwidth (Q) is also variable. The smaller the bandwidth, the less the audio signal on either side of the frequency center
is boost or cut, whereas a wider bandwidth produces a more audible change to the overall tone of a signal. In addition to basic
tone controls, parametric lters are ideal for eliminating problem feedback frequencies without greatly affecting the overall
sound. They are also useful for adding or removing a characteristic hot spot from microphones or for precisely compensating
for room resonance. It is well worth the time becoming procient with parametric EQ lters, as they offer the best solution to
many EQ problems.
HPF/LPF: The highpass and lowpass lters are cut only, with adjustable frequency and slope. There are 20 different lter types
to choose from including Butterworth, Bessel, and Linwitz-Riley, with lter slopes ranging from 6db/oct to 48dB/oct. These
lters are typically used to limit bandwidth. A common application is to use an aux output to drive 70V transformer tapped
speakers that are not suited for signal below 80Hz. Set the HPF for that Aux output to 80Hz, then select the desired lter type.
Tone Control: The four EQ lters can be used as basic tone controls with tuneable frequencies, ie high, high-mid, low-mid,
and low. High and low typically use shelving lters. Press the <Flat EQ> button to restore all lters to 0dB gain, medium Q,
and default starting frequencies and lter types. A lower Q broadens the lter to have a much greater effect, while a higher Q
narrows the bandwidth and makes less of an overall difference when boost or cut.
Notch EQ for Feedback Control: To eliminate a feedback problem on a live mic input, set the PEQ at and turn up the mi-
crophone level until it is on the edge of feedback. Then using the frequency control, sweep a narrower bandwidth (higher Q)
lter through a problem feedback area, with just a slight amount of gain on that lter, until nding the exact frequency causing
feedback. Once the feedback frequency has been identied, reduce the lter's gain until feedback is gone. Adjust the bandwidth
(Q) as narrow as possible while still eliminating feedback. Repeat with additional lters and frequencies as necessary. Finding
the problem frequency is relatively easy, but nding the best combination of minimal cut and bandwidth takes a little practice.
Notch EQ for Room Resonance: To reduce excess reverberation or boominess in a room, use the parametric lter on the main
or aux outputs. With music playing through the speakers, engage a PEQ lter on the output, then sweep the lter's frequency
with a slight boost and medium Q until you hear a disproportionate increase in the boominess of the music. This frequency is a
room resonance, and can be notched to compensate. Adjust the bandwidth and cut only as little as necessary to x the problem.
Figure 4.2: PEQ Parametric EQ Screen

Operating Manual - digiMIX24 Digital Mixer
16
4.3 GEQ Graphic EQ
The 31-band GEQ graphic equalizer is only available on the
Main, Aux, or Sub outputs. It is not available for use with
any input or FX channels.
Adjust GEQ lters by selecting and dragging them up and
down on the touchscreen, or use the
up/down/left/right but-
tons and
Adjust Parameter knob. The left/right buttons select
frequency, and the up/down buttons or Adjust Parameter
knob can be used to adjust lter boost and cut.
The GEQ is engaged when the <On> button on the touch-
screen is solid green. To bypass the GEQ, press the <On>
touchscreen button again or press the EQ Bypass button
found at the right of the screen.
To return all lters to 0dB, press the <Flat EQ> button on the
touchscreen and conrm, or press the Flat button to the right of the screen and conrm.
Up to 48 different GEQ lter curves can be created, saved, and recalled. Current lter settings can also be copied to another
output, subgroup, or aux using the <Copy> function, found on the touchscreen as well as having its own panel button.
4.4 Expander/Gate
A noise gate is typically used to eliminate unwanted, low
level noise from an individual input, allowing only the
louder signals to pass. An expander is used to increase the
dynamic range of a signal by lowering the quietest signals.
Threshold is the input signal level above which the gate
opens up and input signal is allowed to pass through un-
changed.
Attack sets the amount of time from when the input signal
reaches threshold to when the gate actually opens up. A me-
dium attack time helps the gating action sound more natural.
Release sets the time the gate remains open after signal
level falls back below threshold.
Ratio determines how much the input signal gets attenuated
when the gate is closed. Innite ratio completely silences the input when its signal is below the threshold, while a lower ratio
allow some signal to pass through at all times.
When used as a downward expander, the idea is to extend the signal's dynamic range by taking the quieter signals and lowering
their level even further. The lower the ratio control, the more signal below threshold will pass through. The higher the ratio, the
greater the dynamic range will be between softest and loudest signals. An innite ratio silences all signal below the threshold.
Figure 4.4: Expander/Gate Screen
Figure 4.3: GEQ Graphic EQ Screen

17
Operating Manual - digiMIX24 Digital Mixer
4.5 Compressor/Limiter
This compressor/limiter has adjustable gain, threshold, at-
tack time, release time, and ratio. The controls will only
work when the ON button is pressed. The green bar above
the ON button indicates when gain reduction is occuring.
Press the <Flat> button to clear and return all compressor/
limiter parameters to their default settings.
Threshold - This sets the input level above which gain
reduction is used to compress the signal. Threshold range
is from -30dB to +20dB.
Attack Time - The rate at which gain reduction occurs to the
input signal when it exceeds threshold, from 10ms to 150ms.
Release Time - The rate at which gain reduction ends once
the signal falls back down below threshold, from 10ms to
1000ms.
Ratio - This sets the amount of gain reduction applied to the signal above the threshold point. Ratio is from 1:1 to innite.
Post Gain - The post gain control adjusts the compressor/limiter output level to make up for any loss of overall level due to gain
reduction. It is typically used to match the level of compressed output with the original un-compressed input level, allowing an
easy way to compare signal with and without compression.
Compression occurs when any signal above threshold has its gain reduced by the ratio settings. For example, a ratio of 4:1 means that as
input signal increases above the threshold by 4dB, its output signal only increases by 1dB. The higher the ratio, the more gain reduction
occurs. Use a compressor to minimize vocal peaks or instrument transients, or to reduce the dynamic range of a signal.
A limiter is a compressor with innite ratio. The input signal cannot exceed the threshold at all. A limiter is primarily used on outputs for
speaker protection or setting maximum SPL, whereas the compressor is more natural sounding and typically used on microphone inputs.
Figure 4.5: Compressor/Limiter Screen

Operating Manual - digiMIX24 Digital Mixer
18
4.6 FX (Effects)
This mixer includes 12 different effects and effect combinations.
Only two effects can be used at one time. Up to 104 different ef-
fects can be created, saved, and loaded as FX presets (sec. 2.31).
Press the FX1 or FX2 button to open the FX editor window, then
choose an effect type, edit its parameters, then save.
The next step is to send the desired signal level from input
channels to the FX1 or FX2 bus. (sec. 2.12).
Lastly, select and assign FX1 or FX2 to aux, subgroup, or main
outputs as desired. (sec. 2.12) Press either FX mute button to si-
lence its effect. All available effects are listed in the table below.
All effects are in stereo, meaning they will synthesize a stereo
effect even when driven by a mono send signal.
FX Presets Description Parameters
Reverb - Hall Simulate and acoustic space of the sound Pre-Delay; Decay; Room Size; Brightness;
Diffusion; Wet-Dry Out
Reverb - Room Simulate a studio room with many early
reections
Pre-Delay; Decay; Room Size; Brightness;
Diffusion; Wet-Dry Out
Reverb - Plate Simulate the transducer's sound like classic
bright vocal plate
Pre-Delay; Decay; Room Size; Brightness;
Diffusion; Wet-Dry Out
Delay Echo of the input signal Time; Decay; Brightness; Wet/Dry Out
ST Delay Stereo Echo L Time; R Time; L Decay; R Decay; Brightness;
Wet/Dry Out
Tremolo Modulation of signal without any pitch or
phase shift Depth; Mod Freq; Wet-Dry Out
Flanger
Adds a sweeping, swooshing "jet plane"
sound using phase shift with delayed
feedback
Feedback; Sweep Width; Mod Freq;
Wet-Dry Out
Chorus Creates the illusion of several vocals or
instruments from a single input source
Feedback; Sweep Width; Mod Freq;
Wet-Dry Out
Delay + Reverb Delay with room reverb
Pre-Delay; Reverb Decay; Room Size; Bright-
ness; Diffusion; Delay Time; Delay Feedback;
Delay Bright; Wet-Dry Out
ST Delay + Reverb Stereo delay with room reverb
Pre-Delay; Reverb Decay; Room Size; Brightness;
Diffusion; Delay L/R Time; Delay L/R Feedback;
Delay Bright; Wet-Dry Out
Chorus + Tremolo Chorus with Tremolo Feedback; Sweep Width; Mod Freq; Tremolo Depth;
Tremolo Freq; Wet-Dry Out
Chorus + Reverb Chorus with room reverb
Pre-Delay; Reverb Decay; Room Size; Bright-
ness; Diffusion; Chorus Feedback; Sweep Width;
Mod Frequency; Wet-Dry Out
Figure 4.6: FX Screen

19
Operating Manual - digiMIX24 Digital Mixer
5 SYSTEM FUNCTIONS
5.1 LCD Brightness
Press and drag the LCD brightness control bar to adjust.
5.2 Fader Calibration
The motorized fader speed can be reduced and quieted by
pressing <Fader Calibration>. The fader will begin to travel
up and down at the currently assigned speed. Adjust speed in
both directions as necessary, then press Save/Exit.
5.3 Restore Default Settings
Press this button to reset the mixer to its default settings,
returning all faders and EQ to zero, removing all DCA groups,
and removing all channel and FX assignments. This does not
erase the password or stored presets, it only resets the current
unsaved scene settings.
5.4 Aux/Sub Mode
Press this button to switch Sub 1-4 outputs to function instead as Aux 5-8 outputs.
5.5 Password Settings
Press the "Password Settings" button to enter a new password, delete the current password, or reset the password. The same pass-
word is used for both system and EZ-Mode. Note that entering a password is only the rst step when making security changes,
you must also lock or unlock features using the password.
To enter a password for the rst time, press System>Password Settings. A keyboard appears with two empty text boxes labeled
"New Password" and "Conrm Password". A solid orange bar appears below the active text box. With the "New Password" text
box active, type in a one to four character password using upper case (ABC.), lower case (abc.), or numerals/symbols (.?123).
Passwords are case sensitive. Select and re-enter the password into the "Conrm Password" box and press "Enter" on the keyboard.
The password is now stored in the mixer for system use or for EZ-Mode.
To Delete or Reset an existing password, press System>Password Settings. If a password is already stored in the mixer, the two
text boxes say "Delete Password" and "Reset Password".
To delete the password, make sure the "Delete Password" box is active with the orange bar beneath it and press "Enter". The screen
prompts for the current password to be entered into both text boxes, press enter, and the password is permanently erased from memory.
To reset the current password, press System>Password, make sure the "Reset Password" text box is active with the orange bar be-
neath it, and press "Enter". Type the current password in the "Enter Password" box, then select and type the new password into the
"New Password" box and press "Enter". A blue screen pops up saying "Password Reset Successfully". Press "ok" to conrm the reset.
If the password has been forgotten, press and hold the <System + Clear> buttons for three seconds or until the screen blinks. This
clears the existing password.
5.6 Lock/Unlock
Press the "Lock/Unlock" button to lock out mixer functions. If there is currently no password saved in the mixer, the screen
prompts for a new password in the "New Password" and "Conrm Password" text boxes. After entering the new password, press
"Enter", and the mixer will be locked. Attempting to move a control will prompt the user for the password before allowing changes.
If there is already a password in the mixer when you press "Lock/Unlock", the screen prompts for the current password, type it in
and press "Enter" and the mixer will become locked.
The only controls that cannot be locked out are the power switch and the analog input trim controls.
Figure 5: System Screen

Operating Manual - digiMIX24 Digital Mixer
20
5.7 System Shortcuts
Several shortcuts are available within the system touchscreen for navigating to common mixer functions. While most shortcut
functions are also available by pressing control buttons, the EZ-Mode shortcut is only found here in the system screen. See sec-
tion 6 for complete EZ-Mode details.
5.8 Other System Functions
Device Name - Press and hold the "Device Name" text box in the upper right hand corner of the system screen to bring up the
keyboard, then type in the desired name for the mixer and press "Enter". The default name is "digiMIX24".
Current Scene - This displays the name of the scene loaded from memory onto the mixer. If no scene has been loaded, the current
scene name is "Default".
Selected Channel - This displays the name of the DSP channel preset loaded from memory onto the currently selected input, FX,
aux, subgroup, or main output channel. If no DSP channel has been loaded, the selected channel name is "Default".
FX1 & FX2 - This displays the name of the FX channel preset loaded from memory onto FX1 and FX2. If no FX preset has been
loaded, the FX1 or FX2 name is "Default".
Firmware versions - The lower left corner of the touchscreen shows the currently loaded DSP and micro-controller rmware les.
These are the internal programs that run the mixer. To update rmware, see section 5.9.
Factory Reset - For factory reset, press and hold all three <Load + Save + Enter> buttons during power-up, then press "yes" when
prompted. This will erase all stored presets. It will also unlock the mixer if locked, but preserves the previous password in memory.
5.9
Firmware Update and Save/Load Preset software utility (PC or MAC version available)
IMPORTANT: Before updating the mixer rmware, remove the Dante-32 or USB-32 option if installed, then follow these steps:
1) Download the Digimix rmware update software from the Ashly website product page. Once installed, there will be a
root directory called "DigitalMixer24Update*" containing a single le named "digitalMixer24Update*.exe", plus a sub-directory
called "Lib" containing other les.
2)
Turn off the mixer. Connect the mixer's Ethernet jack to a
network shared with the PC, or connect directly to the PC with a USB
printer cable. If using USB, the USB driver must rst be downloaded
from the Ashly website DigiMix product page and installed.
3) Press and hold the mixer's <System> button during power-
up. Several lines of blue text will appear on the mixer touchscreen.
4) Open the "digitalMixer24Update*.exe" le from step
#1. The status box remains grey until the rmware update tool is
communicating with the mixer via the network or USB connec-
tion. The software automatically discovers the IP address or COM
port used for the mixer. When it does, the mixer's address or port
is shown in the "SerialPort/IP" line. If the address is not shown,
click the software's "Refresh" button or reboot the mixer again in
rmware update mode (step 3).
There should only be one mixer on
the local network during rmware update.
5) Once the IP address or COM port is displayed, click the
"Connect" button, which if successful changes the status button to
green.
6) Once the Status is connected, click the "Update Firmware" button, then on the next screen click "Program". The entire
rmware update process takes about ve minutes.
7) Exit the software and restart the mixer normally.
Save/Load Preset utility: To copy or back up presets between a mixer and a computer, use the rmware update
software tool by repeating steps 4-5 above, then click the "Save/Load Presets" button to view and use preset copy functions. Selected
individual presets can be copied between mixer and the computer, as well as a full preset backup and restore. It is not necessary
to remove digital audio options to save/load presets with a computer.
Figure 5.9: DigitalMixer24Update.exe software
Other manuals for digiMix24
1
Table of contents
Other Ashly Music Mixer manuals

Ashly
Ashly MX-206 User manual

Ashly
Ashly MX-206 User manual

Ashly
Ashly Parametric Equalizers PQ-16 User manual

Ashly
Ashly MX-206 User manual

Ashly
Ashly digiMIX18 User manual

Ashly
Ashly MX-508 User manual

Ashly
Ashly MX-406 Quick start guide

Ashly
Ashly MX-508 User manual

Ashly
Ashly LX-308B User manual

Ashly
Ashly MX-508 User manual

Ashly
Ashly MX-206 Quick start guide

Ashly
Ashly digiMix24 User manual

Ashly
Ashly LX-308B User manual

Ashly
Ashly MX-406 User manual

Ashly
Ashly MX-508 User manual

Ashly
Ashly LX-308B Quick start guide

Ashly
Ashly LX-308 User manual

Ashly
Ashly MX-206 User manual

Ashly
Ashly MX-406 User manual

Ashly
Ashly MX-508 Quick start guide