manuals.online logo
Brands
  1. Home
  2. •
  3. Brands
  4. •
  5. Asko
  6. •
  7. Dishwasher
  8. •
  9. Asko D1996SS User manual

Asko D1996SS User manual

8
Standard Dishwashers
ASKO dishwashers will fit in both American and European cabinets. The leveling legs can accommodate virtually any
height requirement, including installations under 3 " counters that comply with Americans with Disabilities Act (ADA)
requirements. Toe kick space is also adjustable.
For standard NON-raised panels, use 1/16" up to 1/ " material. For custom raised panels, the decor trim will accept
up to 1/ " flange. The raised panel can be mounted on a backing sheet cut to fit as shown.
• Backing sheet dimensions: Upper - 23-3/16" w. x 21-3/16" h.; Lower - 23-3/16" w. x -3/16"h.
• Raised portion dimensions: Upper - 21-3/16" w. x 17-15/16" h; Lower - 21-3/16" w. x 2-3/16" h.
See the Dishwasher Installation Instructions for detailed information.
*2 " from fill strip to fill strip.
**23-7/16" depth includes space for high-loop drain hose.
2 "
32-1/ " to 3 -1/ "
23-7/16"
2"
Wall must be free
of pipes and wires.
Electrical and water supply should enter through the
shaded area and come up through the right side of the machine.
Maximum of " from the back wall and 8" from the floor.
There cannot be any electrical connections in this area.
"
6-1/4"
to 8-1/4"
"
2"
23-7/16"**
2 "*
32-1/ "
to 3 -1/ "
5-1/2"
6-1/4"
to 8-1/4"
1"
1"
23-3/16"
1"
2-1/ "
1"
1"
1"
1"
-3/16"
21-3/16"
INSTALLATION & CUSTOMIZATION
9
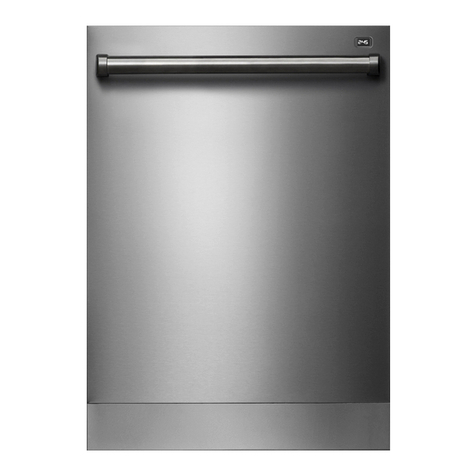
D1996SS and D1996HNDL (Handle)
Even though the controls are on the top of the door, these units install like a standard ASKO dishwasher. They fit in
American ( " toe kick) cabinets with a 2 " wide opening. They will not accept a custom panel.
*23-7/16" depth includes space for high-loop drain hose.
D1796FI and D1996FI (Fully Integrated)
These units were built for European cabinets (6" toe kick). However, the toe kick will accommodate American cabinets
( " toe kick). In American-height cabinets, a 2" filler strip above the unit will be necessary. This is an excellent place for a
pull-out cutting board. The unit’s width is 23-5/8", 3/8" narrower than standard domestic dishwashers, so it easily installs
in European and American cabinets.
They come only in stainless steel. The control panel (hidden under the counter top) and toe kick are metallic colored. A
black toe kick can be purchased separately, if desired. (See dealer.) If the homeowner prefers, the toe kick can be covered
with the same baseboard used in the kitchen. It is not recommended that the baseboard running in front of the unit and
the cabinets be one continuous piece. Should the unit ever have to be removed, it is much easier if the baseboard in front
of the dishwasher can be removed separately.
These units have a special locking system so they can be installed with a custom panel. This panel can match the cabinets,
with a drawer front, a cabinet door and matching hardware. It is recommended that a handle be used for opening the
dishwasher. A knob may not provide enough grip.
They come with everything needed to make the installation easy. The dishwasher’s door is pre-drilled for the panel’s
mounting screws. The Turbo Fan Interval Drying System’s vent is adjustable and must extend below the custom panel.
The lower access panel has been eliminated to give the unit its single door appearance.
See the Dishwasher Installation Instructions for detailed information.
32-1/4"
to
34-1/4"
24"
4"
2"
23-7/16"
*
24"
32-1/4"
to 34-1/4"
45-1/2"
6-1/4"
to 8-1/4"
10
4 Toe Kick Installations – D1796FI and D1996FI with Custom Panel Door
Where the custom panel’s height matches the dishwasher’s door, a 2" decorative fill strip or
cutting board must be used to fill the area between the panel and the counter top (A).
For this installation, the custom door panel dimensions are 23-1/2" wide x 28-1/8" high.
The opening width is 23-3/ ", 3/8" narrower than standard domestic dishwashers.
Another installation option for " toe kick cabinets is to extend the door panel 1-3/ " above/beyond the control panel (B).
This eliminates the need for a 2" decorative fill strip. This door panel is 23-1/2" wide x 30-1/8" high (two inches higher
than previous option). This also means a 2" support strip must be installed between the tank and the counter top to fill
the gap.Even though, like all ASKOs, the D1796FI and D1996FI can be mounted with screws going through the sides,
this support strip can also be used for anchoring the unit from the top. A popular and more finished looking installation is to
use the metal top fill strip shown in Dishwasher Accessories (page 7). It fills the gap between the top of the tank and the
counter top. When used, the dishwasher is mounted with screws through the sides of the tank into the sides of the cabinets.
The custom door panel should be at least 3/ " thick.
6 Toe Kick Installations – D1796FI and D1996FI
with Custom Panel Door
For 6" toe kick installations, fill strips are unnecessary. These units install like a
standard ASKO dishwasher.
Installing the custom panel is simple. No additional trim kit is needed. Four
screws go through the dishwasher’s pre-drilled door and into the back of the
panel. The screw heads are completely hidden when the door is closed.
See the Dishwasher Installation Instructions for detailed information.
28-1/8"
23-1/2"
6"
28-1/8"
23-1/2"
"
(A)
2" decorative fill strip or
cutting board required
23-1/2"
23-3/ "
"
30-1/16"
Custom panel extends
2" beyond/above
dishwasher door.
Custom panel goes from
toe kick to counter top:
23-1/2"w x 30-1/8"h.
(B)
There will be a 1-3/4"
height difference
between controls
and panel
11
D1976CSTM Dishwasher
The D1976CSTM was built for European cabinets (6" toe kick). However, the toe kick will accommodate American cabi-
nets ( " toe kick). In American-height cabinets, a 2" filler strip above the unit will be necessary. This is an excellent place for a
pull-out cutting board. The opening width is 23-3/ ", 3/8" narrower than standard domestic dishwashers.
The D1976CSTM was designed to easily accommodate an owner-supplied custom panel to further its integrated appear-
ance. The trim kit was eliminated to reduce unnecessary hardware. The custom panel attaches to the dishwasher door via
four screws that are invisible when the door is closed.
Spacers allow the control panel height to be increased up to 1-7/16" so it matches the cabinet drawers. When used with
custom panels, the panel’s height must be reduced by the height of the spacers.
Electrical And Water Requirements – All Dishwashers
Electricity and water can enter the opening on either side within an area " from the back and 8" from the floor. They
should run from the back along the right side. Allow space for the necessary bends. Water pressure should be 18 to 176
PSI. The supply line connects to the hot water supply with 3/8" OD copper tubing. A 3/8" NPT female connection
attaches to the fill valve. A 120 V, 60 Hz, 15 amp circuit with proper grounding is required. It should be the only appli-
ance on the circuit and the connection should be non-metallic, cable or conduit.
23-3/8" wide
3/ " minimum thickness
22-9/16" to 23-11/16" high,
depending upon your specific
installation and the use of
panel spacers.**
" toe kick
2" filler strip or cutting board
6" toe kick
3 -1/ "
opening
23-3/ "
32-1/ "
to 3 -1/ "
23-7/16"*
2"
6-1/ "
to 8-1/ "
*23-7/16" depth includes space for high-loop
drain hose.

This manual suits for next models

4

Other Asko Dishwasher manuals

Asko DFI564XXL.U User manual

Asko

Asko DFI564XXL.U User manual

Asko DBI565PXXLS.U User manual

Asko

Asko DBI565PXXLS.U User manual

Asko D5538 User manual

Asko

Asko D5538 User manual

Asko DFI655G User manual

Asko

Asko DFI655G User manual

Asko D1876 User manual

Asko

Asko D1876 User manual

Asko DW20.1 User manual

Asko

Asko DW20.1 User manual

Asko 1805 User manual

Asko

Asko 1805 User manual

Asko D5434XXL B User manual

Asko

Asko D5434XXL B User manual

Asko WMC63VACS User manual

Asko

Asko WMC63VACS User manual

Asko D3250FI User manual

Asko

Asko D3250FI User manual

Asko DFI675XXL User manual

Asko

Asko DFI675XXL User manual

Asko D5424XLS User manual

Asko

Asko D5424XLS User manual

Asko D5893 User manual

Asko

Asko D5893 User manual

Asko DFI433B User manual

Asko

Asko DFI433B User manual

Asko DBI766IQ.S.AU User manual

Asko

Asko DBI766IQ.S.AU User manual

Asko 1885 User manual

Asko

Asko 1885 User manual

Asko D5883 Service manual

Asko

Asko D5883 Service manual

Asko DFI644BXXL/1 User manual

Asko

Asko DFI644BXXL/1 User manual

Asko DFS244IB User manual

Asko

Asko DFS244IB User manual

Asko CW4176S User manual

Asko

Asko CW4176S User manual

Asko D5424 Assembly instructions

Asko

Asko D5424 Assembly instructions

Asko 1325 User manual

Asko

Asko 1325 User manual

Asko DBI565IK.W.AU User manual

Asko

Asko DBI565IK.W.AU User manual

Asko DBI564IXXLS U Series User manual

Asko

Asko DBI564IXXLS U Series User manual

Popular Dishwasher manuals by other brands

GE CDT 725-765 Series owner's manual

GE

GE CDT 725-765 Series owner's manual

Bosch SMS4EMI01E INFORMATION FOR USE

Bosch

Bosch SMS4EMI01E INFORMATION FOR USE

Whirlpool WIC 3C33 PFE quick guide

Whirlpool

Whirlpool WIC 3C33 PFE quick guide

Kenmore 14071 owner's manual

Kenmore

Kenmore 14071 owner's manual

Hotpoint Ariston MSTB 6B00 operating instructions

Hotpoint Ariston

Hotpoint Ariston MSTB 6B00 operating instructions

Zanussi DW 904 Instruction booklet

Zanussi

Zanussi DW 904 Instruction booklet

Westinghouse SB908 user manual

Westinghouse

Westinghouse SB908 user manual

Bosch SMU4ECW15S INFORMATION FOR USE

Bosch

Bosch SMU4ECW15S INFORMATION FOR USE

Miele G 611 operating instructions

Miele

Miele G 611 operating instructions

Hotpoint FDFSM 31111Smart Tech operating instructions

Hotpoint

Hotpoint FDFSM 31111Smart Tech operating instructions

Electrolux ESL 6810RO user manual

Electrolux

Electrolux ESL 6810RO user manual

Jenn-Air DU430 operating instructions

Jenn-Air

Jenn-Air DU430 operating instructions

IKEA NUTID DW60 Quick reference guide

IKEA

IKEA NUTID DW60 Quick reference guide

Winterhalter UC series manual

Winterhalter

Winterhalter UC series manual

Amica ZIM466TB operating instructions

Amica

Amica ZIM466TB operating instructions

Atag VA3013RT operating instructions

Atag

Atag VA3013RT operating instructions

Siemens SN25L280 operating instructions

Siemens

Siemens SN25L280 operating instructions

Siemens SN25M283EU operating instructions

Siemens

Siemens SN25M283EU operating instructions

manuals.online logo
manuals.online logoBrands
  • About & Mission
  • Contact us
  • Privacy Policy
  • Terms and Conditions

Copyright 2025 Manuals.Online. All Rights Reserved.