asmodus Colossal 80W User manual

ASMODUS

www.asmodus.com
ASMODUS
13
19
25
31
43
49
55
37
中文 - 07

01

1. Turn on
Rapidly press fire button 5 times.
2. Mode selection
When the screen is unlocked, sliding the screen to left or right will select working modes
(POWER, TEMP, CURVE, TCR, TFR) cyclically.
3. Working parameter setting
POWER mode:
Power setting: When screen is unlocked, long press power display position to
enter the power setting interface; press “+” and “-” icons directly on power
setting interface to set power; press “Fire” key to confirm and quit.
TEMP mode:
Selection of coil material: When screen is unlocked, long press “TEMP” mode
display position to enter the coil material selection interface; press “+” and “-”
icons to select coil material; press “Fire” key to confirm and quit.Temperature
control power, temperature display switching: single click the power display
position to switch to temperature display; single click the temperature display position to
switch to power display.
Temperature control power setting: under the unlocked state of touch screen, long
press the power display position to enter power setting interface; press “+” and “-” icons
directly on power setting interface to set power; press “Fire” key to confirm and quit.
Temperature setting: under the unlocked state of touch screen, long press the
temperature display position to enter temperature setting interface; press “+” and “-”
icons directly on temperature setting interface to set power; press “Fire” key to confirm
and quit.
CURVE mode:
02

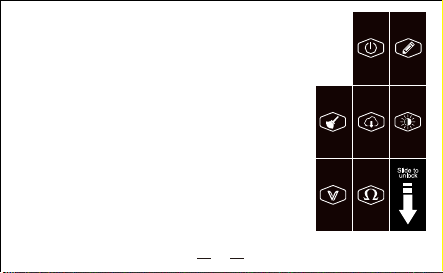
Power point selection: When screen is unlocked, sliding the screen up and down can select power points
P1 ~ P5 cyclically.
Power value, time display switching: single click the power display position can switch to time display;
single click the time display position can switch to power display.Power value setting: under the unlocked
state of touch screen, long press power display position to enter the power setting interface; press “+” and “-”
icons directly on power setting interface to set power; press “Fire” key to confirm and quit.
Time value setting: When screen is unlocked, long press time display position to enter the time setting
interface; press “+” and “-” icons directly on time setting interface to set power; press “Fire” key to confirm and
quit.
TCR mode:
TCR selection: When screen is unlocked, sliding the screen up and down will select M1~ M5.Temperature
control power setting and temperature setting refer to “TEMP” mode.
TCR value setting: When screen is unlocked, long press the “TCR” mode display position to enter the TCR
value setting interface; slide the screen left and right to select digit bit to be edited; press “+” and “-“ icons to
set value; press “Fire” key to confirm and quit.
TFR mode:
TFR selection: When screen is unlocked, sliding the screen up and down will select M1~ M5.Temperature
control power setting and temperature setting refer to “TEMP” mode.
TFR value setting: When screen is unlocked, long press the “TFR” mode display position to enter the TFR
value setting interface; slide the screen up and down to select temperature bit to be edited; slide the screen
left and right to select digit bit to be edited; press “+” and “-“icons to set value; press “Fire” key to confirm and
quit.
4. System setting
Press “Fire” key rapidly for 5 times under the working mode to enter system setting interface. Sliding the
screen for system setting interface left and right can select setting items (turn off, port number setting, port
number resetting, luminance setting, updating, check the version, resistance detection) cyclically.
Turn off: select the “turn off” item and click the icon position, the system is will turn off.
03

04
Port number limit setting: select the “port number setting” item and click the icon
position to enter port number setting interface; click “+” and “-“ icons to set port number
limit value. Press “Fire” key to confirm and return to previous interface.
Port number resetting: select the “port number resetting” item and click the icon
position to enter port number resetting interface; click the icon of resetting to reset port
number. Press “Fire” key to confirm and return to previous interface.
Updating: select “updating” item and click the icon position to enter updating
confirmation interface; click the “YES” icon on updating confirmation interface and
pressure “Fire” key as prompted until the screen displays “Download Mode”.
Luminance setting: select “luminance setting” item and click the icon position
to enter luminance setting interface; click “+” and “-“ icons to set luminance
value. Press “Fire” key to confirm and return to previous interface.
Check the version: select “version” item and click the icon position to check
the system version; re-press “Fire” key to return to previous interface.
Resistance detection: When the device is on, press “Fire” key rapidly for 5
times to enter the setting interface; slide the screen left and right to select
resistance test interface; click the icon to test resistance (note: under the TEMP
mode, please confirm resistance detected is in cold state. This is the
precondition for normal operation of equipment!) click “ADJ” to revise
resistance value. Press “Fire” to confirm resistance value and quit.
5. Locking and unlocking
Unlocking of touch screen: When screen is unlocked, Swipe down on the
touch screen to unlock.
Locking of touch screen: press “Fire” key to lock.
Locking of system: When unlocked,press fire 3 times rapidly, press “Fire” key
rapidly by 3 times to lock.
Unlocking of system: When locked, press fire 3 times rapidly.

05
6. System updating
1. The equipment enters updating mode “Download Mode”.
2. Connect the equipment to computer via USB cable.
3. Open the update software on computer and click “Connect” button. The grey block on
left of the button turns to green, indicating the equipment is successfully connected
with update software.
4. Click “File” button to select firmware to be updated (e.g.: xxx.firmware).
5. Click “Update” button to update.
6. After successful update, the equipment will prompt “Update OK”.
7. De-energize and restart.
☆
7. Battery handling method
☆
1. The negative pole of the battery is against the negative pole of the machine。
2. Push the battery to the negative direction, and then remove the battery。
1. Warning when atomizer resistance is too high: “HIGH ATOMIZER”
2. Warning when atomizer resistance is too low: “LOW ATOMIZER”
3. Warning when atomizer resistance is removed: “ ATOMIZER REMOVE”
4. Warning when no atomizer is connected: “CHECK ATOMIZER”
5. Warning when atomizer gets short circuit: “ ATOMIZER SHORT”
6. Warning when battery voltage is too high: “HIGH BATTERY”
7. Warning when battery voltage is too low: “LOW BATTERY”
8. Warning when fire working time exceeds 10S: “WORK OVERTIME”
9. Display when device turns on: “ASMODUS”
10. Display when device turns off: “GX80HUT V2”
Tips:

06
* Always recommended to use external charger if available.
Puff Limit
Mode
Vaping Time
Battery Door
USB
Charging port
Fire Button
Output Wattage
Atomizer
Resistance
Battery Level Lock
Output Voltage

www.asmodus.com
Asmodus Colossal 80W TC is an ELECTRONIC NICOTINE DELIVERY SYSTEM (ENDS).
It is not suitable for persons under legal vaping age, pregnant or nursing women, persons at
risk of heart disease, persons with hypertension and/or diabetes, or persons taking medication
for depression and/or asthma.
LEGAL DISCLAIMER: Underage sale of this product is prohibited. Depending on your
country/region, legal vaping age is 21+ and 18+ elsewhere.Keep out of reach of children.
Keep the contents of this package out of reach of children,non vapor and animals
This product contains nicotine which is a highly addictive substance.
CAUTION:This product is for adult use only.Store in a cool dry place.Only for use in electronic
cigarettes.Do not ingest or apply to skin.If nicotine poisoning occurs seek immediate medical
attention.

07
参数特点:
●芯片采用GX-80H-U-T-V2
●支持电池型号:18650型(1节18650高倍率平头电池)
●输出功率范围 (功率模式):5.0 Watts-80.0 Watts
●输出功率范围(温控模式):5.0 Watts-60.0 Watts
●发热丝阻值范围:0.1 Ω-3.0 Ω
●温度限制范围:212℉-572℉/100℃-300℃
●支持TCR、TFR模式以及多种材质发热丝
●支持CURVE(曲线)模式
●支持口数清零/限制功能
●支持系统升级功能
●充电参数:DC 5V/1A
●最高输出电压:7.5 Volts
●最高输出电流:35.0 Amps
●输入电压范围:3.2 Volts-4.2 Volts
●显示屏工作电流:25mA
●待机工作电流:<350uA
●待机时间:18S
●吸烟时间:10S
●工作效率94%
● 电池反向保护 ● 电池过压保护
安全功能设计:

08
一、开机
快速连按5下“Fire”按键开机。
二、模式选择
在触屏解锁状态下,左右滑屏可循环选择工作模式(POWER、TEMP、
CURVE、TCR、TFR)。
三、工作参数设置
POWER模式:
功率设置:在触屏解锁状态下,长按功率显示位置,进入功率设置界面,
在功率设置界面下直接按“+”、“-”图标设置功率值,按“Fire”键确认
并退出。
TEMP模式:
线圈材料选择:在触屏解锁状态下,长按“TEMP”模式显示位置,进入线圈材料
选择界面,按“+”、“-”图标选择线圈材料,按“Fire”键确认并退出。
温控功率、温度显示切换: 单击功率显示位置,可切换到温度显示,单击温度显示
位置,可切换到功率显示。
温控功率设置:在触屏解锁状态下,长按功率显示位置,进入功率设置界面,在功率
设置界面下直接按“+”、“-”图标设置功率值,按“Fire”键确认并退出。
温度设置:在触屏解锁状态下,长按温度显示位置,进入温度设置界面,在温度设置
界面下直接按“+”、“-”图标设置温度值,按“Fire”键确认并退出。
● 电池欠压保护 ● 低阻保护
● 高阻保护 ● 短路保护
● 过热保护(芯片过温保护)
功能介绍:

09
CURVE模式:
选择功率点:在触屏解锁状态下,上下滑屏可循环选择P1~P5功率点。
功率值、时间显示切换: 单击功率显示位置,可切换到时间显示,单击时间显示位置,可切换到功率显示。
功率值设置:在触屏解锁状态下,长按功率显示位置,进入功率设置界面,在功率设置界面下直接按“+”、
“-”图标设置功率值,按“Fire”键确认并退出。
时间值设置:在触屏解锁状态下,长按时间显示位置,进入时间设置界面,在时间设置界面下直接按“+”、
“-”图标设置时间值,按“Fire”键确认并退出。
TCR模式:
TCR选择:在触屏解锁状态下,上下滑屏可循环选择M1~M5。
温控功率设置、温度设置参考“TEMP”模式。
TCR值设置:在触屏解锁状态下,长按“TCR”模式显示位置,进入TCR值设置界面,左右滑屏选择待
编辑数字位,按“+”、“-”图标设置值,按“Fire”键确认并退出。
TFR模式:
TFR选择:在触屏解锁状态下,上下滑屏可循环选择M1~M5。
温控功率设置、温度设置参考“TEMP”模式。
TFR值设置:在触屏解锁状态下,长按“TFR”模式显示位置,进入TFR值设置界面,上下滑屏选择待
编辑温度点,左右滑屏选择待编辑数字位,按“+”、“-”图标设置值,按“Fire”键确认并退出。
四、
系统设置
在工作模式下快速连按5下“Fire”按键进入系统设置界面。在系统设置界面左右滑屏可循环选择设置项
(关机、口数设置、口数清零、亮度设置,升级,查看版本,电阻检测)。
关机:选中“关机”项,点击图标位置系统关机。
口数限制设置:选中“口数设置”项,点击图标位置进入口数设置界面,点击”+”、”-”图标可设置
口数限制值;按“Fire”键确认并返回上级界面。

10
口数清零:选中“口数清零” 项,点击图标位置进入口数清零界面,点击清除图标
清除口数。按“Fire”键退出并返回上级界面。
升级:选中“升级”项,点击图标位置进入升级确认界面,在升级确认界面点击
“YES”图标,根据提示按住“Fire”键直到屏幕显示“Download Mode”。
亮度设置:选中“亮度设置”项,点击图标位置进入亮度设置界面,点击“+”、
“-”图标可设置亮度值;按“Fire”键确认并返回上级界面。
查看版本:选中“版本”项,点击图标位置可查看系统版本;再次按“Fire”键返回
上级界面。
电阻检测:在开机状态下,快速连按5下“Fire”按键进入设置界面,左右
滑屏选择电阻测试界面,点击图标即测试电阻值(注意:在温控模式下,
请确认所检测的电阻值为冷态阻值,这是设备正常工作的前提!),点击
“ADJ”可对电阻值进行修改。按“FIRE”键确认阻值并退出。
五、锁定与解锁
触屏解锁:在触屏锁定状态下,在触屏上写“L”解锁。
触屏锁定:按“Fire”键锁定。
系统锁定:在工作模式下快速连按3下“Fire”按键锁定。
系统解锁:在系统锁定状态下,快速连按3下“Fire”按键解锁。
六、系统升级
1、设备进入升级模式“Download Mode”。
2、将设备通过USB线缆连接到电脑。
3、打开电脑端的升级软件,点击“Connect”按钮,按钮左边灰色方块
变成绿色,表示设备与升级软件连接成功。
4、点击“File”按钮,选择待升级的固件(如:xxx.firmware)。
5、点击“Upgrade”按钮进行升级。

11
6、升级成功后,设备提示“Upgrade Ok”。
7、断电重启。
☆
七:电池装卸方式
☆
1、电池负极顶住机器负极,载入电池。
2、电池负极往机器负极施压,然后取出电池。
提示说明:
1、雾化器阻值过高提示:“HIGH ATOMIZER”
2、雾化器阻值过低提示:“LOW ATOMIZER”
3、雾化器移除提示:“ATOMIZER REMOVE”
4、无雾化器提示:“CHECK ATOMIZER”
5、雾化器短路提示:“ATOMIZER SHORT”
6、电池电压过高提示:“HIGH BATTERY”
7、电池电压过低提示:“LOW BATTERY”
8、吸烟超时提示:“WORK OVERTIME”
9、开机提示:“ASMODUS”
10、关机提示:“GX80HUT V2”

12
模式
输出功率
输出电压
吸烟口数
雾化器阻值
USB充电口
电池门
电源按钮
电池电量 锁
吸烟时间

www.asmodus.com
将本包装所包含的物品放在儿童,非吸烟者和动物无法接触的地方
该产品含有高度成瘾物质的尼古丁。
使用前请仔细阅读使用说明书
Asmodus Colossal 80W TC是电子尼古丁传送系统(ENDS)。不适
合年龄未到法定吸烟年龄的人,不适合怀孕或哺乳期的妇女,心脏病患者,
高血压和糖尿病患者,或服用药物者用于抑郁症和哮喘。
法律声明:本产品未经授权销售,禁止使用。 取决于你的国家/地区,合法吸
烟年龄在其他地方21+和18+以上。儿童接触不到。
注意:本产品仅供成人使用。 储存在阴凉,干燥的地方。 仅用于电子烟。 不
要摄入或应用于皮肤。 如果尼古丁中毒发生,立即就医。
请将本品放在儿童不能接触的地方。

Technische Daten:
Funktionale Sicherheit:
Beschreibung der function:
13

14

15

16
Other manuals for Colossal 80W
1
Table of contents
Languages:
Other asmodus Electronic Cigarette manuals