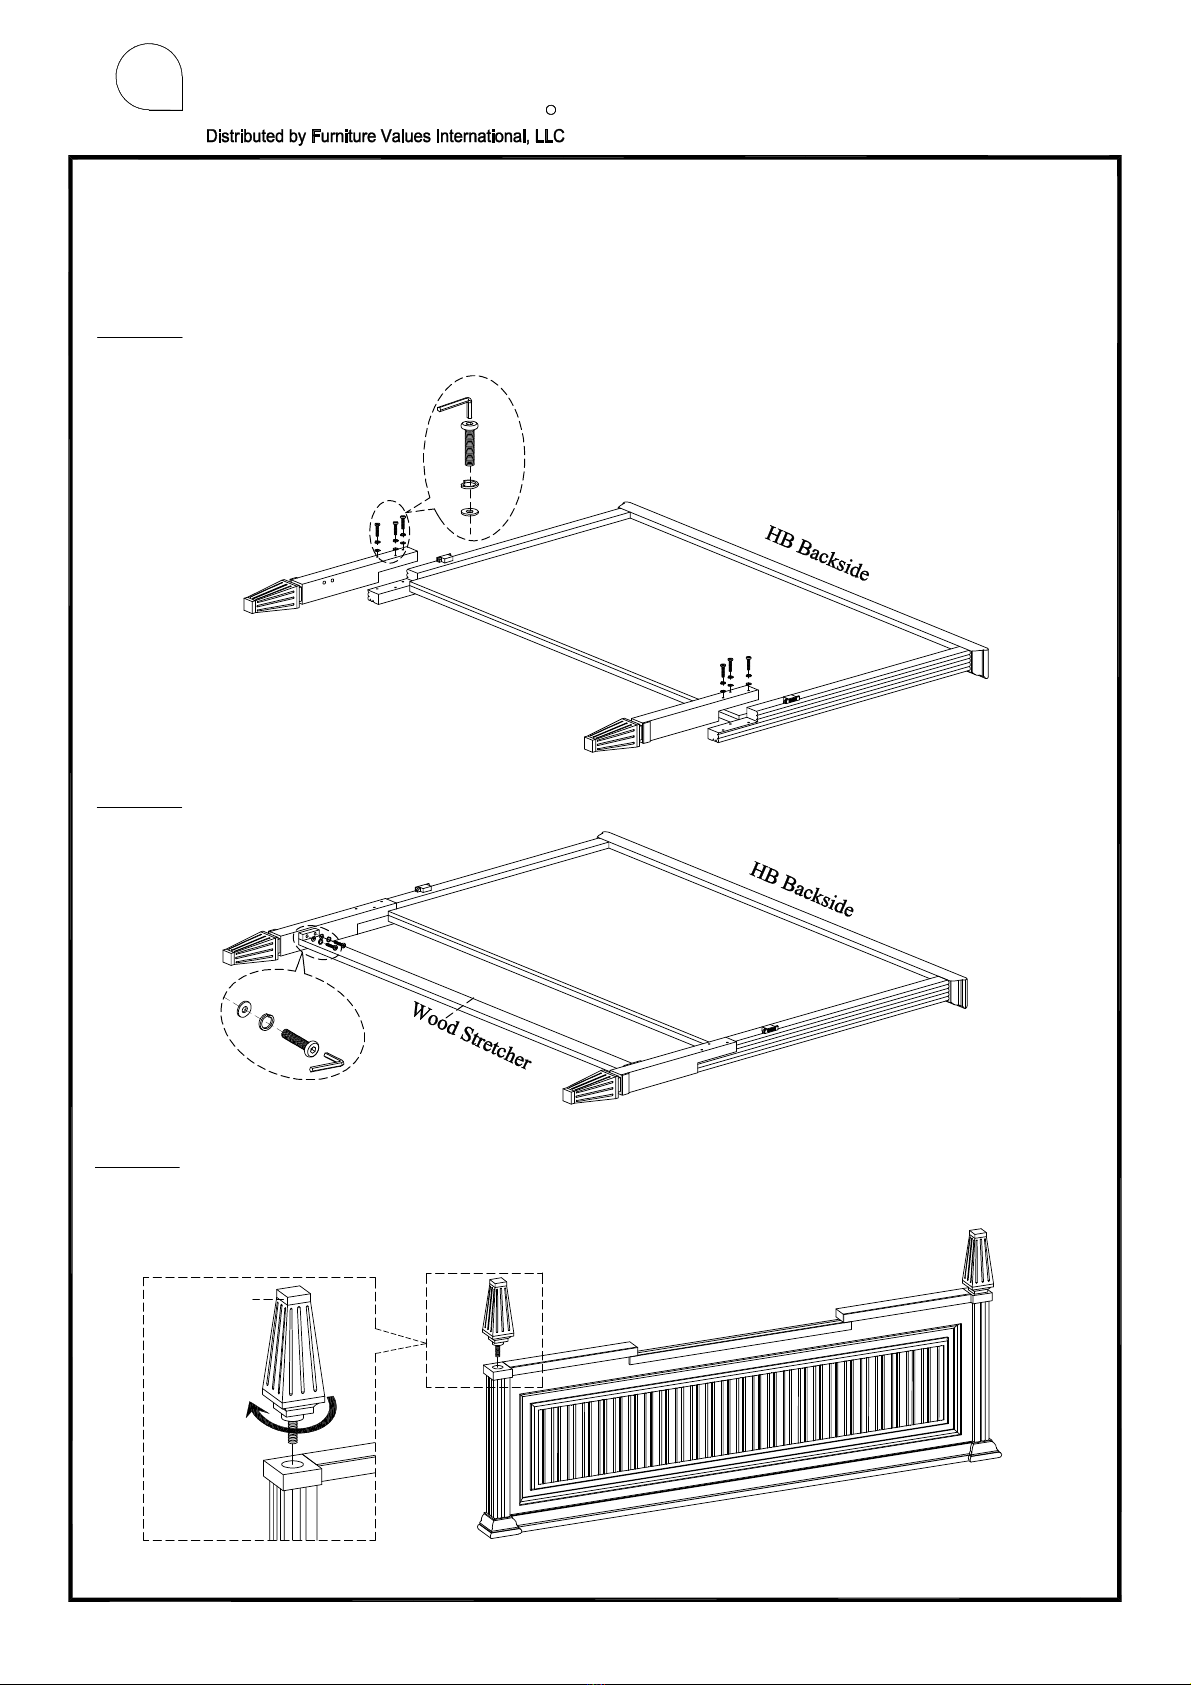
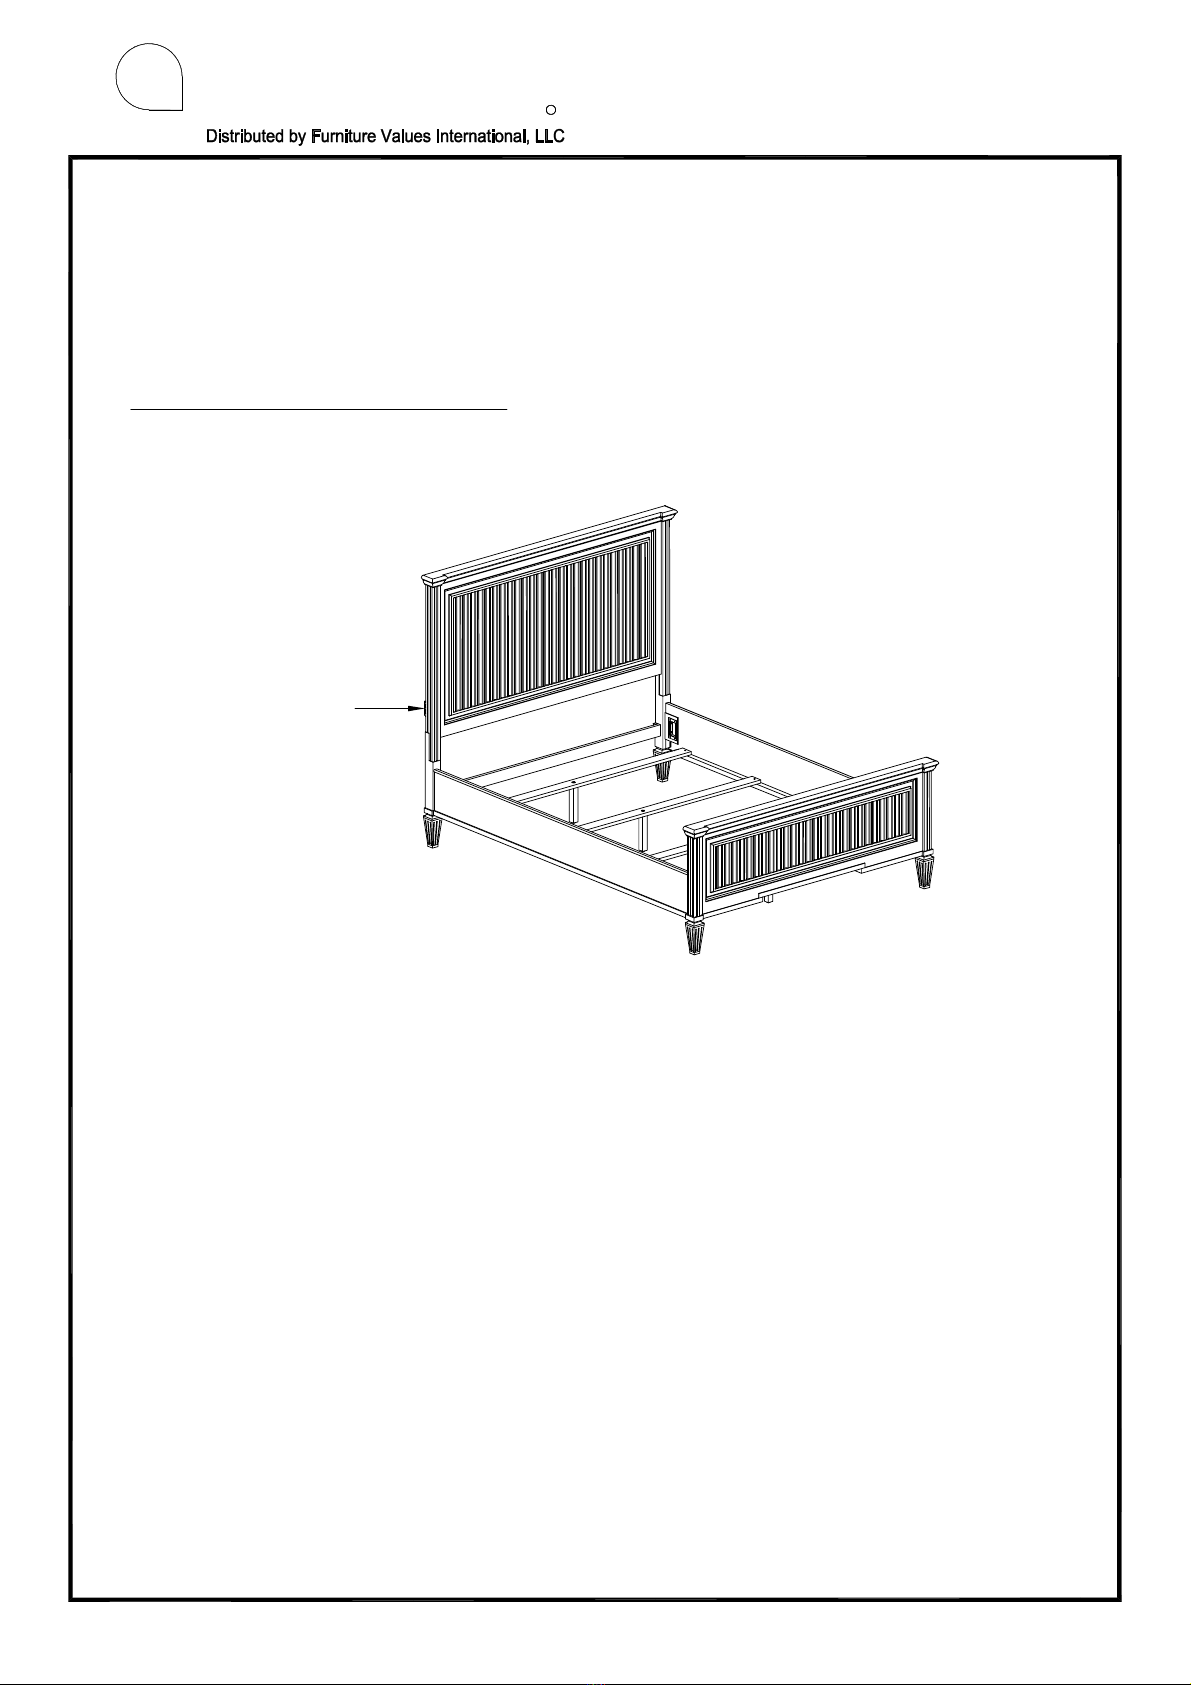
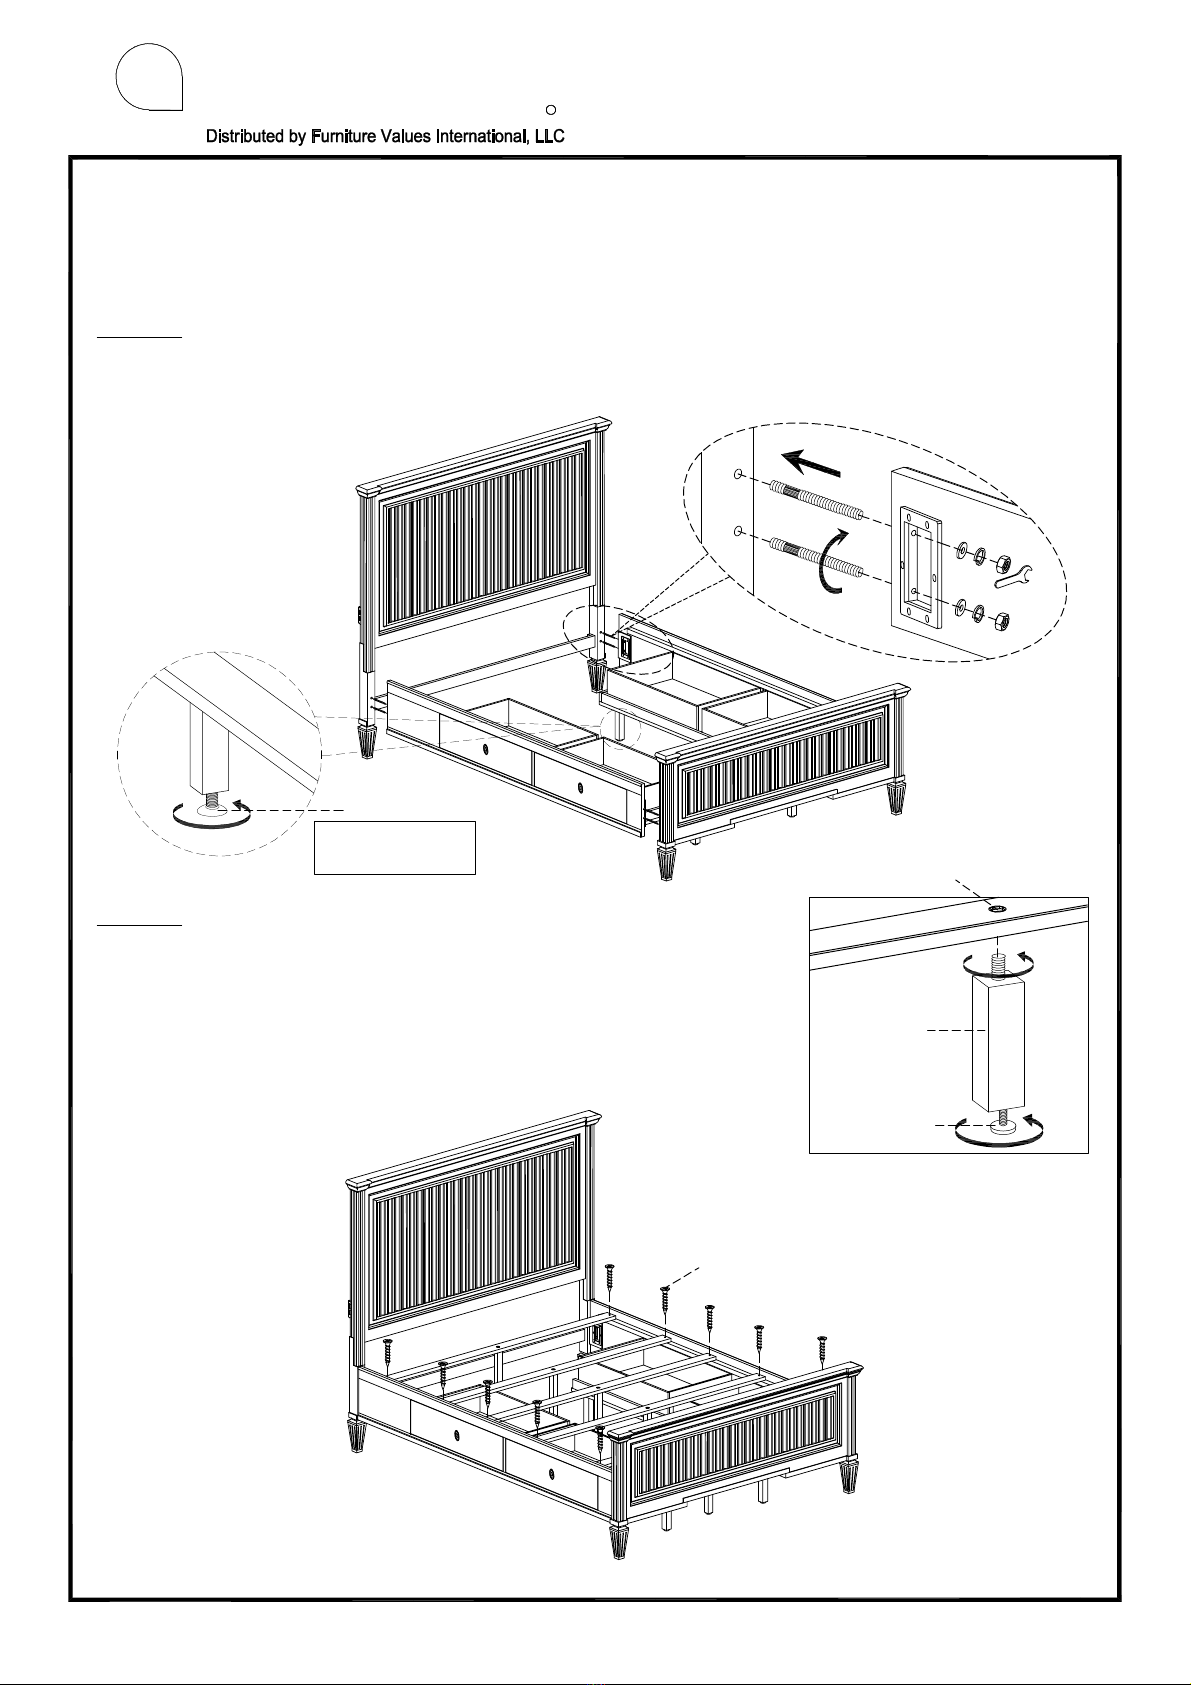
aspenhome I249-412-TAL User manual
Other aspenhome Indoor Furnishing manuals

aspenhome
aspenhome I34-462-SNA User manual

aspenhome
aspenhome I07-360T-PEP/WBR User manual

aspenhome
aspenhome I256-9100 User manual

aspenhome
aspenhome I287-371 User manual

aspenhome
aspenhome Oxford I07-412-WBR User manual

aspenhome
aspenhome I597-400 User manual

aspenhome
aspenhome I597-9100 User manual

aspenhome
aspenhome I644-456 User manual

aspenhome
aspenhome IHP-360T-FSL User manual

aspenhome
aspenhome I349-9150-WST User manual

aspenhome
aspenhome IML-473-BRN User manual

aspenhome
aspenhome I251-303-1 User manual

aspenhome
aspenhome I221-366 User manual

aspenhome
aspenhome I287-9150 User manual

aspenhome
aspenhome I430-412 User manual

aspenhome
aspenhome I215-333 User manual

aspenhome
aspenhome IHP-316-KHA User manual

aspenhome
aspenhome I07-316-PEP/WBR User manual

aspenhome
aspenhome I644-6640S User manual

aspenhome
aspenhome I218-465F-WHT User manual


Popular Indoor Furnishing manuals by other brands

Regency
Regency LWMS3015 Assembly instructions

Furniture of America
Furniture of America CM7751C Assembly instructions

Safavieh Furniture
Safavieh Furniture Estella CNS5731 manual

PLACES OF STYLE
PLACES OF STYLE Ovalfuss Assembly instruction

Trasman
Trasman 1138 Bo1 Assembly manual

Costway
Costway JV10856 manual