4
2.1.12 Keep the PV module packed in the carton until installation.
2.1.13 Do not use modules near equipment or in places where ammable gases may be generated.
2.2 Installation Safety
2.2.1 Wear protective head gear, insulating gloves, safety shoes, and insulated tools when installing the modules.
2.2.2 Do not install the modules in rain, snow, or otherwise wet or windy conditions.
2.2.3 Completely cover the PV module surface with an opaque material during PV module installation and wiring to
prevent accidental charge buildup.
2.2.4 Plug in connectors tightly when working on wiring.
2.2.5 Due to the risk of electrical shock, do not perform any work if the terminals of PV module are wet.
2.2.6 Do not touch the terminal box and the end of output cables (connectors) with bare hands.
2.2.7 Do not unplug the connector under load.
2.2.8 Do not work alone.
2.2.9 Wear a safety belt if working far above the ground.
2.2.10 Do not wear metallic jewelry, which can cause electric shock, while installing or troubleshooting the PV system.
2.2.11 Follow the safety regulations for any and all other system components, including wires, connectors, charging
regulators, batteries, inverters, etc.
2.2.12 Do not expose wires to direct sunlight. Use UV-resistant cabling.
2.2.13 Do not damage the surrounding PV modules or mounting structure when replacing a PV module.
2.2.14 Do not change any PV module components (diode, junction box, plug connectors, etc.).
3. Mechanical Installation
3.1 Installation Conditions
3.1.1 Environment temperature: -40 to 85 °C
3.1.2 Operating temperature: -40 to 85 °C
3.1.3 Mechanical load on panels (e.g., from wind or snow): less than 5400 Pa
3.1.4 Tilt Angle selection: The installation should be facing north in the southern hemisphere and facing south in the
northern hemisphere.
3.1.5 To maintain the modules’ Class C re rating, the re class of the roof and building materials should higher than Class C.
3.2 Installation Methods
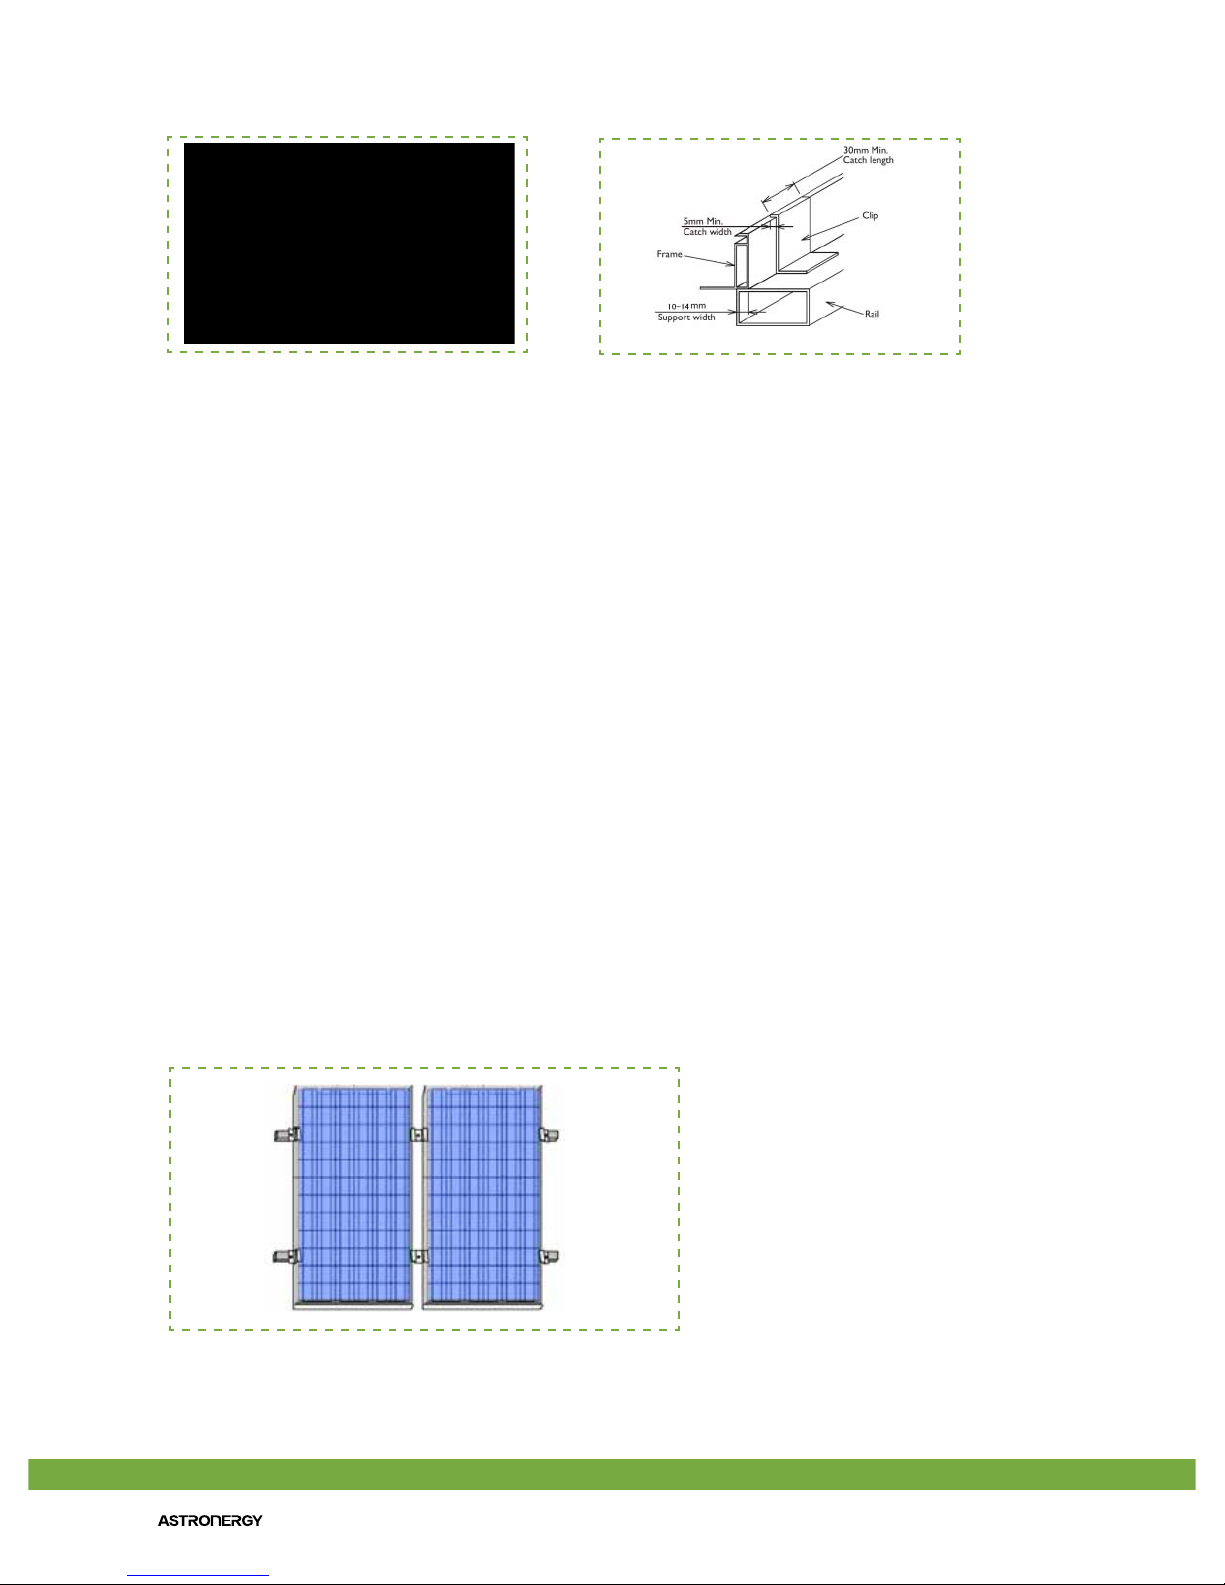
3.2.1 Bolts
All modules must be securely fastened with at least 4 bolts. For maximum security against strong winds or heavy snow falls, all
6 mounting holes (modules CHSM5409M, CHSM6609M/P, and CHSM6610M/P; see gure 1a) or 8 mounting holes (CHSM6611P
and CHSM6612P; gure 1b) should be used.