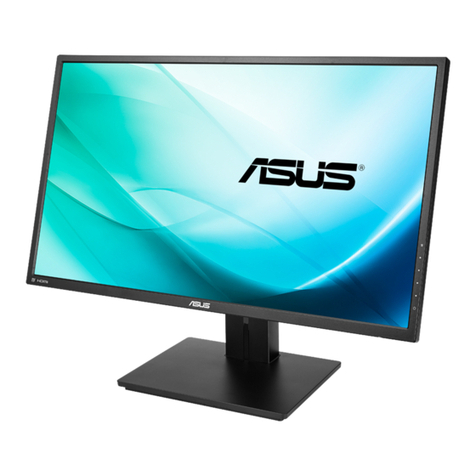
Asus VK192 Series User manual

iQuick Start Guide
Table of content
ASUS contact information ............................................................ii
English ....................................................................................... 1
Français ....................................................................................... 7
Deutsch ..................................................................................... 13
Italiano ..................................................................................... 19
Español ..................................................................................... 25
Pyccкий
..................................................................................... 31
Nederlands................................................................................. 37
繁體中文 ..................................................................................... 43
简体中文..................................................................................... 49
日本語
..................................................................................... 55
한국어
..................................................................................... 61
Português .................................................................................. 67
Türkçe ..................................................................................... 73
..................................................................................... 79
ไทย
..................................................................................... 85
Dansk ..................................................................................... 91
Suomi ..................................................................................... 97
Norsk ...................................................................................103
Svenska ...................................................................................109
Polski ...................................................................................115
Čeština
...................................................................................121
Magyar ...................................................................................127
Română
...................................................................................133
Srpski ...................................................................................139
Ελληνικά
...............................................................................145
Indonesia
.................................................................................151
Български
..............................................................................157
Slovensky
................................................................................163

ii Quick Start Guide
ASUS contact information
ASUSTeK COMPUTER INC.
Address 15 Li-Te Road, Peitou, Taipei, Taiwan 11259
Telephone +886-2-2894-3447
Fax +886-2-2894-7798
E-mail [email protected]
Web site www.asus.com.tw
Technical Support
Telephone +86-21-38429911
ASUS COMPUTER INTERNATIONAL (America)
Address 44370 Nobel Drive, Fremont, CA 94538, USA
Fax +1-510-608-4555
Web site usa.asus.com
Technical Support
Telephone +1-812-282-2787
Support fax +1-812-284-0883
Online support support.asus.com
ASUS COMPUTER GmbH (Germany and Austria)
Address Harkort Str. 25, D-40880 Ratingen, Germany
Telephone +49-2102-95990
Fax +49-2102-959911
Web site www.asus.de
Online contact www.asus.de/sales
Technical Support
Telephone +49-1805-010923
Support Fax +49-2102-9599-11
Online support support.asus.com

1Quick Start Guide
English
VK192 Series
LCD Monitor
Quick Start Guide

2 Quick Start Guide
English
Safety information
• Before setting up the monitor, carefully read all the documentation that came
with the package.
• Topreventreorshockhazard,neverexposethemonitortorainormoisture.
• The monitor should be operated only from the type of power source indicated
on the label. If you are not sure of the type of power supplied to your home,
consult your dealer or local power company.
• Use the appropriate power plug which complies with your local power standard.
• To ensure satisfactory operation, use the monitor only with UL listed computers
whichhaveappropriateconguredreceptaclesmarkedbetween100-240VAC.
• Ifyouencountertechnicalproblemswiththemonitor,contactaqualiedservice
technician or your retailer.
Monitor introduction
Front view
* Hotkey for 5 video preset mode selection.
** Adjusts the image automatically by pressing the button for 2–3 seconds.
1.SPLENDID™*/Auto-adjust**/ExitMENU
button
2.Volumehotkey/Decreasebutton(formodels
with speakers)
3.MENU/Enter/Selectionbutton
4.Brightnesshotkey/Increasebutton
5 . Power button
Base
21 3 4 5
1.SPLENDID™*/Auto-adjust**/ExitMENU
button
2.Contrasthotkey/Decreasebutton(formodels
without speakers)
3.MENU/Enter/Selectionbutton
4.Brightnesshotkey/Increasebutton
5 . Power button
Base
21 3 4 5
WebcamWebcam

3Quick Start Guide
English
Connecting the cables
Connectthecablesasshown:
6.AC-inport
7.DVIport(forsomemodels)
8.VGAport
9.Audio-inport(formodelswithspeakers)
10.USB2.0port
1. Power cord
2.DVIsignalcable
3.VGAsignalcable
4.Audio-in cable (for models withAudio-incable(formodelswith
speakers)
5. USB cableUSB cable
• To connect the power cord:connectoneendofthepowercordsecurelyto
themonitor’sACinputport,andtheotherendtoapoweroutlet.
• To connect the USB cable:connectoneendoftheUSBcable(upstream)to
themonitor'sUSBport,andtheotherendtothecomputer'sUSB2.0port.
• To connect the VGA/DVI cable:
a. PlugtheVGA/DVIconnectortotheLCDmonitor’sVGA/DVIport.
b. ConnecttheotherendoftheVGA/DVIcabletoyourcomputer’sVGA/
DVIport.
c. TightenthetwoscrewstosecuretheVGA/DVIconnector.
• To connect the audio cable (For those models with speakers):connectone
endoftheaudiocabletothemonitor’sAudio-inport,andtheotherendtothe
computer'saudio-outport.
WhenboththeVGAandtheDVIcablesareconnected,youcanchooseeither
VGAmodeorDVImodefromtheInputSelectitemoftheOSDfunctions.
1 4
253
VGA USB
Rear view
AC-IN DVI VGA AUDIO IN USB
8
7
6 9
Stereo speakers (for
some models)
10

4Quick Start Guide
English
Built-in webcam support
Thebuilt-inwebcamallowsyoutotakepictures,haveavideoconference,or
recordvideoclips.WhilechattingwithfriendsviaInternet-basedcommunication
tools, you can directly show your vivid image with this device.
System requirements
• ApersonalcomputerwithPentium®III800MHzorhigherprocessor
• Microsoft®Windows®Vista/XPServicePack2operatingsystems
• Minimum200MBfreeharddiskspacetoruntheprogram
• 128MBofRAMorabove
• Adisplaycardsupporting16-bithighcolormode
• MakesurethatthebundledUSBcableisconnectedtoboththeLCD
monitorandyourPC.Otherwise,thewebcamwillnotbeactivated.
• MakesurethatyouhaveinstalledtheWindows® Vista/XPServicePack2
or later versions before using the device.
Using the device
ThedevicetransmitsimagestoyourPCthroughtheUSB2.0port.Therefore,
makesurethatthebundledUSBcableisconnectedtoboththeLCDmonitorand
yourPCbeforeyouusethedevice.
Webcam
LifeFrame 2 software
ASUSVK192providestheeasy-to-useLifeFrame2softwarethatcanworkwith
the webcam, allowing users to create their own photos or video clips.
• LifeFrame2onlysupportsMicrosoft®Windows®Vista/XPServicePack2
operating systems.
• TheLifeFrame2softwareisbundledinthesupportCD.
Installation instructions
1. Closeallotherapplications.
2. InsertthesupportCDintotheopticaldriveandruntheLifeFrame2program.
3. Followtheon-screeninstructionstocompletetheinstallation

5Quick Start Guide
English
Troubleshooting (FAQ)
Problem Possible Solution
PowerLEDisnotON • Press the button to check if the monitor is in
theONmode.
•Checkifthepowercordisproperlyconnectedto
the monitor and the power outlet.
The power LED lights amber and there is no
screen image
•Checkifthemonitorandthecomputerareinthe
ONmode.
•Makesurethesignalcableisproperlyconnected
the monitor and the computer.
• Inspect the signal cable and make sure none of
the pins are bent.
•Connectthecomputerwithanotheravailable
monitor to check if the computer is
properly working.
Screen image is too light or dark •AdjusttheContrastandBrightnesssettingsvia
OSD.
Screenimageisnotcenteredorsizedproperly • Press the button for 2–3 seconds to
automaticallyadjusttheimage(VGAinputonly).
•AdjusttheH-PositionorV-Positionsettingsvia
OSD(VGAinputonly).
Screen image bounces or a wave pattern is
present in the image
•Makesurethesignalcableisproperly
connected to the monitor and the computer.
•Moveawayelectricaldevicesthatmaycause
electrical interference.
Screenimagehascolordefects(whitedoesnot
look white)
• Inspect the signal cable and make sure that
none of the pins are bent.
• Perform All ResetviaOSD.
•AdjusttheR/G/Bcolorsettingsorselectthe
ColorTemperatureviaOSD.
Screenimageisblurryorfuzzy • Press the button for 2–3 seconds to
automaticallyadjusttheimage(VGAinputonly).
•AdjustthePhaseandClocksettingsviaOSD
(VGAinputonly).
No sound or sound is low • Ensure that thse audio cable is properly
connected to the monitor and the computer
•Adjustthevolumesettingsofbothyour
monitor and computer.
• Ensure that the computer sound card driver
is properly installed and activated.
Webcam is not working •MakesurethatyouhaveconnectedtheUSBcable
securelytoboththeLCDmonitorandyour
computer.
•MakesurethatyouusetheMicrosoft®Windows®
Vista/XPServicePack2operatingsystems.

6 Quick Start Guide
English
Supported operating modes
* Modes not listed in the table may not be supported. For optimal resolution, we recommend that
you choose a mode listed in the table above.
Resolution Refresh Rate Horizontal Frequency
640x480 60Hz 31.5kHz
640x480 72Hz 37.9kHz
640x480 75Hz 37.5kHz
800x600 56Hz 35.2kHz
800x600 60Hz 37.9kHz
800x600 75Hz 46.9kHz
848x480 60Hz 31.0kHz
1024x768 60Hz 48.4kHz
1024x768 70Hz 56.5kHz
1024x768 75Hz 60.0kHz
1152x864 75Hz 67.5kHz
1280x720 60Hz 44.7kHz
1280x768 60Hz 47.4kHz
1280x768 75Hz 60.3kHz
1280x800 60Hz 49.6kHz
1280x960 60Hz 60.0kHz
1280x1024 60Hz 64.0kHz
1280x1024 75Hz 80.0kHz
1360x768 60Hz 47.7kHz
1440x900 60Hz 55.5kHz
1440x900 60Hz 59.9kHz

7Guide de démarrage rapide
Français
Séries VK192
Moniteur LCD
Guide de démarrage
rapide

8 Guide de démarrage rapide
Français
Informations sur la sécurité
• Avantdecongurerlemoniteur,assurez-vousd’avoirlutouteladocumentation
incluse dans le paquet.
• Pouréviterlesrisquesd’incendieetdechocélectrique,n’exposezpaslemoniteur
à la pluie ou à l’humidité.
• Le moniteur ne doit être utilisé qu’avec le type de source d’alimentation indiqué
sur l’étiquette à l’arrière. Si vous n’êtes pas sûr du type d’alimentation électrique
dontvousdisposez,contactezvotrerevendeurouvotrefournisseurenélectricité
local.
• Utilisezlaprised’alimentationcompatibleaveclesstandardsélectriquesdevotre
région.
• Pourassurerun fonctionnementcorrect, n’utilisezle moniteurqu’avec des
ordinateurscertiésUL,etfonctionnantentre110-240V.
• Sivousrencontrezunproblèmetechniqueavecvotremoniteur,contactezun
technicienqualiéouvotrerevendeur.
Introduction au moniteur
Vue avant
* Raccourci clavier pour la sélection de 5 modes audio pré dénis.
** Permet d’ajuster automatiquement l’image en touchant le bouton pendant 2-3 sec.
1.SPLENDID™*/Ajustementauto**/Bouton
quitterMENU
2.Raccourcivolume/BoutondesélectionBas
(pourlesmodèleavechaut-parleurs)
3.MENU/Entrée/Boutondesélection
4.Raccourciluminosité/BoutondesélectionHaut
5 . Bouton d’alimentation
Base
21 3 4 5
1. SPLENDID™*/Ajustementauto**/Bouton
quitterMENU
2. Raccourci contraste/Bouton de sélection Bas
(pourlesmodèleavechaut-parleurs)
3. MENU/Entrée/Boutondesélection
4.Raccourciluminosité/BoutondesélectionHaut
5 . Bouton d’alimentation
Base
21 3 4 5
WebcamWebcam

9Guide de démarrage rapide
Français
Connecter les câbles
Pourconnecterlescâbles:
6. PortAC-in
7.PortDVI(surunesélectiondemodèles)
8.PortVGA
9.Portd'entréeaudio(pourlesmodèles
avechaut-parleurs)
10.PortUSB2.0
1.Cordond’alimentation
2. CâbleDVI
3. CâbleVGA
4.Câbled’entréeaudio (pourles
modèlesavechaut-parleurs)
5. CâbleUSB
• Pour connecter l’adaptateur d’alimentation:connectezd’abordlecordonde
l’adaptateurauportAC-indumoniteur.Puis,connectezlecordond’alimentation
àl’adaptateursecteur,etl’autreextrémitéàunepriseélectrique.
• Pour connecter le câble USB:connectezuneextrémitéducâbleUSB(amont)
auportUSBdumoniteur,puisl'autreextrémitéauportUSB2.0duPC.
• Pour connecter le câble VGA/DVI:
a. BranchezleconnecteurVGA/DVIauportVGA/DVIdumoniteurLCD.
b. Connectezl'autreextrémitéducâbleVGA/DVIauportVGA/DVIdevotre
ordinateur.
c. SerrezlesdeuxvispoursécuriserleconnecteurVGA/DVI.
• Pour connecter le câble audio (pour les modèles avec haut-parleurs):
connectezuneextrémitéducâbleaudioauportAudio-indumoniteur,puis
l'autreextrémitéauportdesortieaudiodevotreordinateur.
LorsquelescâblesVGAetDVIsonttousdeuxconnectés,vouspouvezchoisir
d’utiliserlemodeVGAouDVIcommesourcevidéodepuislemenuOSD.
1 4
253
VGA USB
Vue arrière
AC-IN DVI VGA AUDIO IN USB
8
7
6 9
Haut-parleurs stéréo(sur
une sélection de modèkes
10

10 Guide de démarrage rapide
Français
Webcam embarquée
Lacaméraembarquéede1.3mégapixelsvouspermetdeprendredesphotos,faire
de la visioconférence, créer des vidéos; mais aussi de discuter avec vos amis via
des services de messagerie instantanée sur Internet, et ainsi de vous montrer tel
que vous êtes.
Conguration requise
• Un ordinateur avec un processeur Pentium®III800MHzousupérieur
• Systèmed’exploitationMicrosoft®Windows®Vista/XPSP2
• 200Mod’espacedisquelibrepourl’installationduprogramme
• 128Moouplusdemémoirevive
• Unecartegraphiquesupportantl’afchagedescouleurs16-bits
• Assurez-vousquelecâbleUSB2.0fourniestconnectéaumoniteurLCDet
auPC.Sinon,lawebcamnepourrapasfonctionner.
• Assurez-vousd'utiliserWindows® Vista/XPSP2ouversionsultérieure
avant d'utiliser ce périphérique.
Utiliser le périphérique
LedispositiftransmetdesimagesetdusonversvotrePCvialeportUSB2.0.Pourcela,
assurez-vousquelecâbleUSB2.0fourniestconnectéaumoniteurLCDetauPC.
Webcam
Logiciel LifeFrame 2
LemoniteurLCDASUSVK192estaccompagnéedulogicielconvivialLifeFrame2
permettantauxutilisateursdecréerleurspropresphotosetclipsvidéos.
• LifeFrame2nesupportequelessystèmesd’exploitationMicrosoft®
Windows®Vista/XPSP2.
• LelogicielLifeFrame2estcontenudansleCDdesupport.
Instructions d'installation
1. Fermeztouteslesapplicationsencoursd’exécution.
2. InsérezleCDdesupportdansvotrelecteuroptiqueetlancezleprogramme
LifeFrame2.
3. Suivezlesinstructionsapparaissantàl’écranpourterminerl’installation.

11Guide de démarrage rapide
Français
Dépannage (FAQ)
Problème Solution possible
Le voyant d’alimentation ne s’allume pas •Appuyezsurlebouton pourvérierquele
moniteur est bien sous tension.
•Vériezsilecordond’alimentationestbien
connecté au moniteur et à une prise
électrique.
Le voyant d’alimentation s’allume en ambré
et aucune image n’apparaît à l’écran
•VériezquelePCetlemoniteursontbien
sous tension.
•Assurez-vousquelecâbleVGAouDVIest
bienconnectéaumoniteuretauPC.
•InspectezlecâbleVGAouDVIpourvous
assurer qu’aucune des broches ne sont
pliées.
•Connectez,sipossible,lePCàunautre
moniteurpourvérierqueleproblèmene
provientpasduPC.
L’image est trop claire ou trop sombre •Ajustezlesréglagesdecontrasteetde
luminositéviaOSD.
L’image n’est pas correctement centrée ou
de mauvaise taille •Appuyezsurlebouton pendant 2
secondespourajusterautomatiquement
l’image.
•Ajustezlapositionhorizontaleouverticale
viaOSD.
L’image saute et des vaguelettes
apparaissent à l’écran
•Assurez-vousquelecâbleVGAouDVIest
bienconnectéaumoniteuretauPC.
•Déplaceztoutpériphériqueélectrique
pouvant causer des interférences
électriques.
Les couleurs apparaissant à l’écran sont
anormales(lesblancsn’apparaissentpas
blanc)
•InspectezlecâbleVGAouDVIpourvous
assurer qu’aucune des broches ne sont
pliées.
•EffectuezuneréinitialisationviaOSD.
•Ajustezlesréglagesdescouleursou
sélectionnezunetempératuredecouleur
viaOSD.
L’image est trouble ou brouillée •Pressezlebouton pendant 2 secondes
pourajusterautomatiquementl’image.
•AjustezlesparamètresdePhaseetde
FréquenceviaOSD.
Pas de son ou son trop bas •Assurez-vousquelecâbleaudioest
correctementconnectéaumoniteuretauPC.
•AjustezlesréglagesduvolumeduPCet
du moniteur.
•Assurez-vousquelespilotesdelacarte
sonduPCsontbieninstallésetactivés.
La Webcam ne fonctionne pas •Assurez-vousd’avoirconnectélecâble
USB2.0fourniaumoniteuretàvotre
ordinateur.
•Assurez-vousd’utiliserMicrosoft®
Windows®Vista/XPSP2.

12 Guide de démarrage rapide
Français
Résolution Taux de rafraîchissement Fréquence horizontale
640x480 60Hz 31.5kHz
640x480 72Hz 37.9kHz
640x480 75Hz 37.5kHz
800x600 56Hz 35.2kHz
800x600 60Hz 37.9kHz
800x600 75Hz 46.9kHz
848x480 60Hz 31.0kHz
1024x768 60Hz 48.4kHz
1024x768 70Hz 56.5kHz
1024x768 75Hz 60.0kHz
1152x864 75Hz 67.5kHz
1280x720 60Hz 44.7kHz
1280x768 60Hz 47.4kHz
1280x768 75Hz 60.3kHz
1280x800 60Hz 49.6kHz
1280x960 60Hz 60.0kHz
1280x1024 60Hz 64.0kHz
1280x1024 75Hz 80.0kHz
1360x768 60Hz 47.7kHz
1440x900 60Hz 55.5kHz
1440x900 60Hz 59.9kHz
Modes de fonctionnement supportés
* Les modes non listés dans ce tableau peuvent ne pas être supportés. Pour une résolution
optimale, il est recommandé de sélectionner un mode listé dans le tableau.

13Schnellstarthilfe
Deutsch
VK192 Serie
LCD-Monitor
Schnellstarthilfe

14 Schnellstarthilfe
Deutsch
Sicherheitsinformationen
• BevorSiedenMonitorinstallieren,lesenSiesorgfältigallemitgelieferten
Informationen.
• UmFeuer-undStromschlagrisikenzuvermindern,setzenSiedenMonitor
niemalsRegenoderFeuchtigkeitaus.
• DerMonitorsolltenurmitderaufdemAufkleberbezeichnetenSpannung
betrieben werden. Sind Sie sich über die Spannung der von Ihnen
benutztenSteckdosenichtsicher,erkundigenSiesichbeiIhrem
EnergieversorgungsunternehmenvorOrt.
• VerwendenSieStromstecker,diemitdenStromstandardsIhrerRegion
übereinstimmen.
• UmeinensicherenBetriebzugewährleisten,verwendenSiedenMonitornur
inVerbindungmitComputern,diedemUL-Standardentsprechenundüber
korrekteingestellteAnschlüssemiteinerSpannungvon100-240V~verfügen.
• Sollten technische Probleme mit dem Produkt auftreten, kontaktieren Sie den
qualiziertenKundendienstoderIhreVerkaufsstelle.
Monitoreinführung
Vorderansicht
* Hotkey zur Auswahl der 5 Videomodi.
** Passt die Datei automatisch an, indem Sie den Knopf für 2-3 Sekunden gedrückt halten.
1. SPLENDID™* / automaische
Feineinstellung**/MENÜ-Verlassen-Knopf
2. Verringerungsknopf/Lautstärke-Hotkey(für
ModellemitLautsprechern)
3.MENÜ/Bestätigen/Auswahltaste
4.Vergrößerungsknopf/Helligkeits-Hotkey
5 . Stromtaste
Ständer
21 3 4 5
1. SPLENDID™* / automaische
Feineinstellung**/MENÜ-Verlassen-Knopf
2.KontrastHotkey/Verringerungsknopf(für
ModellemitLautsprecher)
3. MENÜ/Bestätigen/Auswahltasten
4.Vergrößerungsknopf/Helligkeits-Hotkey
5 . Stromtaste
Ständer
21 3 4 5
WebcamWebcam

15Schnellstarthilfe
Deutsch
Anschließen der Kabel
VerbindenSiedieKabelnachfolgenderAnleitung
6.Netzstromanschluss
7.DVI-Anschluss(füreinigeModelle)
8.VGA-Anschluss
9.Audio-EingangAnschluss(fürModelle
mit Lautsprecher)
10.USB2.0-Anschluss
1.Netzstromanschluss
2.DVI-Signalkabel
3.VGA-Signalkabel
4.Audio-Eingang Kabel (fürAudio-EingangKabel(für
ModellemitLautsprechern)
5.USB-KabelUSB-Kabel
• So schließen Sie das Netzkabel an:VerbindenSieeinEndedesNetzkabels
mitdemNetzanschlussdesMonitorsundsteckenSiedasandereEndeineine
Steckdose.
• So schließen Sie ein USB-Kabel an:VerbindenSieeinEndedesUSB-
Kabels(Upstream)mitdemUSB-PortdesMonitorsunddasandereEndemit
demUSB2.0-PortdesComputers.
• So schließen Sie das VGA/DVI-Kabel an:
a. SteckenSiedenVGA/DVI-SteckerindenVGA/DVI-Anschlussdes
Monitors
b. VerbindenSiedasandereEndemitdemVGA/DVI-AnschlussIhres
Computers.
c. Ziehen Sie die beiden Schrauben fest.
• So schließen Sie das Audiokabel an:VerbindenSiedaseineEndedes
AudiokabelsmitdemAudioeingangdesMonitorsunddasandereEndemit
demAudioausgangIhresComputers.
WennsowohleinVGA,alsaucheinDVI-Kabelangeschossensind,können
SieinderEingangsauswahlderOSD-FunktionenzwischendemVGA-oder
DVI-Moduswählen.
1 4
253
VGA USB
Hinteransicht
AC-IN DVI VGA AUDIO IN USB
8
7
6 9
Stereolautsprecher (für
einige Modelle)
10

16 Schnellstarthilfe
Deutsch
Unterstützung der eingebauten Webcam
DieeingebauteWebcamerlaubtdasaufnehmenvonFotos,abhaltenvon
VideokonferenzenundAufnehmenvonVideoclips.WährenddemChatüberdas
InternetkönnenIhreFreundesieaufihrenBildschirmauchLivesehen.
Systemanforderungen
• EinComputermitPentium®III800MHzodereinemhöherenProzessor
• Microsoft®Windows®Vista/XPServicePack2Betriebssystem
• Mindestens200MBfreienFestplattenspeicherumdasProgrammzustarten.
• 128MBRAModerhöher
• EineGrakkarte,dieeinen16-bitFarbmodusunterstützt.
• StellenSiesicher,dassdasmitgelieferteUSB-Kabelsowohlmitdem
LCD-MonitoralsauchmitihremPCverbundenist.Anderenfallswirddie
Webcam nicht aktiviert werden.
• Stellen Sie sicher, dass Windows® Vista/XPServicePack2odereine
neuereVersioninstalliertist,bevorSiedasGerätbenutzen.
Nutzung des Geräts
DasGerätsendetübereinenUSB-2.0-AnschlussBilderzuihremComputer.
Daheristeswichtig,dassSievorderNutzungdesGerätessicherstellen,dass
dasmitgelieferteUSB-KabelsowohlmitdemLCD-Monitor,alsauchmitihremPC
verbunden ist. Webcam
LifeFrame 2 Software
DerASUSVK192bietetdieeinfachzunutzendeLifeFrame2Softwarean,welche
mitderWebcamarbeitetundesdemBenutzerüberdieseermöglicht,eigene
FotoszumachenundVideoszudrehen.
• LifeFrame2unterstütztnurdasMicrosoft®Windows®Vista/XPService
Pack 2 Betriebssystem.
• DieLifeFrame2SoftwarebendetsichaufderHilfs-CD.
Installationsanweisung:
1. SchließenSiealleanderenAnwendungen.
2. LegenSiedie Hilfs-CDin dasoptische Laufwerkein undstartenSie das
LifeFrame2Programm.
3. Folgen Sie denAnweisungen auf dem Bildschirm um die Installation
abzuschließen.

17Schnellstarthilfe
Deutsch
Problembehandlung
(Häug gestellte Fragen)
Problem Mögliche Lösung
Power-LEDleuchtetnicht • Drücken Sie den -Knopf,umzuprüfen,obder
Monitoreingeschaltetist.
•PrüfenSie,obdasNetzkabelkorrektmitdem
MonitorundderStromquelleverbundenist..
DiePower-LEDleuchtetorange,undder
Bildschirmzeigtnichtsan •PrüfenSie,obderMonitorundderComputer
eingeschaltet sind.
• Stellen Sie sicher, dass das Signalkabel korrekt mit
demMonitorunddemComputerverbundenist.
• Prüfen Sie, ob die Pole des Signalkabels verbogen
sind.
•VerbindenSiedenComputermiteinemanderen
verfügbarenMonitor,umzuprüfen,obdie
Computereinstellungenkorrektsind.
DieAnzeigeistzuhelloderzudunkel •StellenSieKontrastundHelligkeitüberdasOSD
ein.
DieAnzeigeistnichtmittig,oderkorrekt
proportioniert • Drücken Sie den Knopffür2-3Sekunden,
umdieAnzeigeautomatischzujustieren.(NurVGA-
Eingang).
•VerändernSiedieH-PositionoderV-Position
EinstellungenüberdasOSD(NurVGA-Eingang)
DieAnzeigewackeltoderzeigteinWellenmuster
an • Stellen Sie sicher, dass das Signalkabel korrekt mit
demMonitorunddemComputerverbundenist.
•EntfernenSieelektrischeGeräte,dieInterferenzen
hervorrufenkönnten.
DieAnzeigeistdefekt(weißwirdnichtalsweiß
angezeigt) • Prüfen Sie, ob die Pole des Signalkabels verbogen
sind.
•FührenSieeinResetüberdasOSDaus.
•VerändernSiedieR/G/B-Farbeinstellungenoder
stellenSiedieFarbtemperaturüberdasOSDein.
DieAnzeigeistverschwommen • Drücken Sie den Knopffür2-3Sekunden,
umdieAnzeigeautomatischzujustieren.(NurVGA-
Eingang).
•VerändernSiePhrasen-undTakteinstellungenüber
dasOST(NurVGA-Eingang)
KeinTon,oderTonzuleise •StellenSiesicher,dassdasAudiokabelkorrektmit
demMonitorunddemComputerverbundenist.
•VerändernSiedieLautsterkeeinstellungenan
IhremComputerundanIhremMonitor.
• Stellen Sie sicher, dass der Soundkartentreiber
IhresComputersinstalliertundaktivertist.
Webcam funktioniert nicht •StellenSiesicher,dassSiedasUSB-Kabelkorrekt
mitdemLCD-MonitorunddemComputerverbunden
haben.
• Stellen Sie sicher, dass Sie das Betriebssystem
Microsoft®Windows®Vista/XPServicePack2
benutzen..

18 Schnellstarthilfe
Deutsch
Unterstützte Arbeitsmodi
*Nicht inderTabelleaufgeführte Modiwerden wahrscheinlichnicht unterstützt.
FüroptimaleAuösungwird empfohlen,einenModus ausderobigenTabelle
auszuwählen.
Auösung Vertikale Frequenz Horizontale Frequenz
640x480 60Hz 31.5kHz
640x480 72Hz 37.9kHz
640x480 75Hz 37.5kHz
800x600 56Hz 35.2kHz
800x600 60Hz 37.9kHz
800x600 75Hz 46.9kHz
848x480 60Hz 31.0kHz
1024x768 60Hz 48.4kHz
1024x768 70Hz 56.5kHz
1024x768 75Hz 60.0kHz
1152x864 75Hz 67.5kHz
1280x720 60Hz 44.7kHz
1280x768 60Hz 47.4kHz
1280x768 75Hz 60.3kHz
1280x800 60Hz 49.6kHz
1280x960 60Hz 60.0kHz
1280x1024 60Hz 64.0kHz
1280x1024 75Hz 80.0kHz
1360x768 60Hz 47.7kHz
1440x900 60Hz 55.5kHz
1440x900 60Hz 59.9kHz
Table of contents
Languages:
Other Asus Monitor manuals

Asus
Asus MB16AWP User manual

Asus
Asus ML228H Series User manual

Asus
Asus PA329CV Series User manual

Asus
Asus VL278 Series User manual

Asus
Asus VW22A series User manual

Asus
Asus ROG STRIX XG43VQ User manual

Asus
Asus C1221Q Series User manual

Asus
Asus VE248Q User manual

Asus
Asus VA27A Series User manual

Asus
Asus VL279 Series User manual