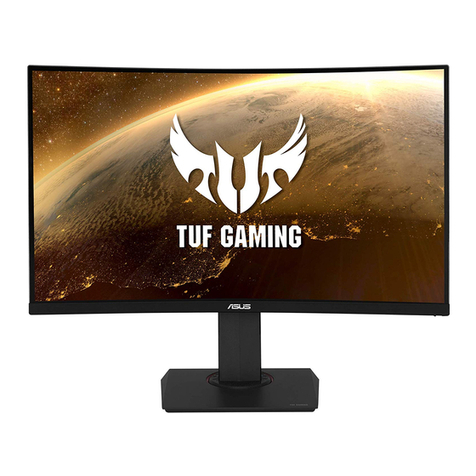
Asus VY279HF Series User manual

VY279HF Series
LCD Monitor
User Guide

ii
Copyright © 2023 ASUSTeK COMPUTER INC. All Rights Reserved.
No part of this manual, including the products and software described in it, may be reproduced,
transmitted, transcribed, stored in a retrieval system, or translated into any language in any form or by any
means, except documentation kept by the purchaser for backup purposes, without the express written
permission of ASUSTeK COMPUTER INC. (“ASUS”).
Product warranty or service will not be extended if: (1) the product is repaired, modied or altered, unless
such repair, modication of alteration is authorized in writing by ASUS; or (2) the serial number of the
product is defaced or missing.
ASUS PROVIDES THIS MANUAL “AS IS” WITHOUT WARRANTY OF ANY KIND, EITHER EXPRESS
OR IMPLIED, INCLUDING BUT NOT LIMITED TO THE IMPLIED WARRANTIES OR CONDITIONS OF
MERCHANTABILITY OR FITNESS FOR A PARTICULAR PURPOSE. IN NO EVENT SHALL ASUS, ITS
DIRECTORS, OFFICERS, EMPLOYEES OR AGENTS BE LIABLE FOR ANY INDIRECT, SPECIAL,
INCIDENTAL, OR CONSEQUENTIAL DAMAGES (INCLUDING DAMAGES FOR LOSS OF PROFITS,
LOSS OF BUSINESS, LOSS OF USE OR DATA, INTERRUPTION OF BUSINESS AND THE LIKE),
EVEN IF ASUS HAS BEEN ADVISED OF THE POSSIBILITY OF SUCH DAMAGES ARISING FROM ANY
DEFECT OR ERROR IN THIS MANUAL OR PRODUCT.
SPECIFICATIONS AND INFORMATION CONTAINED IN THIS MANUAL ARE FURNISHED FOR
INFORMATIONAL USE ONLY, AND ARE SUBJECT TO CHANGE AT ANY TIME WITHOUT NOTICE,
AND SHOULD NOT BE CONSTRUED AS A COMMITMENT BY ASUS. ASUS ASSUMES NO
RESPONSIBILITY OR LIABILITY FOR ANY ERRORS OR INACCURACIES THAT MAY APPEAR IN THIS
MANUAL, INCLUDING THE PRODUCTS AND SOFTWARE DESCRIBED IN IT.
Products and corporate names appearing in this manual may or may not be registered trademarks or
copyrights of their respective companies, and are used only for identication or explanation and to the
owners’ benet, without intent to infringe.
Table of contents
TCO certied ............................................................................................... iii
Notices......................................................................................................... iv
Care & Cleaning........................................................................................ viii
1.1 Welcome! ...................................................................................... 1-1
1.2 Package contents......................................................................... 1-1
1.3 Assembling the monitor.............................................................. 1-2
1.4 Outline dimension........................................................................ 1-2
1.5 Connect cables............................................................................. 1-3
1.5.1 Rear of the LCD monitor ................................................. 1-3
1.6 Monitor introduction .................................................................... 1-6
1.6.1 Using the Controls button .............................................. 1-6
2.1 Detaching the arm/stand (for VESA wall mount) ...................... 2-1
2.2 Adjusting the monitor.................................................................. 2-2
3.1 OSD (On-Screen Display) menu ................................................. 3-1
3.1.1 Howtorecongure.......................................................... 3-1
3.1.2 OSD Function Introduction.............................................. 3-2
3.2 Specications............................................................................. 3-11
3.3 Troubleshooting (FAQ).............................................................. 3-12
3.4 Supported Timing List............................................................... 3-13
iii
TCO certied
A third-party certification according to ISO 14024
Say hello
to a more sustainable product
IT products are associated with a wide range of sustainability risks
throughout their life cycle. Human rights violations are common in the
factories. Harmful substances are used both in products and their
manufacture. Products can often have a short lifespan because of poor
ergonomics, low quality and when they are not able to be repaired or
upgraded.
This product is a better choice. It meets all the criteria in TCO Certified,
the world’s most comprehensive sustainability certification for IT
products. Thank you for making a responsible product choice, that help
drive progress towards a more sustainable future!
Criteria in TCO Certified have a life-cycle perspective and balance
environmental and social responsibility. Conformity is verified by
independent and approved verifiers that specialize in IT products, social
responsibility or other sustainability issues. Verification is done both
before and after the certificate is issued, covering the entire validity
period. The process also includes ensuring that corrective actions are
implemented in all cases of factory non-conformities. And last but not
least, to make sure that the certification and independent verification is
accurate, both TCO Certified and the verifiers are reviewed regularly.
Want to know more?
Read information about TCO Certified, full criteria documents, news and
updates at tcocertified.com. On the website you’ll also find our Product
Finder, which presents a complete, searchable listing of certified
products.
Toward sustainable IT products

iv
Notices
NOTE:ThismonitorisENERGYSTARcertied.
ThisproductqualiesforENERGYSTARinthefactory
defaultsettingwhichcanberestoredby“FactoryReset”
functionintheOSDmenu.Changingthefactory
defaultsettingsorenablingotherfeaturesmayincrease
powerconsumptionthatcouldexceedtheENERGYSTAR
speciedlimits.
Federal Communications Commission Statement
This device complies with Part 15 of the FCC Rules. Operation is subject
to the following two conditions:
• Thisdevicemaynotcauseharmfulinterference,and
• Thisdevicemustacceptanyinterferencereceivedincluding
interferencethatmaycauseundesiredoperation.
Thisequipmenthasbeentestedandfoundtocomplywiththelimitsfor
aClassBdigitaldevice,pursuanttoPart15oftheFCCRules.These
limits are designed to provide reasonable protection against harmful
interferenceinaresidentialinstallation.Thisequipmentgenerates,uses
andcanradiateradiofrequencyenergyand,ifnotinstalledandusedin
accordancewiththeinstructions,maycauseharmfulinterferencetoradio
communications.However,thereisnoguaranteethatinterferencewill
not occur in a particular installation. If this equipment does cause harmful
interferencetoradioortelevisionreception,whichcanbedeterminedby
turningtheequipmentoffandon,theuserisencouragedtotrytocorrect
theinterferencebyoneormoreofthefollowingmeasures:
• Reorient or relocate the receiving antenna.
• Increase the separation between the equipment and receiver.
• Connect the equipment to an outlet on a circuit different from that to
which the receiver is connected.
• Consult the dealer or an experienced radio/TV technician for help.
Canadian Department of Communications Statement
This digital apparatus does not exceed the Class B limits for radio
noise emissions from digital apparatus set out in the Radio Interference
Regulations of the Canadian Department of Communications.
ThisclassBdigitalapparatuscomplieswithCanadianICES-003.

v
Declaration of Conformity
This device complies with the requirements set out in the Council
DirectiveontheApproximationoftheLawsoftheMemberStates
relatingtoElectromagneticCompatibility(2014/30/EU),Low-voltage
Directive(2014/35/EU),ErPDirective(2009/125/EC)andRoHSdirective
(2011/65/EU).Thisproducthasbeentestedandfoundtocomplywith
theharmonizedstandardsforInformationTechnologyEquipment,these
harmonizedstandardspublishedunderDirectivesofOfcialJournalofthe
EuropeanUnion.
WEEE Symbol Statement
Thissymbolontheproductoronitspackagingindicatesthatthisproduct
mustnotbedisposedofwithyourotherhouseholdwaste.Instead,itis
yourresponsibilitytodisposeofyourwasteequipmentbyhandingitover
toadesignatedcollectionpointfortherecyclingofwasteelectricaland
electronicequipment.Theseparatecollectionandrecyclingofyourwaste
equipment at the time of disposal will help to conserve natural resources
andensurethatitisrecycledinamannerthatprotectshumanhealthand
theenvironment.Formoreinformationaboutwhereyoucandropoffyour
wasteequipmentforrecycling,pleasecontactyourlocalcityofce,your
householdwastedisposalserviceortheshopwhereyoupurchasedthe
product.
ASUS CONTACT INFORMATION
ASUSTeK Computer Inc. ASUS Computer International (America) ASUS Computer GmbH (Germany and Austria)
Address Address 48720 Kato Rd, Fremont,
CA 94538, USA
Address Harkortstr. 21-23
D-40880 Ratingen, Germany
Telephone +886-2-2894-3447 Fax +1-510-608-4555
Telephone +49-1805-010920Telephone +1-510-739-3777
Fax +886-2-2894-7798 Website http://usa.asus.com/
Website http://www.asus.de/
E-mail [email protected]
Online Contact http://www.asus.de/sales
Website http://www.asus.com.tw/
Technical Support
Technical Support Technical Support
Telephone +86-21-38429911
Telephone +1-812-282-2787 (English Only) Telephone +49-1805-010923
+1-905-370-2787 (French Only) Support Fax +49-2102-959911
Online Support http://support.asus.com/ Online Support http://support.asus.com/
1F., No. 15,
Lide Rd., Beitou Dist.,
Taipei City 112, Taiwan

vi
Safety information
• Beforesettingupthemonitor,carefullyreadallthedocumentationthat
camewiththepackage.
• Topreventfireorshockhazard,neverexposethemonitortorainor
moisture.
• Nevertrytoopenthemonitorcabinet.Thedangeroushighvoltages
insidethemonitormayresultinseriousphysicalinjury.
• Ifthepowersupplyisbroken,donottrytofixitbyyourself.Contacta
qualifiedservicetechnicianoryourretailer.
• Beforeusingtheproduct,makesureallcablesarecorrectlyconnected
andthepowercablesarenotdamaged.Ifyoudetectanydamage,
contactyourdealerimmediately.
• Slotsandopeningsonthebackortopofthecabinetareprovidedfor
ventilation.Donotblocktheseslots.Neverplacethisproductnearor
over a radiator or heat source unless proper ventilation is provided.
• Themonitorshouldbeoperatedonlyfromthetypeofpowersource
indicatedonthelabel.Ifyouarenotsureofthetypeofpowersupplyto
yourhome,consultyourdealerorlocalpowercompany.
• Usetheappropriatepowerplugwhichcomplieswithyourlocalpower
standard.
• Do not overload power strips and extension cords. Overloading can
resultinfireorelectricshock.
• Avoiddust,humidity,andtemperatureextremes.Donotplacethe
monitorinanyareawhereitmaybecomewet.Placethemonitorona
stable surface.
• Unplug the unit during a lightning storm or if it will not be used for a
long period of time. This will protect the monitor from damage due to
power surges.
• Neverpushobjectsorspillliquidofanykindintotheslotsonthe
monitor cabinet.
• Toensuresatisfactoryoperation,usethemonitoronlywithULlisted
computerswhichhaveappropriateconfiguredreceptaclesmarked
between100~240VAC.
• Thesocket-outletshallbeinstalledneartheequipmentandshallbe
easilyaccessible
• Ifyouencountertechnicalproblemswiththemonitor,contacta
qualified servic er.
• Provide an earthing connection before the mains plug is connected to
themains.And,whendisconnectingtheearthingconnection,besure
to disconnect after pulling out the mains plug from the mains.

vii
WARNING
Usageofotherthanspeciedhead-orearphonescanresultinhearing
loss due to excessive sound pressures.
Pleaseconrmthedistributionsysteminbuildinginstallationshallprovide
thecircuitbreakerrated120/240V,20A(maximum).
Ifprovidedwitha3-pinattachmentplugonthepowercord,plugthecord
intoagrounded(earthed)3-pinoutlet.Donotdisablethepowercord
groundingpin,forexample,byattachinga2-pinadapter.Thegrounding
pinisanimportantsafetyfeature.
RestrictiononHazardousSubstancesstatement(India)Thisproduct
complieswiththe“IndiaE-Waste(Management)Rules,2016”and
prohibitsuseofLead,Mercury,HexavalentChromium,polybrominated
biphenyls(PBBs)andpolybrominateddiphenylethers(PBDEs)in
concentrationexceeding0.1%byweightinhomogenousmaterials
and0.01%byweightinhomogenousmaterialsforcadmium,exceptof
exemptions listed in Schedule 2 of the Rule.
ThisproductiscompliantwithrequirementsofCircularNo.30/2011/TT-
BCTRegulations“STIPULATINGTEMPORARILYTHEPERMISSIBLE
CONTENTLIMITATIONOFSOMETOXICCHEMICALSINTHE
ELECTRONIC,ELECTRICALPRODUCTS”.

viii
Care & Cleaning
• Beforeyouliftorrepositionyourmonitor,itisbettertodisconnectthe
cables and power cord. Follow the correct lifting techniques when
positioningthemonitor.Whenliftingorcarryingthemonitor,graspthe
edgesofthemonitor.Donotliftthedisplaybythestandorthecord.
• Cleaning.Turnyourmonitoroffandunplugthepowercord.Cleanthe
monitorsurfacewithalint-free,non-abrasivecloth.Stubbornstains
mayberemovedwithaclothdampenedwithmildcleaner.
• Avoidusingacleanercontainingalcoholoracetone.Useacleaner
intendedforusewiththeLCD.Neverspraycleanerdirectlyonthe
screen,asitmaydripinsidethemonitorandcauseanelectricshock.
The following symptoms are normal with the monitor:
• Thescreenmayflickerduringtheinitialuseduetothenatureofthe
fluorescent light. Turn off the Power Switch and turn it on again to
makesurethattheflickerdisappears.
• Youmayfindslightlyunevenbrightnessonthescreendependingon
thedesktoppatternyouuse.
• Whenthesameimageisdisplayedforhours,anafterimageofthe
previousscreenmayremainafterswitchingtheimage.Thescreenwill
recoverslowlyoryoucanturnoffthePowerSwitchforhours.
• Whenthescreenbecomesblackorflashes,orcannotworkanymore,
contactyourdealerorservicecentertofixit.Donotrepairthescreen
byyourself!
Conventions used in this guide
WARNING:Informationtopreventinjurytoyourselfwhentryingto
completeatask.
CAUTION:Informationtopreventdamagetothecomponents
whentryingtocompleteatask.
IMPORTANT:InformationthatyouMUSTfollowtocompletea
task.
NOTE:Tipsandadditionalinformationtoaidincompletingatask.

ix
Wheretondmoreinformation
Refer to the following sources for additional information and for product
and software updates.
1. ASUS websites
TheASUSwebsitesworldwideprovideupdatedinformationonASUS
hardware and software products. Refer to http://www.asus.com
2. Optional documentation
Yourproductpackagemayincludeoptionaldocumentationthatmay
havebeenaddedbyyourdealer.Thesedocumentsarenotpartof
thestandardpackage.
Takeback Services
ASUSrecyclingandtakebackprogramscomefromourcommitmenttothe
higheststandardsforprotectingourenvironment.Webelieveinproviding
solutionsforourcustomerstobeabletoresponsiblyrecycleourproducts,
batteriesandothercomponentsaswellasthepackagingmaterials.
Pleasegotohttp://csr.asus.com/english/Takeback.htmfordetailrecycling
information in different region.
Product information for EU energy label

1-1
ASUS LCD Monitor VY279HF Series
1.1 Welcome!
ThankyouforpurchasingtheASUS®LCDmonitor!
ThelatestwidescreenLCDmonitorfromASUSprovidesacrisper,
broader,andbrighterdisplay,plusahostoffeaturesthatenhanceyour
viewing experience.
Withthesefeatures,youcanenjoytheconvenienceanddelightfulvisual
experiencethatthemonitorbringsyou!
1.2 Package contents
Checkyourpackageforthefollowingitems:
LCDMonitor
MonitorStand
MonitorBase
QuickStartGuide
WarrantyCard
1x Power Cord
1xHDMICable
1xL-shapedScrewdriver(optional)
4xScrews
• Ifanyoftheaboveitemsisdamagedormissing,contactyourretailer
immediately.
• *AlsotheReplaceablepartsrequiredbytheTCOCertified.

1-2 Chapter 1: Product Introduction
1.3 Assembling the monitor
To assemble the monitor:
1. Placethedisplayonaclothonthetable,Useascrewdrivertotighten
theassemblyscrews,andsecurethearmtothedisplaytightly.Then
attachthehingecovertomonitorbody,attachthebasetothearmand
xwiththescrewtojointhemtightly.Youcaneasilytightenthescrew
byngers.
2. Adjustthemonitortotheanglethatismostcomfortableforyou.
2
1
3
4
5
1.4 Outline dimension
Unit: mm [inch]

1-3
ASUS LCD Monitor VY279HF Series
1.5 Connect cables
1.5.1 Rear of the LCD monitor
HDMI
231
4
1. AC-INPort
2. HDMIPort
3. Earphone-outPort
4. KensingtonLock

1-4 Chapter 1: Product Introduction
Installaion
1. Turnoffyourcomputerandunplugyourcomputer'spowercord.
2. ConnectthesignalcabletotheHDMIinputsocketofthemonitor,and
theHDMIoutputsocketofthegraphicscardonthecomputer.Then
tighten the thumbscrews on the signal cable connector.
3. Insertthemonitorpowercableintothepowerportatthebackofthe
monitor.
4. Plugthepowercordsofyourcomputerandyourmonitorintoa
nearbyelectricaloutlet.
A
B
C
2
AC IN
HDMI

1-5
ASUS LCD Monitor VY279HF Series
• POWERCORDspecificationsrefertopagev.
• Fortheinstallationofreplaceableparts,pleaserefertotheaboveinstallation
instructions.
• Usersmaygotothelocalservicenetworktoreplace/purchasethequalified
replaceable parts.
• Forlocalservicecentersandservicecontacts,pleasereferto
https://www.asus.com/support

1-6 Chapter 1: Product Introduction
1.6 Monitor introduction
1.6.1 Using the Controls button
Usethecontrolbuttononthebackofthemonitortoadjusttheimage
settings.
34
Power
52
61
Power
Exit
Energy Saving
Brightness
1. Power Indicator:
• The color definition of the power indicator is as the below table.
Status Description
White ON
Amber Standbymode
OFF OFF
2. Central button:
• Press this button to enter the OSD menu.
3. Leftkey:
• ExittheOSDmenuorreturntothepreviouslayer.
4. Rightkey:
• PowerOffshortcutkey.
• Entertheoptionofthenextlayer.
5. Upkey:
• Brightnessshortcutkey.
• Movetheoptionupwardsorincreasetheoptionvalue.
6. Downkey:
• EnergySavingshortcutkey.:
• Movetheoptiondownwardsordecreasetheoptionvalue.
• KeyLockshortcutkey.Pressandholditfor5secondstoenable/
disableKeysLock.
• Youcanpress5-waykeyanydirectiontoturnonthemonitor.

2-1
ASUS LCD Monitor VY279HF Series
2.1 Detaching the arm/stand (for VESA wall
mount)
ThedetachablestandofthismonitorisspeciallydesignedforVESAwall
mount.
To detach the arm/stand
1. Disconnectpowerandsignalcables.Carefullyput the front of the
monitor face down on a clean table.
2. Removethehingecoverfrommonitorbodybyusingyourngers.
3. Useascrewdrivertoremovethescrewsonthearm,andthendetach
the arm/stand from the monitor.
• Werecommendthatyoucoverthetablesurfacewithsoftclothtoprevent
damage to the monitor.
• Hold the stand of the monitor while removing the screws.
2
1
3
4
5
• TheVESAwallmountkit(100x100mm)ispurchasedseparately.
• UseonlytheULListedWallMountBracketwithminimumweight/load12kg
(Screwsize:M4x10mm).

2-2 Chapter 2: Setup
2.2 Adjusting the monitor
• Foroptimalviewing,werecommendthatyoulookatthefullfaceofthe
monitor,thenadjustthemonitortotheanglethatismostcomfortable
foryou.
• Hold the stand to prevent the monitor from falling
whenyouchangeits
angle.
• Youcanadjustthemonitor’sanglefrom+23˚to-5˚.
-5° 23°
Itisnormalthatthemonitorslightlyshakeswhileyouadjusttheviewing
angle.

3-1
ASUS LCD Monitor VY279HF Series
3.1 OSD (On-Screen Display) menu
3.1.1 Howtorecongure
Standard Mode
sRGB Mode
Scenery Mode
Theater Mode
Game Mode
Night View Mode
Reading Mode
Darkroom Mode
VY279HF
1920 x 1080 100 Hz
Splendid
Standard Mode
Signal
HDMI
Btightness
65
Splendid
EyeCare
Image
Back/Exit Enter
Color
Settings
1. PresstheMENUbuttontoactivatetheOSDmenu.
2. Press the and buttons to toggle between options in the
Menu.Asyoumovefromoneicontoanother,theoptionnameis
highlighted.
3. ToselectthehighlighteditemonthemenupresstheCentralkey.
4. Press the and buttons to select the desired parameter.
5. PresstheCentralkeytoentertheslidebarandthenusetheor
buttons,accordingtotheindicatorsonthemenu,tomakeyour
changes.

3-2 Chapter 3: General Instruction
3.1.2 OSD Function Introduction
1. Splendid
Thisfunctioncontainseightsub-functionsthatyoucanselectforyour
preference.
Standard Mode
sRGB Mode
Scenery Mode
Theater Mode
Game Mode
Night View Mode
Reading Mode
Darkroom Mode
VY279HF
1920 x 1080 100 Hz
Splendid
Standard Mode
Signal
HDMI
Btightness
65
Splendid
EyeCare
Image
Back/Exit Enter
Color
Settings
• Standard Mode: This is the best choice for document editing with
SPLENDID™VideoIntelligenceTechnology.
• sRGB Mode: This is the best choice for viewing photos and graphics
from PCs.
• Scenery Mode:Thisisthebestchoiceforsceneryphotodisplayingwith
SPLENDID™VideoIntelligenceTechnology.
• Theater Mode: This is the best choice for movie watching with
SPLENDID™VideoIntelligenceTechnology.
• Game Mode:ThisisthebestchoiceforgameplayingwithSPLENDID™
VideoIntelligenceTechnology.
• Night View Mode:Thisisthebestchoiceforplayingdark-scenegame
orwatchingdark-scenemoviewithSPLENDID™VideoIntelligence
Technology.
• Reading Mode :Thisisthebestchoiceforbookreading.
• Darkroom Mode :Thisisthebestchoiceforaweakambientlight
environmen.
• IntheStandardMode,theSaturation,Sharpness,andASCRfunctionsare
not user-configurable.
• InthesRGB,theSaturation,ColorTemp.,Sharpness,Brightness,Contrast
andASCRfunctionsarenotuser-configurable.
• IntheReadingMode,theSaturation,ASCR,contrast,andColorTemp
functions are not user-configurable.

3-3
ASUS LCD Monitor VY279HF Series
2. EyeCare
AdjusttheenergylevelofEyeCarefromLEDbacklight.
VY279HF
1920 x 1080 100 Hz
Splendid
Standard Mode
Signal
HDMI
Btightness
65
Splendid
EyeCare
Image
Back/Exit Enter
Color
Color Augmentation
Blue Light Filter
Rest Reminder
OFF
Settings
• Blue Light Filter:Inthisfunction,youcanadjustthebluelightfilterfrom
0tomax.0:nochanges;Max:Thehigherthelevel,thelessbluelight
isscattered.Whenbluelightfilterisactivated,thedefaultsettingsof
StandardModewillbeautomaticallyimported.Besidesmaximumlevel,
thebrightnessisuser-configurable.Maximumistheoptimizedsetting.
It is compliance with TUV low blue light certification*. The brightness
function is not user configurable.
• Whentheuseradjustsbluelightfilterbartomaximumlevel.
• *Whencoloraugmentationisindefaultvalue(50).
• Rest Reminder:Thisfunctionprovidesyouarestreminderaccording
tohowlongyousetforyourworkingtime.Forexample,ausersets30
minutesworkingtimeandtherewillbeapopupreminderappearedon
theupperleftcornerofthemonitorfor5seconds.Pressanykeytomake
this reminder OSD disappeared.
• Whenthisfunctionisenable,thefollowingfunctionsarenotavailable:
SplendidDemoMode,GamePlusandQuickFit.
• Color Augmentation: The adjusting range of color enhancement is from
0to100.
• ThisfunctionisnotavailableinsRGBmodeunderSplendid.
Table of contents
Other Asus Monitor manuals

Asus
Asus VG248QE User manual

Asus
Asus C624C Series User manual

Asus
Asus PB277Q User manual

Asus
Asus ProArt PA32UCX-PK User manual

Asus
Asus PB247Q User manual

Asus
Asus VS208 Series User manual

Asus
Asus ROG STRIX XG17AHP User manual

Asus
Asus PA24US Series User manual

Asus
Asus VS278 Series User manual

Asus
Asus VP247T User manual

Asus
Asus VN247HA User manual

Asus
Asus MW221U/201U User manual

Asus
Asus VA24DCP User manual

Asus
Asus VB191T User manual

Asus
Asus VP299CL Series User manual

Asus
Asus MW221 series User manual

Asus
Asus REPUBLIC OF GAMERSROG SWIFT PG43UQ User manual

Asus
Asus VG278HR Series User manual

Asus
Asus VG249Q3A Series User manual

Asus
Asus VA24DQF User manual