8
Introduction
With this conversion-set you can convert your gas hob from natural gas
(G25 / 25 mbar) to propane/butane gas (G30 / 28-30 mbar). Before you
start conversion, check whether your gas hob is genuinely set to natural
gas.
Tools
A. Tube- (or socket spanner 7)
B. Screwdriver 2 mm (blade width)
C. Leak spray and/or special
pressure gauge
Attention: Check the gas tightness
after converting the appliance
(see chapter 2).
Replace the following parts:
- injector for the burners
- 2 data labels with the modified gas setting
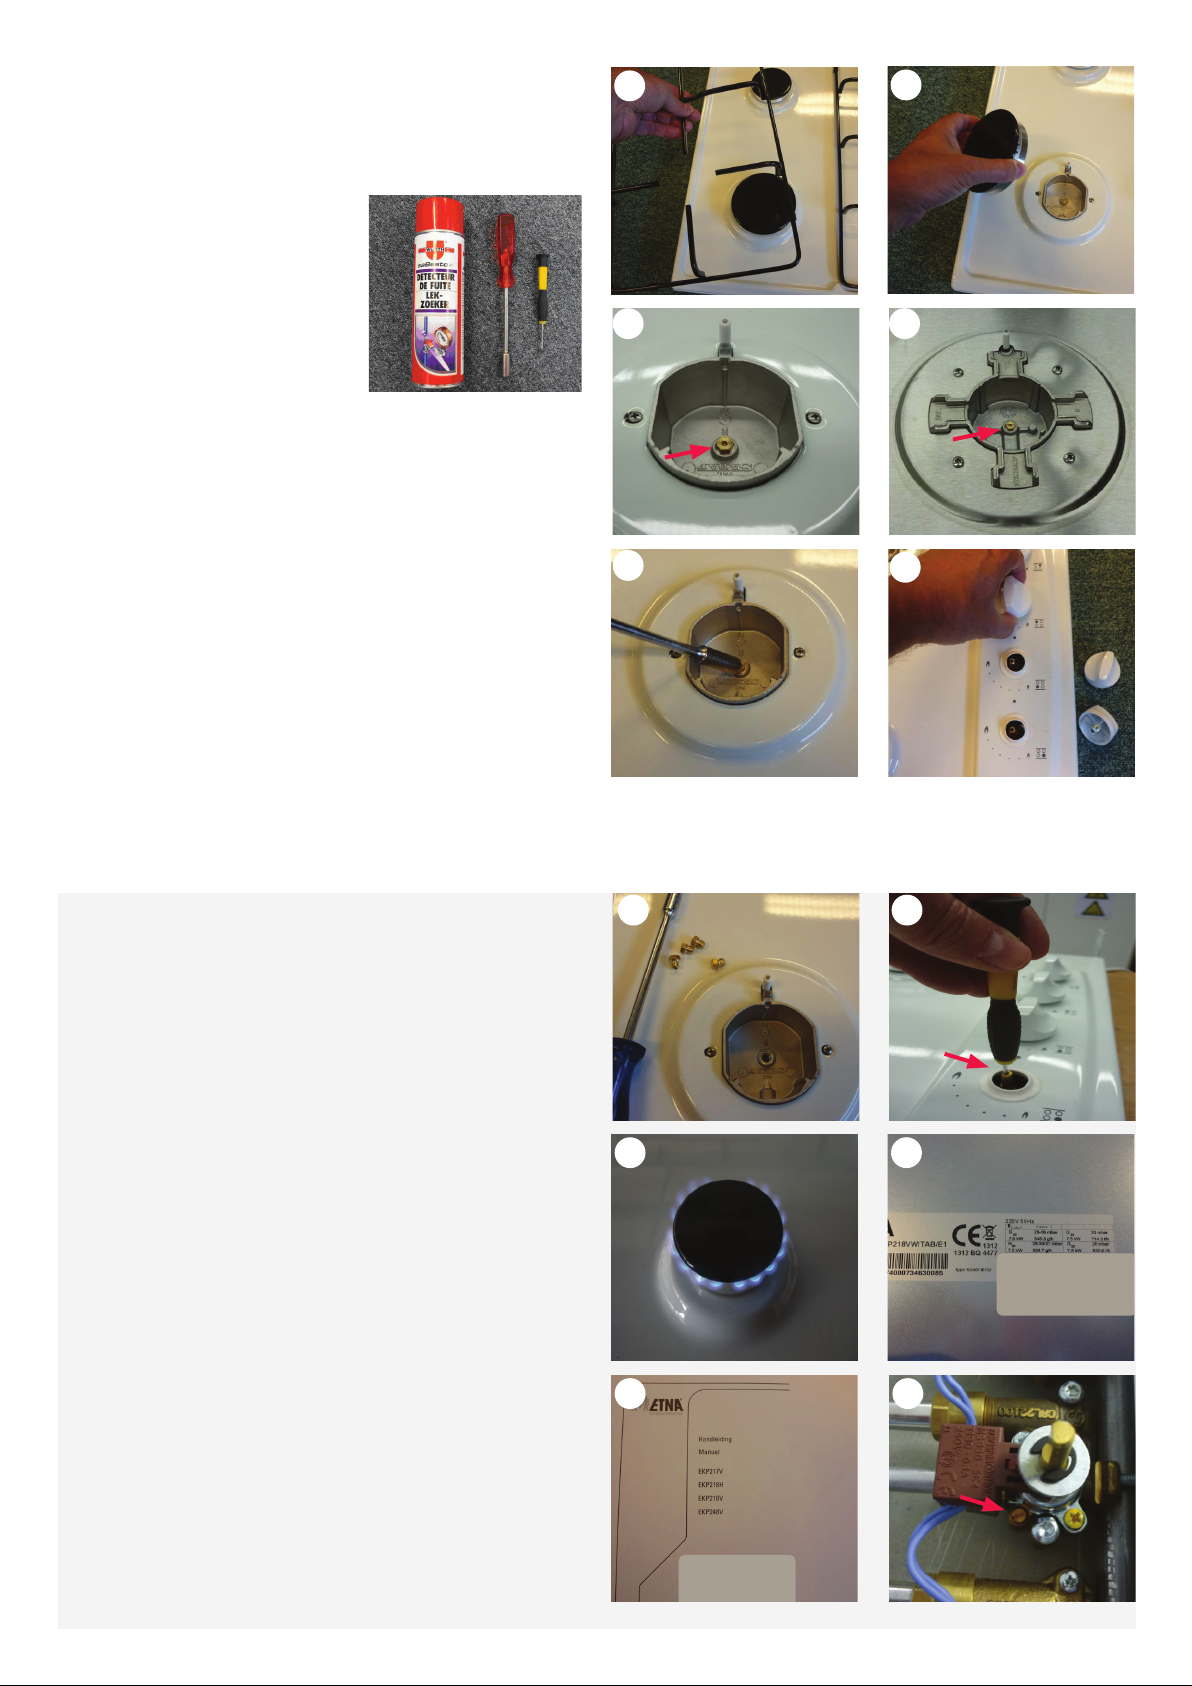
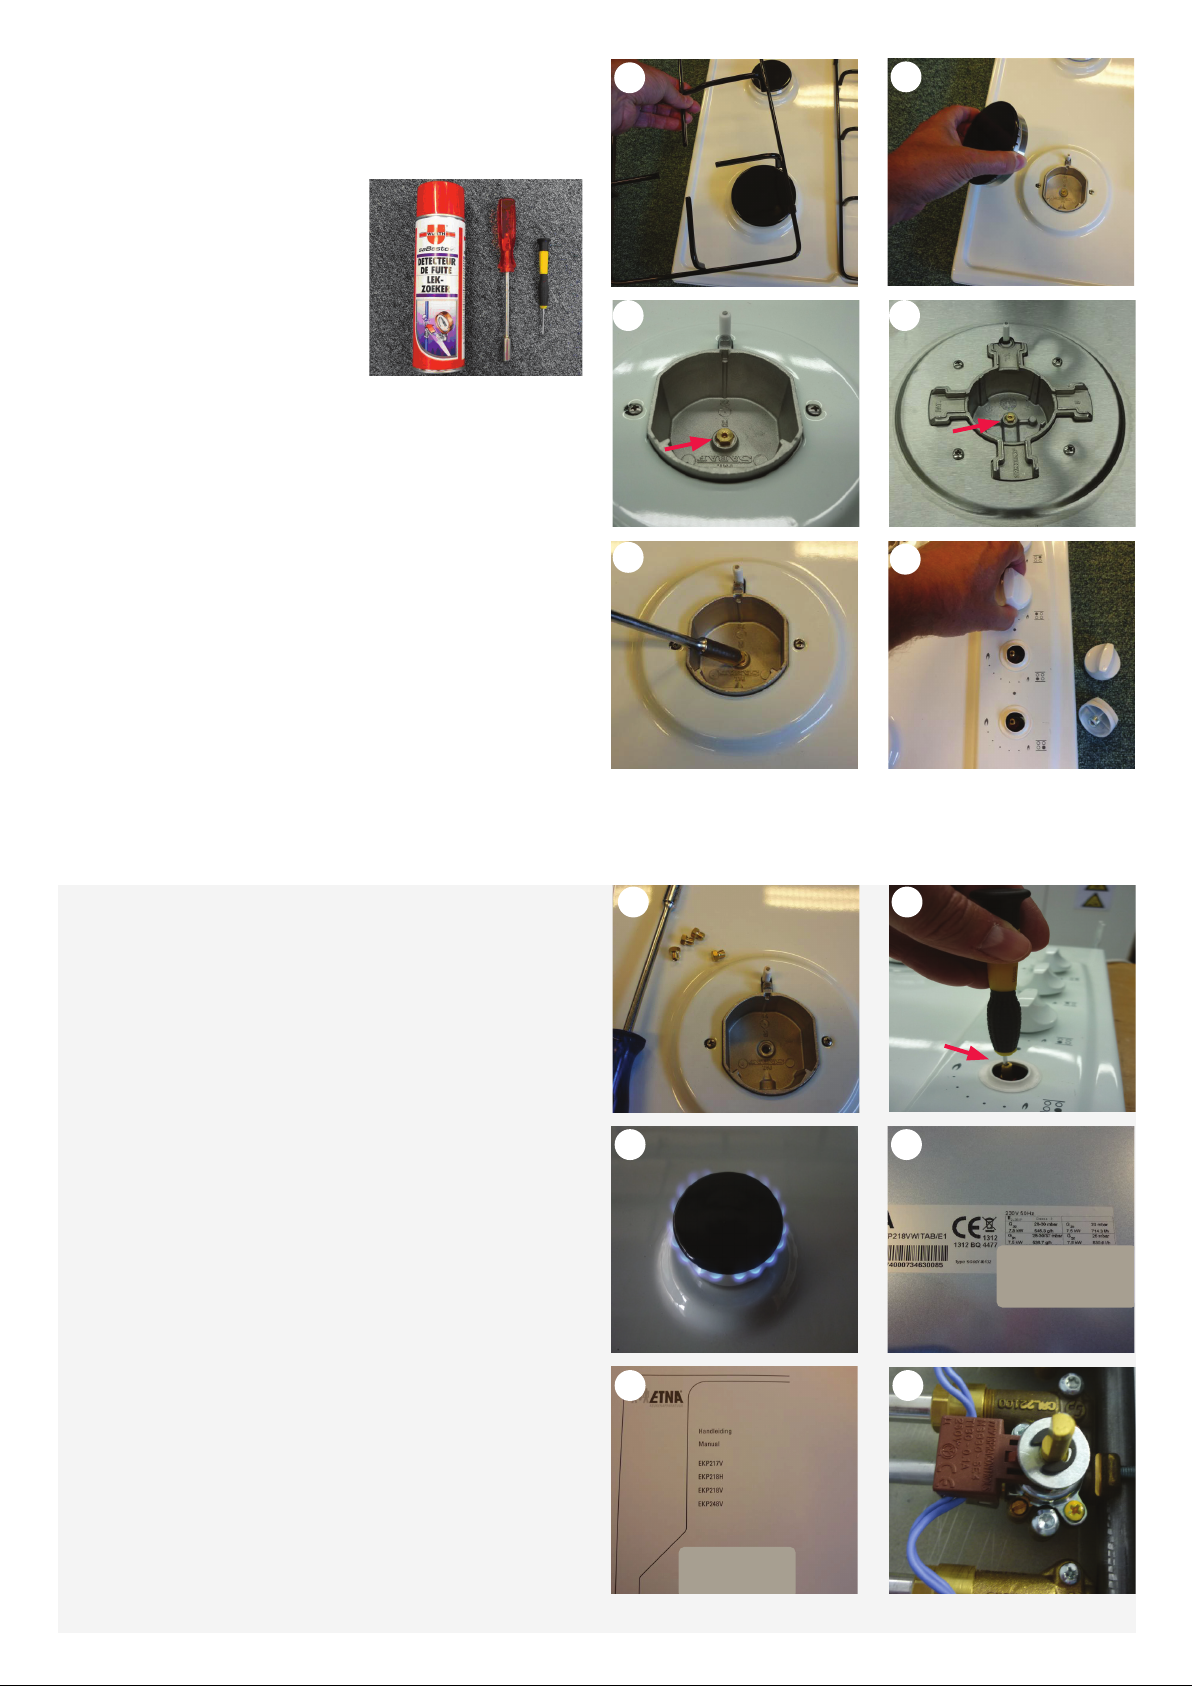
Dismantling
Prevent damage of the work top. Lay down parts of the appliance on a
protected base.
1. Remove the pan supports, burner heads and the ornamental cover
(if present). See fig. A and B.
2. Remove the 4 injectors in the burners. See illustrations C and D.
Use a tubular spanner 7 for disassembling/assembling the injector.
3. Pull up the control knobs vertically and remove them. (see
illustration E).
Converting
1. Replace the injectors (G30 - 28/30 mbar) in the burners (see illustra-
tion F). Use a tubular spanner 7 for disassembling/assembling the
injector.
For verification, the values of the nozzles can be found in the table of
values for injectors (see p. 9).
2. Place the burner heads and connect the hob to a gas cylinder of
G30-30 mbar.
3. Using a small screwdriver, adjust the simmer setting with the simmer
setting screw. The simmer setting screw can be found in the valve stem of
the gas tap (see fig. G) or on the body of the gas tap (see fig. K). When the
simmer setting screw is on the body of the gas tap, the screw can be reached
through the gas tap cut-out in the drip tray. The drip tray does not need
to be removed. Ignite the burner, turn the gas tap to ‘simmer setting’ and
adjust the flames to a length of approx. 4mm (see fig. H). Please note:
the flame may not blow out in simmer setting. After adjusting, the flame
should be stable. I.e., the burner may not blow out, for example, when
fanned manually.
4. Partially attach the data sticker on the current data sticker (with gas
type / gas tightness) to the bottom of the gas hob (see fig. I).
5. Attach the second data sticker to the front of the user manual
(see fig. J).
Warning!
Check the appliance for gas tightness, especially the injectors and
simmer setting screws!
Always check for gas tightness before using the appliance!
Deze kookplaat staat ingesteld
voor G30 / 28-30 mbar (LPG)
Deze kookplaat staat ingesteld
voor G30 / 28-30 mbar (LPG)
AB
C1 C2
D
G
H I
J K
E
F
B
C
A