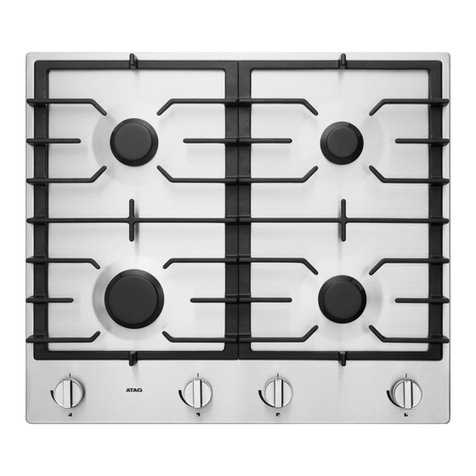
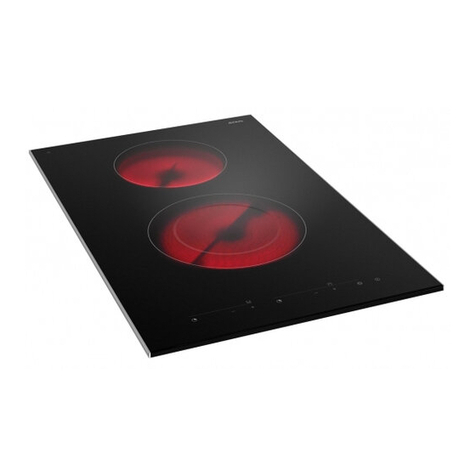
Atag HL2B Series User manual

gebruiksaanwijzing
instructions for use
mode d’emploi
Gebrauchsanweisung
Cook-light kookplaat
Cook-light hob
table de cuisson Cook-light
Cook-light Kochmulde
HL2..B
HL2..L
HL2..C
art.nr. 723.618.10 / T91824 /A postbus 8 - 7070 AA Ulft - Nederland

toestelbeschrijving
1kookzone Cook-light Ø 14,5 cm (1200 W)
2vis/wildpanzone
Cook-light Ø 18/41,5 cm (1561/735/1561W)
3dubbele kookzone
Cook-light Ø 14,5/21 cm (1000/2000 W)
4bedieningsknoppen kookzone 3
5restwarmte-indicatie
6aan/uit signalering
7bedieningsknop kookzone 1
8bedieningsknoppen vis/wildpanzone 2
9dubbele kookzone
Cook-light Ø 17/26,5 cm (1400/2200 W)
10 kookzone Cook-light Ø 18 cm (1800 W)
11 bedieningsknop kookzone 9
12 bedieningsknop kookzone 10
13 kookzone Cook-light Ø 14,5 cm (1200 W)
14 bedieningsknop kookzone 13
woord vooraf
In deze handleiding vindt u informatie
over de installatie, veiligheid,
bediening en onderhoud van uw
toestel.
De installatievoorschriften zijn
bestemd voor de installateur die het
toestel veilig voor u kan installeren.
Als u de overige informatie doorleest,
bent u snel op de hoogte van alle
mogelijkheden van het toestel.
Bewaar dit boekje. Een eventueel
volgende gebruiker van dit toestel kan
daar zijn voordeel mee doen.
Veel plezier.

BENL
IE
FR
CH
CH
AT
LU
LU
GB
BE
DE BE
nederlands blz. NL 1 - NL 12
english page GB 1 - GB 12
français page FR 1 - FR 12
Deutsch Seite DE 1 - DE 12
inhoudsopgave
inleiding 1
waar vindt u ATAG 1
veiligheidsvoorschriften 2
inbouwmaten 3
installatievoorschrift 4 - 5
bediening 6 - 7
gebruik 7
onderhoud 8
kooktabel 9
storingen zelf verhelpen 10
technische gegevens 10
verpakking en toestel afvoeren 11
wat garandeert ATAG 12
buiten de garantie vallen 12
inleiding
De “ATAG Cook-light” elementen combineren
de voordelen van een halogeenelement met die
van de conventionele stralingselementen. Het
element verwarmt gelijkmatig en snel.
Cook-light kookzones zijn binnen 3 seconden op
volle temperatuur, maar verbruiken zeer weinig
energie.
België:
ATAG België n.v.
bezoekadres
Keerstraat 1
postadres
Industriezone Erpe-Mere
9420 ERPE-MERE
Telex: 12467 ATAG B
Telefax: 053 - 80.60.57
Servicedienst - consumenteninformatie
053-80.62.08
waar vindt u ATAG
Nederland:
ATAG keukentechniek b.v.
bezoekadres
Nijverheidsweg 1, 7071 CH Ulft
postadres
Postbus 8, 7070 AA Ulft
Telefax: 0315 687 888
ATAG consumenteninformatie
0315 687 887
Home Product Service
0544 393939
Home Product Service onderdelenverkoop
0544 393838

inbouwmaten
veiligheidsvoorschriften
1. Het toestel mag alleen door een elektro-
technisch installateur aangesloten worden.
2. Tijdens en na het gebruik wordt het toestel
warm. Met kleine kinderen is dit een punt
waar u rekening mee moet houden.
3. Zorg ervoor dat er geen vocht in het toestel
dringt.
4. Hoewel het kookvlak erg sterk is, kan
bijvoorbeeld een vallend zoutvaatje al een
barst doen ontstaan. Zodra een barst in het
kookvlak zichtbaar wordt, moet het toestel
stroomloos gemaakt worden. Gebruik het in
dit geval niet meer en neem contact op met
de Servicedienst.
let op
Wanneer een waterkering in het blad aanwezig
is dan dient de kookplaat achter de waterkering
geïnstalleerd te worden.
type: HL2..C
type: HL2..B / HL2..L

installatievoorschrift
elektrische aansluiting
230 V - 50 Hz
Aansluitwaarde: HL2..C 7257 W
HL2..L 7200 W
HL2..B 6300 W
Sluit het toestel aan volgens de eisen van
NEN 1010 en de plaatselijk geldende
voorschriften. Op het gegevensplaatje aan de
onderzijde van het toestel staan de
aansluitmogelijkheden en aansluitwaarden
aangegeven.
inbouwen
Het toestel, met uitzondering van de HL2..C, is
in de fabriek al voorzien van een aansluitkabel
waar u alleen een stekker aan hoeft te
monteren. De aansluitkabel is hittebestendig.
Als de kabel beschadigd is moet een
gelijksoortige kabel worden gebruikt van
bijvoorbeeld het type HO5VVF5 1,5 mm2,
temperatuurbestendigheid 105 °C.
Het toestel wordt geleverd met een
afdichtband.
1. Monteer de stekker volgens het
aansluitschema.
2. Zaag de uitsparing in het aanrechtblad. Doe
dit zeer nauwkeurig, rekening houdend met
de inbouwmaten op de vorige pagina. Zaag
eventueel ook de tussenschotten uit.
installatievoorschrift (vervolg)
3. Verwijder de beschermfolie van het
afdichtband en plak het band op het midden
van de rand van de kookplaat.
4. Laat de kookplaat in de uitsparing zakken.
5. Zet de kookplaat vast met behulp van de
bijgeleverde klemmen.
6. Breng de elektrische aansluiting tot stand.
7. Controleer tenslotte de werking van het
toestel.

enkele kookzones
U kunt de bedieningsknop zowel rechts- als
linksom draaien.
Op het bedieningspaneel staan drie standen
aangegeven. U kunt echter gerust op elke
gewenste tussenstand instellen.
dubbele kookzones
Met de linker knop regelt u het vermogen van
zowel de kleine als de grote kookzone. Door de
rechter knop op + te draaien schakelt u de
buitenste ring in.
let op
De buitenste ring van de dubbele kookzone kan
nooit alleen gebruikt worden.
vis/wildpanzone
Deze kookzone bestaat uit drie
verwarmingselementen. Door alle elementen in
te schakelen krijgt u één ovale kookzone die
geschikt is voor het bereiden van gerechten in
langwerpige pannen of schalen.
Wilt u de “brug” tussen beide zones
inschakelen, draai dan de extra knop op +.
De brug kan nooit alleen gebruikt worden.
let op
Stel beide zones in op dezelfde stand zodat u
een gelijkmatige warmteverdeling ontstaat.
controlelampjes
bediening
aan/uit signalering
Het controlelampje (A) onder de glasplaat licht
op zodra u een kookzone inschakelt.
restwarmte
De vier lampjes (B) onder de aan/uit signalering
geven aan dat er een kookzone warm is.
De restwarmte- indicatie blijft ook branden als
het element wordt uitgeschakeld. Het dooft pas
als de glasplaat een veilige temperatuur bereikt
heeft.
pannen
Gebruik alleen pannen die geschikt zijn voor
elektrisch koken. Wanneer de pan iets groter is
dan de kookzone kan overkooksel niet op de
gloeiend hete kookzone terecht komen.
Ingebrande voedselresten kunt u hiermee
vermijden.
Zet alleen pannen met een schone en droge
bodem op de kookzone. Kalk of andere moeilijk
te verwijderen vlekken kunt u hiermee
voorkomen.
kookvlak
Een kookplaat is geen werkvlak. Gebruik het
alleen om op te koken. Een enkel
achtergebleven zandkorreltje (bijvoorbeeld van
het schoonmaken van groente) kan later een
krasje veroorzaken dat niet meer te verwijderen
is. Schuif niet met pannen over het kookvlak.
Een krasje is snel gemaakt en niet meer weg te
krijgen.
gebruik
niet zó
maar zó
niet zó
maar zó

– trekken van bouillon;
– rood koken van stoofperen;
– bereiden van stoofvlees.
– doorkoken van gerechten als:
- aardappelen
- deegwaren
- peulvruchten
- pap;
– smoren van groenten.
– bakken van dikke pannekoeken;
– bakken van dikke, gepaneerd
vlees;
– gaar bakken van dun vlees;
– doorbraden van groot vlees;
– uitbakken van blokjes spek of
plakjes bacon;
– bakken van rauwe aardappelen.
– bakken van flensjes en dunne
pannekoeken;
– bakken van wentelteefjes;
– bakken van gepaneerde vis;
– bakken van dun, gepaneerd
vlees;
– ontdooien van harde groenten.
NB: het ontdooien van
groenten gaat het snelst in
kokend water in een passende
pan.
kooktabel
dagelijks
Maak de glasplaat na gebruik altijd schoon.
Gebruik hiervoor bijvoorbeeld een sopje van
een afwasmiddel.
Neem na het schoonmaken de glasplaat af met
schoon water.
Verwijder aangekoekte vlekken, metaal- en
kalkvlekken op de glasplaat met speciale
schoonmaakmiddelen zoals vernieuwde Jif,
Collo Luneta of Stahlfix. Gebruik een sopje van
een afwasmiddel voor reinigen van gelakte
delen (bedieningspaneel).
Maak de kookplaat nooit schoon met een
schuurmiddel.
Verwijder overgekookte voedselresten met een
glasschraper (zie illustratie).
let op
Gesmolten kunststof en suiker direkt (dus
terwijl het kookvlak nog warm is) verwijderen
met een glasschraper.
wekelijks
Speciale onderhoudsmiddelen voor ceramische
kookplaten, zoals Collo Profi of Cerafix, geven
de glasplaat een beschermende laag. Behandel
de glasplaat daarom elke week met een van
deze middelen.
Behandel de glasplaat ook met deze middelen
wanneer hardnekkige vlekken verwijderd zijn.
onderhoud
Stand 1/2- 1
Stand 3/4- 1
Stand 1 - 11/2
Stand 11/2- 2
– aanbraden van vlees;
– bakken van platvis, dunne
moten of filet;
– bakken van gare
aardappelen;
– bereiden van glad gebonden
soepen/sauzen;
– bakken van omeletten;
– bakken van biefstuk (medium,
rozerood);
– frituren.
Zeer afhankelijk van de
temperatuur van de
gerechten en van de
hoeveelheid.
Kleine hoeveelheden geven
mooier resultaat dan (te)
grote hoeveelheden.
– snel aan de kook brengen
van gerechten;
– slinken van bladgroenten;
– blancheren van groenten;
– verhitten van olie, vet, boter
en margarine;
– bakken van biefstuk
(saignant, rood);
– onder druk brengen van de
snelkookpan;
NB: net voor het bereiden
van de gewenste druk
terugschakelen naar een
stand tussen 1/2en 1.
– koken van glad gebonden
pudding en vla.
Stand 2 - 3
Stand 3

De verpakking van het toestel is recyclebaar.
Gebruikt zijn:
– karton
– CFK-vrij polystyreen (PS-hardschuim)
Deze materialen op verantwoorde wijze en
conform de bepalingen in uw gemeente
afvoeren.
De gemeente kan u ook informatie verschaffen
over het op verantwoorde wijze afvoeren van
afgedankte huishoudelijke apparaten.
Dit toestel voldoet aan de EG-richtlijnen
verpakking en toestel afvoeren
storingen zelf verhelpen
storing
Kookzones worden niet
warm
Metaalachtige vlekken
op de glasplaat
Krassen op de glasplaat
oorzaak
Stekker niet in het
stopcontact
Zekering in de meterkast
defect
Verkeerd
reinigingsmiddel
gebruikt
Het schuiven van
pannen over de
glasplaat is meestal de
oorzaak
remedie
Stekker in het stopcontact
steken
Meterkast controleren
Verwijderen met middelen als
“Stahlfix”
Schuif geen pannen over de
glasplaat
technische gegevens
Typenummers: zie voorblad
Energiesoort: 230 V - AC 50 Hz
aansluitwaarde: HL2..C 7257 W
HL2..L 7200 W
HL2..B 6300 W

wat garandeert ATAG
omvang van de garantie
◆Op dit apparaat geeft ATAG u:
– 5 jaar onderdelengarantie;
– 1 jaar gratis service.
◆De garantie op ATAG keukenapparatuur is
alleen geldig indien het toestel voor
huishoudelijk gebruik is geïnstalleerd en in
gebruik is voor doeleinden waarvoor het is
geconstrueerd.
◆De garantieperiode gaat in op de datum van
aflevering. Deze datum moet u op verzoek
kunnen aantonen, bijvoorbeeld met een
afleveringsbon of aankoopnota. Onderdelen
die defect zijn geraakt door materiaal-,
constructie- of fabricagefouten, worden
gedurende een periode van 5 jaar gratis
geruild.
◆Tijdens het eerste jaar ontvangt u ook gratis
service. Dat wil zeggen dat bij reparaties
geen administratiekosten, voorrijkosten en
arbeidsloon in rekening worden gebracht.
Bij het verzenden van gratis onderdelen
worden gedurende het eerste jaar geen
verzendkosten in rekening gebracht.
tot wie kunt u zich wenden
◆In de landen waar ATAG een
vertegenwoordiging heeft, kunt u zich tot
deze wenden als u een beroep wilt doen op
de ATAG Servicedienst.
◆In de overige landen neemt u contact op
met uw leverancier.
buiten de garantie vallen
transportschade
◆Controleer uw nieuwe apparatuur voordat u
deze in gebruik neemt.
◆Als u beschadigingen aantreft, neem dan
contact op met uw leverancier.
installatiefouten
◆Defecten en schaden die het gevolg zijn van
een installatiefout vallen buiten de garantie.
◆Schade ontstaan door onvoldoende
ventilatie van het toestel of een foutieve
elektrische aansluiting wordt niet vergoed.
◆Ook gebreken die ontstaan omdat er
wijzigingen aan de apparatuur zijn
aangebracht, zijn van garantie uitgesloten.
gebruiksfouten en verkeerd of
onvoldoende onderhoud
◆Dit geldt bijvoorbeeld voor glasbreuk en
emaillebeschadigingen, ontstaan door
stoten of vallen van voorwerpen op of tegen
de apparatuur.
◆Door onvoldoende of verkeerd onderhoud
kunnen verkleuringen aan oppervlakten
ontstaan en rubbers en kunststoffen snel
verouderen. Ook dit valt niet onder de
garantie.
gebruiksslijtage of veroudering
◆Voorbeelden hiervan zijn defect geraakte
lampen, verkleuringen van kunststof of
gelakte delen en krassen op de apparatuur.
contents
introduction 1
where you can find ATAG 1
safety instructions 2
building-in dimensions 3
installation instructions 4 - 5
operation 6 - 7
use 7
maintenance 8
table of cooking times 9
solving problems yourself 10
technical information 10
disposal of packaging and appliance 11
the ATAG guarantee 12
exclusions from the guarantee 12
introduction
The "ATAG Cook-light" elements combine the
advantages of a halogen element and the
advantages of the conventional radiation
elements. The element heats food evenly and
quickly.
Cook-light cooking zones reach their maximum
temperature within 3 seconds, but use very little
energy.
where do you find ATAG
United Kingdom
ATAG (UK) Limited
19-20 Hither Green
Clevedon, Sommerset BS21 6XU
The Technical and Service Department
Tel: 01275 - 870606
Fax: 01275 - 871371
If you need to contact the ATAG Service
Department, please supply us with the model
number of the appliance in question together
with as many details as possible regarding the
problem.
This guarantee in no way affects your statutory
rights.
ATAG UK is a member of the Dutch ATAG Group
of companies with sister companies in Holland,
Belgium and Germany.
description of appliance
1Cook-light cooking zone Ø 14.5 cm (1200 W)
2Cook-light fish/game-pan cooking zone
Ø 18/41.5 cm (156/735/1561 W)
3Cook-light double cooking zone Ø 14.5/21 cm
(1000/2000W)
4control knobs for cooking zone 3
5residual heat indication
6on/off indication
7control knob for cooking zone 1
8control knobs for fish/game-pan cooking zone 2
9Cook-light double cooking zone Ø 17/26.5 cm
(1400/2200 W)
10 Cook-light cooking zone Ø 18 cm (1800 W)
11 control knob for cooking zone 9
12 control knob for cooking zone 10
13 Cook-light cooking zone Ø 14.5 cm (1200 W)
14 control knob for cooking zone 13
opening remarks
This instruction manual contains
information about the installation,
safety, operation and maintenance of
your appliance.
The installation instructions are
intended for the fitter who will install
the appliance safely for you.
By reading the other information, you
will quickly learn all about the facilities
which the appliance has to offer.
Please keep this booklet. Future users
will find it very useful.
Happy cooking.

building-in dimensions
model: HL2..C
model: HL2..B / HL2..L
safety instructions
1. This appliance should only be connected up
by an electrotechnical fitter.
2. During and after use, the appliance is hot.
You should bear this in mind if you have
young children.
3. Ensure that no damp gets into the
appliance.
4. The cooking surface is very strong. But a
falling salt-cellar, for example, could cause
a crack in it. As soon as a crack is observed
in the cooking surface, the appliance should
immediately be disconnected from the
power supply. In this situation, do not use
the appliance any more and contact Atag's
service department.
attention
If the worktop has a raised edge, the hob should
be installed behind this raised edge.

installation instructions (continued)
3. Remove the protective foil from the sealing
strip and attach the strip to the middle of the
edge of the hob.
4. Lower the hob into the recess.
5. Fix the hob in position with the clamps
supplied.
6. Connect the plug to the power supply.
7. Finally, check that the appliance functions
properly.
installation instructions
electrical connection
230 V - 50 Hz
Connected load: HL2..C 7257 W
HL2..L 7200 W
HL2..B 6300 W
Always comply with the locally applicable
regulations for the electrical connection.
The connection possibilities and connected
loads are indicated on the data plate at the
bottom of the appliance.
building-in
Exept in the case of the HL2..C, the appliance
has already been fitted with a connection cable
in the factory. So all you have to do is attach a
plug to this cable. The cable is heat-resistant. If
the cable is damaged, a similar cable should be
used as replacement, for example
H05VVF5 1.5 mm2, with a resistance to
temperatures of 105 °C.
The appliance is delivered with a sealing strip.
1. Fit the plug in accordance with the
connection diagram.
2. Saw out the recess in the worktop. Do this
very accurately, bearing in mind the
building-in dimensions on the previous
page. If necessary, saw out also the
partitions.

control lights
on/off indication
The control light (A) under the glass top comes
on as soon as you switch on a cooking zone.
residual heat
The four lights (B) under the on/off indication
indicate that a cooking zone is hot.
The residual heat indicator light stays on after
the element has been switched off. It does not
go out until the glass top has reached a safe
temperature.
pans
Only use pans which ar
e suitable for cooking on
an electrical hob. Moreover, by using a pan
which is slightly larger than the cooking zone,
you avoid food or liquid which boils over from
ending up on the glowing hot cooking zone. In
this way, you can avoid remains of food getting
burnt onto the glass top.
Only put pans with a clean and dry bottom on
the cooking zone. You can thereby prevent lime
or other difficult-to-remove spots from getting
onto the glass top.
cooking surface
A cooking surface is not a work surface. Only
use it for cooking. A single grain of sand left
behind (from cleaning vegetables, for example)
could later cause a scratch which can then
never be removed. Do not slide pans over the
cooking surface. A scratch is quickly made, but
cannot then be removed.
use
not like this
but like this
not like this
but like this
single cooking zones
You can turn the control knob either to the right
or to the left.
Three settings are marked on the control panel.
You can, however, set the zone to any
intermediate setting required.
double cooking zones
You control the power of both the small and the
large cooking zone by means of the left knob.
You switch on the outer ring by turning the right
knob to +.
attention
The outer ring of the double cooking zone can
never be used on its own.
fish/game-pan zone
This cooking zone consists of three heating
elements. By switching on all the elements, you
get one oval cooking zone which is suitable for
preparing food in elongated pans or dishes.
Should you wish to switch on the 'bridge'
between both zones, turn the extra knob to +.
The bridge can never be used on its own.
attention
Set both zones to the same setting, so that you
get an even distribution of heat.
operation

– making stock;
– stewing pears;
– cooking meat stew;
– cooking thoroughly dishes such
as:
- potatoes;
- pasta;
- pulses;
- porridge;
– simmering vegetables.
– frying thick pancakes;
– frying thick slices of meat coated
in breadcrumbs;
– frying thin slices of meat;
– cooking thoroughly joints of
meat;
– frying bacon in cubes;
– cooking raw potatoes.
– frying crêpes and thin pancakes;
– frying French toast;
– frying fish coated in
breadcrumbs;
– frying thin slices of meat coated
in breadcrumbs;
– defrosting frozen vegetables.
N.B. The fastest way to defrost
vegetables is in boiling water
using an appropriate pan.
table of cooking times
Setting 1/2- 1
Setting 3/4- 1
Setting 1 - 11/2
Setting 11/2- 2
– searing meat;
– frying flat fish, thin steaks or
fillets of fish;
– frying cooked potatoes;
– preparing smooth thick
sauces/soups;
– frying omelettes;
– frying steak (medium, pink);
– deep-frying
This depends ver
y much on
the temperature of the dish
and the quantity. Small
amounts give a better
result than amounts which
are (too) large.
– bringing dishes quickly to the
boil;
– boiling down green
vegetables;
– blanching vegetables;
– heating up oil, fat for frying,
butter and margarine;
– frying steak (rare, red);
– getting pressure cooker to
pressure point;
N.B. Reduce the setting to
between 1/2 or 1 just
before reaching the
desired pressure.
– cooking thick, creamy
puddings and custards.
Setting 2 - 3
Setting 3
daily
Always clean the glass top after use. For this,
use suds of a washing-up liquid, for example.
Neem na het schoonmaken de glasplaat af met
schoon water.
After cleaning, rinse the glass top with clean
water.
Remove burnt-on spots and spots of metal or
lime on the glass top with the aid of special
cleansing agents. Use suds of a washing-up
liquid to clean coloured parts (control panel).
Never clean the hob with an abrasive.
Remove remains of food which have boiled over
with the aid of a glass scraper (see illustration).
attention
Remove melted plastic and sugar immediately
(while the cooking surface is still hot, therefore)
with the aid of a glass scraper.
weekly
Special agents for maintaining ceramic hobs
provide the glass top with a protective layer. So
treat the glass top every week with one of these
agents.
Also treat the glass top with one of these
agents when stubborn spots have been
removed.
maintenance

The packaging of the appliance is recyclable. It
is made up of:
– cardboard
– polyethylene film (PE)
Please dispose of these materials in a
responsible way in accordance with the
regulations of your local authority.
Your local authority will also be able to give you
information about disposing disused household
appliances in a responsible way.
This appliance complies with the CE directives.
disposal of packaging and appliance
solving problems yourself
problem
Cooking zones do not
become hot
Metal spots on the glass
top
Scratches on the glass
top
cause
Plug not in the socket
Fuse in meter cupboard
defective
Wrong cleansing agent
used
Usually caused by
sliding pans over the
glass top
remedy
Insert plug into socket
Check meter cupboard
Remove with an agent
Don’t slide pans over the
glass top
technical information
Model numbers: see cover
Power: 230 V - AC 50 Hz
Connected load: HL2..C 7257 W
HL2..L 7200 W
HL2..B 6300 W

ATAG’s guarantee
scope of the terms of guarantee:
◆ATAG warrants this appliance for the
following guarantee periods:
– 5-year guarantee on parts;
– 1-year service guarantee.
◆The guarantee on ATAG kitchen appliances
is valid only if the appliance has been
installed for household use and is used only
for the purposes for which it was designed.
◆The guarantee period is effective from the
date of delivery of the appliance. Evidence
of the date of delivery must be provided
upon request, for example with a delivery
slip or sales receipt.
◆Parts which malfunction as a result of
material, construction or factory errors will
be replaced free of charge for a period of
five years effective from the date of delivery.
◆During the first year starting from the date
of delivery, ATAG also provides free service.
This means that in case of repairs, there will
be no charges for costs such as handling
charges, travel expenses or labour costs. In
addition, no shipping or handling costs will
be charged for free parts sent to you during
this year.
whom to contact:
◆In countries with an ATAG establishment,
please contact the ATAG Service Depart-
ment.
◆In all other countries, please contact your
supplier or your ATAG importer.
excluded from the guarantee:
transport damages:
◆Check your new appliance before using it.
◆Contact your supplier if you discover any
damages.
installation errors:
◆Defects or damages resulting from
installation errors, are excluded from the
guarantee. Insufficient ventilation or faulty
electrical connections, for example.
◆Complaints resulting from changes to the
appliance are also excluded from the
guarantee.
improper use and incorrect or
insufficient maintenance:
◆Examples include broken glass caused by
bumps or by dropping objects on or against
the appliance.
◆Insufficient or improper maintenance may
also result in discolouration of surfaces or
rapid ageing of rubber and plastic parts.
These complaints are also excluded from
the guarantee.
wear due to use or ageing:
◆Examples include broken light bulbs,
discolouration of synthetic or enamelled
parts, and scratches.

table des matières
Introduction 1
Où trouver ATAG ? 1
Prescriptions de sécurité 2
Dimensions d'encastrement 3
Prescriptions d'installation 4 - 5
Commande 6 - 7
Utilisation 7
Entretien 8
Tableau de cuisson 9
Problèmes à résoudre soi-même 10
Données techniques 10
Évacuation emballage et appareil11
Est garanti par ATAG 12
N'est pas garanti par ATAG 12
introduction
Les éléments "ATAG Cook-light" allient les
avantages d'un élément halogène à ceux des
éléments rayonnants traditionnels. L'élément
chauffe régulièrement et rapidement.
Les zones de cuisson atteignent une
température élevée dans l'espace de
3 secondes mais consomment très peu
d'énergie.
où trouver ATAG
Belgique:
ATAG België n.v.
adresse de visite
Keerstraat 1
adresse postale
Zone industrielle Erpe-Mere
B 9420 ERPE-MERE
service depannage
information consommateur
053-80.62.08
description de l'appareil
1Zone de cuisson Cook-light Ø 14,5 cm (1200 W)
2Zone pour plat de poisson/gibier Cook-light
Ø 18/41,5 cm (1561/735/1561W)
3Double zone de cuisson Cook-light Ø 14,5/21 cm
(1000/2000 W)
4Boutons de commande zone de cuisson 3
5Indicateur de chaleur restante
6Indicateur marche/arrêt
7Bouton de commande zone de cuisson 1
8Boutons de commande zone 2poisson/gibier
9Double zone de cuisson Cook-light Ø 17/26,5 cm
(1400/2200 W)
10 Zone de cuisson Cook-light Ø 18 cm (1800 W)
11 Bouton de commande zone de cuisson 9
12 Bouton de commande zone de cuisson 10
13 Zone de cuisson Cook-light Ø 14,5 cm (1200W)
14 Bouton de commande zone de cuisson 13
avant-propos
Vous trouverez dans cette notice
d'utilisation des informations relatives
à l'installation, à la sécurité, à la
commande et à l'entretien de votre
appareil.
Les prescriptions d'installation sont
destinées à l'installateur qui placera
votre appareil en toute sécurité.
Les autres informations vous
permettront de connaître rapidement
toutes les possibilités de votre
appareil.
Conservez cette notice. Elle pourra
servir à tout autre utilisateur éventuel
de l'appareil.
Nous vous souhaitons beaucoup de
satisfactions avec votre nouvel
appareil.

dimensions d'encastrement
type: HL2..C
type: HL2..B / HL2..L
prescriptions de sécurité
1. Cet appareil ne peut être raccordé que par
un monteur électrotechnique.
2. Pendant et après son utilisation l'appareil
est chaud. Tenez en compte si vous avez
des enfants en bas âge.
3. Veillez à ce qu'aucune humidité ne pénètre
dans l'appareil.
4. La table de cuisson est très résistante.
Toutefois, vous pouvez en faisant tomber
par exemple une salière, provoquer une
fêlure. Dès que vous apercevez une fêlure
dans la table de cuisson, vous devez
débrancher l'appareil. N'utilisez plus votre
appareil et contactez le service après-
vente.
attention
Si le plan est doté d'une retenue d'eau, vous
installerez la table de cuisson derrière la
retenue d'eau.

prescriptions d'installation (suite)
3. Retirez la pellicule de protection de la
bande étanche et collez la bande au milieu
du bord de la table de cuisson.
4. Introduisez la table de cuisson dans
l'évidement.
5. Fixez la table de cuisson à l'aide des pinces
fournies.
6. Effectuez le branchement électrique
7. Pour finir, contrôlez le fonctionnement de
l'appareil
prescriptions d'installation
branchement électrique
230 V - 50 Hz
Puissance
de raccordement: HL2..C 7257 W
HL2..L 7200 W
HL2..B 6300 W
Lors du branchement électrique, respectez
toujours les prescriptions locales en vigueur.
Les puissances et possibilités de raccordement
sont indiquées sur la plaque signalétique qui se
trouve sous l'appareil.
encastrement
Vu que l’appareil (à l’exception du HL2..C) a déjà
été pourvu d’un câble de raccordement, il ne
vous reste plus qu’a installer une fiche. Ce
cordon d'alimentation est thermorésistant. Si le
câble est endommagé, vous devrez le
remplacer par un câble analogue, par exemple
de type HO5VVF5 1,5 mm2, thermorésistant à 105
°C.
L'appareil est livré avec une bande étanche.
1. Montez la fiche selon le schéma de
raccordement.
2. Sciez l'encoche dans le plan de travail.
Faites-le avec beaucoup de précision en
tenant compte des dimensions
d'encastrement spécifiées à la page
précédente. Retirez éventuellement les
morceaux médians.

témoins lumineux
témoin lumineux arrêt/marche
Le témoin lumineux (A) qui se trouve sous la
plaque en verre s'allume dès que vous mettez
une zone de cuisson en marche.
chaleur restante
Les quatre témoins lumineux (B) qui se trouvent
sous le témoin lumineux marche/arrêt indiquent
qu'une zone de cuisson est chaude. Le témoin
de la chaleur restante reste aussi allumé quand
l'élément est arrêté. Il ne s'éteint que lorsque la
plaque en verre a atteint une température sans
risque.
casseroles
N'utilisez que des casseroles convenant à la
cuisson électrique. En utilisant une casserole
plus grande que la zone de cuisson, vous
éviterez que tout aliment qui déborde salisse la
plaque et s'incruste dedans en cuisant.
Ne placez sur la zone que des casseroles dont
le fond est sec et propre. Vous éviterez les
taches de calcaire ou autres taches, difficiles à
éliminer.
table de cuisson
Une table de cuisson n'est pas un plan de
travail. Ne l'utilisez que pour la cuisson. Un
simple grain de sable pr
ovenant par exemple du
nettoyage des légumes peut provoquer des
rayures ineffaçables. Ne frottez pas le fond de
la casserole sur la table de cuisson en la
déplaçant. Les rayures sont vite faites et
impossibles à éliminer.
utilisation
pas comme ceci
mais comme cela
pas comme ceci
mais comme cela
zones de cuisson simples
Vous pouvez tourner le bouton aussi bien à
droite qu'à gauche.
Le tableau de commande indique trois
positions. Vous pouvez cependant régler le
bouton sur chaque position intermédiaire.
doubles zones de cuisson
A l'aide du bouton gauche, vous réglez la
puissance de la petite et de la grande zone. En
positionnant le bouton droit sur +, vous allumez
l'anneau extérieur.
attention
L'anneau extérieur de la double zone de
cuisson ne peut jamais être utilisé tout seul.
zone pour plats de poisson/gibier
Cette zone de cuisson se compose de
3éléments de chauffage. En allumant les trois
éléments, vous obtiendrez une zone de cuisson
ovale apte à recevoir des mets présentés dans
de longs plats.
Si vous voulez allumer le "pont" qui se trouve
entre les deux zones, tournez le bouton
supplémentaire sur +.
Le "pont" ne peut jamais être utilisé seul.
attention
Mettez le bouton sur la même position pour les
deux zones, la chaleur sera répartie de façon
égale.
commande
This manual suits for next models
2
Table of contents
Languages:
Other Atag Hob manuals

Atag
Atag GM3011A User manual

Atag
Atag HI6271TUU/A1 User manual

Atag
Atag HI7071M User manual

Atag
Atag HI1272S User manual

Atag
Atag HL60 G Series User manual

Atag
Atag HI64 CB Series User manual

Atag
Atag HL6271T User manual

Atag
Atag HG6471MBA User manual

Atag
Atag HG6111K User manual

Atag
Atag HG8471MBA User manual
Popular Hob manuals by other brands

John Lewis
John Lewis U29492 JLBIIH603 instruction manual

Bosch
Bosch PRA3A6D71T INFORMATION FOR USE

Signature
Signature STI3B/2 Instructions for use

Fulgor Milano
Fulgor Milano F4IT24B2 Use & care manual

Miele
Miele CS 1021 Operating and installation instructions

Waterline
Waterline essentials ESSGH60E Users guide & installation handbook