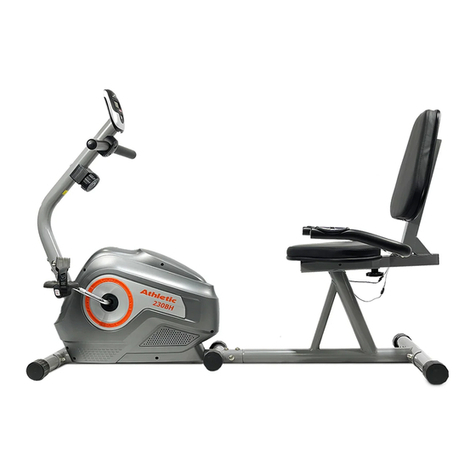
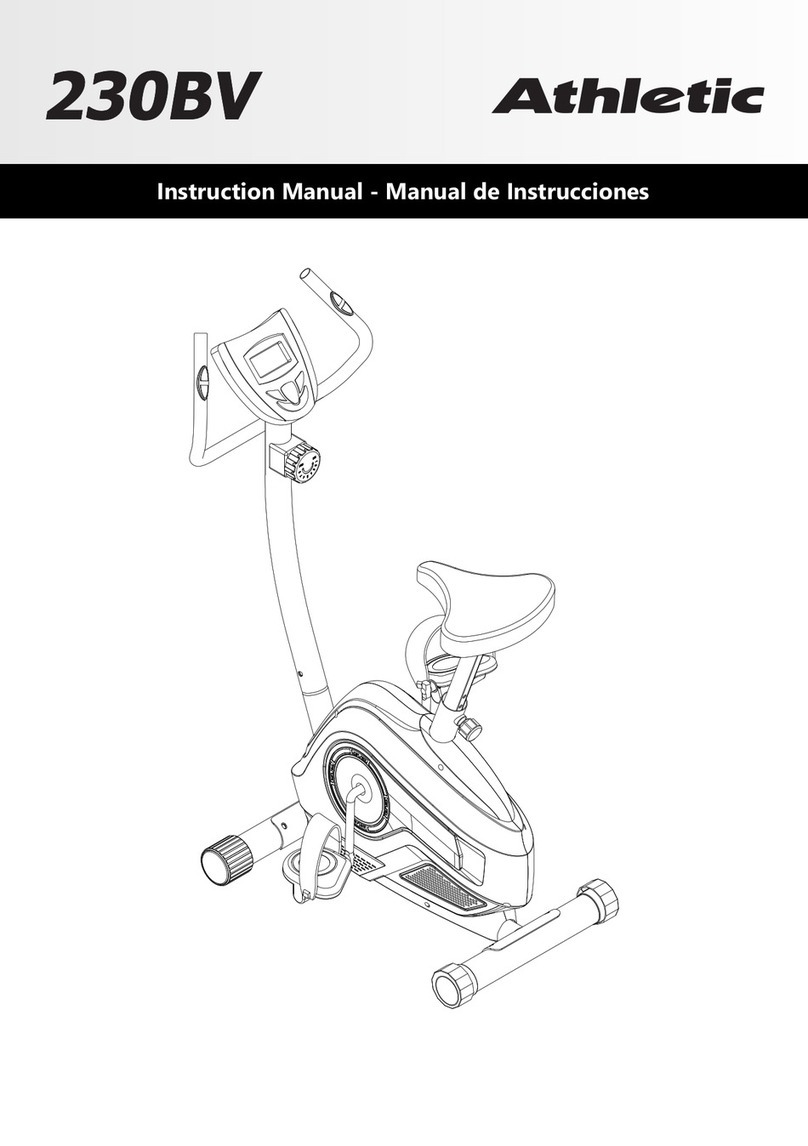
Athletic 100BA-03368 User manual

Instruction Manual - Manual de Instrucciones - Manual de Instruções
Bike Air

ATTENTION / ATENCIÓN / ATENÇÃO
Carefully read the safety and usage guidelines contained herein. Follow the guidelines for correct assembly of the product.
Caution: Do not push any objects into the openings of the product. Stay clear of moving parts.
Safety and security: it is the owner's responsibility to ensure that all users are properly informed about safety precautions, use, maintenance
and care of the product.
Lea cuidadosamente las instrucciones de seguridad y uso contenidas en el presente documento. Siga las instrucciones para el correcto montaje
del producto.
Precaución: No introduzca ningún objeto en las aberturas del producto. Manténgase alejado de las piezas móviles.
Protección y seguridad: es responsabilidad del propietario asegurarse de que todos los usuarios estén bien informados sobre las precauciones
de seguridad, uso, mantenimiento y cuidado del producto.
Leia com atenção as orientações de uso e segurança contidas neste manual. Siga as orientações para a correta montagem do produto.
Cuidado: não insira nenhum objeto nas aberturas do produto. Mantenha-se afastado das partes móveis.
Proteção e segurança: é responsabilidade do proprietário garantir que todos os usuários estejam corretamente informados sobre precauções
de segurança, uso, manutenção e cuidados com o produto.
Inappropriate use for children and animals.
El uso inapropiado para los niños y los animales.
Uso inadequado para crianças e animais. MAX
100KG
Obrigado por adquirir um produto Universal Fitness!
É com grande satisfação que oferecemos à você, orientação, incentivo e oportunidade de praticar exercícios
aeróbicos e musculares, conquistando assim a preparação física necessária pra se sentir bem.
A Universal Fitness lhe garante um produto confiável e moderno, produzido com alta tecnologia por pessoas
que se preocupam com o seu bem estar.
Este manual aborda os principais dados, a estrutura básica e principais procedimentos de operação e
manutenção preventiva. Ele irá ajudá-lo a se familiarizar com todas as funções do equipamento, para que você o
desfrute por muito tempo.
nThank you for purchasing a Universal Fitness product!
It is with great pleasure that we offer you the opportunity, guidance and encouragement to practice aerobic
and muscular exercises, getting like this, the physical preparation needed to feel good.
Universal Fitness guarantees a reliable and modern product, produced with high technology for people who
care about their well-being.
and preventive This manual covers the main information, the basic structure and the main operation
maintenance. It will help you familiarize yourself with all the equipment functions, for you enjoy it for a long time.
Gracias por comprar un producto Universal Fitness!
Es con gran placer que le ofrecemos, orientación, estímulo y oportunidad de practicar ejercicio aeróbico y
muscular, ganando la preparación física necesaria para sentirse bien.
Universal Fitness garantiza un producto confiable y moderno, producido con alta tecnología por personas que
se preocupan por su bienestar.
Este manual cubre los datos clave, la estructura básica y principales procedimientos de operación y
mantenimiento preventivo. Te ayudará a familiarizarse con todas las funciones del equipo para asegurar que usted
disfrute de su producto por mucho tiempo.

CONTENTS/SUMARIO/SUMÁRIO
english
español
português
SAFETY INFORMATION........................................................................................................................................5
COMPONENTS AND TECHNICAL SPECIFICATIONS.........................................................................................6
ASSEMBLY.......................................................................................................................................7
THE MONITOR..........................................................................................................................................................9
WARRANTY.....................................................................................................................................................10
INFORMACIÓN DE SEGURIDAD.....................................................................................................................11
COMPONENTS Y ESPECIFICACIONES TÉCNICAS............................................................................12
MONTA JE...............................................................................................................................13
EL MONITOR......................................................................................................................................................15
GARANTÍA.........................................................................................................................................16
INFORMAÇÕES DE SEGURANÇA....................................................................................................................17
COMPONENTES E ESPECIFICAÇÕES TÉCNICAS.................................................................................18
MO N TAG E M. ... .. ... .. ... .. . .. .. . .. .. . .. .. . .. .. . .. .. . .. .. . .. .. . .. .. . .. .. . .. .. . .. .. . .. .. . .. ... .. ... .. ... .. . .. .. . .. .. . .. .. . 19
O MONITOR...................................................................................................................................21
GARANTIA........................................................................................................................................22

4
SAFETY INFORMATION
Read this manual before using the product and retain for future reference, avoiding heating risks, fire,
electric shock or injury. It is the owner's responsibility to ensure that all users of the equipment are adequately
informed of the safety precautions.
- Place the equipment on a level surface at least 30 cm away from any wall, keeping free from any obstacle.
- Never allow the use of the equipment for more than one person at a time.
- This product is not intended for use by persons (including children) with some reduced physical, sensory or
mental capacity, lack of experience and knowledge, unless they have given proper product use instructions and is
under the care of a person responsible for their safety. Children should be observed so that they do not play with
the product, whether or not in use.
- Consult your doctor before starting and during any exercise program. Special attention should be given to
children, pregnant women, elderly, people with heart problems and people with disabilities.
- Keep away from equipment, children and pets, especially during use and do not enter or leave objects on the
equipment openings.
- Use appropriate sportswear. Do not wear loose clothing which might be attached to the equipment. Always wear
shoes to work out. Do not walk barefoot or in sandals.
- Periodically make sure that the equipment is in good condition by checking the connections and fasteners.
- The cleaning of equipment should be done only with a cloth moistened with water. Never use abrasives, alcohol
or solvents for cleaning.
- Do not leave the equipment exposed to natural agents such as sunlight, rain, dew, dust, salt spray etc. Do not
place it in a dusty or humid environment, humid, saunas or anywhere unventilated.
- Always use original spare parts as the conservation or improper maintenance can cause damage to the product,
as well as the loss of warranty.
A. The customer is responsible for all costs resulting from unfounded answering calls.
B. No dealer or authorized technical assistant is authorized to change these Terms or make commitments on behalf
of the manufacturer / supplier.
C. The manufacturer / supplier is not responsible for any accidents and their consequences, arising from breach of
the original features or assembly outside the standard of their products factory.
NOTE: The drawings and photos contained in this manual are merely illustrative. The manufacturer / supplier
reserves the right to change specifications and design without notice. This manual can illustrate optional that are
not part of the equipment purchased.
General Considerations
Conservations and Cleaning
Observations

5
COMPONENTS AND
TECHNICAL SPECIFICATIONS
1. Monitor
2. Hand Grip
3. Handlebar
4. Tension control
5. Main frame
6. Front feet
7. Rear feet
8. Pedal
9. Seat
10. Adjust knob
Product Packaged
Net weight (approximate) 17,50 kg
Maximum width 529 mm
Maximum length 1014 mm
Maximum height 1135 mm
Gross weight 19,50 kg
Width (carton box) 1135 mm
Height (carton box) 529 mm
Lenght (carton box) 890 mm
2
1
3
4
5
7
8
10 6
9

6
Place the Front Floor Tube (06) underneath the saddle
bracket at the front of the frame. The square holes must
be placed faced down.
Align the holes in the Front Floor Tube with the holes on
the bracket and put 2 Carriage Bolts (20) through the
holes as depicted below. Place two Washers (22) on
bolts and screw on two Dome Nuts (27) and tighten to
fix.
NOTE: Place the packaging with the equipment on a level surface. It is recommended that you place a
protective cover for your floor. Exercise caution when you are loading and transporting equipment.
Unpack and assemble the equipment where it will be used.
If necessary, ask the help of someone else.
ASSEMBLY
STEP 1
STEP 2
Attach the Rear Floor Tube (02) into the rear of the Main
Frame (01). Fix the 3 Screws and 3 Washers (49, 50 and
51), securing the Rear Floor Tube to the Main Frame (01)
rear end.

7
STEP 3
Remove the nuts (26) and washers (24) and the fixing
screws (21) from the handle bracket (19).
Slide the handle rotation bar (19) through the link tube
on top of the main frame (1). The bar (19) may need a
little lubricant to glide easily.
The bottle support (08) must be mounted on the
connecting tube with the handle's rotation bar
inside it. Therefore, take the bottle holder (08) and
screw the screws (21) back through the bottle holder
(08).
Next, assemble the left handle (03L) which is marked
with an "L" on the left side of the end of the Rotation bar
(19). Slide the threaded rod from the handle's rotation
bar through the handle pivot.
Place a washer (24) and tighten it with the nut (26) and
attach the external cover (40), you can find it in the
package of screws.
Connect the right handle (03R) in the same way as
described.
1
3L
03R
402624
24 2640
8
21
52
42D
19

8
Installing the Pedals (44 and 45) and Link Arms (07R and 07L)
The Left Pedal (44) is marked with an “L” and the Right Pedal (45) is marked with an “R”. So are the left and right Link
Arms (07R and 07L) which are also labeled with “R” and “L”. These Pedals and Link Arms needs to be assembled as
described in Figure 4 with Diagrams 1 to 4 correctly. It is very important that each Pedal and Link Arm is fixed on the
correct sides.
1. Take the Left Pedal (44). Slide the Pedal Bearing (29) on to the pedal stem of the Left Pedal as shown.
2. Rotate the Link Arm (07L) to meet the Pedal. Bring the “C” open slot on the Link Arm up from the bottom to hook
on the Two Step Bearing (29) from under as shown below in Diagram 2 below.
3. Then insert the Metal Bushing (30) through the Pedal Stem. Ensure the Metal Bushing is well inserted through
the holes of the Washer and “C” open slot of the Link Arm. Then fix the Pedal onto the Crank (09) as shown below.
The Left Pedal tightens anti-clockwise onto the Crank as shown on Diagram 3.
4. Then screw on the Lock Nut (28L) onto the Pedal Stem, from behind the Crank (09) and tighten it in the counter-
clockwise screwing direction as shown in Diagram 4 with the Wrench (53) and (54).
STEP 4
44( L )
29 07 L 2 3
30 0 9 2 8L 2 9
07L
53 45 ( R)
28 ( R)
54
Install the Right Pedal (45) in the same manner.
Note: The Right Pedal locks onto the Crank (09) in the clockwise direction when screwing into it.
The Lock Nut (28R) is for tightening the Right Pedal.
VERY IMPORTANT: Please follow the depictions or Diagrams 1 to 4 below, step by step. The Pedal Stem must be
secured tightly, the Lock Nut must be secured tightly too. Check occasionally to ensure it is always secure and firm
Insert Lock Clip (56) into steel bushing (29) and Left Connection Bar (07L).
Attach the right pedal (45) in the same way as left pedal(44).
Install following fig. 1 - 2 - 3.
56
29
44
07L
fig. 1 fig. 2 fig. 3

9
STEP 5
Remove the three Nuts (26) and Washers (25) which are
already screwed onto the studs at bottom of the Seat
(43). Then place the Seat onto the Seat Post (04) as
shown below in figure 5. Re-screw back the Washers
(25) and the Nuts (26) back onto the studs underneath
the Seat so as to secure the Seat and Seat Post together.
Tighten the Nuts to lock on firmly. Select the desired
and appropriate seat height by sliding the Seat Post (04)
onto the Seat Stem of the Mainframe as shown below.
Align the holes of the Seat Post and the Seat Stem at the
selected height and then insert the Seat Adjust Knob
(37) to lock into position. Always ensure it is tightly
locked.
STEP 6
Remove the Nut attached at the end of the Flexible
Monitor Stand, then fix the Flexible Monitor Stand onto
the Main frame (01) firmly by fastening back the Nut as
shown in Figure 6 below. Adjust the Flexible Monitor
Stand stem to your desired and appropriate angle or
position.
Note, in some models, this step is already factory pre-
assembled, so not necessary to follow up.
Then connect the Rotation Sensor Cable (42B) coming
from the Mainframe and the Monitor Sensor Cable
(42A) coming from the end of the Flexible Monitor
Stand as shown.
Mount the Monitor (42) onto the top end of the Monitor
Rack(05) and plug the Sensor wires(42A) and Pulse
Sensor wires (42C,42D) from the monitor as shown.

10
OPERATION
LEVELING THE EXERCISE BIKE
Place the Platinum Bike in the location you
choose. But the floor surface should be hard and
flat. The bike should sit firmly on the floor. If the
bike is not stable, then rotate the two End Caps
(35) on the two extreme ends of the Front Floor
Tube (06), until the bike is stable and balanced.
Turn, adjust, one End Cap at a time as it may only
be necessary to adjust one side of the bike to
balance it.
ADJUSTING THE TENSION
The Platinum Bike has a Tension Adjust Knob (46)
on the Mainframe that can be used to increase or
decrease the tension resistance. Turn clockwise to
increase tension or anti-clockwise to decrease.
The tension range can be further increased or
decreased by adjusting the Tension Strap (47).
Turn the Tension Adjust Knob (46) anti-clock wise
until it stops. Pull the Tension Strap through the
strap's buckle at the top end of the Main Frame to
make the strap tighter around the fan wheel
which will increase the strength of the tension
range. Loosen the Tension Strap to decrease it.
HOOKING THE LINK ARMS FOR STATIONARY
FUNCTION OF THE HANDLEBARS
Use the Wrench (54) to loosen and remove the
Lock Nut (28R), and then rotate the Right Pedal
(45) anti-clockwise (as shown below) with the
Wrench (53) to take out the Right Link Arm (07R).
Then re-install the Right Pedal (45) with Lock Nut
(28R) tightly back.
54
53
A
Turn over top the Right Link Arm (07R) as shown
in the direction depicted as “d” and hook the
Right Link Arm (07R) onto the jutting screw
depicted as “A” shown below.
Follow up the hooking of the Left Link Arm (07L)
in the same two steps described above

11
WARRANTY
General Warranty Terms
a. The warranty will be carried out only upon presentation of
the original bill of sale/receipt, and within the time limits set
out in this Agreement. The warranty is provided by the
Authorised Technical Service .
b. The conditions set out in this Agreement are guaranteed to
the first user purchaser of this product for a period of one (1)
year (including the legal guarantee period - first 90 (ninety)
days counted from the date of issuance of the note / tax
coupon sale, in case of exclusively residential use.
c. Warranty periods and coverage starting from the date of
issuance of the note / tax coupon sale, including the statutory
period of ninety (90) days:
d. Parts repaired or replaced under this warranty does not stop
nor extend the warranty period originally stipulated.
e. To utilize this warranty, the equipment must have been
installed by Authorised Technical Service, except for residential
products.
f. The warranty does not cover installation and preventive
maintenance services such as cleaning, lubrication and
adjustment of the product.
g. No dealer is authorized to receive client product from a
costumer to send it to the support or to return to it and provide
information in the name of Manufacturer / Supplier about the
progress of the service. The Manufacturer / Supplier or
Authorised Technical Service will not be responsible for any
damage or delay because of this non-compliance.
h. The Manufacturer / Supplier will hold a spare parts inventory
until they cease the manufacture or import the equipment. If
ceased the production or import of the equipment the
Manufacturer / Supplier spare supply its line of equipment for
a reasonable period of time, according to the law.
i. Within the period of 30 (thirty) days if the equipment presents
some functional problem, the customer may choose to take
the product to an authorized posts or requesting service in
your home without travel expenses in those municipalities
covered by the Authorised Technical Service. After the period
of thirty (30) days or municipalities not covered by the
Authorised Technical Service expenses resulting from any
transport or equipment to a freight service, displacement or
technical visit by qualified assistant, are due to the customer,
whether or not this equipment covered by this warranty.
j. Lubricants, silicones for treadmills, vaseline to the guide
weights and micro oil to the joints of weight stations, should be
exclusively recommended by the manufacturer, available in
the Authorised Technical Service.
k. Components that wear out with regular use of equipment
such as motor brushes, belts, pads, brake bands, felt, steel
chains and cables, when present in the equipment, will
guarantee for a period of 90 days from the invoice or
manufacturing defect found by the Authorised Technical
Service.
End of Warranty
This warranty will be considered void when:
a. The normal period of its validity.
b. The equipment is delivered for repair by anyone not
authorized by Manufacturer / Supplier, signals are checked
violation of its original features or assembly outside the factory
default.
c. Damage that it will suffer as a result of misuse, use of
improper cleaning products, oxidation originating from
external agents, weathering, neglect, modification, use of
accessories not recommended, bad design for the application
for which it is, falls, perforations, use and installation not in
accordance with the instruction manual, wiring unfit tensions,
ungrounded in bad sized grids and / or excessive fluctuations
and overloads.
d. For residential line is forbidden any type of user equipment
maintenance or a third party other than the Authorised
Technical Service.
e. The product is used in academies, condos, clinics, clubs,
saunas, submerged in water or any use so that it resembles that
does not end for residential application or purpose for which it
is intended.
Observations
a. Cables, carabiners, pedals when existing in the product must
be replaced once a year.
b. The Manufacturer / Supplier is not responsible for any
accidents and their consequences, arising from breach of the
original features or assembly outside the factory default of
their equipment.
c. Customer's responsibility are the costs of unfounded judged
call answering.
Note: The Manufacturer / Supplier reserves the right to make
changes without notice this.
1 year
1 year
1 year
1 year
90 days
1 year
1 year
1 year
1 year
1 year
1 year
WARRANTY
TIME
PARTS AND
COMPONENTS
Structure
Painting (oxidation)
Monitor
Strain control motor
Belt
Cover
Plastic parts and rubber
Pedals
Seat
Manpower
Manufacturing defects

12
INFORMACIÓN DE SEGURIDAD
Consideraciones Generales
Observaciones
Conservación y limpieza
Lea este manual antes de utilizar el producto y guárdelo para consultarlo en el futuro, evitando los riesgos de
calentamiento, incendio, descargas eléctricas o lesiones. El propietario es responsable de asegurar que todos los
usuarios de los equipos estén adecuadamente informados sobre las precauciones de seguridad.
- Coloque el equipo sobre una superficie plana por lo menos 30 cm de distancia de cualquier pared, manteniendo
libre de cualquier obstáculo.
- Nunca permita el uso del equipo por más de una persona a la vez.
- Este producto no está destinado a ser utilizado por personas (incluidos niños) con alguna disminución de la
capacidad física, sensorial o mental, la falta de experiencia y conocimiento, a menos que se han dado las
instrucciones adecuadas de uso del producto y está bajo el cuidado de un persona responsable de su seguridad.
Los niños deben ser observados para que no jueguen con el producto, sea o no en uso.
- Consulte a su médico antes de iniciar y durante cualquier programa de ejercicios. Especial atención se debe dar a
los niños, mujeres embarazadas, ancianos, personas con problemas de corazón y las personas con discapacidad.
- Mantener alejado de los equipos, los niños y los animales domésticos, sobre todo durante el uso y no entrar o salir
de los objetos en las aberturas del equipo.
- Utilizar ropa deportiva adecuada. No use ropa suelta que pueda ser conectado al equipo. Siempre use zapatillas
de deporte para hacer ejercicio. No camine descalzo o con sandalias.
- Periódicamente asegurese de que el equipamiento está en buenas condiciones verificando las conexiones y
elementos de fijación.
- La limpieza de su equipo debe ser realizada apenas con un paño humedecido en agua. Nunca use abrasivos,
alcohol o solvente para la limpieza.
- No deje el equipamiento expuesto a agentes naturales como: luz solar, lluvia, rocío, polvo, mareas, etc.
- Use siempre piezas originales para reposición.
- La conservación / manutención incorrecta podrá acarrear daños al producto, así como la pérdida de la garantía.
A. El cliente es responsable de los costes derivados de contestar llamadas juzgadas infundadas.
B. Ningún distribuidor o servicio técnico autorizado de servicio está autorizado a cambiar estos Términos o
compromisos con el fabricante.
C. El fabricante no se responsabiliza de los accidentes y sus consecuencias, derivada del incumplimiento de las
características originales o montaje fuera de la norma de su fábrica de productos.
NOTA: Los dibujos y fotos contenidas en este manual son meramente ilustrativas. El fabricante se reserva el
derecho de cambiar las especificaciones y el diseño sin previo aviso. Este manual puede ilustrar opcionales que no
forman parte del equipo adquirido.

13
COMPONENTES Y
ESPECIFICACIONES TÉCNICAS
1. Monitor
2. Hand Grip
3. Manúbrio
4. Control de Tensión
5. Estructura principal
6. Pies delanteros
7. Pies traseros
8. Pedal
9. Assiento
10. Perilla
Producto Envasado
Peso neto (aproximado) 17,50 kg
Largo máxima 529 mm
Ancho máximo 1014 mm
Altura máxima 1135 mm
Peso bruto 19,50 kg
Ancho (caja) 1135 mm
Altura (caja) 529 mm
Largo (caja) 890 mm
2
1
3
4
5
7
8
10 6
9

14
NOTA: Coloque la embalaje con el equipo en una superficie plana. Se recomienda que coloque una
cubierta protectora para su piso. Tenga precaución al que va a cargar y transportar el equipo. Desembale
y montar el equipo donde se utilizará.
Si es necesario, pida la ayuda de otra persona.
MONTAJE
Coloque el pie delantero (06) atentando que los
agujeros cuadrados deben colocarse boca abajo.
Alinee los orificios del pie con los orificios en el soporte
y coloque 2 tornillos (20), 2 arandelas (22) y atornille las
dos tuercas de cúpula (27) y apriete para fijarlas.
PASO 1
PASO 2
Conecte el pie trasero (02) en la parte posterior de la
estructura pincipal (01). Fije con 3 tornillos y 3 arandelas
(49, 50 y 51).

15
PASO 3
Retire las tuercas (26) y arandelas (24) y los tornillos de
fijación (21) del soporte de la manija (19).
Deslice la barra de rotación de la manija (19) a través del
tubo de enlace en la parte superior de la estructura
principal (1). La barra (19) puede necesitar un poco de
lubricante para deslizarse con facilidad.
El soporte de la botella (08) debe montarse en el
tubo de enlace con la barra de rotación de la manija
en su interior. Por lo tanto, tome el soporte de botella
(08) y vuelva a atornillar los tornillos (21) a través del
soporte de botella (08).
Luego, ensamble la manija izquierda (03L) que está
marcada con una "L" en el lado izquierdo del extremo
de la barra de Rotación (19). Deslice el vástago roscado
de la barra de rotación de la manija a través del pivote
de la manija.
Coloque una arandela (24) y apriétela con la tuerca (26)
e coloque la tapa externa (40), puede encontrarla en el
paquete de tornillos.
Conecte la manija derecha (03R) de la misma manera
que se describe.
1
3L
03R
402624
24 2640
8
21
52
42D
19

16
Instale los pedales (44 y 45) y los brazos de enlace (07R y 07L). El pedal izquierdo (44) está marcado con una "L" y el pedal
derecho (45) está marcado con una "R". También lo son los Brazos de enlace izquierdo y derecho (07R y 07L) que también
están etiquetados con "R" y "L". Estos pedales y brazos de enlace deben ensamblarse como se describe en la figura 4 con
los diagramas 1 a 4 correctamente. Es muy importante que cada Pedal y Brazo de enlace esté fijo en los lados correctos.
1. Toma el Pedal Izquierdo (44). Deslice el rodamiento del pedal (29) en el vástago del pedal izquierdo como se muestra.
2. Gire el brazo de enlace (07L) para encontrar el pedal. Ponga la ranura abierta "C" en el brazo de enlace hacia arriba
desde la parte inferior para enganchar el cojinete de dos pasos (29) de abajo como se muestra a continuación en el
Diagrama 2.
3. Luego inserte la arandela 23 y el buje de metal (30) a través del vástago del pedal. Asegúrese de que el buje de metal
esté bien insertado. Luego, fije el pedal en la manivela (09) como se muestra a continuación. El pedal izquierdo se aprieta
en sentido contrario a las agujas del reloj en la manivela, como se muestra en el Diagrama 3.
4. A continuación, atornille la tuerca de seguridad (28L) en el vástago del pedal, por detrás de la manivela (09) y apriételo
en sentido antihorario como se muestra en el diagrama 4 con la llave inglesa (53) y (54).
PASO 4
44( L )
29 07 L 2 3
30 0 9 2 8L 2 9
07L
53 45 ( R)
28 ( R)
54
fig. 1 fig. 2 fig. 3
56
29
44
07L
Instale el Pedal Derecho (45) de la misma manera.
Nota: El pedal derecho se bloquea en la manivela (09) en el sentido de las agujas del reloj cuando se atornilla.
La tuerca de seguridad (28R) es para apretar el pedal derecho.
MUY IMPORTANTE: siga las representaciones o los Diagramas 1 a 4 a continuación, paso a paso. El vástago del pedal
debe asegurarse firmemente, la tuerca de seguridad también debe asegurarse firmemente. Verifique ocasionalmente
para asegurarse de que siempre sea seguro y firme.
Inserte el clip de bloqueo (56) en el casquillo de acero (29) y la barra de conexión izquierda (07L).
Coloque el pedal derecho (45) de la misma manera que el pedal izquierdo (44).
Instalar siguiente fig. 1 - 2 - 3.

17
PASO 5
Retire las tres tuercas (26) y arandelas (25) que ya están
atornilladas en los tornillos en la parte inferior del
asiento (43). Luego coloque el Asiento en el Poste del
Asiento (04) como se muestra. Vuelva a atornillar las
Arandelas (25) y las Tuercas (26) en los pernos debajo
del Asiento para asegurar el Asiento y el Poste del
Asiento juntos. Aprieta las tuercas para asegurarlas
firmemente. Seleccione la altura deseada y apropiada
del asiento deslizando el Poste del Asiento (04) sobre la
Base del Asiento del Mainframe como se muestra a
continuación. Alinee los orificios del poste del asiento y
el vástago del asiento a la altura seleccionada e inserte
la perilla de ajuste del asiento (37) para fijar en su
posición. Siempre asegúrese de que esté bien cerrado.
PASO 6
Retire la tuerca unida al extremo del soporte del
monitor flexible, luego fije firmemente el soporte del
monitor flexible en el marco principal (01) sujetando la
tuerca como se muestra en la Figura 6 a continuación.
Ajuste el vástago del soporte del monitor flexible al
ángulo o posición deseada y apropiada.
Tenga en cuenta que, en algunos modelos, este paso ya
viene premontado de fábrica, por lo que no es necesario
realizar un seguimiento.
Luego conecte el Cable del Sensor de Rotación (42B)
proveniente del Mainframe y el Cable del Sensor del
Monitor (42A) que viene del extremo del Soporte de
Monitor Flexible como se muestra.
Monte el monitor (42) en el extremo soporte (05) y tape
los cables del sensor (42A) y los cables del sensor de
pulso (42C, 42D) del monitor como se muestra.

18
OPERACIÓN
NIVELACIÓN DE LA BICICLETA DE EJERCICIOS
Coloque la bicicleta en el lugar que elija. Pero la
superficie del piso debe ser dura y plana. La
bicicleta debe estar firmemente apoyada en el
suelo. Si la bicicleta no es estable, gire las dos
tapas finales (35) en los dos extremos del tubo del
piso delantero (06), hasta que la bicicleta esté
estable y equilibrada. Gire, ajuste, una tapa final a
la vez, ya que solo será necesario ajustar un lado
de la bicicleta para equilibrarla.
AJUSTANDO LA TENSIÓN
La bicicleta tiene una perilla de ajuste de tensión
(46) en la unidad central que se puede usar para
aumentar o disminuir la resistencia a la tensión.
Gire en el sentido de horario para aumentar la
tensión o en sentido antihorario para disminuir.
El rango de tensión puede aumentarse o
disminuirse más ajustando la correa de tensión
(47). Gire la Perilla de Ajuste de Tensión (46) en
sentido antihorario hasta que se detenga. Tire de
la correa de tensión a través de la hebilla de la
correa en el extremo superior del bastidor
principal para ajustar la correa alrededor de la
rueda del ventilador, lo que aumentará la
resistencia del rango de tensión. Afloje la correa
de tensión para disminuirla.
ENGANCHANDO LOS BRAZOS DE ENLACE
PARA LA FUNCIÓN ESTACIONARIA DE LOS
MANILLARES
Use la Llave (54) para aflojar y quitar la Tuerca de
Bloqueo (28R), y luego gire el Pedal Derecho (45)
en sentido antihorario (como se muestra a
continuación) con la Llave (53) para sacar el Brazo
de Enlace Derecho (07R) . Luego vuelva a instalar
el Pedal Derecho (45) con la Contratuerca (28R)
bien cerrada.
54
53
A
Voltee la parte superior del brazo de enlace
derecho (07R) como se muestra en la dirección
representada como "d" y enganche el brazo de
enlace derecho (07R) en el tornillo sobresaliente
representado como "A" que se muestra a
continuación.
Siga el enganche del brazo de enlace izquierdo
(07L) en los mismos dos pasos descritos
anteriormente.

19
GARANTIA
Condiciones Generales de la Garantía
a. La atención en garantía será realizará solamente mediante la
presentación de la factura/cupón fiscal original de venta y en los
límites establecidos por este término. La garantía será prestada
por la Red de Asistencia Técnica Autorizada.
b. Las condiciones establecidas en el presente Acuerdo se
garantiza al primer comprador usuario de este producto por un
período de un (1) año (incluyendo el período de garantía legal -
primeros 90 (noventa) días contados a partir de la fecha de
emisión de la venta de cupones de la nota / de impuestos, en caso
de uso exclusivamente residencial.
c. Los periodos de garantía y la cobertura a partir de la fecha de
emisión de la venta de cupones de la nota / de impuestos,
incluyendo el plazo estatutario de los noventa (90) días:
d. Las piezas reparadas o cambiadas bajo esta garantía no se
detiene ni se extienden el período de garantía estipulado
inicialmente.
e. Para utilizar esta garantía, el equipo debe haber sido instalado
por el asistente técnico autorizado, a excepción de los productos
residenciales.
f. La garantía no cubre los servicios de instalación y
mantenimiento preventivo, como la limpieza, lubricación y ajuste
del producto.
g. Ningún revendedor está autorizado a recibir producto de
cliente para encaminarlo a la Asistencia Técnica Autorizada o de
esta retirarlo para devolución al mismo proporcionar
informaciones en nombre de Fabricante / distribuidor sobre el
progreso del servicio. El Fabricante / distribuidor no se
responsabilizará por cualquier daño o retraso debido a este
incumplimiento.
h. El Fabricante / distribuidor mantendrá disponibles los
repuestos hasta que dejen de fabricar o importar el equipo. Si
cesado la producción o importación de los equipos para
mantener el suministro de repuesto el Fabricante / distribuidor su
línea de equipos para un período de tiempo razonable, de
acuerdo con la ley.
i. Dentro del plazo de 30 (treinta) días si el equipo presenta algún
mal funcionamiento, el cliente puede optar por llevar el producto
a un puestos autorizados o servicios que solicite en su casa sin
gastos de viaje en los municipios incluidos en la Rede de
Asistencia Técnica Autorizada. Transcurrido el plazo de treinta (30)
días o municipios no incluidos en la Rede de Asistencia Técnica
Autorizada los gastos resultantes de cualquier transporte o el
equipo a un servicio de carga, desplazamiento o visita técnica por
ayudante cualificado, se deben al cliente, si este equipo cubierto
por esta garantía.
j. Lubricantes, siliconas para caminadoras, vaselina para los pesos
de guía y micro aceite a las articulaciones de las estaciones de
peso, se recomienda exclusivamente por el fabricante, disponible
en la Rede de Asistencia Técnica Autorizada.
k. Los componentes que se desgastan con el uso regular de los
equipos, tales como escobillas del motor, correas, pastillas,
bandas de freno, fieltro, cadenas y cables de acero, cuando está
presente en el equipo, garantizan por un período de 90 días a
partir de la factura o defecto de fabricación, apreciada por la Rede
de Asistencia Técnica Autorizada.
Extinción de la Garantía:
Esta Garantía será considerada sin efecto cuando:
a. Haya transcurrido normalmente el plazo de su validez.
b. El equipamiento fuere entregado para reparación de las
personas no autorizadas por el Fabricante / distribuidor, fueren
verificados signos de violación de sus características originales o
montaje fuera del nivel de fábrica.
c. Hayan ocurrido daños que este venga a sufrir como
consecuencia de mal uso, uso de productos de limpieza
inadecuados, la oxidación de origen de los agentes externos, a la
intemperie, negligencia, modificación, uso de accesorios no
recomendados, mal diseño de la aplicación para la que es, caídas,
perforaciones , utilizar e instalación que no esté conforme con el
manual de instrucciones, cableado tensiones no aptos, sin
conexión a tierra en redes de tamaño malos y / o fluctuaciones y
sobrecargas excesivas.
d. Para la línea residencial está prohibido cualquier tipo de
mantenimiento del equipo de usuario o un tercero distinto de la
red de asistencia técnica.
e. El producto fuera utilizado en academias, condominios,
clínicas, clubes, saunas, sumergido en agua o cualquier modo de
uso que se asemeje a este, así como cualquier uso que no sea la
finalidad de aplicación a que se destina.
Observaciones:
a. Cables, mosquetones, pedales cuando ya existente en el
producto deben ser reemplazados una vez al año.
b. El Fabricante / distribuidor no se responsabiliza por eventuales
accidentes y sus consecuencias, derivadas de la violación de las
características originales o montaje fuera del estándar de fábrica
de sus equipamientos.
c. Son de responsabilidad del cliente los costos de atención de
llamadas infundado juzgado.
Nota: El Fabricante / distribuidor se reserva el derecho de
promover alteraciones de éste sin previo aviso.
1 año
1 año
1 año
1 año
90 días
1 año
1 año
1 año
1 año
1 año
1 año
PERÍODO DE
GARANTÍA
PIEZAS Y
COMPONENTES
Estructura
Pintura (oxidación)
Monitor
Motor regulador de esfuerzo
Correa
Carenado
Piezas de plástico y de caucho
Pedales
Assiento
Mano de obra
Defectos de fabricación

20
INFORMAÇÕES DE SEGURANÇA
Leia atentamente este manual antes de usar o produto e conserve-o para futuras consultas, evitando danos
físicos. É de responsabilidade do proprietário garantir que todos os usuários do equipamento sejam informados
adequadamente das precauções de segurança.
Se o equipamento não estiver em perfeitas condições, chame um assistente técnico.
- Posicione em superfície nivelada, no mínimo 30 cm afastada de qualquer parede, mantendo o equipamento
livre de qualquer obstáculo.
- Nunca permita o uso do equipamento por mais de uma pessoa ao mesmo tempo.
- Este produto não está destinado ao uso de pessoas (incluindo crianças) com alguma redução de capacidade
física, sensorial ou mental, falta de experiência e conhecimento, a menos que se tenha dado as devidas instruções
de uso do produto e esteja sob cuidados de uma pessoa responsável por sua segurança. As crianças devem ser
observadas para que não brinquem com o produto, estando ou não em uso.
- Consulte seu médico antes de iniciar e durante qualquer programa de exercício. Atenção especial deve ser
dada à crianças, gestantes, idosos, pessoas com problemas cardíacos e portadores de alguma deficiência.
- Mantenha distante do equipamento, crianças e animais de estimação, principalmente durante o uso e não
insira ou deixe objetos nas aberturas do equipamento.
- Vista trajes esportivos adequados. Não use roupas folgadas que eventualmente possam ficar presas ao
equipamento. Use sempre tênis para exercitar-se. Não ande descalço ou com sandálias.
-Periodicamente certifique-se que o equipamento esteja em boas condições de uso, verificando as conexões e
elementos de fixação.
- A limpeza do equipamento deve ser feita apenas com pano umedecido com água. Nunca use abrasivos,
álcool ou solventes para a limpeza.
-Não deixe o equipamento exposto a agentes naturais tais como: luz solar, chuva, orvalho, poeira, maresia etc.
Não coloque-o em ambientes empoeirados, úmidos, saunas ou em qualquer lugar não ventilado.
-Use sempre peças originais de reposição, pois a conservação ou manutenção incorreta poderá acarretar
danos ao produto, bem como a perda da garantia.
A. São de responsabilidade do cliente as despesas decorrentes do atendimento de chamadas julgadas
improcedentes.
B .Nenhum revendedor ou Assistência Técnica Autorizada tem autorização para alterar este Termo ou assumir
compromissos em nome do fabricante.
C. não se responsabiliza por eventuais acidentes e suas conseqüências, decorrentes da violação O fabricante
das características originais ou montagem fora do padrão de fábrica de seus produtos.
NOTA: as figuras e fotos contidas neste manual são meramente ilustrativas. O fabricante reserva-se o direito
de alterar as especificações técnicas e de design sem aviso prévio. Este manual pode ilustrar opcionais que não
fazem parte do equipamento adquirido.
Considerações gerais
Observações
Conservação e limpeza
Table of contents
Languages:
Other Athletic Exercise Bike manuals