ATiB 2 Series User manual

U
M
И
M
N
E
User
l
Инстру
Manual
Návod
Eksploa
ser Ma
e d'uso
d'utili
Manual
Manuell
MManuall
de uti
укция п
lde uti
k použ
atacijo
Manua
oe ma
isation
ilizo y m
по эксп
ilizare
žití a úd
s bei p
ual
anutenz
et d'e
manten
плуата
şi de în
držbě
priežiūr
zione
ntretie
nimien
ации и
ntreţin
ros žiny
en
nto
Tехобс
ere
ynas
SERIE 2
служиваниюю
IT
FR
ES
DE
RU
RO
CS
LT
PL
Instrukcja użytkowania i konserwacji
A.T.I.B. ELETTRONICA SRL Via XXIV Maggio, 2 - Longhena 25030 (BS) Italy Tel. +39 030 9971051 [email protected] www.atibelettronica.it
EN
Use and maintenance manual
Rev. 06/21
Gebrauchs- und Wartungsanleitung
2SPM - 2SPT - 2SPTE


WA
R
Rea
d
batt
1.
M
2.
T
3.
T
o
If c
h
Do
n
Not
e
T
i
P
W
D
d
d
D
i
I
s
This set of
b
The batter
y
same amou
Before char
For indoor
u
Disconnect
R
NING: Exp
l
d
the electric
ery it should
r
M
ains voltage
T
he Battery v
o
T
he maximu
m
o
ffice.
h
arger electri
c
n
ot try to rep
a
e
: Measure
b
the plug
o
(230V)
▌
voltage t
o
T
he electrical
s assured onl
y
P
rotect the p
o
W
e suggest u
s
D
o not disco
n
d
oor. To prev
d
isconnect th
e
D
o not open t
s disconnect
e
I
f the power
s
pecialised pe
LED
C
L1
G
L2
Y
L3
G
L4
B
Seri
e
b
attery char
g
y
charger is
d
nt of hours
t
ging, read t
h
u
se. Do not
e
the supply
b
l
osive gas!
P
data on the c
r
echarge:
. Usually, it i
s
o
ltage. Its vol
m
charging cu
r
c
data were n
o
a
ir failures, pl
e
b
y a tester t
o
n the pow
e
+ 5% 420
V
o
the neares
connection a
n
y
when the pl
o
wer supply c
a
s
ing power s
o
n
nect the bat
t
ent casual o
r
e
charger fro
m
he Battery C
h
e
d.
cables or th
e
rsonnel.
C
olor
G
reen Batt
e
Y
ellow Final
G
reen Batt
e
Red Alar
m
B
lack ON/
O
e
s 2 –
U
g
ers is plan
n
d
esigned fo
r
t
hey worked
h
e instructi
o
e
xpose to ra
i
b
efore maki
n
P
revent fla
m
harger identi
f
s
400V-50Hz
f
tage rating
m
r
rent. For th
e
o
t in accordin
g
e
ase call our
S
he real AC
v
e
r transform
e
V
(240V) ▌
+
t value.
n
d the replac
e
ug is connect
a
bles with slo
w
o
cket with a r
o
t
ery plug bef
o
r
voluntary di
s
m
AC-main.
h
arger before
e
Battery Cha
Signal
e
ry on
Charge
e
ry Charged
m
O
FF
L
1
U
se an
d
n
ed for floo
d
r
an intermi
t
o
n
i
n
n
g or breaki
n
m
es and spar
1. WAR
N
f
ication plate
a
f
or the three-
p
m
ust correspo
n
e
correct valu
e
g
with your el
S
ervice.
v
oltage duri
n
e
r. The pow
e
+
10% 440V
e
ment of the
ed to an effic
i
w
fuses or m
a
o
tary switch t
o
o
re the Batt
e
s
connection,
w
checking the
rger are wor
n
The battery
The gassing
The battery
There is a f
a
Switch to st
a
1
L2 L3
d
main
t
d
ed lead acid
t
tent workin
g
n
g the conn
e
ks and prov
i
N
INGS - S
A
a
nd check th
e
p
hase system
n
d with volta
g
e
, please refe
ectric system
n
g the charg
e
r transfor
m
(250V) (o
n
charger’s plu
g
i
ent ground.
a
gnetotherma
o
avoid plug
e
e
ry Charger i
s
w
e suggest
y
power plug i
s
n
or even if
t
is present or
level has be
e
is charged. T
a
ult or an ano
a
rt or stop th
e
L4
t
enanc
e
battery rec
h
g
, this mea
n
e
ctions to th
e
i
de adequat
e
A
FET
Y
e
y are in conf
o
s
and 230V-5
g
e battery ch
a
r the special
or your batt
e
e and check
m
er has 4 pl
u
n
ly some sp
e
g
s must be d
o
l switch (D c
u
e
xtraction.
s
switched of
f
y
ou to use m
e
s
disconnecte
d
t
hey are par
t
the charge h
a
e
n achieved (
2
he battery ch
a
maly
e
battery cha
r
e
manu
h
arging
n
s that they
e
battery
e
ventilation
o
rmity with y
o
0Hz AC for si
n
a
rger
capacity/cur
r
e
ry you must
it is the sa
m
u
gs: ▌-5% 3
e
cific model
o
ne by skilled
u
rve).
f
by the ON/
O
e
chanical blo
c
d
, the main s
w
t
ially damage
d
a
s started
2
,4 V/cell)
a
rger has sto
p
r
ger
al
will have to
during cha
r
o
ur electric s
y
n
gle-phase s
y
r
ent table, a
v
NOT connect
m
e as the v
o
80V (220V)
l
s) ▌, pleas
e
staff. The el
e
O
FF button l
o
c
ks or auxilia
r
w
itch is off a
n
d
, please rep
p
ped
rest for th
e
r
ging.
y
stem and th
e
y
stems.
v
ailable at ou
r
them.
o
ltage set b
y
▌NOM 400
V
e
match th
e
e
ctrical safet
y
o
cated on th
e
r
y contacts t
o
n
d the batter
y
lace them b
y
e
e
r
y
V
e
y
e
o
y
y
1
www.atibelettronica.it
EN

2. OPERATION
Battery Charger follows a cycle called Wa, defined by the DIN 41774 rule (maximum charging time: 13 hours).
Any charge can be interrupted and restarted at the same point for a countless time, using the ON/OFF switch situated on
control panel. The charging memory is deleted only after disconnecting the battery.
The main functions are identified by a fixed light led.
The leds L1 L2 L3 show battery condition, while the led L4 shows charger alarm condition.
LED symbols key: flashing light
off
fixed light
Charging phases visualisation (LED) L1 L2 L3
Initial test – (5 seconds to the start)
Initial charge. Voltage battery < 2,4 V/cell.
When the Battery Charger is switched on, if the battery is fully discharged,
the nominal current is given. Gradually the voltage goes up while the
current goes down. Reaching the gassing’s level (2,4V/cell), the current is
at 50% of its nominal level. The first phase is finished. This phase last
minimum 30 minutes even if the battery’s voltage is beyond the gassing
point.
Final charge. Voltage battery > 2,4 V/cell.
The charge continues for a fixed time of 3 hours.At the end of this phase
voltage can achieve the maximum value of 2,65V/cell. If this happens the
current is at 25% of its nominal value. The charge is finished and the
Battery Charger is switched off. In this phase the acid is gassing. This is
absolutely normal.
Battery Charged
Equalisation and preservation phase.
Equalisation phase: the battery charger goes automatically on for 5 minutes
each hour. This cycle is repeated for 15 times.
Preservation phase: the battery charger goes on for 5 minutes every 15
hours. This cycle is repeated until the Battery Charger is switched off.
Alarm signals and error search L1 L2 L3 L4
The battery charger’s switch is in the OFF position
The battery is not connected to the Battery Charger or its voltage is too
low.
The fuse protecting the diode bridge is burnt.
The battery plug is damaged.
A battery cable is interrupted.
Battery connected, battery charger’s switch in ON position, but there’s no
AC voltage or Voltage battery < 1,4V/cellafter 1 minute to the start.
Battery is connected, the battery charger’s switch is in theOFF position
but the AC main plug is disconnected or the main switch is off.
One or more fuses are burnt because they are too weak or there was a
short circuit. Warning: if during the operation of the charger the AC main
current drops, the charger doesn't show any alarm (the led signals the
charging phase of that moment). When the AC main reverts the charger
restarts his regular operation.
The thermal probe opened the circuit of the power transformer.
If transformer is at room temperature the probe is faulty (usually is
Normally Closed), otherwise wait its restoration within 20 minutes.
Voltage battery > 2,70V/cell
The maximum time has been exceeded (time out error). The battery has
not reached 2,40 V/cell within 10 hours.
Battery not fitted for the this charger, sulphated or a cell is interrupted and
the battery does not reach the gassing point (2,40 V/cell).
A diode on the bridge is burnt and the current is not enough to charge the
battery.
Main voltage is too low or a phase is missing.
Wrong card setting.
Quick Test
Maximum time alarm checks by quick cycle. The internal timer changes the hours in minutes and the minutes in
seconds. If you wish to enter in Quick Test simply put the dipswitch 1 in ON position BEFORE switching on the card.
Then carry out the standard operation to start the charger. Since there are two variable, the results can be as follows:
If the battery is charged the gassing point is quickly achieved (L2 on).
First phase can take between ½ minute and 9 minutes, the second phase
has a fixed duration of 3 minutes. Maximum time required 13 minutes.
The battery is not charged. 10 minutes are not enough to reach the
gassing point, so after this time interval, the Battery Charger sets on
“Phase 1 time alarm”.
2
www.atibelettronica.it
EN

Dipswitch battery voltage
setting on the electronic board
1 2 3 4 5 6
Quick Test Yes
No
Equalisation /
preservation
Yes
No
Voltage battery (V)
12 Jumper insterted
24
36
48
60
72
80
96 uninterested
3. INSTALLATION
The operation must be made with the electrical power disconnected.
1. Put the Battery Charger in a suitable place, allowing an adequate air change.
2. Connect the plugs, being very careful in earthling the AC side. Do not invert the battery polarity in comparison with the
Battery Charger.
3. Check the data on the charger identification plate, they must correspond with the mains and battery data.
4. Check the power cables and the battery are well earthen.
5. Check there are no short circuits on plugs and cables.
6. Connect the plug to AC mains.
7. Connect the battery plug.
8. Push the start button.
4. MAINTENANCE
The maintenance schedule depends on use and operating conditions but, generally, it should not exceed three months.
The maintenance operations have to be made by specialised personnel, in compliance with safety rules.
Please, follow the instructions in paragraph 4.1 “Put the equipment out of service”
4.1 Put the equipment out of service
When you want to do a routine or extraordinary maintenance on your Battery Charger, or you do not want to use it for a
long time or there is a fault, you must keep it out of service.
Please follow these instructions:
1. Switch off the Battery Charger
2. Rotate the AC mains switch in “off” position and disconnect the plug.
3. Disconnect the battery plug.
Should you wish not to use your Battery Charger for a time, please do not expose it to heat or atmospheric agents, but
keep it in a dry, safe place. The AC main plug and the battery plug must be raised from the ground and secured.
4.2 Routine Maintenance
1. Clean carefully the AC and battery cables. Check they are not damaged or burnt. In this case, replace them
immediately.
2. Check the AC mains and battery plugs. If they are crushed or burnt or damaged, replace them immediately.
3. Electrical equipment must not be exposed to dust and humidity. Clean the Battery Charger. Should it be too dirty or
damp, put it in a safer place.
4.3 Extraordinary Maintenance
1. Follow the checklist of “Routine maintenance”.
2. Open the Battery Charger. Clean carefully the dust, on the printed circuits by a clean brush, on the other components
by a blow of compressed air; stay at 20 cm (8 inch) at least.
3. Check the screws and electrical connections are well tightened.
4. Check the fuses, the fuse holders and the moving mechanical parts (contactor).
3
www.atibelettronica.it
EN

GARANZIA/WARRANTY/GARANTIE/GARANTÍA/GARANTIE/ГАРАНТИЯ/
GARANȚIE/ZÁRUKA/GARANTIJA/GWARANCJA
Durata La normale durata della garanzia è di 12 mesi. Ulteriori estensioni devono essere definite in fase d’ordine
Decorrenza La data di spedizione dallo stabilimento A.T.I.B. Elettronica rappresenta la data di decorrenza
Copertura La A.T.I.B. Elettronica si impegna a:
Fornire gratuitamente i materiali difettosi.
La loro sostituzione è gratuita presso il proprio stabilimento di Longhena, mentre è a pagamento se
effettuata presso la sede del cliente finale.
I costi di spedizione dei materiali in sostituzione sono a carico del cliente
Decadenza La garanzia decade qualora
Non siano state osservate le istruzioni contenute nel presente manuale di istruzioni
Sia accertato l’uso improprio o la manomissione del prodotto
Il carica batteria sia utilizzato al di fuori dei parametri definiti dalle specifiche del prodotto o dall’ordine
Duration Atib Elettronica guarantees these products for one year. Extended guarantee must be defined in advance
Starting date The delivery date from Atib Elettronica is considered the starting date of the warranty
Covering Defective components will be repaired or replaced free of charge
Labour is free of charge nearby our factory. If carried out at customer/users’s site it will be on chargeable
basis.
Delivery costs of replacement components are at consignee’s expense
Loss of right Warranty is not valid in case of:
The instruction of this manual is not observed
Improper use, violation or modification of the charger.
Charger being used outside the defined parameters in accordance with product specifications and/or order
details.
Durée La normale durée de la garantie est de 12 mois. Extensions éventuelles doivent être concordées à la commande
Début La garantie démarre à la date d’expédition du magasin A.T.I.B. Elettronica.
Couverture La A.T.I.B. Elettronica s’engage à:
Fournir gratuitement les pièces défectueuses.
Le remplacement de ces pièces est gratuit si réalisé dans son usine de Longhena-Italie, Si elle est faite
chez le client sera payante.
Les coûts du transport des pièces demeurent à la charge du client.
Déchéance La garantie sera annulée si:
On n’a pas suivi les instruction de ce manuel.
On aura détecté une utilisation non conforme du chargeur ou sa manumission
On trouve que le chargeur est utilisé au delà des paramètres définis lors de la commande.
Duracion La normal duracion de la garantía es de 12 meses. Ulteriores extensiones deberían ser establecidas al pedido
Entrada en vigor La fecha de entrega desde el almacén A.T.I.B. Elettronica representa la fecha de entrada en vigor
Cobertura La A.T.I.B. Elettronica se encarga de:
Proceder gratuitamente los recambios de los materiales fallados.
Su sustitución es gratuita en los almacenes ATIB en Longhena, mientras que de deberá de pagar si es
efectuada en las instalaciones del cliente.
Los gastos de expedición de los recambios son a cargo del cliente
Anulación La garantía es anulada si:
No se han observado las instrucciones contenidas en el manual de instrucciones
Es evidente el utilizo impropio o maltratamiento del producto
El cargador de batería se ha utilizado fuera de los parámetros definidos de las características técnicas ó
del pedido
Dauer Die standard Garantie ist 12 Monate, wenn nicht anders schriftlich vereinbart
Laufzeit Die Garantie start mit Lieferdatum von unserem Werk
Bedingungen A.T.I.B. Elettronica verpflicht sich, dass
die Ersatzteilen kostenlos geliefert werden (die Transportkosten werden von Kunden bezahlt)
der Ersatz der Teilen ist nur bei unserem Werk kostenlos
Gültigkeit Die Garantie geht verlustig, wenn
alle Informationen dieser Bedienungsaleitung nicht befolgen geworden sind
das Gerät aufgebrochen wurde
die Benutzung des bestellten Gerätes nicht fur die genaue Aufwendung verwendet wird
Срок действия Срок действия гарантии составляет 12 месяцев. Дополнительные продления должны оговариваться при
размещении заказа.
Вступление всилу Датой вступления всилу является дата отправки продукции сзавода A.T.I.B. Elettronica.
Покрытие Компания A.T.I.B. Elettronica обязуется:
Бесплатно заменить дефектные материалы.
Их замена является бесплатной на нашем заводе вБарбариге, оплачивается по месту расположения
заказчика.
Расходы по отправке заменяемых материалов оплачивается заказчиком.
Утрата Гарантия утрачивается вследующих случаях:
При несоблюдении инструкций, содержащихся вданном руководстве.
При установлении несоответствующего использования или несанкционированного вмешательства в
продукцию.
При использовании зарядного устройства вне параметров, установленных спецификациями на
продукцию или заказом.
4
www.atibelettronica.it

GARANZIA/WARRANTY/GARANTIE/GARANTÍA/GARANTIE/ГАРАНТИЯ/
GARANȚIE/ZÁRUKA/GARANTIJA/GWARANCJA
DuratăPerioada de garanție normalăeste de 12 luni. La comandătrebuie săfie definite extensii suplimentare
Începutul Data expedierii de la uzina A.T.I.B. Electronica reprezintădata de începere a garantiei
Acoperire A.T.I.B. Elettronica garantează:
Oferăgratuit materialele defectate
Înlocuinţa materialeleor defectate la uzina din Barbariga este gratuită, dar dacăsunt efectuate direct la
client atunci nu sunt gratuite
Costurile de transport ale materialelor de înlocuire vor fi suportate de client
Expirarea Garanția este nulăatunci când:
Nu s-au observat instrucțiile din acest manual
Se stabilește o folosinţă incorectăsau manipularea a produsului
Dacăîncărcătorul este utilizat în afara parametrilor definite de specificațiile produsului sau comandă.
Dacănumărul de cicluri de încărcare este mai mare de 365 pe an pentru încărcătorul standard (un maxim
de cicluri de încărcare una pe zi) şi 730 pe an pentru încărcătoare HF și Wowa standard (maxim de pânăla
douăcicluri de încărcări pe zi).
Dacăun defect este detectat din cauza lipsei de întreținere, atât ordinare cât și extraordinare a
dispozitivului.
Doba trv
á
n
í
Atib Elettronica zaru
č
uje tyto produkty po dobu jednoho roku. Roz
šíř
en
á
z
á
ruka mus
í
b
ý
t definov
á
na p
ř
edem
Počáteční datum Datum dodání od společnosti Atib Elettronica se považuje za počáteční datum záruky
K
ry
ti
na Vadné součásti budou bezplatněopraveny nebo vyměněny
V blízkosti naší továrny je práce zdarma. Pokud bude provedeno na webu zákazníka / uživatele, bude
zpoplatněno.
Náklady na dodání náhradních komponent jsou na náklady příjemce
Zt
r
át
a pr
á
va Z
á
ruka neplat
í
v p
ří
pad
ě
:
Pokyny v této příručce nejsou dodržovány
Nesprávné použití, porušení nebo úprava nabíječky.
Nabíječka se používá mimo definované parametry v souladu se specifikacemi produktu a / nebo
podrobnostmi objednávky.
Garantinis
laikotarpis Atib Elettronica suteikia vieneriųmetųgarantijąsavo produktams. Garantijos pratęsimas turėtųbūti iš anksto
apibrėžtas.
Pradžios data Garantijos galiojimo pradžia laikoma įkrovos stendo pristatymo data iš Atib Elettronica.
Įsipareigojimai Sugedękomponentai bus ištaisyti arba pakeisti nemokamai
Netoliese mūsųgamyklos darbas yra nemokamas. Jei tai atliekama kliento / vartotojo svetainėje, tai bus
mokama.
Pakaitiniųkomponentųpristatymo išlaidos apmokamos gavėjo sąskaita
Garantijos
praradimas
Garantija negalioja, jei:
Nesilaikoma šios instrukcijos nurodymų
Netinkamas įkroviklio naudojimas, pažeidimas ar modifikavimas.
Įkroviklis naudojamas ne pagal nustatytus parametrus pagal produkto specifikacijas ir (arba) išsamią
užsakymo informaciją.
Trwanie Atib Elettronica udziela na te produkty rocznej gwarancji. Gwarancja przedłużona musi byćzdefiniowana z
góry.
Data początkowa Termin dostawy od Atib Elettronica jest uważany za datęrozpoczęcia gwarancji
Pokrycie Wadliwe elementy zostanąnaprawione lub wymienione bezpłatnie
Praca w pobliżu naszej fabryki jest bezpłatna. Jeśli zostanie przeprowadzona w siedzibie
klienta/użytkowników, będzie odpłatna.
Koszty dostawy części zamiennych na koszt odbiorcy
Utrata prawa Gwarancja nie obowiązuje w przypadku:
Instrukcje zawarte w niniejszej instrukcji nie sąprzestrzegane
Niewłaściwe użytkowanie, naruszenie lub modyfikacja ładowarki.
Ładowarka używana poza określonymi parametrami zgodnie ze specyfikacjąproduktu i/lub szczegółami
zamówienia.
5
www.atibelettronica.it

Wa CURVE
Battery Voltage (V)
12 12.0 12.3 12.6 12.9 13.2 13.5 13.8 14.1 14.4 14.7 15.0 15.3 15.6 15.9
24 24.0 24.6 25.2 25.8 26.4 27.0 27.6 28.2 28.8 29.4 30.0 30.6 31.2 31.8
36 36.0 36.9 37.8 38.7 39.6 40.5 41.4 42.3 43.2 44.1 45.0 45.9 46.8 47.7
40 40.0 41.0 42.0 43.0 44.0 45.0 46.0 47.0 48.0 49.0 50.0 51.0 52.0 53.0
48 48.0 49.2 50.4 51.6 52.8 54.0 55.2 56.4 57.6 58.8 60.0 61.2 62.4 63.6
60 60.0 61.5 63.0 64.5 66.0 67.5 69.0 70.5 72.0 73.5 75.0 76.5 78.0 79.5
72 72.0 73.8 75.6 77.4 79.2 81.0 82.8 84.6 86.4 88.2 90.0 91.8 93.6 95.4
80 80.0 82.0 84.0 86.0 88.0 90.0 92.0 94.0 96.0 98.0 100 102 104 106
96 96 98 101 103 106 108 110 113 115 118 120 122 125 127
V/cell 2.00 2.05 2.10 2.15 2.20 2.25 2.30 2.35 2.40 2.45 2.50 2.55 2.60 2.65
Nominal current (A)
10 10.0 9.4 8.8 8.1 7.5 6.9 6.3 5.6 5.0 4.5 4.0 3.5 3.0 2.5
20 20.0 18.8 17.5 16.3 15.0 13.8 12.5 11.3 10.0 9.0 8.0 7.0 6.0 5.0
30 30.0 28.1 26.3 24.4 22.5 20.6 18.8 16.9 15.0 13.5 12.0 10.5 9.0 7.5
40 40.0 37.5 35.0 32.5 30.0 27.5 25.0 22.5 20.0 18.0 16.0 14.0 12.0 10.0
50 50.0 46.9 43.8 40.6 37.5 34.4 31.3 28.1 25.0 22.5 20.0 17.5 15.0 12.5
60 60.0 56.3 52.5 48.8 45.0 41.3 37.5 33.8 30.0 27.0 24.0 21.0 18.0 15.0
70 70.0 65.6 61.3 56.9 52.5 48.1 43.8 39.4 35.0 31.5 28.0 24.5 21.0 17.5
80 80.0 75.0 70.0 65.0 60.0 55.0 50.0 45.0 40.0 36.0 32.0 28.0 24.0 20.0
90 90.0 84.4 78.8 73.1 67.5 61.9 56.3 50.6 45.0 40.5 36.0 31.5 27.0 22.5
100 100 93.8 87.5 81.3 75.0 68.8 62.5 56.3 50.0 45.0 40.0 35.0 30.0 25.0
120 120 113 105 97.5 90.0 82.5 75.0 67.5 60.0 54.0 48.0 42.0 36.0 30.0
140 140 131 123 114 105 96.3 87.5 78.8 70.0 63.0 56.0 49.0 42.0 35.0
% 100 93.8 87.5 81.3 75 68.8 62.5 56.3 50 45 40 35 30 25
8
www.atibelettronica.it

Notes
9
www.atibelettronica.it

Notes
9
www.atibelettronica.it


A.T.I.B. ELETTRONICA SRL
Via XXIV Maggio, 2
Longhena 25030 (BS) Italy
Rev. 06/21
This manual suits for next models
3
Table of contents
Popular Controllers manuals by other brands

Samson
Samson 3271 Mounting and operating instructions
DH Instruments
DH Instruments OPG1 Operation and maintenance manual
GYS
GYS Powerduction Heat Controler instructions

Cass Technology
Cass Technology CASTLE S SERIES Technical operation guide
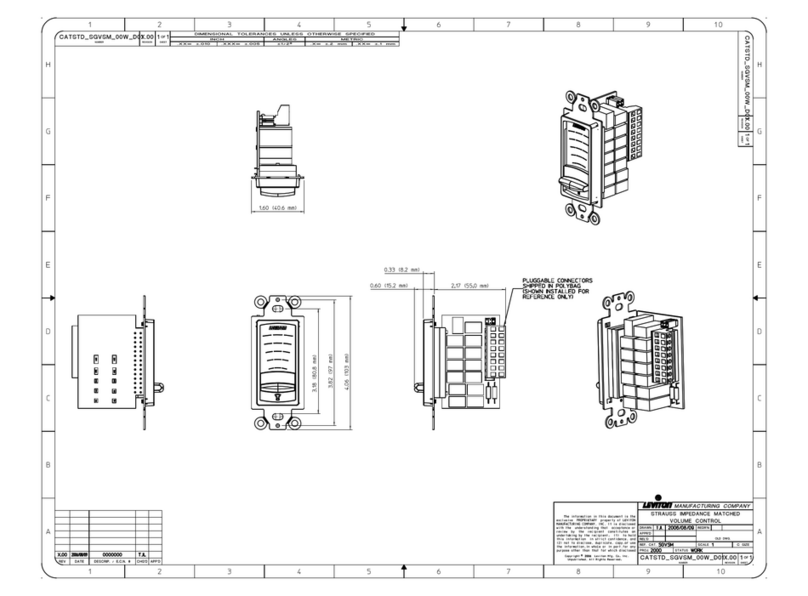
Leviton
Leviton SGVSM-00W Dimension Guide
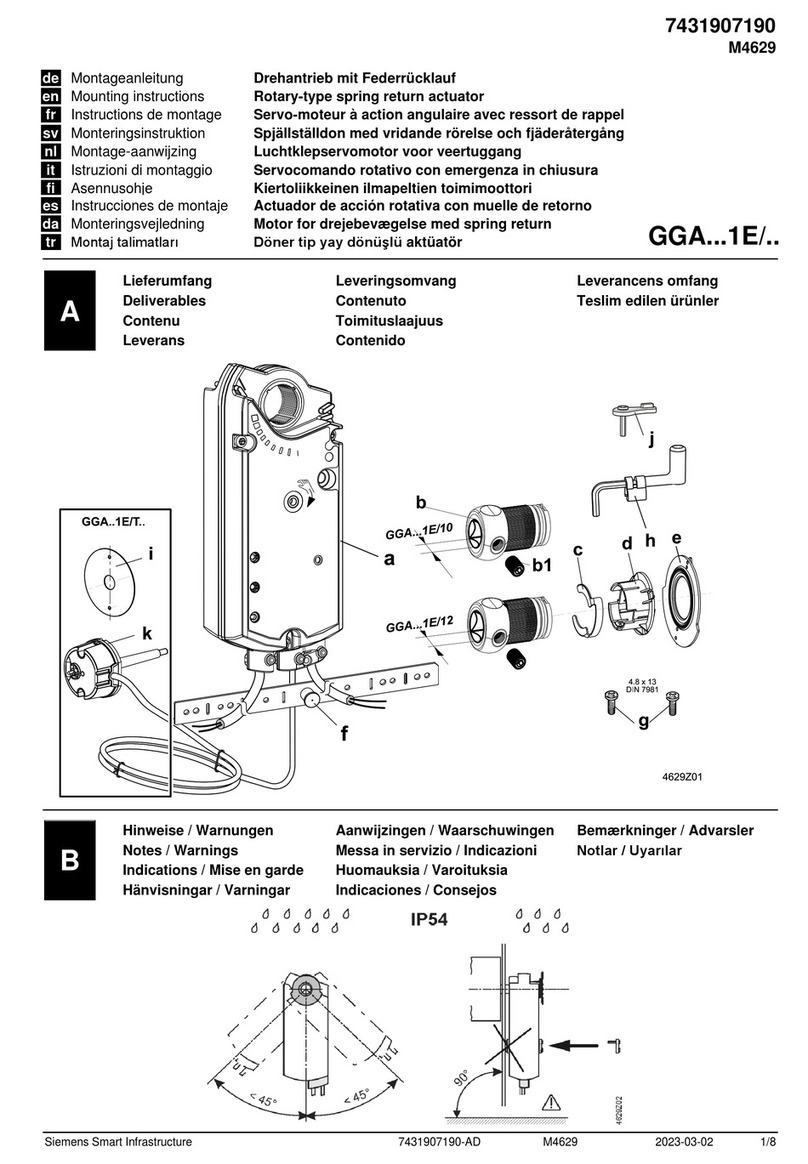
Siemens
Siemens GGA 1E Series Mounting instructions
