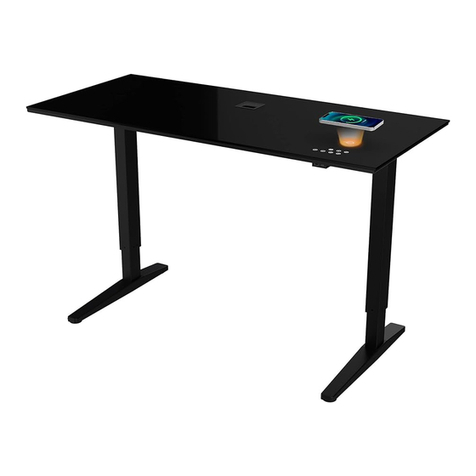
ATLASIO Smart Desk SD User manual

H
H
1
G
E
D
F
C
B
4
4
2
2
1
G
A
2
3
32
3
A B C D
E F GH
1234
M12
3 4
M12
3 4
1 2 3 4
A B C D E F G H
Smart Desk SD
ORIGINALBETRIEBSANLEITUNG
TRANSLATION OF THE ORIGINAL INSTRUCTIONS
www.atlasio.de
DE EN

2
DE
HAUPTBAUTEILE
ORIGINALBETRIEBSANLEITUNG
1
2
MONTAGEMATERIAL UND HILFSMITTEL
INFORMATION: Die untenstehenden Mengenangaben der Einzelteile sind die zum Auau benögten Teile.
In manchen Fällen kann es vorkommen, dass mehr Teile als benögt im Lieferumfang enthalten sind.
Bei fehlenden oder beschädigten Teilen wenden Sie sich bie an unseren Kundenservice.
A B C
D E

3
Smart Desk SD
MONTAGE SCHRITTE
SCHRITT 1
Legen Sie die Tischplae
vorsichg mit der Oberseite
auf einen sauberen, achen
Untergrund.
Stellen Sie sicher, dass
der Untergrund gut
geschützt ist um Schäden
an der Tischplae
zu vermeiden.
1
1
SCHRITT 2
Moneren Sie die Beine
an die Tischplae indem
Sie die Montageteile und
nutzen.
1
x1
x1
A B C D
2
A
B

4
AUX KABEL
FUNKTIONSTASTE
System-Standard-Bluetooth-Modus. Die Funkonstaste
ändert die Audio-Quelle (Bluetooth / USB).
Sie hören eine Ton-Ansage für Bluetooth / USB Modus.
Drücken und halten Sie die Funkonstaste
um die Musikwiedergabe abzuschalten.
LAUTSTÄRKE + / NÄCHSTER TITEL
Drücken und halten um Lautstärke zu erhöhen. Einmal drücken um nächsten Titel zu wählen.
START / PAUSE
Titel starten / pausieren.
Drücken und halten um Lautstärke zu minimieren.
Einmal drücken um vorherigen Titel zu wählen.
Kabellose Ladeäche.
(Mobiles Endgerät zum Laden hier Platzieren)
STECKERMONTAGEPLAN
NETZEINGANG
D
NETZADAPTER
ßEN
ßEN
E
ßEN
1. AUX Eingang. Kann mit Computer, Tablet, Telefon, MP3 etc.
Audio-Ausgang verbunden werden.
2. USB-Anschluss. Unterstützt USB-Eingabe und das Auaden
von Android-Geräten.
3. Power Licht.
4. USB-Anschluss. Unterstützt das Auaden von iPhones oder Android-
Geräten. Unterstützt nicht USB-Eingang oder das Lesen von Daten.
„DC IN“ ist für die
Stromversorgung.
Stromadapterkabel
hier anschließen.

5
Smart Desk SD
AUX
USB
AUX Kabel in AUX IN einstecken um mit Computer, MP3 oder anderen Geräten zur Audio-
Wiedergabe zu verbinden.
Funkonstaste drücken um zum USB Modus zu gelangen.
BLUETOOTH
1. Funkonstaste drücken um zum Bluetooth Modus zu gelangen. Sie hören eine Sprachansage
zum Bluetooth-/ USB-Modus.
2. Akvieren Sie die Bluetooth Funkon auf Ihrem Endgerät, welches Sie verbinden möchten und
wählen Sie „Verbinden“.
3. Verbinden Sie ihr Endgerät mit dem Bluetooth Gerät „smartaudio“.
4. Drücken Sie die Wiedergabe Taste für 3 Sekunden um die Bluetooth Verbindung herzustellen.
5. Der Schreibsch kann nur mit einem Gerät verbunden werden. Um ein anderes Gerät zu
verbinden muss die Verbindung zum ersten Gerät zunächst getrennt werden um anschließend das
neue Gerät zu verbinden.
6. Dieser Tisch verwendet Bluetooth 4.2.
KABELLOSE LADEFUNKTION
Geräte, welche mit einer kabellosen Ladeäche kompabel sind, sind zunächst auf der
Ladeäche zu posionieren. Im nächsten Schri sollte geprü werden, dass das Mobiltelefon
erfolgreich mit der Ladefunkon verbunden ist. Sollte dies nicht der Fall sein, so können Sie
das Gerät einfach in Richtung des Lade-Symbols bewegen, bis die Verbindung erfolgreich ist.
Kabelloses Laden funkoniert nur mit Geräten, welche kompabel mit dieser Funkon sind.
ELEKTRISCHES SYSTEM
ACHTUNG!
STROMSCHLAG
NICHT ÖFFNEN
H
H
1
G
E
D
F
C
B
4
4
2
2
1
G
A
2
3
32
3
A B C D
E F GH
1234
M12
3 4
M12
3 4
1 2 3 4
A B C D E F G H
H
H
1
G
E
D
F
C
B
4
4
2
2
1
G
A
2
3
32
3
A B C D
E F GH
1234
M12
3 4
M12
3 4
1 2 3 4
A B C D E F G H
Dieses Symbol soll den Benutzer auf
das Vorhandensein einer nicht isolierten
gefährlichen Spannung innerhalb des
Gehäuses des Produkts hinweisen,
die stark genug sein kann, um einen
Stromschlag zu verursachen.
Dieses Symbol soll den Benutzer auf das
Vorhandensein wichger Bedienungs-
und Wartungsinformaonen in diesem
Benutzerhandbuch hinweisen.
H
H
1
G
E
D
F
C
B
4
4
2
2
1
G
A
2
3
32
3
A B C D
E F GH
1234
M12
3 4
M12
3 4
1 2 3 4
A B C D E F G H
H
H
1
G
E
D
F
C
B
4
4
2
2
1
G
A
2
3
32
3
A B C D
E F GH
1234
M12
3 4
M12
3 4
1 2 3 4
A B C D E F G H
Um Unfälle zu vermeiden, nicht die Stromverkleidung önen. Bie
wenden Sie sich an einen Experten, sollte die Schaltung fehlerha
sein.
Das Möbelstück darf keiner Feuchgkeit oder Nässe ausgesetzt
werden.
Das Möbelstück sollte Flüssigkeitsbehältern ferngehalten werden.
Wenn Flüssigkeit in das Gerät kommt kann es beschädigt werden.
Das Möbelstück sollte nicht Staub oder Rauch ausgesetzt werden.
Wenn das Möbelstück für längere Zeit nicht genutzt wird, sollte
das Stromversorgungskabel gezogen werde.
Sollte bei der Nutzung des Geräts Rauch oder ein eigenarger
Geruch aureten, schalten Sie bie umgehend das Gerät aus,
ziehen Sie das Netzkabel und suchen Sie professionelle Hilfe.
Der Netzstecker sollte vor der Reinigung des Geräts gezogen
werden. Es kann mit einem feuchten Tuch und etwas Seife
gereinigt werden.

6
HAUPTFUNKTIONEN
PROBLEM URSACHE ABHILFE
Keine Stromanzeige
am Display
Stromkabel steckt nicht richg.
Die Steckdose hat keine
Stromversorgung.
Das Gerät ist ausgeschalten.
Die Buchse muss elektrisch sein.
Drücken Sie den Stecker ausreichend fest in die Steckdose.
Schalten Sie das Gerät ein.
Keine
Musikwiedergabe
Audio Kabel nicht richg verbunden.
Die Lautstärke ist zu leise eingestellt.
Schließen Sie das Audio Kabel korrekt an.
Erhöhen Sie die Lautstärke.
Keine lauten oder
leisen Töne.
Lauter / leise ist auf Minimum
eingestellt. Lautstärke auf normales Niveau einstellen.
Kabelloses Laden
funkoniert nicht.
Stromkabel steckt nicht.
Mobiles Endgerät hat keine kabellose
Ladefunkon/ ist nicht kompabel.
Stellen Sie sicher dass das Gerät mit Strom versorgt und an ist.
Prüfen Sie, dass ihr Endgerät die Fähigkeit zum kabellosen Laden
besitzt.
Sollte es zu einem Problem kommen, lesen Sie sich bie die folgenden Lösungen durch, um mögliche Ursachen zu
nden und den Fehler zu heben. Sollten diese Hinweise keine Hilfe sein, bie wenden Sie sich an einen Fachexperten
oder unseren Kundenservice.
KONTEXT PARAMETER KONTEXT PARAMETER
Spannung AC100V-240/50-60HZ S / N ≥65dB
Ausgangsleistung (RMS) 8W*2 Verzerrung ≤0.5%
Frequenzbereich 80HZ-20KHZ Abtrennung ≥40dB
ENTSORGUNG
H
H
1
G
E
D
F
C
B
4
4
2
2
1
G
A
2
3
32
3
A B C D
E F GH
1234
M12
3 4
M12
3 4
1 2 3 4
A B C D E F G H
Sollte die Entsorgung des Gerätes notwendig werden, stellen Sie bie eine umwelreundliche Entsorgung
sicher. Kontakeren Sie lokale Behörden bezüglich einer geeigneten Entsorgung oder Recycling-Oponen
in Ihrer Nähe. Entsorgen Sie das Gerät oder Teile des Geräts nicht im Hausmüll.
EMC Direcve 2014/30/EU, RED 2014/53/EU
EN 61000-6-3:2007+A1, EN 61000-6-1:2007
LVD Direcve 2014/35/EU, EN 60335-1:2012+A1,
EN 6223:2008, ROHS 2011/65/EU
H
H
1
G
E
D
F
C
B
4
4
2
2
1
G
A
2
3
32
3
A B C D
E F GH
1234
M12
3 4
M12
3 4
1 2 3 4
A B C D E F G H
Pantes GmbH, Maria-Theresia-Str. 11,
81675 München, Germany
München, 01.09.2021
H
H
1
G
E
D
F
C
B
4
4
2
2
1
G
A
2
3
32
3
A B C D
E F GH
1234
M12
3 4
M12
3 4
1 2 3 4
A B C D E F G H

7
Smart Desk SD
Pantes GmbH, Maria-Theresia-Str. 11,
81675 München, Germany
München, 01.09.2021
EN
MAIN COMPONENTS
TRANSLATION OF THE ORIGINAL INSTRUCTIONS
1
2
NOTE: The quanes below are the correct amount to complete the assembly.
In some cases more ngs may be supplied than are required.
For missing or damaged parts, please contact our Customer Service.
A B C
D E

8
ASSEMBLY STEPS
STEP 1
Carefully place table top
upside down onto a clean
at surface.
Ensure the surface is suitably
protected to prevent any
damage to top .
1
1
STEP 2
Assemble legs to table
Top using xings
and .
2
1
A
B
x1
x1
A B C D

9
Smart Desk SD
AUX CABLE
FUNCTION KEY
System default Bluetooth mode. The Funcon key
changes the audio frequency signal source (Bluetooth /
USB). You will hear a voice prompt for Bluetooth /
USB mode. Press and hold the Funcon key to turn o
music playback.
Press and hold to increase volume. Press once to select the next track.
PLAY / PAUSE
Play / Pause tracks.
Press and hold to decrease volume. Press once
to select the previous track.
Locaon for wireless charging.
(Place mobile device on top to charge)
CONNECTOR ASSEMBLY DIAGRAM
D
E
1. AUX IN. Connects with Computer, tablet, phone MP3 etc Audio
output.
2. USB socket. Supports USB input and Android recharge.
3. Power light.
4. USB socket. Supports iphone / Android recharge. It will not support
USB input or data reading.
TABLE TOP CONTROLS
„DC IN“ is for
power input.
Connect the power
adaptor cable.

10
AUX / LINE
USB
Plug the AUX cable into AUX IN to connect with computer, mp3 and other devices
for Audio output.
Press funconal key on the top panel to change over to USB mode.
BLUETOOTH
1. Press Funcon key on the top panel to change over to Bluetooth mode. You will hear a voice
prompt in Bluetooth / USB mode.
2. Acvate the Bluetooth funcon on the device which is to be connected and select pairing.
3. Pair your device with the Bluetooth name “smartaudio”.
4. Hold down the play buon on the top panel for 3 seconds to pair with Bluetooth devices.
5. This unit can only be paired with one device at a me. To connect to a dierent device, rst
disconnect from the original device and start pairing again with the new device.
6. This unit is Bluetooth 4.2.
In the case of wireless charging compable devices, please put the phone on the wireless
charging indicator and check if the phone is successfully connected to the charging funcon.
If not, move the mobile phone near the logo unl the connecon is successful.
Wireless charging will only work with wireless charging compable mobile devices.
ELECTRICAL SYSTEM
PLEASE READ CAREFULLY
ELECTRIC SHOCK
DO NOT OPEN
H
H
1
G
E
D
F
C
B
4
4
2
2
1
G
A
2
3
32
3
A B C D
E F GH
1234
M12
3 4
M12
3 4
1 2 3 4
A B C D E F G H
H
H
1
G
E
D
F
C
B
4
4
2
2
1
G
A
2
3
32
3
A B C D
E F GH
1234
M12
3 4
M12
3 4
1 2 3 4
A B C D E F G H
This symbol is intended to alert the
user to the presence of un-insulated
„dangerous voltage“ within the product‘s
enclosure that may be of sucient
magnitude to cause an electric shock.
This symbol is intended to alert the user
to the presence of important operang
and maintenance Instrucons in this user
manual.
H
H
1
G
E
D
F
C
B
4
4
2
2
1
G
A
2
3
32
3
A B C D
E F GH
1234
M12
3 4
M12
3 4
1 2 3 4
A B C D E F G H
H
H
1
G
E
D
F
C
B
4
4
2
2
1
G
A
2
3
32
3
A B C D
E F GH
1234
M12
3 4
M12
3 4
1 2 3 4
A B C D E F G H
In order to avoid accidents, do not open any electrical covers.
Refer to a professional if the circuit is faulty.
b. Do not expose the unit to damp or moisture.
c. Keep the unit away from containers holding liquid.
If any liquid enters into the unit, it may be damaged.
d. Do not expose the unit to dust or smoke.
e. If the unit will not be used for a long me, please unplug
the power.
f. When using the unit, if smoke appears, or if there is a peculiar
smell, please turn o the power, pull out the socket and seek
professional help.
g. Pull out the plug before cleaning the surface of the machine.
It can be cleaned with a damp cloth and soap.

11
Smart Desk SD
MAIN FEATURES
PROBLEM PROBLEM CAUSE REMEDY
No power display
Power plug not inserted properly.
There is no power in the socket.
The power is not switched on.
The jack must be electrical.
Press the plug.
Turn on the power.
No sound
Audio sound cable not properly
connected. The volume was set to
the minimum.
Connect the audio sound cable correctly.
Set the volume to normal standard.
No high or low sound High/ low volume set to minimum. Set the volume to normal standard.
No wireless charging
Power not connected.
Mobile device does not have wireless
charging funcon.
Check power is connected and on. Check your mobile device
has wireless charging capability.
TROUBLE SHOOTING
When a failure occurs, please refer to the following soluons, nd out the presumable causes and solve the problem,
if these are of no help, please refer to a professional.
ITEM PARAMETER ITEM PARAMETER
VOLTAGE AC100V-240/50-60HZ S / N ≥65dB
OUTPUT POWER (RMS) 8W*2 DISTORTION ≤0.5%
FREQUENCY RESPONSE 80HZ-20KHZ SEPARATION ≥40dB
DISPOSAL
H
H
1
G
E
D
F
C
B
4
4
2
2
1
G
A
2
3
32
3
A B C D
E F GH
1234
M12
3 4
M12
3 4
1 2 3 4
A B C D E F G H
If disposal of this product becomes necessary, please do this in an environmentally responsible way.
Contact your local government oce or authority for suitable disposal or recycling opons in your local
area. Do not dispose of this product, or it‘s components, with your general domesc waste.
EMC Direcve 2014/30/EU, RED 2014/53/EU
EN 61000-6-3:2007+A1, EN 61000-6-1:2007
LVD Direcve 2014/35/EU, EN 60335-1:2012+A1,
EN 6223:2008, ROHS 2011/65/EU
H
H
1
G
E
D
F
C
B
4
4
2
2
1
G
A
2
3
32
3
A B C D
E F GH
1234
M12
3 4
M12
3 4
1 2 3 4
A B C D E F G H
Pantes GmbH, Maria-Theresia-Str. 11,
81675 Munich, Germany
Munich, 01.09.2021
H
H
1
G
E
D
F
C
B
4
4
2
2
1
G
A
2
3
32
3
A B C D
E F GH
1234
M12
3 4
M12
3 4
1 2 3 4
A B C D E F G H

www.atlasio.de
Table of contents
Languages:
Other ATLASIO Indoor Furnishing manuals
Popular Indoor Furnishing manuals by other brands

Forte
Forte Duro 6521552539 Assembling Instruction

Humanscale
Humanscale Float Assembly instructions

BullFrog
BullFrog 1008 BLOBB Assembly and instruction manual

Argos
Argos HOME Maine 2 Door 1 Drawer Sideboard Assembly instructions

Caso
Caso Sound & Cool Black 792 instruction manual

Kangaroo
Kangaroo Kookaburra K3451 Assembly instructions

for Living
for Living Bluebay 088-1796-2 Assembly instructions

ProLinx
ProLinx Maidesite Assembly instructions

Flexispot
Flexispot E5B installation guide

baby&child
baby&child AMIRA MOSAIC WIDE DRESSER Assembly instructions

modway
modway BBT 6496 TWIN HB Assembly instructions

Childcare
Childcare Kids 094114 manual