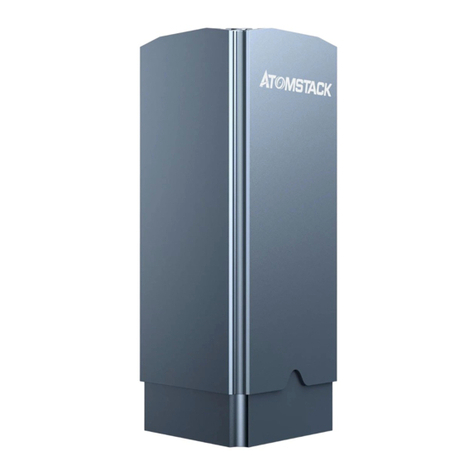
ATOMSTACK M40 Service manual

note: (The picture is for reference only, the actual product shall prevail)
English
Deutsche
Français

Before Using the laser engraving, please read this safety guide carefully, it mentions situations that require special
attention and includes warnings of unsafe practices that can cause damage to your property or even endanger your
personal safety.
1. This product is a laser engraver system components, must be installed in other manufacturers of laser engraver for
use.And the product belongs to Class 4 laser products, the laser system itself must meet the requirements of IEC 60825-1
latest version, otherwise the product is prohibited to be used.
2. Your laser engraver shall have a protective housing which, when in place, prevents human access to laser radiation.
3. If a protective housing is equipped with an access panel which provides "walk-in" access then:
a)means shall be provided so that any person inside the protective housing can prevent activation of a laser hazard that is
equivalent to Class 3B or Class 4.
b)a warning device shall be situated so as to provide adequate warning of emission of laser radiation equivalent to Class
3R in the wavelength range below 400 nm and above 700 nm, or of laser radiation equivalent to Class 3B or Class 4 to any
person who might be within the protective housing.
c)where “walk-in” access during operation is intended or reasonably foreseeable, emission of laser radiation that is
equivalent to Class 3B or Class 4 while someone is present inside the protective housing of a Class 1, Class 2, or Class 3R
product shall be prevented by engineering means.
NOTE Methods to prevent human access to radiation when persons are inside the protective housing can include
pressure sensitive floor mats, infrared detectors, etc.
Part 1: Security Statment and warning

4. The laser itself has a protective cover, the protective cover is fastened by screws. When the laser is installed on the laser
engraver, the protective cover should be checked to be reliably locked, and can not be removed in the energized state.
5. The housing of the laser engraver should have an interlock function. When the housing is opened or removed, the laser
can be automatically turned off.
6. The laser engraver should have an emergency stop button, which can immediately stop the output of the laser when
pressed under unexpected circumstances.
7. The laser engraver should have a reset button, which can resume work under the condition of confirming safety after
lifting the interlock or emergency stop.
8. Laser engraver should use physical keys, dongle, password system and other ways to manage and control, to prevent
personnel without security training operation of this kind of equipment.
9. On the laser engraver any window or channel that can actively observe or passively receive the laser radiation should be
set up warning marks.
10. If the laser burns the skin or eyes, please go to a nearby hospital for examination and treatment immediately.

Part 2: Disclaimer and warning
Thisproductisnotatoyandisnotsuitableforpeopleunder15yearsofage.Donotallowchildrentotouchthelaser
Module.Pleasebecarefulwhenoperatinginsceneswithchildren.
Thisproductisalaser
module,visithttp://www.atomstack3d.com/laserengraverdownloadforcomplete"usermanual"andthelatestinstructionsandw
arnings.ShenzhenAtomStackTechnologiesCo.,Ltd.(Atomstack)reservestherighttoupdatethisDisclaimerandSafeOperatio
nGuidelines.
Pleasebesuretoreadthisdocumentcarefullybeforeusingtheproducttounderstandyourlegalrights,responsibilitiesandsafe
tyinstructions;Otherwise,itmaybringpropertyloss,safetyaccidentandhiddendangerofpersonalsafety.Onceyouusethispr
oduct,youshallbedeemedtohaveunderstood,acceptedandacceptedalltermsandcontentsofthisdocument.Userundertak
estoberesponsibleforhisorheractionsandallconsequencesarisingtherefrom.UseragreestousetheProductonlyforlegiti
matepurposesandagreestotheentiretermsandcontentsofthisdocumentandanyrelevantpoliciesorguidelinesthatAtomS
tackmayestablish.
You understand and agree that AtomStack may not be able to provide you with the cause of the damage or accident and
provide you with AtomStack's after-sale service unless you provide the original engraving or cutting files, engraving software
configuration parameters used, operating system information, video of the engraving or cutting process, and operational steps
prior to the occurrence of a problem or failure.
AtomStackisnotliableforanyandalllossesarisingfromtheuser'sfailuretousetheproductinaccordancewiththismanual.
Atomstackhastheultimaterighttointerpretthedocument,subjecttolegalcompliance.Atomstackreservestherighttoupdat
e,modify,orterminatetheTermswithoutpriornotice.

Part 3:Laser Module Instruction
Plum blossom
handle
Laser slide
Protective cover
Slide mounting
hole
Signal input
Wavelength:455±5nm
Beam Divergence:0.2
Pulse Duration:1ms
Frequency:1kHz
Maximum power output:5W
Laser emitter

Part 4: Function description of adapter board
⑦.3PIN signal
output: the
3PIN signal line
is output to the
laser of the
machine
⑧. High and low signal trigger switch:
when not pressed down, the adapter
board works normally, after pressing
down, the laser continues to work
⑨.12V fan
interface: two
different 2PIN
fan interfaces
⑩.4PIN signal input: 4PIN
input for other manufacturers
(such as Neje, etc.)
.3PIN signal input is the
3PIN signal input of other
manufacturers (such as Ortur,
etc.)
⑤. Ground wire
⑥.TTL signal
input
④.12V input
①. Power
switch: the
on/off button
of the adapter
board
③.2PIN signal input:
2PIN signal input from
other manufacturers
②.DC auxiliary power terminal: when the auxiliary laser
power is insufficient, the compensation power is 12V 3A,
this interface is for power compensation, and it is
connected to the backup power supply when needed.

⑦
W h e n w o r k i n g , f i r s t l o o s e n t h e l o c k n u t , t h e n m o v e t h e l a s e r u p a n d d o w n t o a n
a p p r o p r i a t e h e i g h t ( t h e d i s t a n c e f r o m t h e f i x e d f o c u s o f t h e o b j e c t t o b e e n g r a v e d ) , a n d
t h e n l o c k t h e l o c k n u t , a n d t h e l a s e r p r e p a r a t i o n i s c o m p l e t e .
①②③
①.Install the slider
screw and tighten it
②.Tighten the slide rail
locking screws
③.Insert the laser into
the slider
④.Tighten the laser lock
nut
⑤. Connect the 3pin signal from
the switch board and insert the
3pin port of the laser
⑥.2 Auxiliary power supply: It is
recommended that the power adapter
below 12V3A should be plugged into the
auxiliary power supply, and the auxiliary
power supply is not required for 12V 3A
(inclusive) and above. Of course, this may
be different depending on the specific
model, as long as the laser power can
reach the maximum output power, there
is no need for an external auxiliary power
supply
⑥.1. Insert 3PIN signal
output terminal
⑥.3. According to the number of input
signals, insert the corresponding input
terminals (see Part 4 for details)
⑦.Fix the 3PIN signal
output line with a cable
tie
④
⑤
P a r t 5 : i n s t a l l a t i o n s t e p s
⑥

Laser Light can damage the human eyes and skin. Do not expose the eye or skin to laser light directly. This Laser product
has an optical lens and emits a collimated laser beam. The light from this product, both direct and reflected, is very harmful
as it can propagate a long distance while maintaining high optical density. When handling the product, wear appropriate
safety glasses (OD5+) to protect eyes from laser light including reflected and stray light. The reflected and stray light
spilling into an unintended area should be attenuated and/or absorbed.
P a r t 6 : C a u t i o n s
L A S E R B E A M C A N D A M A G E E Y E S

P a r t 7 : M a i n t e n a n c e i n s t r u c t i o n s a n d w a r n i n g
T his p ro du ct u se s a hi gh ly i nt e g r at ed d es ig n an d re qu ir es n o ma i nt en an ce . Ho we ve r, i f th e
la se r sy st em i ns ta ll ed w it h t hi s pr od uc t ne ed s to b e re pa ir ed o r tu ne d, p le ase :
1. U np lu g th e po we r co rd o n th e la se r, so t ha t th e la se r is i n a s ta te o f po we r fa il ur e;
2. I f yo u ne ed l as er a s si st an ce f or t un in g, p le ase :
1. A ll p re se nt p er so nn el w ea r pr ot ec ti ve g las se s, OD 5+ p ro te ct iv e gl as s i s ne ed ed ;
2. M ak e su re t he re a re n o fl amm ab le o r ex pl os iv e ma te ri al s ar o un d;
3. T he p os it io n an d di re ct io n of t he l ase r ar e fi xe d to e ns ur e th at t he l ase r wi ll n ot
ac c i de nt al ly m ov e an d sh in e on p eo pl e, a n im al s, f la mm ab le , ex p lo si ve a nd o th er
d a ng er ou s an d va lu ab le o bj ec ts d uri ng d eb ug gi ng .
4. D on 't l oo k at l as er s
5. D o no t sh in e th e la se r on t he m ir r o r o b j ec t , l es t th e la se r re fl ec ti on c au se ac c id e nt al
i n j u r y .

Customer Service:
Ø For detailed warranty policy,please visit our official
website at: www.atomstack3d.com
Ø For Laser Engraver technical support and
service,please email
:
Scan the code to enter the engraving machine
discussion group
Scanner APPLICATION:
QR code reader
/ Barcode scanner
or any APP with scanner
This manual suits for next models
1
Table of contents
Other ATOMSTACK Measuring Instrument manuals