TH134 400-134-000-A 1/27/05 2/4
ᎬᎿᎿᎰᎹᎿᎴᎺᎹ Ꭵᎋ ᎭᎰᎱᎺᎽᎰᎋ ᎻᎽᎺᎮᎰᎰᎯᎴᎹᎲᎋ ᏂᎴᎿᎳᎋ ᎿᎳᎰᎋ ᎴᎹᎾᎿᎬᎷᎷᎬ᎘
ᎿᎴ ᎺᎹ ᎗ᎋ ᎮᏀ Ꮏᎋ ᎻᎺᏂᎰᎽᎋ ᎿᎺᎋ ᎿᎳ Ꮀᎋ Ꮃ ᎰᎬᎿᎴ Ꮉ Ꮂᎋ ᎾᏄᎾᎿᎰᎸ ᎋ ᎿᎺᎋ ᎬᏁᎺᎴ Ꭿ
ᎬᎹᏄᎋ ᎽᎴᎾᎶᎋ ᎺᎱᎋ ᎰᎷᎰᎮᎿᎽᎴᎮᎋ ᎾᎳᎺᎮᎶ᎙
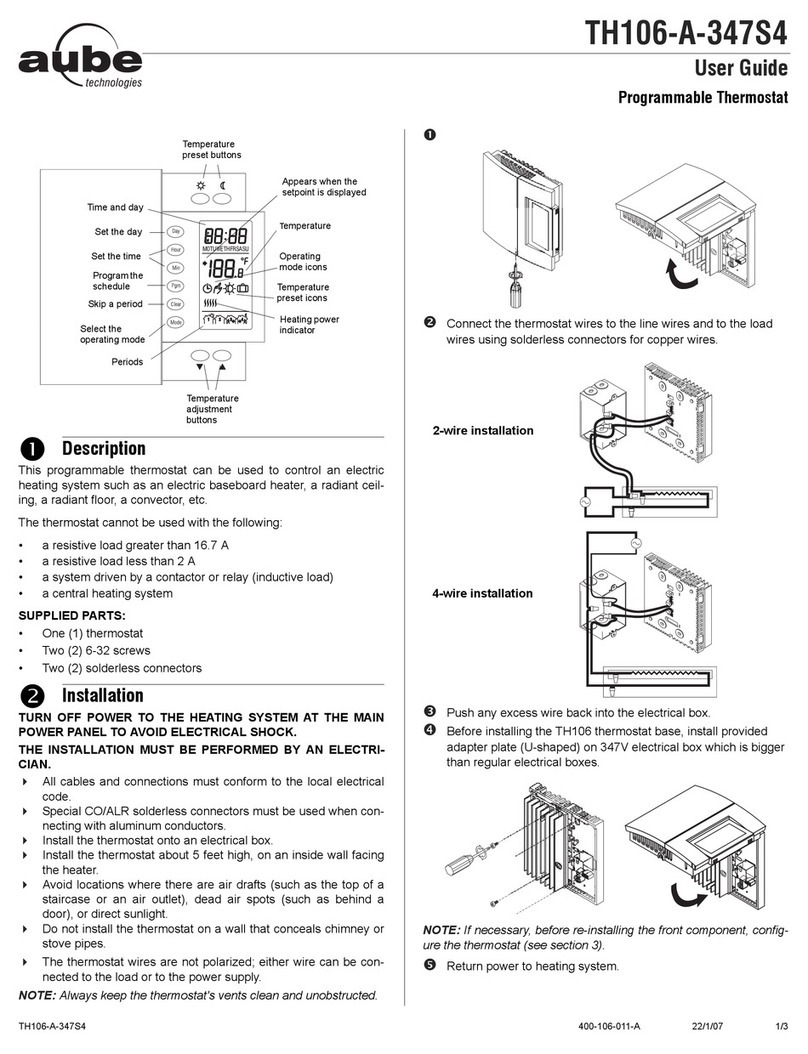
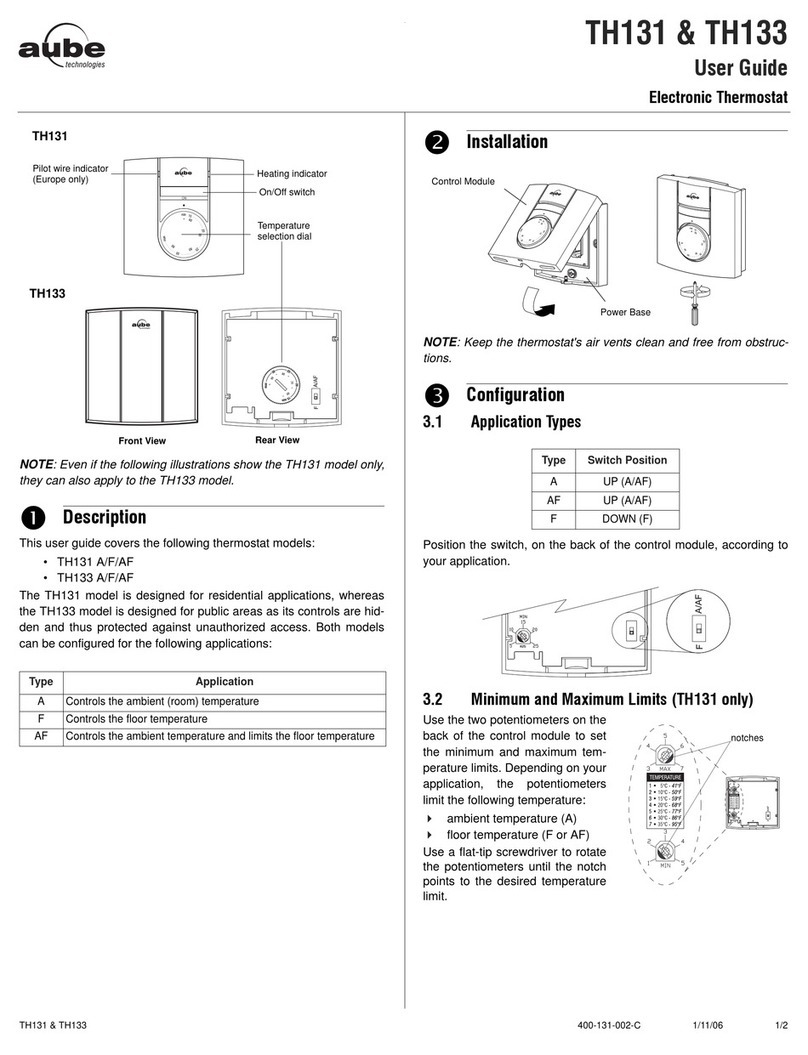
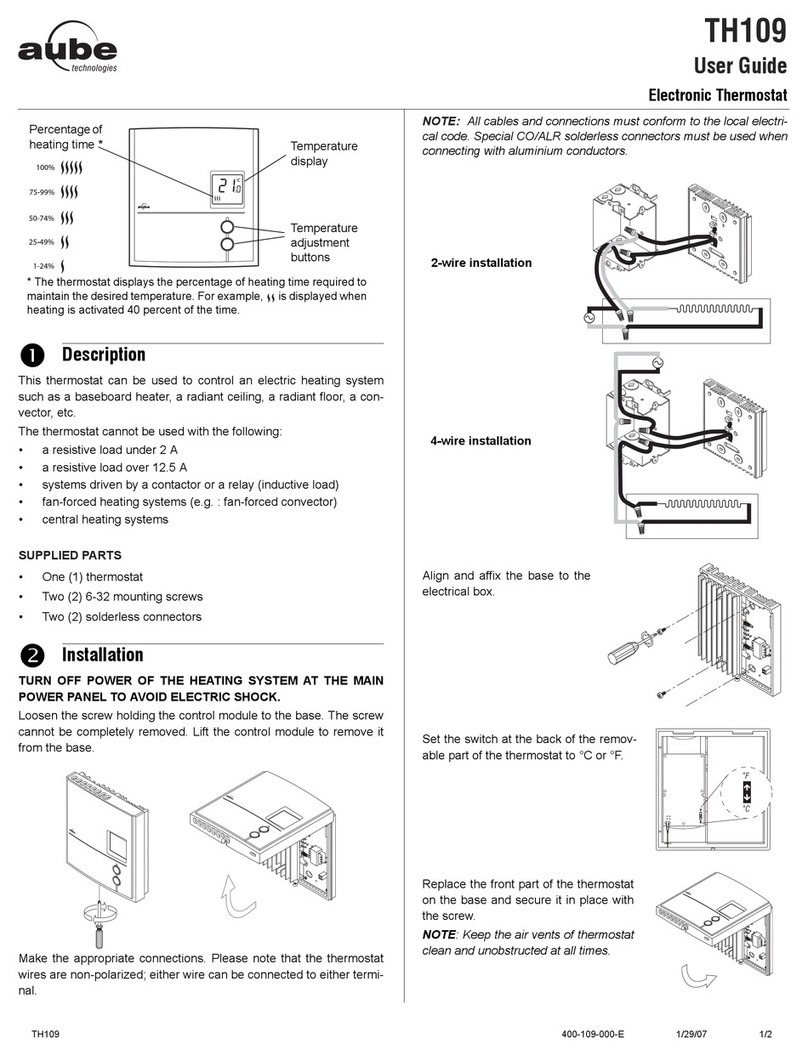
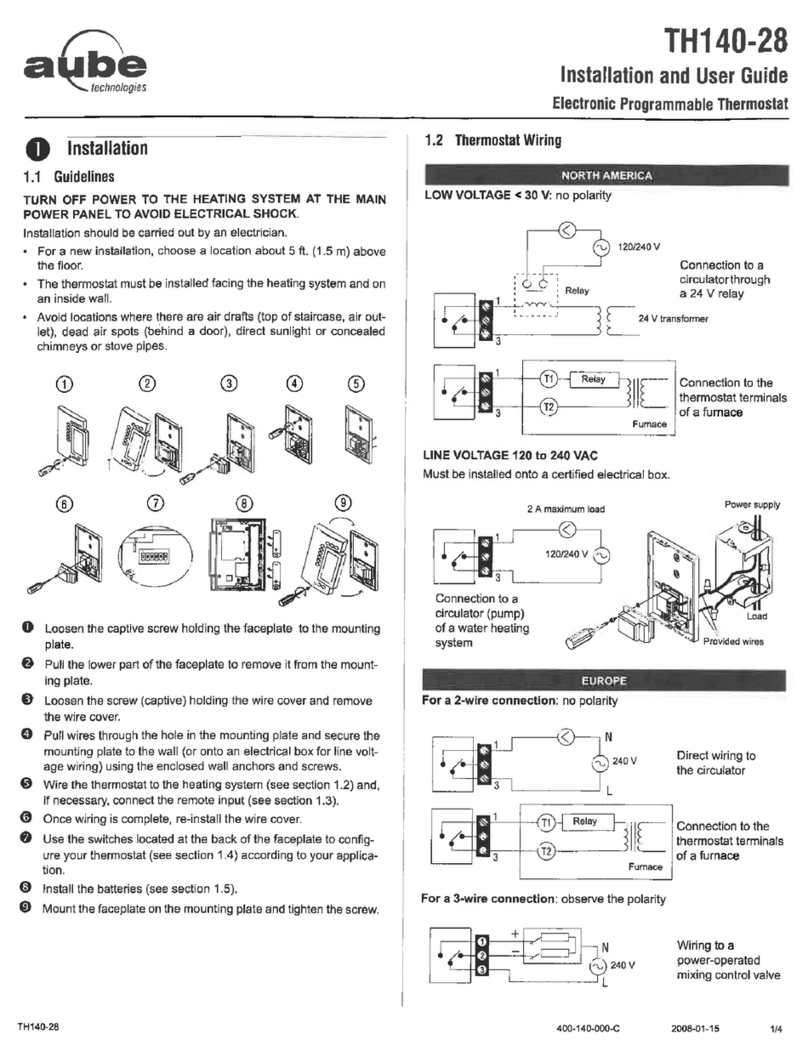
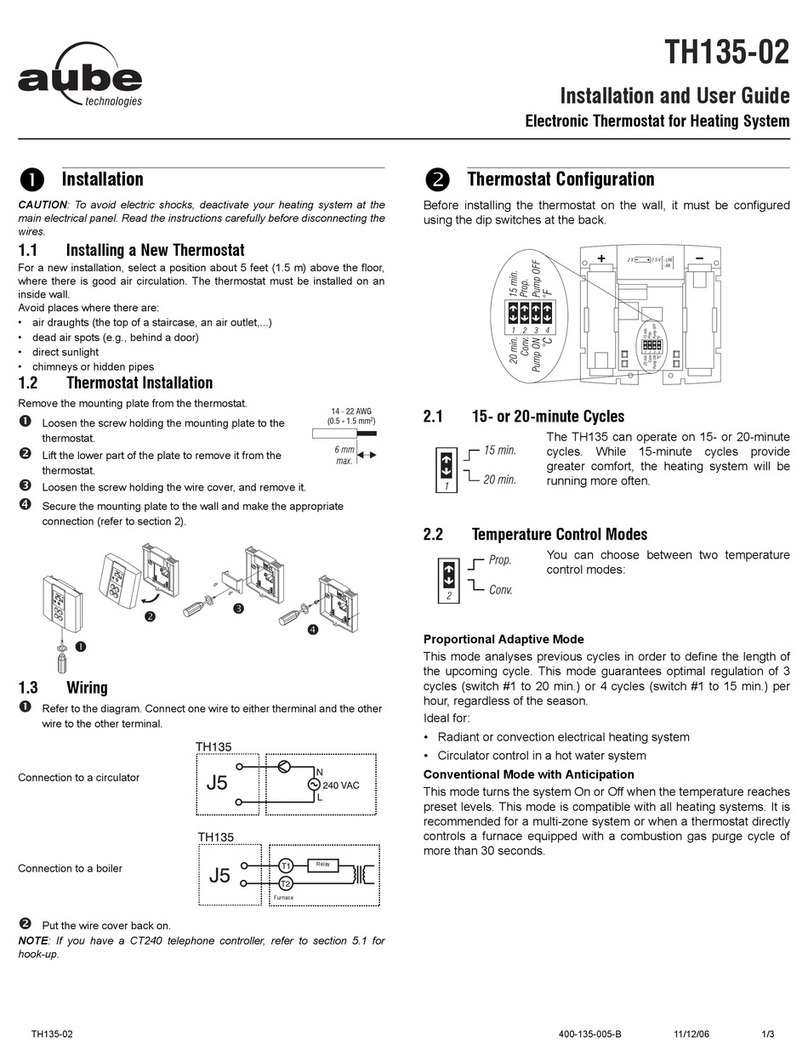
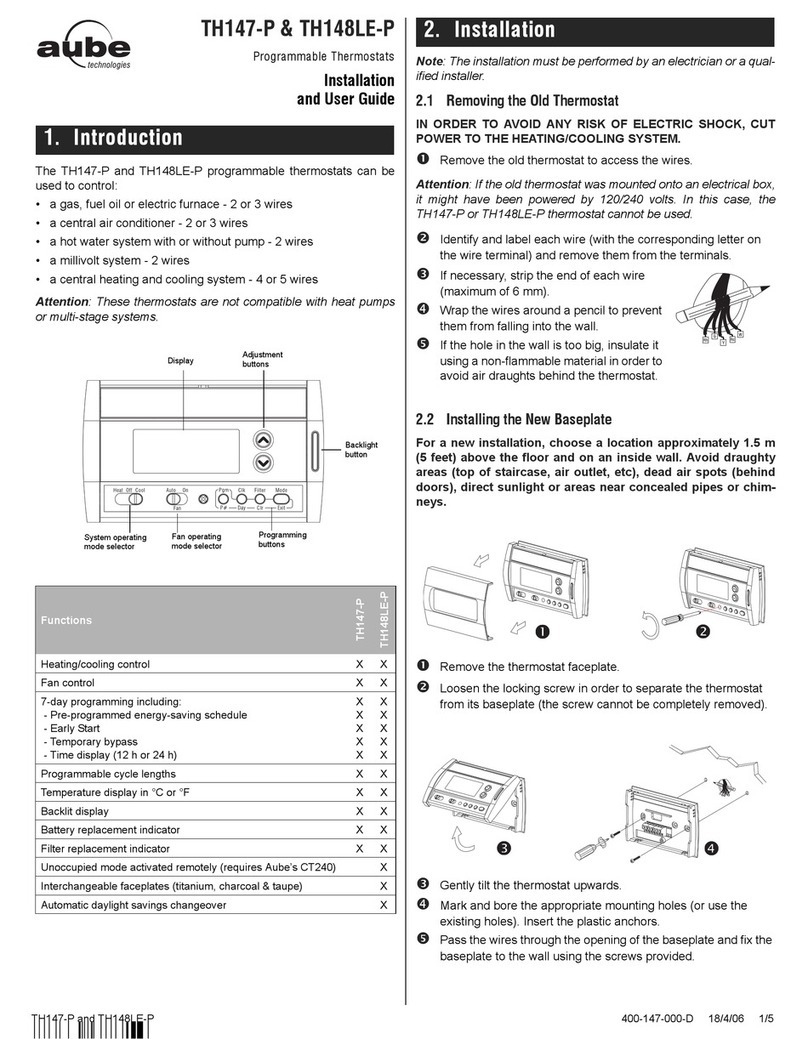
The installation must be performed by an electrician. The program-
mer must be installed on an electrical box.
5HPRYH WKH IDFHSODWH
nLoosen the locking screw (the
screw is captive and cannot be
completely removed).
oPull and lift the bottom of the
faceplate to remove it from its
mounting plate.
&RQQHFW WKH SURJUDPPHU
Connect power to terminals L (line) and N
(neutral).
Connect the pilot wire inputs of the thermo-
stats to terminals FP1, FP2 and FP3.
ឡែះី ឍ
The terminals accept wire thick-
nesses between 0,32 and 2,1 mm2.
&RQQHFW WKH UHPRWH LQSXW RSWLRQDO
᎙ ᎔ᎋ ᎮᎿ ᎋ ᏟᏐᏗᏐᏛᏓᏚᏙᏐᎋ ᏎᏚᏙᏟᏝᏚᏗᏗᏐᏝ
Connect terminals 2 and 1 of the CT240 to terminals L and TEL of
the programmer respectively.
᎙ ᎋ ᎮᎿ ᎋ ᏟᏐᏗᏐᏛᏓᏚᏙᏐᎋᏎᏚᏙᏟᏝᏚᏗᏗᏐᏝ
Connect the terminals of one of the outputs of CT241 to terminals L
and TEL of the programmer .
᎙ ᎔ᎋ ᎳᏚᏘᏐᎋ ᏌᏠᏟᏚᏘᏌᏟᏔᏚᏙᎋ ᏞᏤᏞᏟᏐᏘ
Connect the normally-open relay of the home automation system
terminals L and TEL of the programmer.
᎙᎔ᎋ ᎰᏙᏐᏝᏒᏤᎋ ᏘᏌᏙᏌᏒᏐᏝ
Connect the pilot wire output of the energy manager to the TEL
input of the programmer.
&RPSOHWH WKH LQVWDOODWLRQ
nFix the mounting plate to the wall.
oInstall the faceplate on the mounting plate and lock them
together using the locking screw.
$SSO\ SRZHU WR WKH SURJUDPPHU
During power-up, the TH134 perform a series of test for approxi-
mately 5 seconds. Afterwards, the programmer displays the follow-
ing:
7LPHDQ D\VHWWLQJ
nPress . The hours display flashes.
oSet the hours using the buttons.
pPress . The minutes display flashes.
qSet the minutes using the buttons.
rPress . The day display flashes.
sSet the day using the buttons.
tPress to exit the time and day settings
ឡែះី ឍ
.If the “setback” and “off’ orders received by a heating unit
are reversed, reverse the “Ph” and the “N” wires on the heating unit.
0DQXDOPR H
Transmits the order selected via one of the
order buttons. To use this mode:
nSelect the zone by pressing the Zone but-
ton. (Press for 3 seconds to select all 3
zones.)
oSelect the manual (Man) mode by press-
ing the Man/Auto button.
pSelect the order by pressing the
appropriate order button.
$XWRPDWLF PR H
The orders are sent to each zone according to
the schedule programmed for that zone. To
use this mode:
nSelect the zone by pressing the Zone but-
ton. (Press for 3 seconds to select all 3
zones.)
oSelect the Auto mode by pressing the
Man/Auto button.
ᎭᏤᏛᏌᏞᏞ
You can bypass the automatic mode for 2 hours. At the end of the 2
hours, the programmer returns to the automatic mode.
nSelect the zone using the Zone button. (Press for
3 seconds to select all 3 zones.)
oPress the desired order button.
The auto mode icon flashes during the bypass.
InstallationInstallationInstallationInstallationInstallation
InstallationInstallation
Installation
InstallationInstallation
Installation
InstallationInstallation Power-upPower-upPower-upPower-upPower-up
Power-upPower-up
Power-up
Power-upPower-up
Power-up
Power-upPower-up
OperationOperationOperationOperationOperation
OperationOperation
Operation
OperationOperation
Operation
OperationOperation
Flashes to indicate
that the time and day
must be set.
The programmer is
in manual mode.
All three zones
are in comfort
mode.
Zone 1 is selected.
