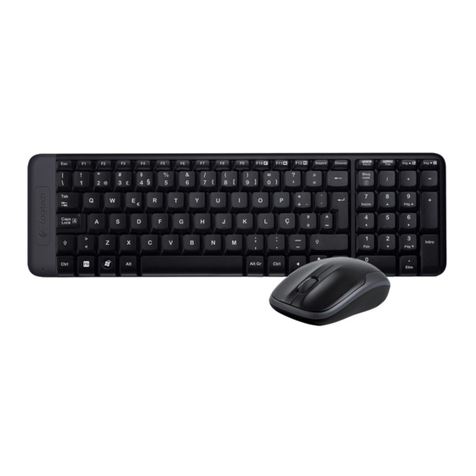
audeeo AOWLMK1 User manual

ITEM: AOWLMK1
QUICK START + INSTRUCTION GUIDE

Welcome to audeeo
Thank you for choosing this product. We are striving
for excellence in both design & comfot. But we could
not do this without you. Let's take accessories to new
heights together.
PARAMOUNT
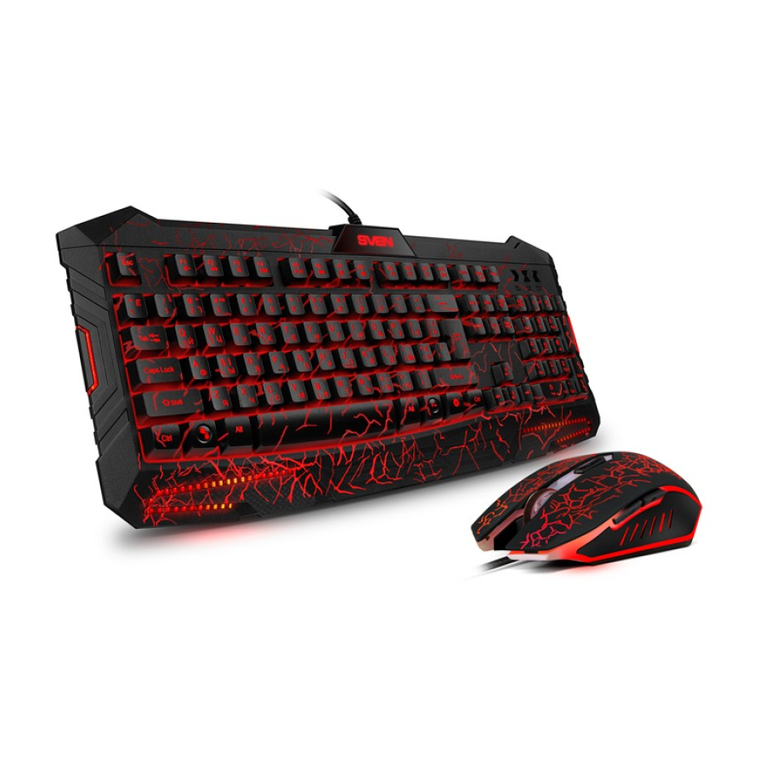
WIRELESS COMBO FULL
KEYBOARD + MOUSE

KEYBOARD & MOUSE COMBO - PARAMOUNT
1Welcome
1.1 What's In The Box
2Your Wireless Keyboard & Mouse
2.1 Getting To Know Your Keyboard
2.2 Getting To Know Your Mouse
3All Features & Contents
4Quick Start Guide
4.1 USB Receiver Installation
4.2 Mouse & Keyboard Setup
5Specifications
6Troubleshooting & Customer Support
7Care & Warnings
8Warranty & Legal
1Welcome
1.1 What's In The Box
Guide Booklet
Wireless Keyboard
Wireless Mouse USB Receiver
Batteries

A
B
B
B
C
C
C
A
A
KEYBOARD & MOUSE COMBO - PARAMOUNT
KEYBOARD & MOUSE COMBO - PARAMOUNT
2Your Wireless Keyboard & Mouse
2.1 Getting To Know Your Keyboard
Number Pad
Application keyLED Indicator Lights
located on the far right of the
keyboard the Num Lock key needs
to be ON for it to function
the same function as right
mouse button
show you if your keyboard has low
battery and if your Caps Lock, &
Num Lock are ON or OFF
2Your Wireless Keyboard & Mouse
2.2 Getting To Know Your Mouse
Left Mouse Button
Scroll Wheel
Right Mouse Button
standard left click to select
applications & programs
roll the scroll wheel to move
up or down. It also doubles
as a third button
standard right click to select
pop-up menu of common
commands
A B C

DESKTOPS
LAPTOPS
ALL-IN-ONES
TABLET PCS
4Quick Start Guide
4.1 USB Receiver Installation
Locate a free USB port on your device. The USB Receiver
is located in the bottom of the mouse next to the battery
compartment. Remove the USB Receiver from the bottom of
the mouse and Plug the USB Receiver into an empty USB
port.
KEYBOARD & MOUSE COMBO - PARAMOUNT
KEYBOARD & MOUSE COMBO - PARAMOUNT
3All Features & Contents
COMFORTABLE ADVANCED
WHEEL SCROLLING
FULL-SIZE KEYBOARD
LONG / EXTEND-
ED BATTERY LIFE
PLUG & PLAY
USB RECEIVER
ACCURATE
fit to contour you perfectly for
long precise scroll wheel is
faster and quieter
familiar feel with all keys
+ number pad
advanced tech to get
more life out of batteries
connects both the
keyboard and mouse
fast & accurate react for
precise input
advanced 2.4 GHz wireless for powerful connectivity
with virtually no delays or dropouts
CONTENTS:
• Keyboard
• Mouse
• USB Receiver
• Quick Start &
Instruction Guide
• 2 x AAA batteries
• 1 x AA battery

30 FT (10M)
KEYBOARD & MOUSE COMBO - PARAMOUNT
KEYBOARD & MOUSE COMBO - PARAMOUNT
Install the included batteries into the battery
compartments located on the bottom of your keyboard and
mouse. Make sure the polarity corresponds to the symbols
in the battery compartment. Place the keyboard and
mouse where you intend to use them within 30 feet (10m) of
the receiver.
The mouse will automatically turn ON when the left, right, or
scroll button is pressed, and immediately connect to the USB
receiver. Click any key on the keyboard to connect with the
USB receiver. If your cursor on screen is not moving or
keyboard is unresponsive, unplug and re-plug the USB
receiver.
NOTE: The keyboard will go to sleep after 4s
of no use. Themouse will go into a shallow
sleep after 4s of no use. (RED light will blink
twice) The mouse will go into a deep sleep
after 10mins of no use. (RED light will be o)
The mouse will wake up when left right, or
scroll button is pressed. The keyboard will
wake up with a click of any key on the keyboard.
4Quick Start Guide
4.2 Mouse & Keyboard Setup
4Quick Start Guide
4.2 Mouse & Keyboard Setup
11
2
2
21
2
3
3

KEYBOARD & MOUSE COMBO - PARAMOUNT
KEYBOARD & MOUSE COMBO - PARAMOUNT
Troubleshooting:
NO CONNECTION BETWEEN
THE MOUSE/KEYBOARD AND
THE RECEIVER
• Check the Nano Receiver and
pull and plug again.
• Try inserting the Nano Receiv-
er into another USB port in your
computer.
• You may need to change
the batteries in your mouse &
keyboard
6Troubleshooting & Customer Support
5Specifications
Specifications: Keyboard & Mouse
WORKING DISTANCE 10m (30+ft)
OPERATING FREQUENCY
RANGE
2.4GHz
KEY TYPE Full Keyboard
WORKING VOLTAGE 3V (Keyboard), 1.5V(Mouse)
WORKING CURRENT 3mA (Keyboard), 30mA
(Mouse)
NUMBER OF MULTIMEDIA KEYS 5Keys
NUMBER OF STANDARD KEYS 103 keys
SENSOR Laser-grade optical sensor
SCROLL WHEEL Yes
DPI 1000

KEYBOARD & MOUSE COMBO - PARAMOUNT
KEYBOARD & MOUSE COMBO - PARAMOUNT
8Warranty & Legal
The condition of this warranty and our responsibilities under this warranty are as follows:
Supplier’s warranty is non-transferable. This warranty is limited to the original purchaser only.
•You must be able to prove the date of original purchase of the unit with a dated receipt.
• The warranty is not applicable if the product has been subject to physical abuse, improper installa-
tion, modification or repair by unauthorized third party.
• The responsibility of supplier’s products shall be limited to the repair or replacement of the product
as its sole discretion.
• Specifically exempt from any warranty are limited-life consumable components subject to normal
wear and tear such as batteries, decorates and other accessories.
• A supplier will not take any responsibility if the failure of the unit has resulted from accident, abuse,
misuse, or any unauthorized repair, modification or disassemble.
• Modification and repair of the unit should be done by authorized and qualified service personnel,
Center or returned to the manufacturer.
• This warranty give you specific legal rights, and you may also have other rights which vary
under local laws.
Guidelines for protection of the environment
This appliance should not be put into the domestic garbage at the end of its useful
life, but must be disposed of at a central point for recycling of electric and electronic
domestic appliances.
This symbol on appliance, instruction manual and packaging puts your attention to this
important issue. The materials used in this appliance can be recycled. By recycling used
domestic appliances you contribute an important push to the protection of our environ-
ment. Ask your local authorities for information regarding the point of recollection.
The information contained herein is subject to change without notice.
Microsoft and Windows are trademarks or registered tradesmarks of Microsoft Corpo-
ration in the United States and/or other countries.
Mac® is a trademark of Apple Inc., registered in the U.S. and other countries.
Chrome OS™ is a trademark of Google LLC.
All other trademarks are the property of their respective owners.
7Care & Warnings
Continuous use of any keyboard may cause injury to hands, wrists,
arms, neck or back. If you feel ache, numbness or weakness in these
areas, consult a qualified health professional.
TO REDUCE THE RISK OF SUCH INJURIES FOLLOW
THESE PRECAUTIONS:
• Position Yourself: Choose a chair that provides support for your
lower back. Adjust your work surface height and your chair to assume a
comfortable and natural body posture.
• Go Lightly: Type with a light touch, keeping your hands and fingers
relaxed. Avoid resting your palms or your wrists on any type of surface
while typing. Don't rest on edges, such as the edge of your desk.
• Take Breaks: Take frequent short breaks. Get up and walk around at
least a couple of times every hour. Adjust your chair so the seat does
not press in to the back of your knees.
WARNING:
Batteries may leak harmful liquids or ignitable materials or explode
causing injury and product damage.
• Do not mix old and new or other battery types.
• Replace all batteries at the same time.
• Replace fully discharged batteries immediately.

Manufactured & Distributed by:
iHip Europe Ltd., Chartwell House,
292-294 Hale Lane, London, UK, HA8 8NP
audeeo™ is a registered trademark of iHip Europe Ltd.
MADE IN CHINA
Table of contents
