Audia Flight FL CD THREE S User manual
FL CD THREE S Player
User manual
UK rel. 1.0

Dear Customer
Audia Flight congratulates you and thanks you for choosing one of its products to make your sound
system.
The FL CD THREE S CD layer and DAC has been patiently designed with the intention of being
one of the best player and D/A converter available on the today's market in its price range. This
ambition has of course requisitioned all the know-how of the brand and demanded fidelity to the
principles and the application of the most developped techniques in digital to analog conversion
concept. Its prodution does not suffer any compromise, was made with an extreme attention and
care and the use of the best available components.
You can be assured of having a device that will serve you and give you many years of musical
enjoyment.
This manual intented to advise you and help you get your player and DAC the best possible.
Safety instructions
Before you start using your FL CD THREE S player and DAC, please read the operating
instructions and safety precautions outlined below :
1) Always make sure the unit is unplugged before connecting or disconnecting any other
device of the audio system in case of intervention on these devices.
2) Your device comes with a three-wire powercord (AC voltage of 100-115 V or 230-245 V).
To prevent electrical shock, all three drivers must be used. If your outlet does not accept this
type plug fitted to the cord, you need an adapter and if so, make sure it meets the required
safety standards and above all it establishes a connection to earth. If in doubt about the
integrity of your electrical system, call the assistance of a qualified professional.
3) The use of an extension cord sector is not recommanded for this product. If an extension is
required, ensure its compliance with safety rules and its ability to withstand the intensity of
current required to power device.
4) Never use flammable or combustible chemical for cleaning.
5) Do not attempt to open the device, in under no circumstances use it without removing all the
packing materials or elements covering the unit.
6) This product contains a class 1 laser diode. To assure continued safety, do not remove any
covers or attempt to gain access inside of the product to avoid any exposure of the beam.
7) Do not spill or spary any liquid directly on the device.
8) Never push objects through the openings or the ventilation slots in this unit.
9) Never remove a fuse.
10) Never replace a fuse with one of size or type than those specified.
11) Never attempt to repair the unit yourself; in case of problems, contact your dealer or your
distributor.
12) Never expose the device to too high or too low temperatures than normal.
13) Do not leave electrical appliances within the reach of children.
Transport and unpacking
lease, do not return the package, following the direction of reading the entries. Before opening the
package, bring it near the planned installation location for the unit. The device is surrrounded by a
cover and a second plastic enveloppe.
The package contains the FL CD THREE S player and DAC, a detailed instruction manual, a power
cord and a remote control with screwdrivers and batteries.
We recommend you to keep the packaging for possible transport. In the case where the unit is
packed again, be sure to try reseating all internal components. Audia Flight not be held responsible
for any incident or damage resulting from poor packaging.
Location
Choose a location that can support the weight of your device. Its operating principle of dissipating
heat allow a space of 10 cm around the player so that its ventilation could happen naturally. Move it
away from sources of heat or vibration ; do not expose it directly to sunlight. Do not locate the unit
close to electroluminescent light sources since they can cause troubles with the remote control
working. For your convenience when loading a disc and playing the display, place your player at a
sufficient height from the floor or at viewing height.
Make sure it is close to the preamplifier or the integrated amplifier so that the lenght of the cables
connecting that is short as possible. In the case the integrated amplifier or preamplifier is not close
with the FLCD3S, it is preferable to use balanced interconnection cables between them to avoid any
noise.
Communication betweeen udia and other brands
On the rear of the FLCD3S, you will find an outlet «Trigger» format 3.5 mm jack.
This connection allows devices from differents manufacturers that have adopted this mode of
communication and equipped with the necessary taken to control its implementation on or standby
simultaneously.
Output connections
On the rear of the player, you have two outputs (OUT UT) : one symmetrical format, XLR, and a
format of an asymmetric pair of RCA jacks.
Using a pair of cables terminated with XLR connectors for balanced transmission or by praying for
RCA unbalanced use, connect the left and right channel outputs of FLCD3S respectively to left and
right channels of the input of a stereo amplifier. Several outputs can be used simultaneously.
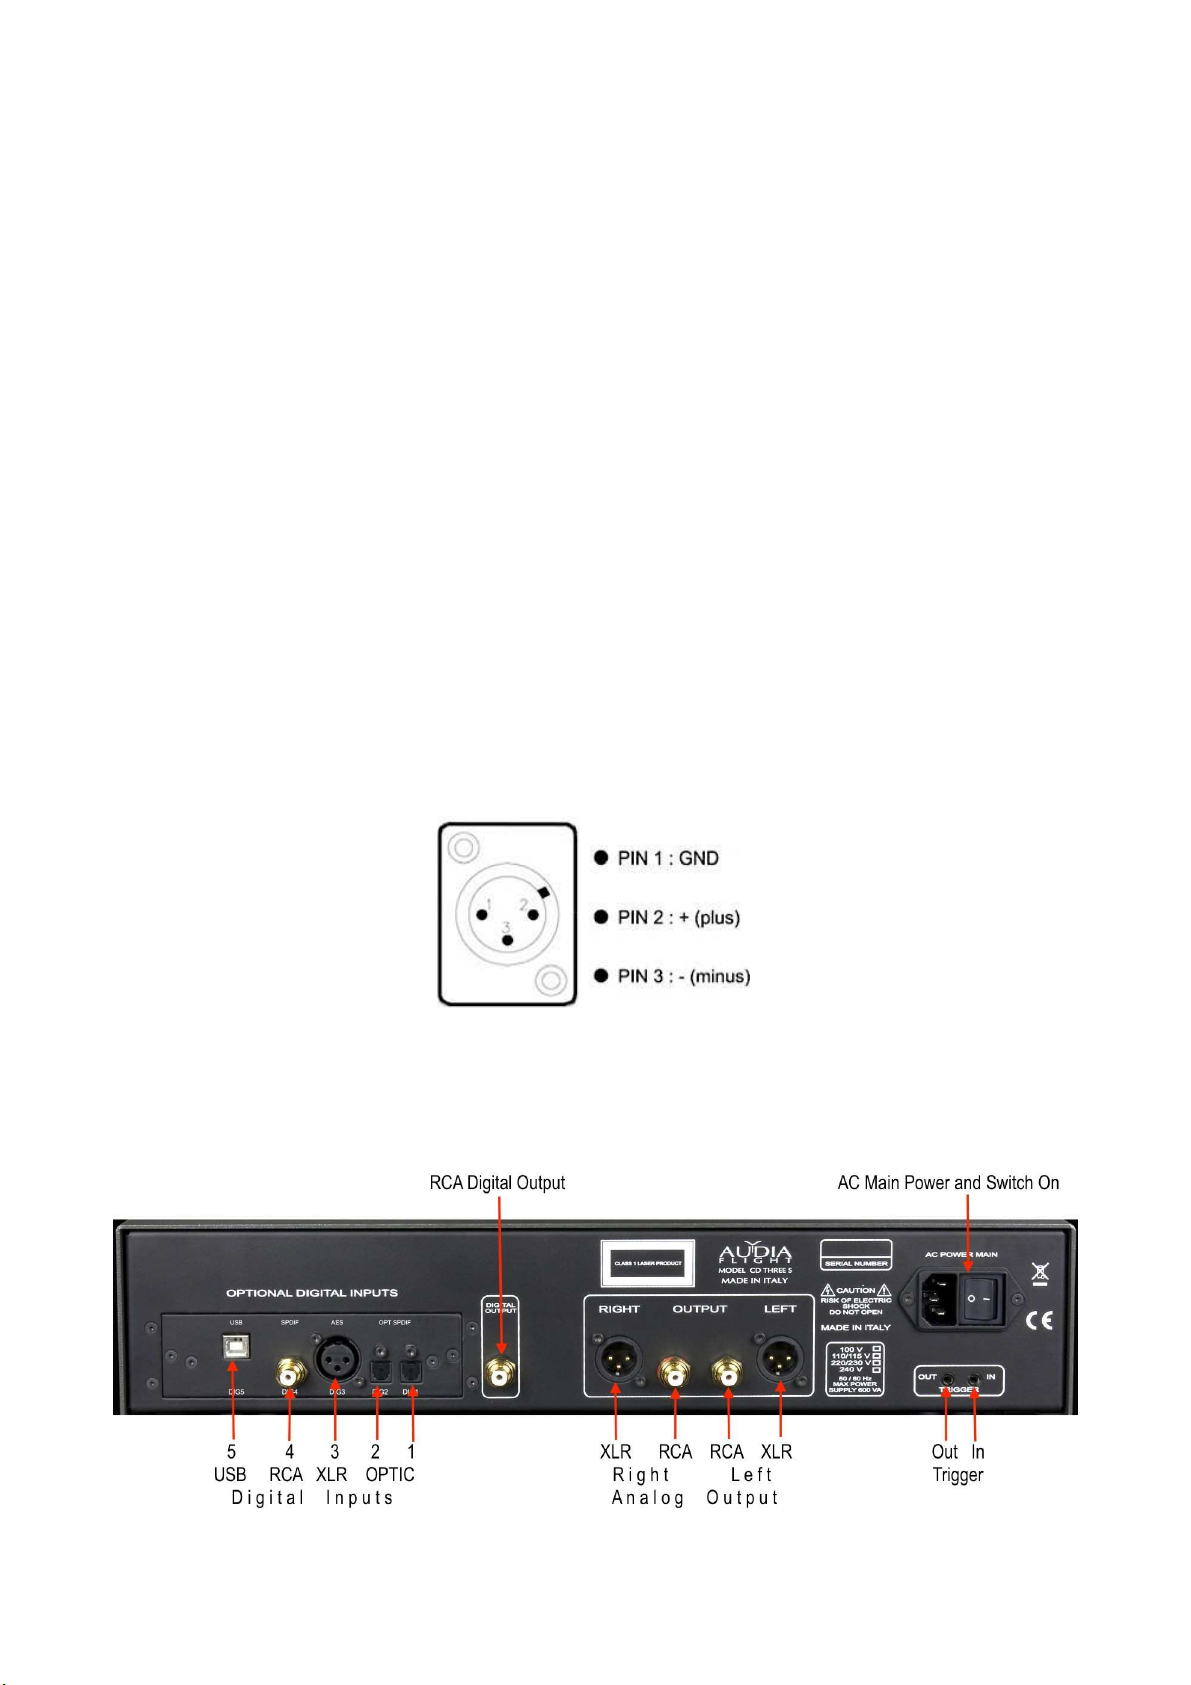
The use of interconnect cables of the highest quality is strongly recommended. The polarity of the
pin XLR connectors output is shown on the diagram below:
Your player is also equipped with a S/ DIF coaxial digital output on an RCA socket allowing the
use of an external converter with a suitable cable (75 Ω) not supplied. The available signal is in
16bit/44.1kHz.

Inputs connection
lease, make sure that the unit is turned off or unplugged from the main power supply before
making connections. If it is equipped with the rear options panel, your player gives access ti its
internal converter to 5 digital inputs.
Input Name Input type Specifications
DIGIT 1 Optic Toslink
DIGIT 2 Optic Toslink
DIGIT 3 AES/EBU Balanced, XLR plug, 110 Ω
DIGIT 4 S/ DIF coaxil Unbalanced, RCA plug, 75 Ω
DIGIT 5 USB USB-A/B cable
When the player is swichted on, it sets in the CD layer mode. To select one of these digital inputs,
the unit set in stop CD layer mode, simply press the INPUT button on the front panel one or more
times, or the IN button on the remote control and then on the + button to increase the order number
or the – button te decrease the order number of the input.
The display shows the name of the input on the first line and the type of the digital signal ( CM,
DSD...) and its sampling frequency on the second line.
C Mains connection and CD playback
lease make sure that the mains voltage is right for which the unit is designed and printed on the
rear panel. lug the power cord supplied on the rear socket of your FLCD3S and then switch the
mains switch of the socket in the « I » position The LED on the front panel lights in amber colour
and indicates the standby state. When pressing the «ON» button of the front panel or the «ST-BY»
button on the remote control, the LED lights in blue colour, the player will be ready for operating
and will display :

The player will try to read the TOC of the CD ….. ….and will inform if there is no disc:
When pressing again the «ON» key of the front panel or the «ST-BY» key on the remote control,
the LED light again in amber colour and the unit return in standby state indicated by :
Playing a CD
To play a CD, press the O EN button on the front panel, place the CD with the label side up on the
tray and press again the O EN to close the drawer. The reading of the TOC of the CD will appear
on the display : the total time (hour ; minutes ; seconds) in the first line and the total number of
tracks on the second line player
You can now listen to the CD by pressing on the PLAY key on the front panel or on the remote
control. The remote control gives the acess to any track of the CD by pressing its order number.
The display shows the elapsed time of the track playing in the first line and the number of this track
in the second line.
The dispaly also shows some function that concerns the CD playback :

Remote control
You will find the remote control in the accessories box with a screwdriver and the battery. The
battery is lithium button 3V, CR2032 type. To place the battery, remove the bottom of the case by
loosening the 3 screws with the provided tool and insert the battery in its compartiment while
observing the correct polarity : + pole upside.
You will find on the remote control all the functions on the front panel and several additional
functions ; some of them will be effective in a next update.
ST-BY (= ON) : to turn the unit in ON or in STANDBY mode
Direct trac access eypad : to access to any track of the CD after starting playback
BACK and FORW : to CD playback in fast reverse ou fast forward mode; the position is indicated
by the elapsed time and/or the track's number display
IN (= INPUT) and + or – keys : to select one of the digital inputs displayed on the first line in front
of ... < INPUT
SET and + or – keys : to navigate in the SET menu (see below)
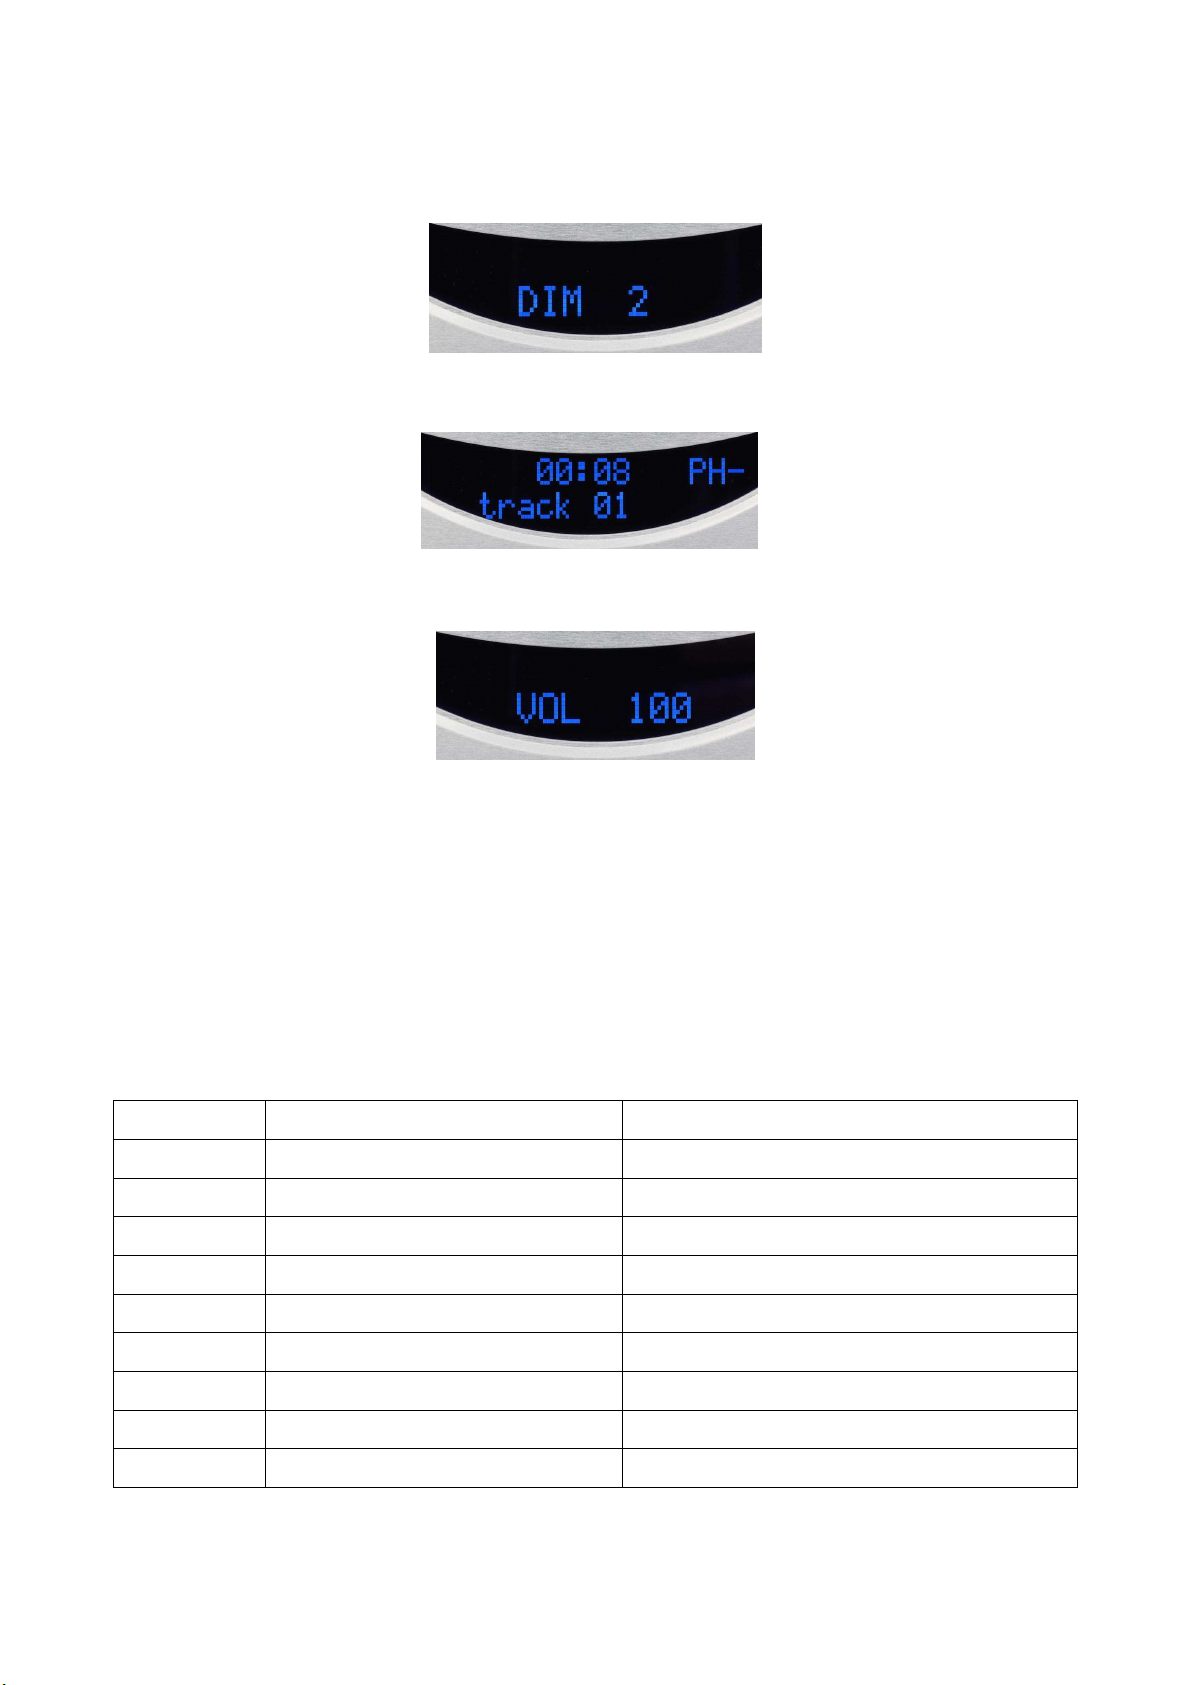
DIM (Dimmer) and + or – : to select one of the 3 screen brightness levels (« 2 » is maximum and
« 0 » is minimum, the screen is then off )
PH : press on this key to revese the phase of signal ( H–); a second press restores the phase ( H)
+ / – : if the possibility is left in the SET configuration (see below) these keys allow to directly
increase (+) or decrease (–) the output level in the digital domain on a scale from 0 (minimum) to
100 (maximum).
SET menu configurations
The configuration of the player and its integrated converter is only available with the remote control
and three of its keys : SET , + and –.
The SET key allows you to access each item, the + key allows you to scroll down the different
modes in the order of the chart below, the – key in the reverse order. The SET key is also used with
+ or – keys to scroll through sub-modes. The choices are indicated by flashing caracters on display
and scrolled through using + or –. Confirmation of the selection is effective after a few seconds
after end of flashing. The heading (or sub-heading) is displayed again to move on another one or
after few seconds the return to the initial screen.
All settings are stored.
Keys actions Display on screen Function
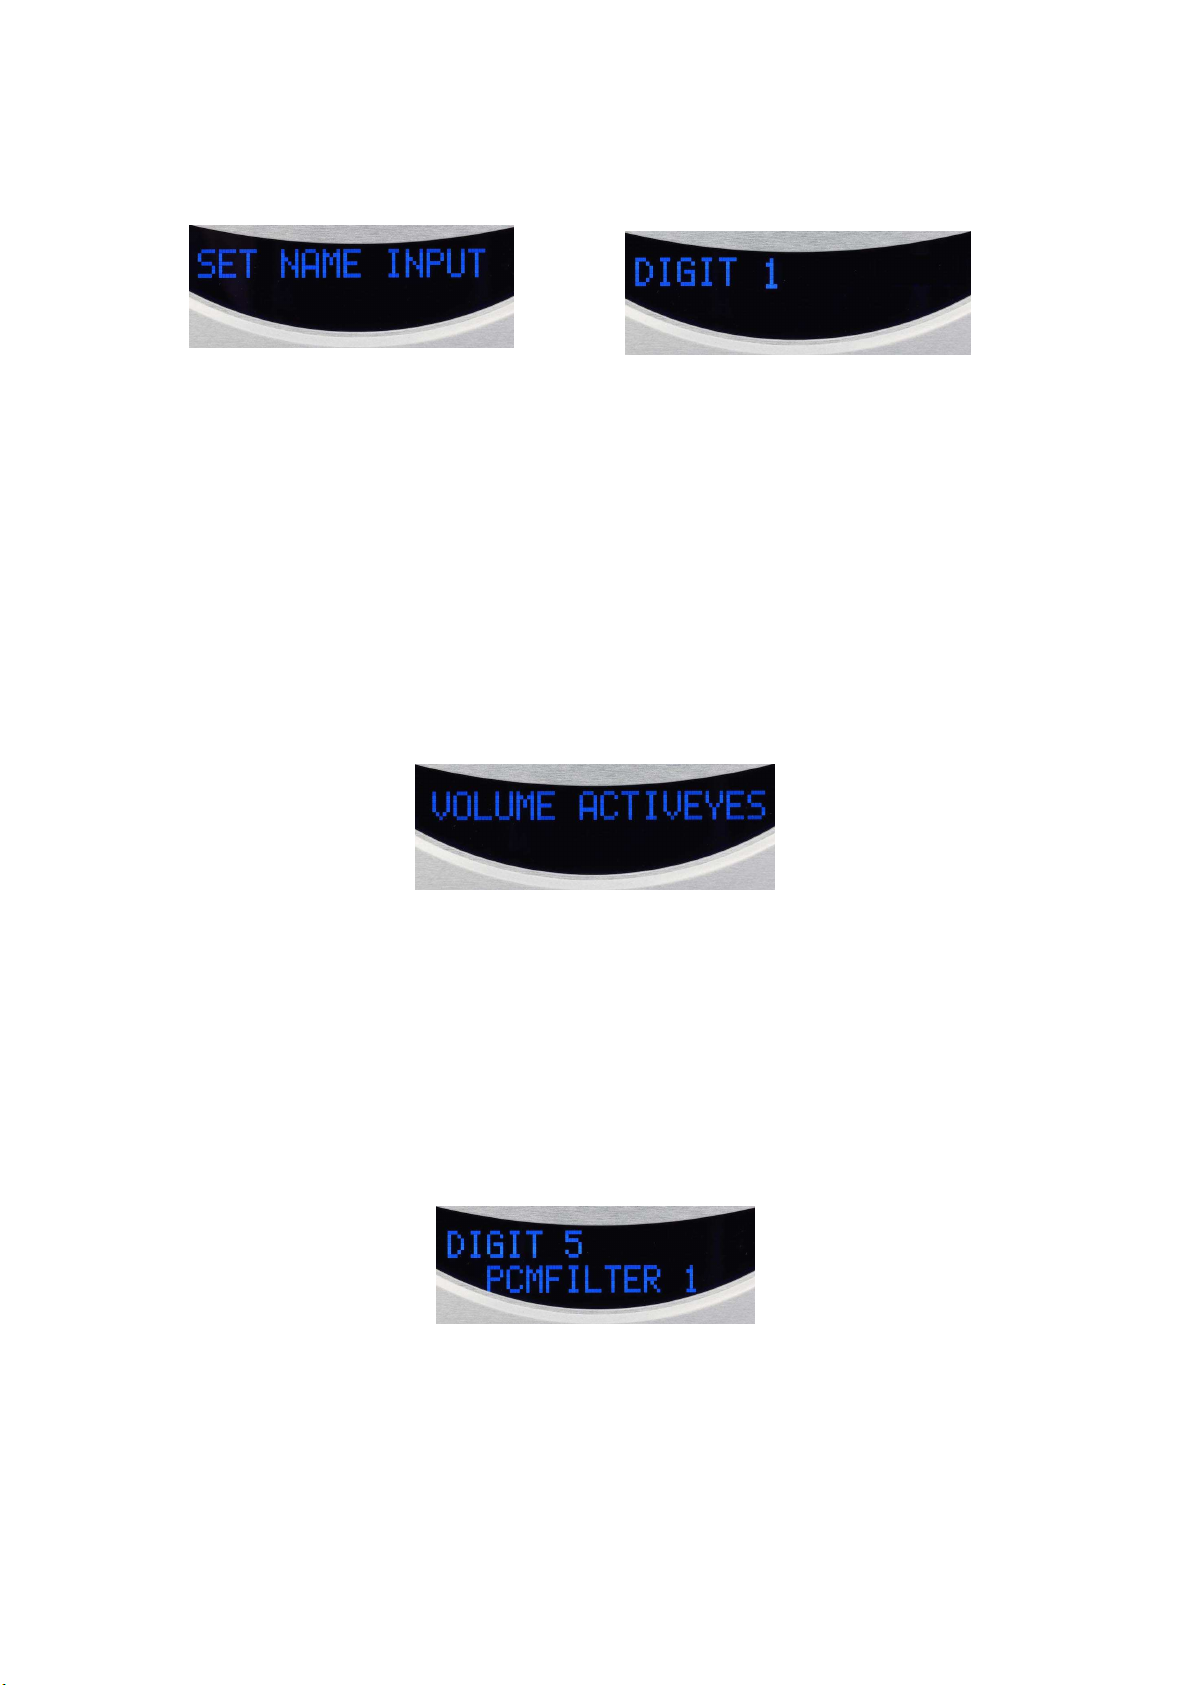
SET SET NAME INPUT Rename digital inputs
1 x (+) SET VOLUME ACTIV Activating, or not, the output level setting
2 x (+) SET PCM FILTER CM digital filter setting
3 x (+) SET DSD FILTER DSD analogic filter setting
4 x (+) SET DSD DIRECT DSD mode on USB input setting
5 x (+) SET SRC BYPASS Sampling rate converter mode, or not
6 x (+) SET DITHER ACTIV CM dithering activation or not
7 x (+) SET LOAD DEFAULT Reset of the configuration
8 x (+) SOFTWARE CD/DAC Software version of the CD/DAC
Mode SET NAME INPUT
By this first function of the menu, you can rename each of the 5 digital inputs, preset from DIGIT 1
to DIGIT 5, on up to 8 characters. CD player mode is named CD LAYER et cannot be changed.
Upon entering this mode by pressing SET key, a digital input is showed. To set this entry press SET
otherwise press + key to select another input or – key to reverse.
The first character will then flash and you can scroll into the list of characters and choose the one
you want by pressing SET key. The next character will flash in wating your choice and validation
by SET key. Once the 8 characters or spaces are selected and validated, the display returns to entry
choice and in lack of instructions, the name will be validated.
By pressing + or – keys you can go to another input and repeat the same operations or after a few
seconds without instructions the dispaly shows the initial screen and the changes are stored.
Each character is selected from a list of 96, including upper and lower letters, numbers, signs and
special characters or space.
Mode SET VOLUME ACTIV
By this function you can activate or disactivate the output level setting.
Upon entering this mode (by pressing SET , + and once more SET keys) the display shows YES
(or NO) blinking at end of line. If you are satisfied with this flashing option, just wait for a few
seconds until the display stops flashing and validation will be effective. Otherwise, press + or –
keys to select the opposite option which will blink. Validation after few seconds without
instructions and back to the original mode screen.
Mode SET PCM FILTER
By this function you can choose the filter which is applied to the digital signal in CM mode
including the one of the CD player. Each one of the 6 filters (FILTER 1 to FILTER 6) have its
roll-off frequency and slope that affect slightly the sound.
Upon entering this mode, the dispaly shows one of the 6 digital sources on the first line and the
filter's number in the second line. By pressing SET you confirm the input displayed, otherwise you
can choose another input by pressing + or – keys. The number of the filter will be flashing waiting
to be confirm by pressing SET key or to be changed by pressing + or – keys. Validation after few
seconds without instructions, the character stops flashing. By pressing + or – keys the same
operation can be done to another input. Otherwise, in lack of instructions the display returns in
original state and the setting is validated and stored.
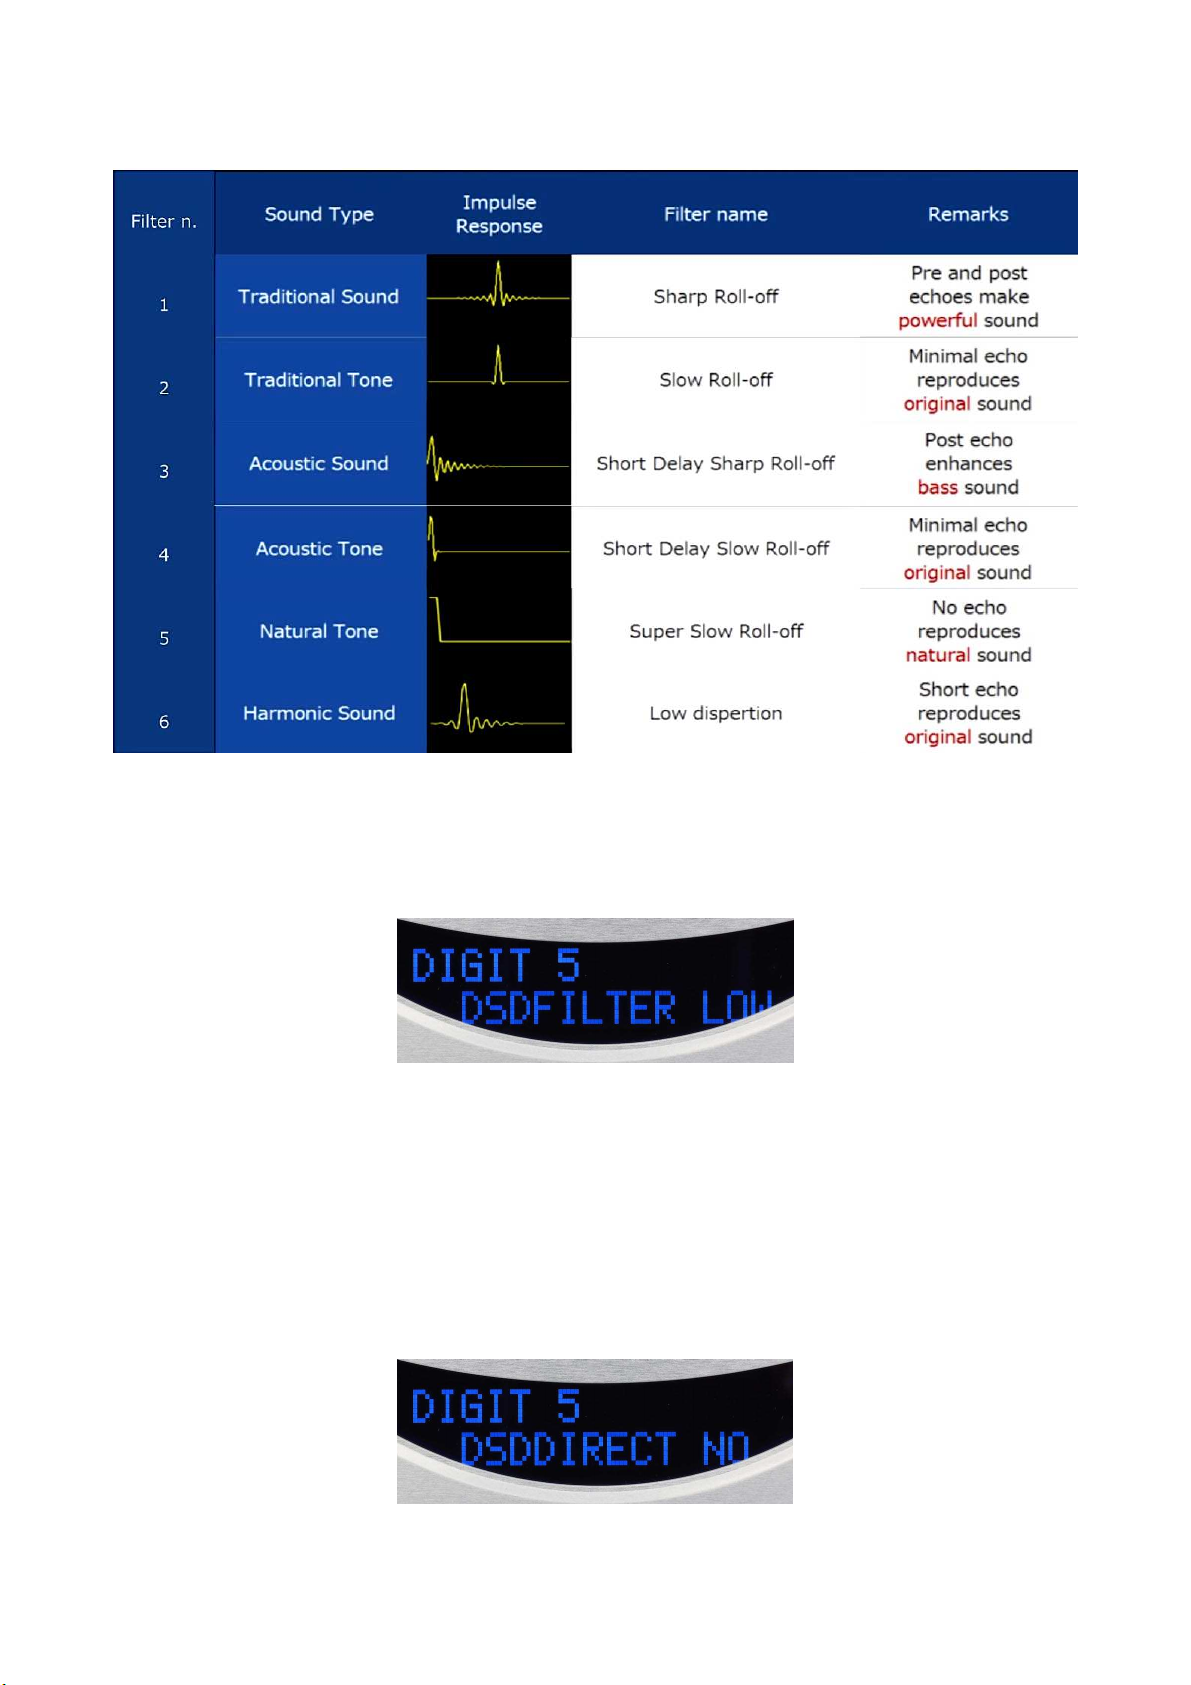
Here is a table to illustrate the differences between the 6 CM filters :
Mode SET DSD FILTER
By this function you can choose the filter applied to the DSD stream on the DIGIT 5 (USB
input )only. Two filters are available and act in the analogic domain after the conversion : LOW
(roll-off at 39 kHz and soft slope ) ou HIGH (roll-off at 76 kHz and sharp slope).
Upon entering in this mode, the display shows automatically the USB input and on second line
either LOW or HIGH filter blinking. ress SET key to confirm otherwise press + or – keys to
select tthe other filter. Validation is effective when the display stops blinking after few seconds
without instructions. The display returns to the initial mode screen.
Mode SET DSD DIRECT
Like the previous one, this mode only concerns the USB input (DIGIT 5). It allows the choice for
the only DSD stream to bypass (DIRECT YES) or to pass though a filter to reduce the noise
(DIRECT NO).

Upon entering this mode, the display shows automatically the USB input (DIGIT 5) on the first line
and DSDDIRECT with YES or NO blinking on the second line. ress SET key to confirm
otherwise press + or – keys to select the opposite instruction. Validation is effective when the
display stops blinking and after fews seconds without instructions. It returns to the initial mode
screen.
Mode SET SRC BYPASS
SRC (Sampling Rate Conversion) consists, by calculation operations, of increasing the resolution of
an incoming digital signal by multiplying its sampling frequency and/or increasing its quantization.
If the choice is made not to bypass the SRC, your FLCD3S converters' capabilities offer the
possibility of a 32 bits/784 kHz resolution of CM stream.
Upon entering this mode, the display shows one of the 5 digital inputs on the first line. ress SET to
choose this input otherwise press + or – to scroll the others inputs and confirm the input choice by
pressing SET. Now the display shows on the second line SRCBYPASS with YES or NO blinking.
In you want to apply the SRC mode on the input selected, you can confirm NO instruction by
pressing SET key. If you donnot want the SRC mode on this input, press + or – keys to select YES
and confirm to bypass the SRC. The display will stop blinking and validation after few seconds.
The display returns to the earlier screen and you can choose another input for the same operation.
Otherwise the dispaly returns to the initial mode screen.
Mode SET DITHER ACTIV
The dithering is a random digital noise that is added to the incoming signal to make the distorsion
due to quantization errors less unpleasant after conversion. It can improve the sound of the weakest
signals in particular. It can be applied on each one of the 5 inputs including the CD LAYER mode.
Upon entering this mode, the dispaly shows one of the 5 inputs or CD LAYER mode on the first
line. ress SET key to choose this input otherwise press + or – keys to select another input and
confirm by pressing SET key. Then the display shows on the second line DITHERACT with YES
or NO blinking. You can change the choice by pressing + or – keys. It will be confirm after few
seconds when dispaly stops blinking. The you can choose another input by pressing + or – for the
same operation. Validation after fews seconds without instructions and the display returns to the
initial mode screen.
Mode SET LOAD DEFAULT
This mode allows you to reset all the items of the SET configuration to their original state and thus
cancel all modifications previously made.

Upon entering this mode the display shows on the second line CONFIRM? with YES or NO
blinking. You can select the choice or its opposite by pressing + or – keys. Validation after few
seconds when the display stops blinking.
Mode SOFTWARE CD3S/DACS
This last mode informs you of the software version of the CD player and by pressing SET key, of
the software of the DAC.

Listening tips
Even if the player has already been run for fifty hours, during which operations and tests have been
successfully passed, we advise you to continue for two hundreds hours, provided that the running
occurs in presence of a CD or a signal.
During a long period of disuse, the complete extinction by the switch on the rear panel is
recommended.
Care and maintenance
To remove dust on the box, use a feather duster. Do not attempt to clean the surface brushed with
alcohol or any siilar solvent. Using a simple wetted microfiber possibly to remove all stains.
Never attempt to clean the laser lens.
Dirt and grease on the connectors can make noise degradation. We recommend cleaning all contacts
to which the signal passes, up to speakers terminals, with isopropyl alcohol.
Specifications
Frequency response : 0.5 Hz –20 kHz ± 0.1dB
Upsampling (only for digital inputs): 32 bits, 768 kHz
Dynamic Range: 126 dB
THD and noise : <0,01%
Signal/Noise ratio: > – 113 dB
Balanced and Unbalanced outputs
Maximum output voltage: 2.5 Vrms
Output impedance: 200 Ohm
Digital Output: CM S/ DIF on RFA plug
Stand-by power consumption: less than 0.5 W
Operation ower consumption: 30 W
Main voltage AC (50-60 Hz): 100, 110-115, 220-230, 240 V
Dimensions: 450 x 110 x 430 mm (WxHxD)
Weight: 10 kg
Shipping dimensions: 550 x 250 x 580 mm (WxHxD)
Shipping weight: 15 kg
Optional Digital Board:
Inputs:
• 1 XLR AES/EBU
• 1 coaxial S DIF
• 2 opticals Toslink
• 1 asynchronous USB
All inputs are insulated.
The USB input can accept files 32 bit 384KHz and DSD512
Table of contents


