manuals.online logo
Brands
  1. Home
  2. •
  3. Brands
  4. •
  5. Audibax
  6. •
  7. Speakers
  8. •
  9. Audibax Denver 15 Malibu User manual

Audibax Denver 15 Malibu User manual

Denver 15 Malibu
Please read the manual before using the product
Por favor, lea el manual antes de usar el producto
USER´S
MANUAL
MANUAL
DE USUARIO
7
Denver 15 Malibu
17. Toma de CA y portafusibles
Enchufe de CA: conecte el cable de alimentación para obtener la fuente de alimentación
de CA
Portafusibles: reemplace el fusible con la especificación correcta
18. Instrucciones del reproductor de MP3
(1).Conector USB/SD
Un conector USB/SD para entrada de señal auxiliar y reproductor de Mp3.
(2).Botón de reproducción/pausa
Presione para iniciar o pausar la reproducción de archivos en unidades flash USB/SD/MMC. Si
está en el modo de radio FM, presione el botón de búsqueda para buscar estaciones y
almacenarlas en la memoria
(3). Botón de Pausa
Este botón detiene la reproducción de unidades USB/SD/MMC/BLUETOOTH
(4). MODE
Presione este botón para elegir el estado FM/BLUETOOTH/USB/SD para la señal.
Nombre de Bluetooth en el teléfono: ZY-BT1
(5). Botón de marcha atrás
Presione en el modo de reproducción Unidad USB/SD/MMC para volver a la canción
anterior, si presiona y mantiene presionada la reproducción de la canción. En modo FM
vuelve a la emisora anterior. Este botón también se utiliza para configurar la fecha, la hora,
la alarma y el temporizador para dormir.
(6). Botón de avance
Presione en el modo de reproducción Unidad USB/SD/MMC para avanzar a la siguiente
canción, si mantiene presionado el botón avanza la canción que se está reproduciendo
actualmente. En modo FM salta a la siguiente emisora. Este botón también se usa para
configurar la fecha, la hora, la alarma y el temporizador de apagado automático.
Tabla de especificaciones
N º de Modelo
DENVER 15 MALIBU
Altavoz de graves
15" , 2"VC
Tweeter
25 mm, titanio
Respuesta frecuente
55Hz-20KHz
Sensibilidad
94dB
Impedancia
8 ohmios
Amplificador
Clase-D
Entrada de micrófono
Conector XLR y 1/4"
En linea
XLR y RCA
Salida de línea
Conector XLR y 1/4"
Ecualizador
Graves, agudos
Reproductor de mp3
Pantalla LCD, control remoto, bluetooth, USB/SD
Micrófono VHF
2
Poder
700W
NOROESTE
13,50 kg
G. W.
14,70 kg
Tamaño del paquete
482X395X750mm
Denver 15 Malibu
1 6
IMPORTANT SAFETY SYMBOLS
CAUTION: Risk of electrical shock – DO NOT OPEN!
CAUTION: To reduce the risk of electric shock, do not remove cover. No user serviceable parts
inside. Refer servicing to qualified service personnel.
WARNING: To prevent electrical shock or fire hazard, this apparatus should not be exposed to
rain or moisture, and objects filled with liquids, such as vases, should not be placed on this
apparatus. Before using this apparatus, read the operating guide for further warnings.
IMPORTANT SAFETY INSTRUCTIONS
WARNING: When using electrical products, basic cautions should always be followed, including
the following:
• Read these instructions.
• Keep these instructions.
Heed all warnings.
Follow all instructions.
Do not use this apparatus near water.
Clean only with a dry cloth.
Do not block any of the ventilation openings. Install in accordance with manufacturer's
instructions.
Do not install near any heat sources such as radiators, heat registers, stoves or other apparatus
(including amplifiers) that produce heat
Do not defeat the safety purpose of the polarized or grounding-type plug. A polarized plug has
two blades with one wider than the other. A grounding type plug has two blades and a third
grounding plug. The wide blade or third prong is provided for your safety. If the provided plug
does not fit into your outlet, consult an electrician for replacement of the obsolete outlet.
• Protect the power cord from being walked on or pinched, particularly at plugs, convenience
receptacles, and the point they exit from the apparatus.
• Only use attachments/accessories provided by the manufacturer.
• Use only with a cart, stand, tripod, bracket, or table specified by the manufacturer, or sold
with the apparatus. When a cart is used, use caution when moving the cart/apparatus
combination to avoid injury from tip-over.
• Unplug this apparatus during lightning storms or when unused for long periods of time.
• Refer all servicing to qualified service personnel. Servicing is required when the apparatus has
been damaged in any way, such as power-supply cord or plug is damaged, liquid has been
spilled or objects have fallen into the apparatus, the apparatus has been exposed to rain or
moisture, does not operate normally, or has been dropped.
• Never break off the ground pin. Write for our free booklet "Shock Hazard and Grounding.
Connect only to a power supply of the type marked on the unit adjacent to the power supply
cord.
Intended to alert the user to the presence of uninsulated “dangerours voltage” within
the product´s enclosure that may be of sufficient magnitude to constitute a risk of
electric shcok to persons.
Intended to alert the user of the presence of important operating and maintenance
(servicing) instructions in the literature accompanying the product.
Protective earthing terminal. The apparatus should be connected to a main socket
outlet with a protective earthing connection.
USER´S
MANUAL
MANUAL
DE USUARIO
7. EQ
Agudos: esta perilla se usa para ajustar el
volumen de las frecuencias altas Graves:
esta perilla se usa para ajustar el volumen
de las frecuencias bajas.
8. Master Vol
Esta perilla se usa para ajustar el volumen
total del producto.
9. Indicador de encendido y clip
Indicador de encendido: Este indicador es
un símbolo de encendido/apagado Clip:
Este indicador es un símbolo de señal,
cuando la señal es demasiado, el
indicador de clip se iluminará y baje el
volumen.
10.ANT
ANT A se usa para recibir la señal de VHF A
ANT B se usa para recibir la señal de VHF B
11. VOL A & VOL B
VOL A se utiliza para ajustar el volumen del
micrófono VHF A
VOL B se utiliza para ajustar el volumen del
micrófono VHF B
12. VHF POWER
Encender/apagar la POTENCIA VHF
13. DC 12 V IN
Esto es para conectarse a la fuente de
alimentación DC12V para obtener energía
eléctrica
14. Indicador de estado de la batería
Estos indicadores muestran el estado de la
batería, cuando el indicador amarillo está
encendido, cargue la batería de
inmediato; Cuando el indicador rojo esté
encendido, apáguelo; de lo contrario, el
producto generará ruido.
15. Interruptor LED
Encender/apagar la iluminación led en el
frente
16. Interruptor de encendido
Encender/apagar el producto
Denver 15 Malibu USER´S
MANUAL
MANUAL
DE USUARIO
5 2
No anule el propósito de seguridad del enchufe polarizado o con conexión a tierra. Un
enchufe polarizado tiene dos clavijas, una más ancha que la otra. Un enchufe con
conexión a tierra tiene dos clavijas y un tercer enchufe con conexión a tierra. La hoja
ancha o la tercera punta se proporciona para su seguridad. Si el enchufe provisto no
encaja en su tomacorriente, consulte a un electricista para reemplazar el tomacorriente
obsoleto.
• Proteja el cable de alimentación para que no lo pisen ni lo pellizquen, especialmente en
los enchufes, los receptáculos de conveniencia y el punto en el que salen del aparato.
• Utilice únicamente aditamentos/accesorios proporcionados por el fabricante.
• Utilícelo únicamente con un carro, soporte, trípode, ménsula o mesa especificados por el
fabricante o vendidos con el aparato. Cuando un
• se utiliza el carro, tenga cuidado al mover la combinación carro/aparato para evitar
lesiones por volcaduras.
• Desenchufe este aparato durante tormentas eléctricas o cuando no se utilice durante
largos períodos de tiempo.
• Remita todo el servicio a personal de servicio calificado. El servicio es necesario cuando el
aparato se ha dañado de alguna manera, como cuando el cable de alimentación o el
enchufe están dañados, se ha derramado líquido o han caído objetos dentro del aparato,
el aparato ha estado expuesto a la lluvia o la humedad, no funciona con normalidad , o se
ha descartado.
• Nunca rompa el pin de tierra. Solicite nuestro folleto gratuito "Peligro de descarga
eléctrica y puesta a tierra". Conéctese solo a una fuente de alimentación
• Fuente de alimentación del tipo marcado en la unidad junto al cable de alimentación.
• Si este producto se va a montar en un bastidor de equipo, se debe proporcionar un
soporte trasero.
• Este aparato eléctrico no debe exponerse a goteos o salpicaduras y se debe tener
cuidado de no colocar objetos que contengan líquidos, como jarrones, sobre el aparato.
• El interruptor de encendido/apagado de esta unidad no rompe ambos lados de la red
principal. Puede haber energía peligrosa dentro del chasis cuando el interruptor de
encendido/apagado está en la posición de apagado. El enchufe de red o el acoplador
del aparato se utiliza como dispositivo de desconexión, el dispositivo de desconexión debe
permanecer fácilmente operable.
Instrucción del panel
1. MIC IN ( 1/4" jack &XLR )
Esto se usa para conectar el cable del micrófono para obtener la señal del micrófono.
2. Line in (XLR& RCA )
Estos conectores se utilizan para obtener la señal del casete del reproductor de CD.
3. Line out ( 1/4" jack&XLR)
Esto se utiliza para dar salida a la señal a otra caja de altavoz activa o amplificador.
4. Mic Vol
Esta perilla se usa para ajustar el volumen de la entrada del micrófono.
5. ECHO
Esta perilla se usa para ajustar el volumen del efecto de eco.
6. MP3 Vol
Esta perilla se usa para ajustar el volumen del reproductor de mp3.
• If this product is to be mounted in an equipment rack, rear support should be provided.
This electrical apparatus should not be exposed to dripping or splashing and care should be
taken not to place objects containing liquids, such as vases, upon the apparatus.
The on/off switch in this unit does not break both sides of the primary mains. Hazardous
energy can be present inside the chassis when the on/off switch is in the off position. The
mains plug or appliance coupler is used as the disconnect device, the disconnect device
shall remain readily operable.
Panel instruction
1. MIC IN ( 1/4" jack &XLR )
This is used to connect microphone cable to
get signal from microphone
2. Line in (XLR& RCA )
These connectors are used to get signal
from CD player cassette
3. Line out ( 1/4" jack&XLR)
This is used to output signal to other active
speaker box or amplifier
4. Mic Vol
This knob is used to adjust the volume of
microphone input
5. ECHO
This is knob is used to adjust the volume of
echo effect
6. MP3 Vol
This knob is used to adjust the volume of
mp3 player
7. EQ
Treble : This knob is used to adjust the
volume of high frequency Bass : This knob is
used to adjust the volume of low frequency
8. Master Vol
This knob is used to adjust the total volume
of the product
9. Power & Clip Indicator
Power Indicator : This indicator is a symbol of
power on / off Clip : This indicator is a symbol
of signal , when the signal is too much , clip
indicator will illuminate and please turn
down the volume.
Denver 15 Malibu
3 4
Specification chart
10.ANT
ANT A is used to receive signal from VHF A
ANT B is used to receive signal from VHF B
11. VOL A & VOL B
VOL A is used to adjust the volume of VHF A microphone VOL B is used to adjust the volume
of VHF B microphone
12. VHF POWER
Turn on / off the VHF POWER
13. DC 12 V IN
This is to connect to DC12V power supply to get electrical power
14. Battery Status Indicator
These indicators are shown the status of the battery, when the yellow indicator is lighted ,
please charge the battery right away ; When the red indicator is lighted ,please switch off ,
otherwise , the product will generate noise
15. LED switch
Turn on / off the led lighting on the front
16. Power switch
Turn on / off the product
17. AC socket and fuse holder
AC Socket:Plug in power cable to get AC power supply
Fuse holder : Please replace the fuse with correct specification
18. MP3 Player instruction
(1).USB/SD Connector
A USB/SD Connector for auxiliary signal input and Mp3 player.
(2).Play/Pause Button
Press to boot or pause playback of files on USB flash drives / SD / MMC. If you are in FM Radio
mode, pressing the seek button to search stations and store them in memory
(3).Stop Buttoon
This button stops playback of USB drives / SD/ MMC/BLUETOOTH
(4). MODE
Press this button to choose FM/BLUETOOTH /USB/SD status for signal.
Bluetooth name on the phone : ZY-BT1
(5). Reverse Button
Press in playback mode USB Drive/SD/MMC to return to the previous song, if you press and
hold back the song playing. In FM mode returns to the previous station. This button is also
used to set the date, time, alarm and sleep timer.
(6). Forward Button
Press in the playback mode USB Drive/SD/MMC to advance to the next song, if you hold
down the button advances the currently playing song. In FM mode jumps to the next station.
This button is also used to set the date, time, alarm and sleep timer.
USER´S
MANUAL
MANUAL
DE USUARIO
Model No
DENVER 15 MALIBU
Woofer
15" , 2"VC
Tweeter
25mm,Titanium
Frequency Response
55Hz-20KHz
Sensitivity
94dB
Impedance
8 OHM
Amplifier
Class-D
Mic in
XLR&1/4"jack
Line in
XLR&RCA
Line out
XLR&1/4"jack
EQ
Bass,TrebIe
MP3 Player
Lcd display,remote control,bIuetooth,USB/SD
VHF Mic
2
Power
700 W
N.W
13.50KG
G.W
14.70KG
Package size
482X395X750mm
SÍMBOLOS DE SEGURIDAD IMPORTANTES
PRECAUCIÓN: Riesgo de descarga eléctrica: ¡NO ABRIR!
PRECAUCIÓN: Para reducir el riesgo de descarga eléctrica, no quite la tapa. No hay piezas
reparables por el usuario en el interior. Solicite el servicio a personal de servicio calificado.
ADVERTENCIA: Para evitar descargas eléctricas o riesgos de incendio, este aparato no debe
exponerse a la lluvia ni a la humedad, y no deben colocarse sobre él objetos que contengan
líquidos, como jarrones. Antes de usar este aparato, lea la guía de funcionamiento para
conocer más advertencias.
INSTRUCCIONES DE SEGURIDAD IMPORTANTES
• Lea estas instrucciones.
• Guarde estas instrucciones.
Preste atención a todas las advertencias.
Siga todas las instrucciones.
No use este aparato cerca del agua.
Limpie solamente con un paño seco.
No bloquee ninguna de las aberturas de ventilación. Instale de acuerdo con las instrucciones
del fabricante.
No instale cerca de fuentes de calor como radiadores, registros de calor, estufas u otros
aparatos (incluidos amplificadores) que produzcan calor.
Pretende alertar al usuario de la presencia de “voltaje peligroso” no aislado dentro
de la carcasa del producto que puede ser de magnitud suficiente para constituir un
riesgo de descarga eléctrica para las personas.
Pretende alertar al usuario de la presencia de importantes instrucciones de
operación y mantenimiento (servicio) en la literatura que acompaña al producto.
Terminal de puesta a tierra de protección. El aparato debe conectarse a una toma
de corriente principal con una conexión a tierra de protección.

This manual suits for next models

1

Other Audibax Speakers manuals

Audibax Drope 6 User manual

Audibax

Audibax Drope 6 User manual

Audibax GROUND 6T User manual

Audibax

Audibax GROUND 6T User manual

Audibax Denver 10 User manual

Audibax

Audibax Denver 10 User manual

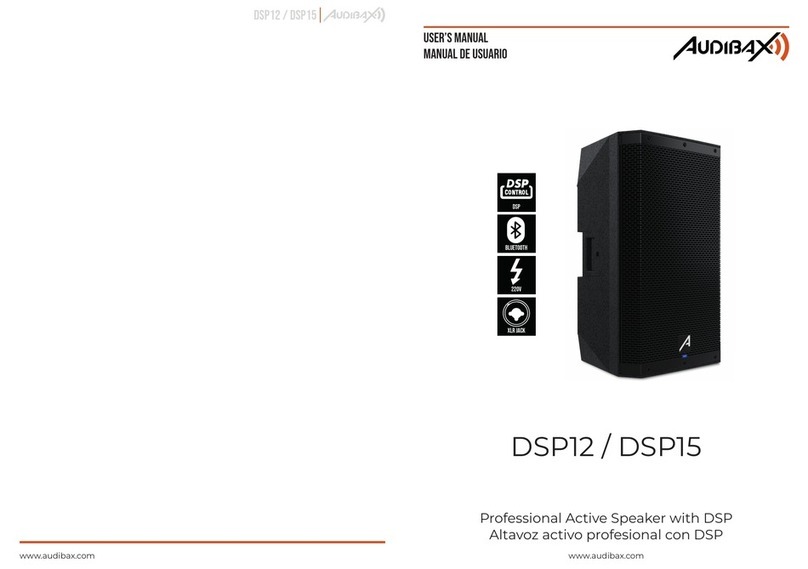
Audibax DSP12 User manual

Audibax

Audibax DSP12 User manual

Audibax Roma 240 Go User manual

Audibax

Audibax Roma 240 Go User manual

Audibax SEATTLE 261LA User manual

Audibax

Audibax SEATTLE 261LA User manual

Audibax Party 212 User manual

Audibax

Audibax Party 212 User manual

Audibax PR42T User manual

Audibax

Audibax PR42T User manual

Audibax Detroit 1000 DSP User manual

Audibax

Audibax Detroit 1000 DSP User manual

Audibax DENVER 12 User manual

Audibax

Audibax DENVER 12 User manual

Audibax CS5T User manual

Audibax

Audibax CS5T User manual

Audibax Roma 80 Go User manual

Audibax

Audibax Roma 80 Go User manual

Audibax PARTY 12 User manual

Audibax

Audibax PARTY 12 User manual

Audibax Arkansas 12 User manual

Audibax

Audibax Arkansas 12 User manual

Audibax PRO8P User manual

Audibax

Audibax PRO8P User manual

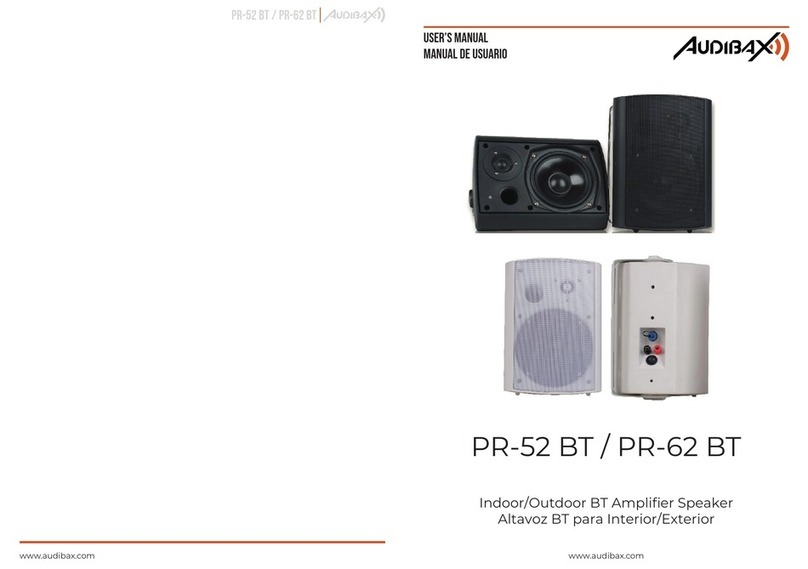
Audibax PR-52 BT User manual

Audibax

Audibax PR-52 BT User manual

Audibax Vegas 12 User manual

Audibax

Audibax Vegas 12 User manual

Audibax Vegas 8 User manual

Audibax

Audibax Vegas 8 User manual

Audibax Detroit 1000X DSP User manual

Audibax

Audibax Detroit 1000X DSP User manual

Audibax Seattle 500 SUB User manual

Audibax

Audibax Seattle 500 SUB User manual

Audibax GROUND 4T User manual

Audibax

Audibax GROUND 4T User manual

Audibax Beta 1BT User manual

Audibax

Audibax Beta 1BT User manual

Audibax DENVER MALIBU 15 User manual

Audibax

Audibax DENVER MALIBU 15 User manual

Audibax DSP12 User manual

Audibax

Audibax DSP12 User manual

Popular Speakers manuals by other brands

YORKVILLE Performance Y115P owner's manual

YORKVILLE

YORKVILLE Performance Y115P owner's manual

Pure Acoustics DREAM MANO owner's manual

Pure Acoustics

Pure Acoustics DREAM MANO owner's manual

iLive isb23 user guide

iLive

iLive isb23 user guide

Dynaudio Stand1 instructions

Dynaudio

Dynaudio Stand1 instructions

PSSO CSA-218A user manual

PSSO

PSSO CSA-218A user manual

Louroe Electronics AOP-650 Installation and operating instructions

Louroe Electronics

Louroe Electronics AOP-650 Installation and operating instructions

Sony SRS-XV900 Help guide

Sony

Sony SRS-XV900 Help guide

Gogen StreetLine BS 050 STR installation manual

Gogen

Gogen StreetLine BS 050 STR installation manual

EarFun UBOOM user manual

EarFun

EarFun UBOOM user manual

sound crush HR-917 operating instructions

sound crush

sound crush HR-917 operating instructions

Focal ELITE K2 POWER user manual

Focal

Focal ELITE K2 POWER user manual

Bathology Acoustics 430 Installation and operation manual

Bathology

Bathology Acoustics 430 Installation and operation manual

Conrad MPA - M.I.L.L.Y. 2.0 MkIII operating instructions

Conrad

Conrad MPA - M.I.L.L.Y. 2.0 MkIII operating instructions

Polk Audio MC Series owner's manual

Polk Audio

Polk Audio MC Series owner's manual

Caliber HPG 429BTL manual

Caliber

Caliber HPG 429BTL manual

DAPAudio SS-105 manual

DAPAudio

DAPAudio SS-105 manual

Episode ES-350-OWLCR-M installation manual

Episode

Episode ES-350-OWLCR-M installation manual

Hama Pluto operating instructions

Hama

Hama Pluto operating instructions

manuals.online logo
manuals.online logoBrands
  • About & Mission
  • Contact us
  • Privacy Policy
  • Terms and Conditions

Copyright 2025 Manuals.Online. All Rights Reserved.