Audio Analogue Primo AM/FM RDS Vacuum Tube Tuner User manual
AUDIO ANALOGUE
PRIMO
VT TUNER
AM/FM RDS VACUUM TUBE TUNER
OWNER’S MANUAL
MANUALE D’ISTRUZIONI
Manual rev1.3a

2
Dear Audi phile,
C ngratulati ns and thank y u f r ch sing Prim VT Tuner. T celebrate the first century fr m the inventi n f the tube, Audio
Analogue presents Prim VT Tuner, equipment that c mbines m dern and tubes techn l gy. M dern techn l gy is used f r
tuning while tubes techn l gy is used in the utput stage: it all ws making the m st f the tubes and highlighting its s und qualities.
We selected all the high-quality, l w-t lerance passive c mp nents f the unit f r their specificati ns and, m st imp rtant at f all,
after l ng listening tests. The unit is supplied by a t r idal transf rmer and is divided int 3 different stabilizati n secti ns. Its l w-
emissi n display minimizes audi circuitry n ise. Its special features and its circuital s luti ns with n c mpr mises make Prim VT
Tuner a high-quality, high-precisi n unit and a valuable and durable investment.
Caro Audiofilo,
congratulazioni e grazie er aver scelto il Primo VT Tuner.
Per celebrare il centenario della invenzione della valvola,
Audio Analogue
ro one il Primo VT Tuner: un a arecchio nel
quale le tecnologie iù moderne si fondono con la tecnologia a tubi. Alle rime è affidato il rocesso di sintonia mentre lo stadio di
uscita è valvolare. In questo modo si riescono a sfruttare al massimo le qualità della valvola e a evidenziarne le caratteristiche
sonore. I com onenti assivi utilizzati, selezionati e a bassissima tolleranza, sono di elevatissima qualità, e sono scelti, oltre che in
base alle misure e ai dati tecnici, in seguito a rolungati test di ascolto dell’a arecchio. L’alimentazione è realizzata con un
trasformatore toroidale ed è caratterizzata da tre sezioni distinte di stabilizzazione. Il dis lay utilizzato è a bassa emissione, ciò
minimizza i disturbi sulla circuitazione audio. Gli accorgimenti adottati e l’utilizzo di soluzioni circuitali senza com romessi fanno del
Primo VT Tuner un com onente audio eccezionalmente musicale e di alta recisione, un a arecchio unico ed un investimento di
regio durevole nel tem o.

3
INTRODUCTION
AUDIO ANALOGUE d es n t take any resp nsibilities in the f ll wing cases:
Whenever the perati nal pr cedures related t the use and the maintenance f the equipment as described in this manual are n t
respected.
Whenever damages t the equipment ccur because f fixing and m dificati ns made f rm n n-auth rized staff r because f
n rmal deteri rati n f the system.
N part f this manual can be repr duced by any means, transmitted r c pied f r private r public use with ut private auth rizati n
fr m AUDIO ANALOGUE.
The inf rmati n c ntained in this manual is related t the data kept by AUDIO ANALOGUE at the m ment f the issue f this
publicati n; AUDIO ANALOGUE has the right t make changes t this d cument with ut pri r n tice.
The equipment has been pr jected and manufactured acc rding t the Regulati ns f the C mmunity 89/336/CEE and is marked CE.
This equipment can’t be used f r different purp ses ther than th se f r which it has been manufactured.
AUDIO ANALOGUE d es n t take any resp nsibilities f r accidents r damages due t impr per use f the equipment.
WARNING
Please d respect the safety standards c ntained in this manual bef re starting t perate the equipment.
D n t pen the equipment. N further interventi ns than th se described in this manual sh uld be made. F r technical assistance,
please c nsult a qualified technician r an AUDIO ANALOGUE dealer.
N t respecting the instructi ns c ntained in this manual will invalidate the terms and c nditi ns f the guarantee.
NECESSARY PRECAUTIONS FOR SAFETY AND MAINTENANCE
ATTENTION: bef re starting any perati n, use r maintenance f the equipment it is strictly necessary t understand the f ll wing
manual.
T av id any accidents r hazards it is necessary t f ll w the f ll wing regulati ns.
Activate the equipment nly pri r checking if the installati n has been pr perly made, and if it is related t the instructi ns c ntained
in this manual.
Av id installing the equipment in places subjected t extremely high temperatures r humidity.
Check that the labels c ntaining inf rmati n ab ut safety are always visible and in g d c nditi ns.
Ensure t n t bstruct ventilati n, t av id excessive verheating. The equipment sh uld be kept t a minimal distance f 15 cm
fr m any bject and n t t place n carpet r ther s ft surfaces. Als the installati n cl se t radiat rs r in cl se envir nments
with ut ventilati n sh uld be av ided.
D n t switch n the equipment until it has n t been c rrectly and c mpletely installed.
Only supply the equipment with the kind f the electric supply as stated n the appr priate label. If in d ubts ab ut the kind f supply
available, please c nsult an expert technician f r technical assistance.
The equipment needs t be wired t an earth terminal. The external case is metal made; a defective c nnecti n with the earth may
be danger us.
In case damages ccurs t the supply cable, it sh uld be immediately replaced with the same kind f cable. This perati n sh uld be
nly made pri r t disc nnecting the main supply.
D n t place bjects n the supply cable and check that this is n t p siti ned in way thr ugh. The cable sh uld n t be kn tted r
curly.
Replace the fuses always with ther f the same kind.
D n t use the equipment cl se t the water r ther liquids. If liquid entered the equipment, the plug sh uld be disc nnected fr m
the s cket av iding t t uch the metal parts. C mpetent technical staff sh uld be asked t check the equipment bef re perating it
again.
D n t place recipients c ntaining liquids n the equipment. Even when it is switched ff.
Keep the equipment far fr m s urces f heat such as the s lar light, kitchens, radiat rs etc…
Always unplug the supply cable during rainy weather.
Always Switch ff and unplug the supply cable bef re cleaning the equipment externally.: this perati n sh uld be made using a dry
and s ft cl th. Never use alc h l based cleaning material.
If the amplifier was carried fr m an extremely c ld envir nment t and extremely h t ne, it c uld create internal c ndensati n,
causing p ssible bad functi ning.
If this ccurs, please wait f r at least an h ur bef re using it again, t all w it t gradually reach r m temperature.
When n t used f r l ng peri ds, please unplug the equipment.
INSTRUCTIONS TO PUT IT OUT OF SERVICE
C nsult qualified staff
F ll w the regulati ns f the current legislati n regarding recycling and waste disp sal.

4
PREMESSA
AUDIO ANALOGUE non accetta res onsabilità nei casi in cui:
Le rocedure o erative di utilizzo e manutenzione dell’a arato descritte nel manuale non siano ris ettate.
I danni si verifichino in seguito a ri arazioni o modifiche dell’a arato eseguite da ersonale non autorizzato o a seguito di normale
deterioramento dell’a arato.
Nessuna arte del resente manuale uò essere ri rodotta con alcun mezzo, trasmessa o co iata er usi ubblici e/o rivati senza
la revia autorizzazione di AUDIO ANALOGUE. Le informazioni contenute nel resente manuale sono relative ai dati in ossesso di
AUDIO ANALOGUE al momento della ubblicazione; AUDIO ANALOGUE si riserva il diritto di a ortare cambiamenti al resente
documento senza alcun reavviso.
L’a arato è rogettato e realizzato in conformità alle Direttive Comunitarie 89/336/CEE e 72/23/CEE e risulta marcato CE.
L’a arato non uò essere utilizzato er sco i diversi da quelli er cui è stato rogettato.
AUDIO ANALOGUE non si assume alcuna res onsabilità er incidenti o danni causati da un utilizzo im ro rio dell’a arato.
AVVERTENZA
Prima di com iere qualunque o erazione attenersi alle norme di sicurezza contenute all’interno del manuale
Non a rire l’a arecchio. Nessun ulteriore intervento oltre a quelli descritti in questo manuale dovrebbe essere effettuato. Per
l’assistenza tecnica, rivolgersi a un tecnico qualificato o a un rivenditore AUDIO ANALOGUE.
Il mancato ris etto delle rescrizioni del seguente manuale im lica il decadimento della garanzia.
PRECAUZIONI PER LA SICUREZZA E MANUTENZIONE
ATTENZIONE: rima dell’utilizzo o manutenzione dell’a arato o di qualsiasi o erazione sullo stesso è necessario rendere visione
del seguente manuale.
Al fine di revenire ogni ericolo di incidente si im ongono le seguenti rescrizioni:
Attivare l’a arato solo do o aver verificato l’adeguatezza dell’installazione e la conformità alle indicazioni contenute nel resente
manuale.
Non installare l’a arecchiatura in luoghi soggetti a sbalzi eccessivi di tem eratura e umidità.
Verificare che le etichette contenenti informazioni sulla sicurezza siano sem re ben visibili ed in buono stato.
Le fessure di ventilazione non devono assolutamente essere ostruite er evitare surriscaldamento dell’a arato. A tal fine,
osizionare l’unità ad una distanza minima di 15 cm da ogni altro ostacolo e non su ta eti, moquette o altre su erfici morbide.
Evitare inoltre di installarlo nei ressi di caloriferi o in ambienti chiusi, rivi di una a ro riata ventilazione.
Non accendere l’a arato finché non è com letamente installato in maniera corretta.
Alimentare l’a arato con il ti o di alimentazione elettrica ri ortato sull’a osita targhetta. In caso di dubbi sul ti o di alimentazione
dis onibile, consultare il servizio di assistenza tecnica.
L’a arecchio deve essere sem re collegato a terra. Poiché l’involucro è costituito in metallo, una connessione di terra difettosa o
mancante otrebbe essere ericolosa.
In caso di danneggiamenti al cavo di alimentazione, rovvedere immediatamente alla sostituzione con un altro dello stesso ti o.
Questa o erazione deve essere effettuata do o aver disconnesso l’alimentazione rimaria.
Non osizionare oggetti sul cavo di alimentazione e verificare che questo non si trovi in una zona di assaggio. Il cavo non deve
essere arrotolato o annodato.
Sostituire i fusibili sem re con altri dello stesso ti o.
Non usare l’a arato in rossimità di acqua o altri ti i di liquidi. Se nell’unità dovesse entrare del liquido, scollegare immediatamente
il cavo di rete dalla resa a muro evitando di toccare le arti metalliche dell’a arecchiatura e rivolgersi al ersonale tecnico er un
controllo rima del riutilizzo.
Non a oggiare reci ienti contenenti liquidi di qualsivoglia natura so ra l’a arato. Anche quando questo è s ento.
Tenete l’a arecchio lontano da fonti di calore come la luce solare, cucine, radiatori, etc…
Scollegare sem re il cavo di alimentazione dalla resa durante i tem orali.
S egnere e scollegare sem re l’alimentazione rima di effettuare la ulizia esterna dell’a arato: questa o erazione deve essere
effettuata utilizzando un anno asciutto e morbido. Non usare mai solventi o detergenti a base di alcool.
Se l’am lificatore viene tras ortato da un ambiente freddo ad un altro caldo, si otrebbe formare condensa al suo interno, causando
ossibili malfunzionamenti. Se ciò si dovesse verificare, si rega di attendere almeno un’ora rima dell’uso in modo da ermettergli
di raggiungere la tem eratura ambiente gradualmente.
In caso di lunghi eriodi di inutilizzo, staccare la s ina dalla resa di rete.
ISTRUZIONI PER LA MESSA FUORI SERVIZIO
Rivolgersi a ersonale s ecializzato.
Seguire le rescrizioni della corrente legislazione in materia di riciclaggio e smaltimento dei rifiuti
5
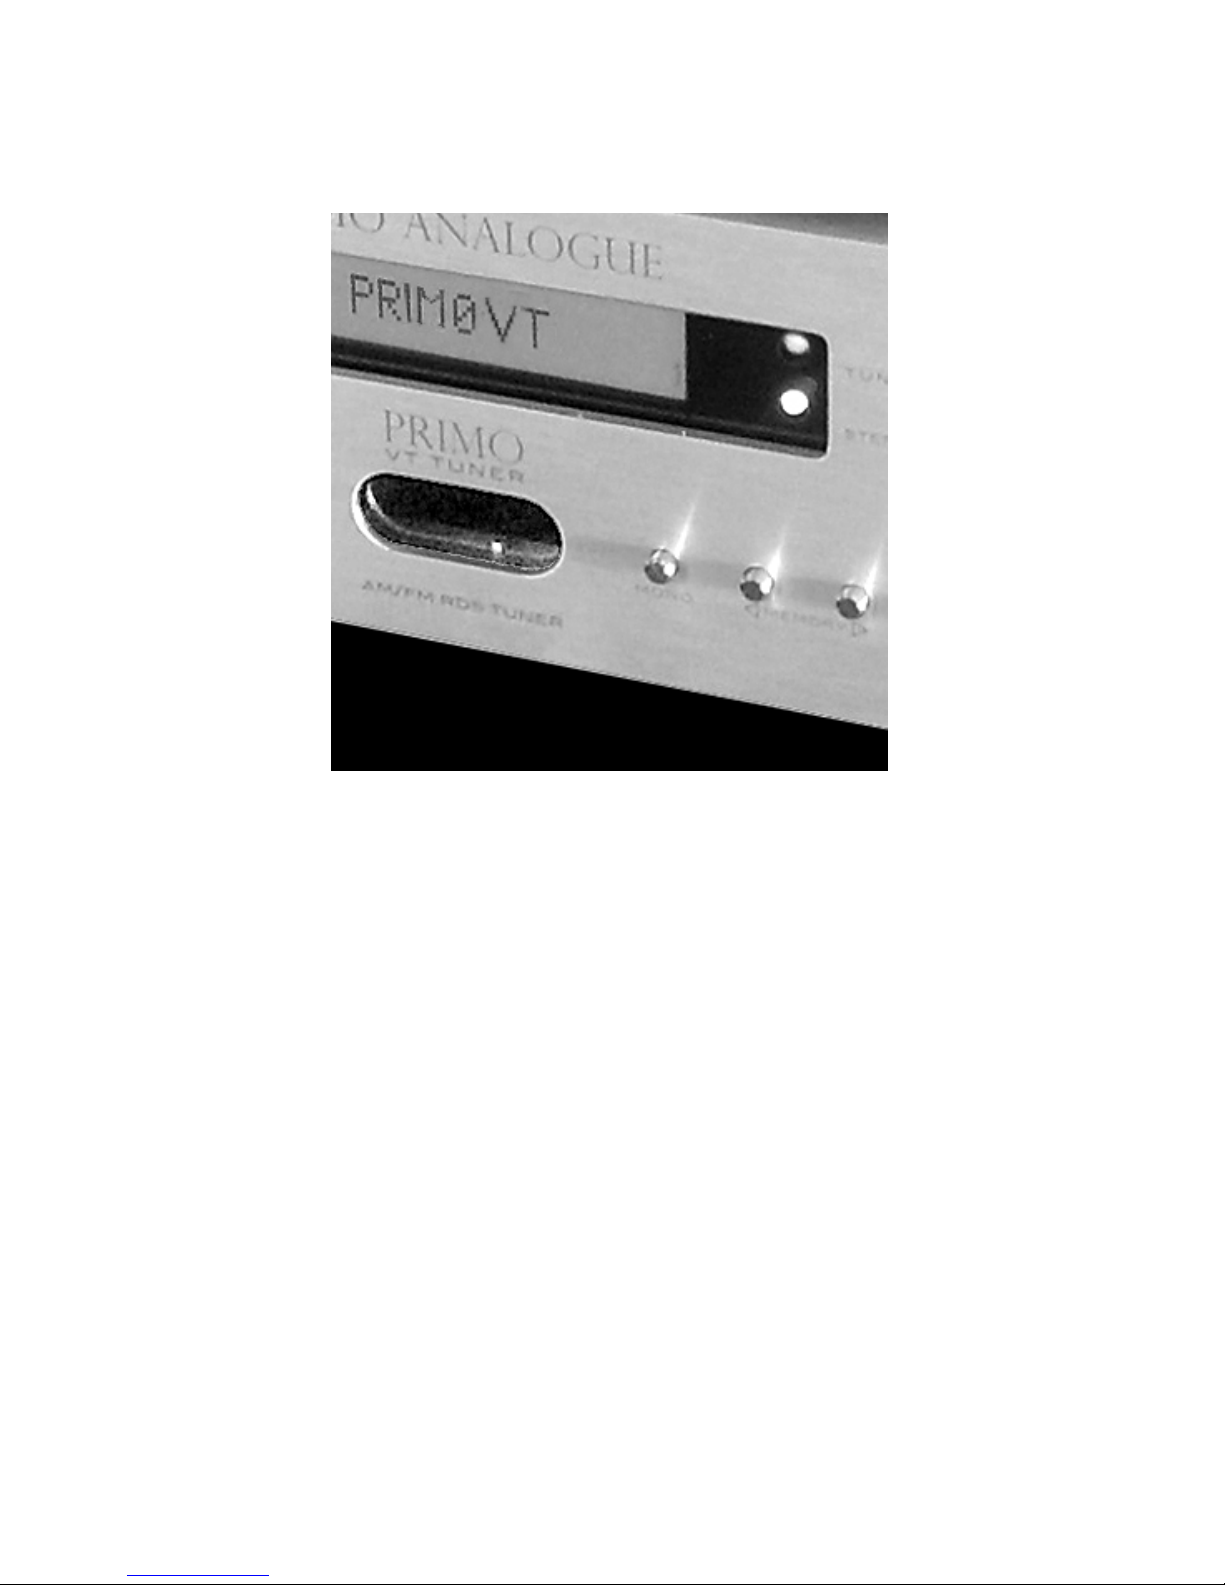
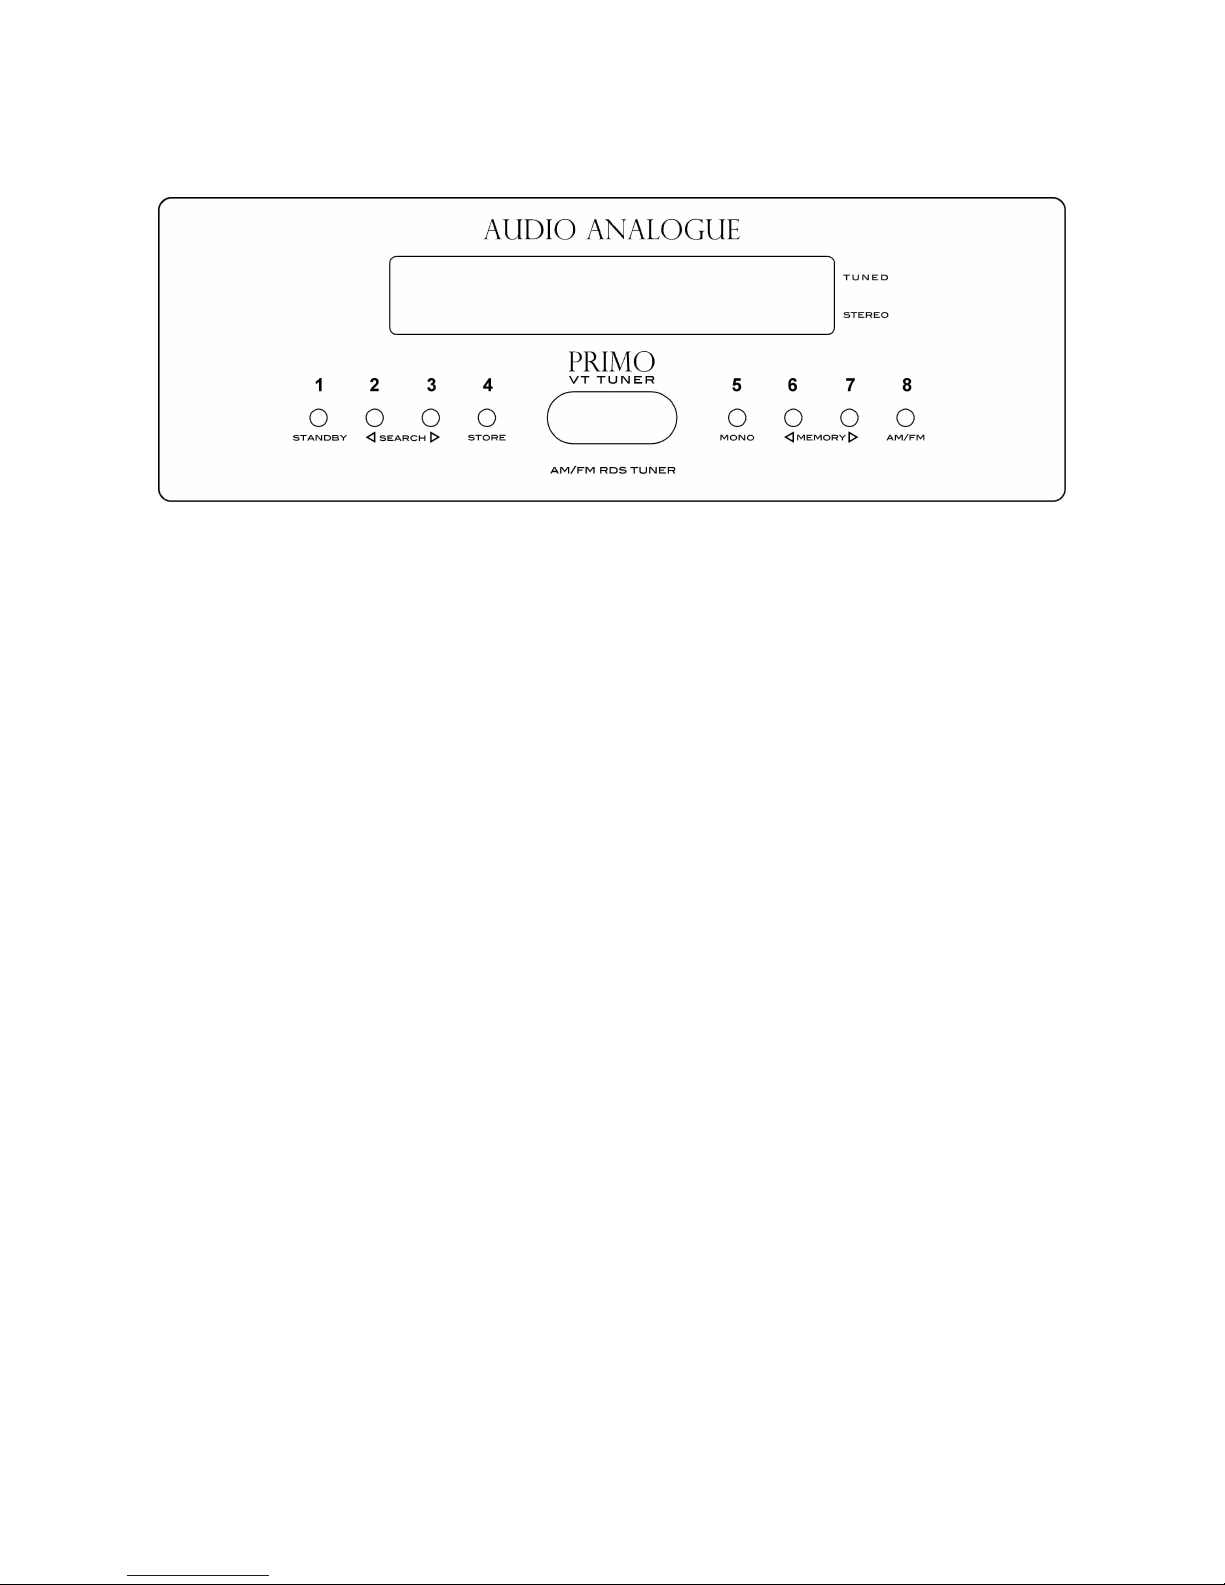
FRONT PANEL
DESCRIZIONE DEL PANNELLO FRONTALE
1) STANDBY. Turns unit n/ ff.
STANDBY. Pulsante di accensione e s egnimento dell’a arecchio.
2) SEARCH+. When this butt n is pressed and immediately released, the frequency level is increased by ne step (SEARCH
functi n). When pressed and released after ne sec nd, the frequency level is increased until a higher-frequency radi stati n
is reached (SCAN functi n): if this is n t p ssible, the wh le bandwidth is scanned back t the initial frequency level.
SEARCH+. Pulsante di “ricerca +”. Se si reme e rilascia il ulsante, viene incrementata di uno ste la frequenza sintonizzata
(funzione SEARCH). Tenendo remuto il ulsante er un tem o di circa un secondo e rilasciandolo, la frequenza viene
automaticamente incrementata fino a raggiungere la rima stazione radio di frequenza su eriore a quella di artenza (funzione
SCAN); qualora ciò non sia ossibile viene effettuata una scansione com leta della banda fino a ritornare alla frequenza
selezionata al momento della ressione del tasto.
3) SEARCH-. When this butt n is pressed and immediately released, the frequency level is decreased by ne step (SEARCH
functi n). When pressed and released after ne sec nd, the frequency level is decreased until a l wer-frequency radi stati n
is reached (SCAN functi n): if this is n t p ssible, the wh le bandwidth is scanned back t the initial frequency level.
SEARCH-. Pulsante di “ricerca –“. Se si reme e rilascia il ulsante, viene decrementata di uno ste la frequenza sintonizzata
(funzione SEARCH). Tenendo remuto il ulsante er un tem o di circa un secondo e rilasciandolo, la frequenza viene
automaticamente decrementata fino a raggiungere la rima stazione radio di frequenza inferiore a quella di artenza (funzione
SCAN); qualora ciò non sia ossibile viene effettuata una scansione com leta della banda fino a ritornare alla frequenza
selezionata al momento della ressione del tasto
4) STORE. Pressing this butt n puts the unit in “St rage” m de and it is p ssible t permanently st re in the unit’s mem ry the
current radi stati n. It is p ssible t st re up t 18 AM and 18 FM stati ns. Please refer t “Radi stati ns st rage” paragraph
f r further details ab ut st rage pr cedure.
STORE. Premendo e rilasciando questo ulsante si entra in modalità “memorizzazione” ed è ossibile memorizzare in modo
non volatile la stazione selezionata al momento della ressione del tasto. Si ossono memorizzare fino a 18 stazioni radio AM e
18 FM. Per maggiori dettagli circa la rocedura er memorizzare le stazioni radio si veda il aragrafo: ”Memorizzazione delle
stazioni radio”.
5) MONO. Pressing this butt n f rces the unit t m n ph nic m de. When this pti n is enabled, the STEREO LED turns red. T
return t n rmal m de, just press this butt n nce. When the unit is in stere ph nic m de, the STEREO LED turns green when
the inc ming signal is stere ph nic, therwise it stays ff.
MONO. Premendo e rilasciando questo ulsante si forza la ri roduzione monofonica. Tale modalità di ri roduzione viene
indicata dall’accensione del LED STEREO rosso. Per tornare alla ri roduzione stereofonica è sufficiente remere e rilasciare
un’altra volta il tasto MONO. In modalità stereo il LED STEREO si illumina di verde quando il segnale ricevuto risulta stereo
mentre resta s ento altrimenti.
6) MEMORY +. Pressing this butt n when the unit is in n rmal m de tunes the radi n the stati n st red in the mem ry all cati n
that f ll ws the last selected all cati n. When the unit exits the Standby m de and when changing m dulati n type, pressing
this butt n tunes the radi n the stati n st red in the 1st mem ry all cati n. Pressing the butt n again tunes the radi n the
stati n n° 2, 3,…, 18 then back t n° 1. If n radi stati n is st red int the selected all cati n, an EMPTY signal sh ws n the
display and the radi switches back t the previ us stati n. When in “St rage” m de, pressing this butt n all ws ch sing the
mem ry all cati n where t st re the selected radi stati n. Please refer t “Radi stati ns st rage” paragraph f r further
details ab ut st rage pr cedure. Please refer t “St red Radi stati ns tuning” paragraph f r further details ab ut radi stati ns
tuning.
MEMORY+. In modalità “normale” la ressione e rilascio di questo tasto ermette di sintonizzare la stazione radio memorizzata
nella locazione di memoria successiva all’ultima locazione selezionata. Quando l’a arecchio esce dallo Standby e quando si
commuta da un ti o di modulazione all’altra, la rima ressione del tasto MEMORY+ orterà alla sintonia della stazione radio
memorizzata nella rima locazione. Le ulteriori ressioni del tasto orteranno alla sintonia delle stazioni memorizzate nelle
This manual suits for next models
1
Other Audio Analogue Tuner manuals


Popular Tuner manuals by other brands


NAD
NAD C 445 owner's manual

Sony
Sony ST-SA5ES operating instructions

Pioneer
Pioneer GEX-P700DAB Operation manual

Sirius Satellite Radio
Sirius Satellite Radio SC-FM1 user guide

Antique Automobile Radio
Antique Automobile Radio 283501B Installation and operating instructions

Sanyo
Sanyo FMT M15L Service manual


