Audio Ape Remote User manual

TM


1
Instruction Manual
for
Audio Ape Remotes
www.audioaperemote.com
TM

2
Congratulations on acquiring your ne Audio Ape product
Let’s dive right in, getting up and running is a snap.
Here are the components:
Power
adapter
Receiver iOS standAntenna Remote
Now that you know what comes with your system, let’s look at each of them.
Audio Ape receiver
This is the heart of your Audio Ape.
It’s built very ruggedly and will serve you and
your show for many years.
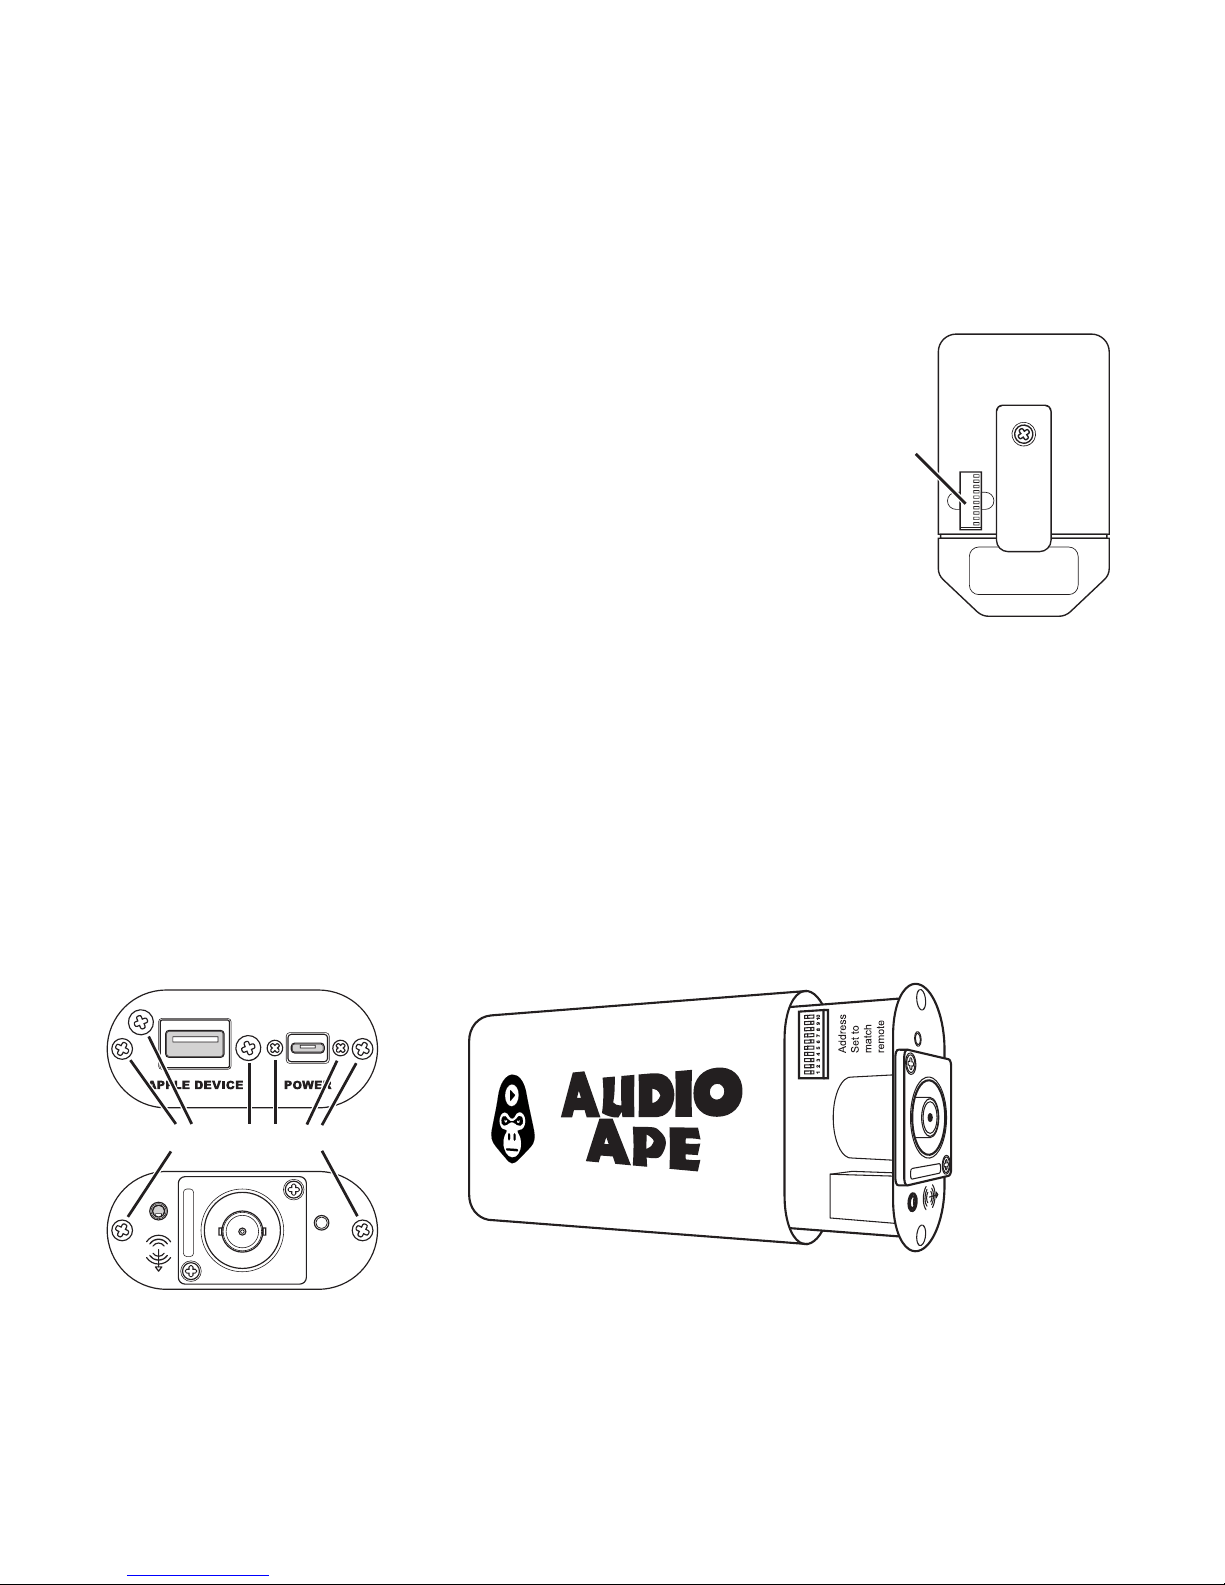
Let’s look at the rear of the receiver rst.
There are 2 ports here.
The port on the right is labeled “Power”.
This is where you will plug in your provided
power adapter.
The second port on the left is labeled “Apple
Device”.

3
Using your own certied Apple 30-pin or lightning cable, plug that lightning
or 30-pin end into your Apple device. Now plug the remaining USB end into
the Audio Ape’s receiver port labeled “Apple Device”.
For optimal range keep your Audio Ape receiver a few feet away from any power
amps, computers, wireless mics, or electrical lines as they will emit interference
and reduce the range.
Battery
Charging
Power Out
To Receiver
Power
Button
NOTE: If you purchased our optional battery
bank simply plug that into the receiver’s power
port instead of the power adapter. Once the
battery is plugged into the receiver, push the
small button on the front of the battery bank
tobegin sending power to your Audio Ape system.

4
Front of the receiver
The front has an LED light on the right.
Here are the dierent LED colors and what
they mean:
• Solid Orange LED – Power plug
is connected but no Apple device
is connected
• Solid Green LED – When power and
an Apple device are both connected
to the receiver.
• Flashing Green LED – Commands from the handheld remote
are being received
• Blinking Red LED – Power overload, replace power adapter with
a working one.
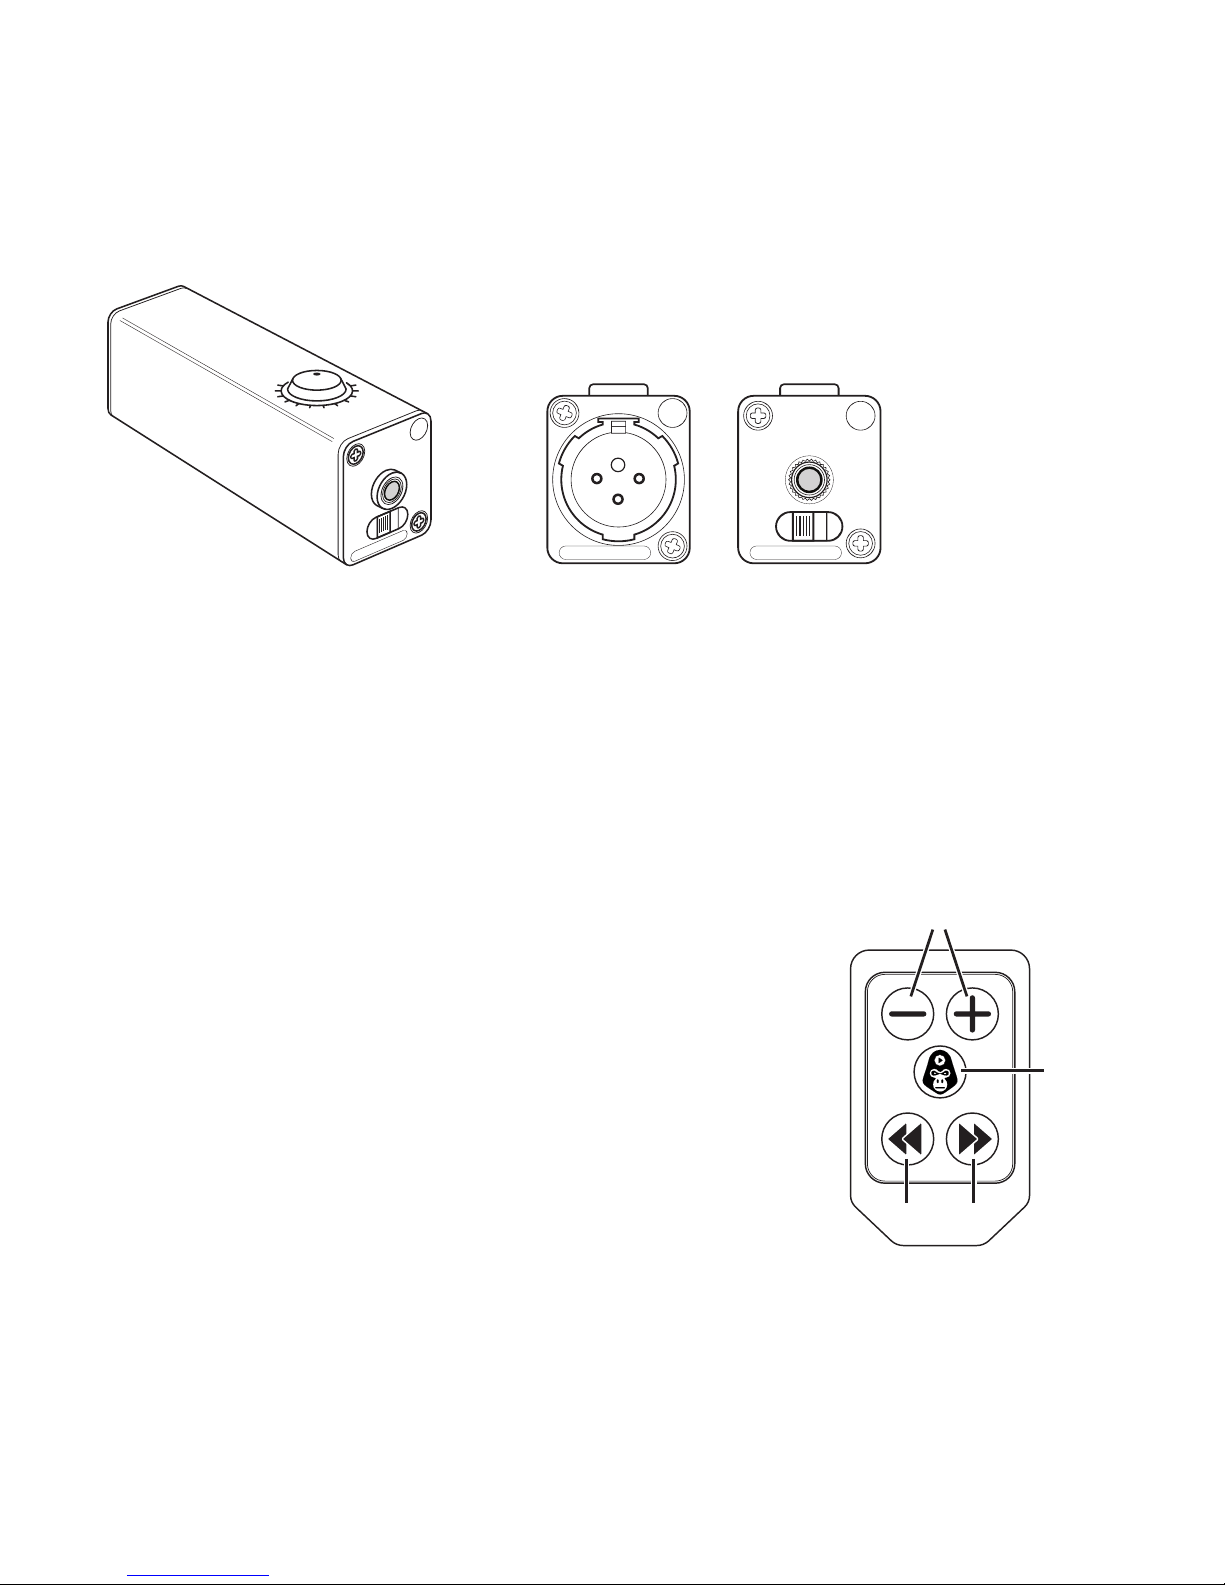
Next in the center is the Antenna port.
Simply line-up the tabs on the receiver’s connector with the slots on
the antenna’s connector. Holding the antenna’s metal ribbed ring push
inward and give a 1/4 turn clockwise to lock in place. To remove the
antenna simply turn the antenna’s metal ring counter-clockwise.
To the left is the 3.5mm audio out port. This will output your audio
from your Apple device to your chosen amplier or sound system. You
can use any number of dierent 3.5 mm connectors to get the sound
out to your chosen system the choice is yours.
Audio
Out
Antenna Connector
LED
5
If you have purchased our DI Box simply plug in the included 3.5mm cable
to the receiver’s audio out and then into the DI box’s input. You can then
run an XLR cable out from the DI Box to any professional sound system.
NOTE: The audio out port is not designed for headphones.
Personal headphones will work but the audio will begin to distort once
you go over 75% volume.
Handheld transmitter remote
This is your remote controller to send commands
to your receiver and Apple Device.
You can choose to operate it from inside your
pocket, your hand or use the included belt-clip.
The buttons will generally behave as labeled but it
is dependent on the chosen iOS app’s settings too.
Volume Control
Play
Pause
RW FF
6
Pairing spare remotes
All remotes are paired individually at the Audio Ape
factory with your receiver.
If you purchased a spare remote for your system it will
need to be paired with your existing system.
To pair a new spare remote, rst open the small back
compartment on your paired (working) remote. Here you
will a see a series of switches that can be set to the up or
down position. Using your working remote as a guide use
a paper clip to ip the switches on your spare remote
to match your working remote. Once set, quickly test to verify.
Checking the receiver’s address
If you are still having trouble you may want to check your receiver’s address.
To do this you will need a small Phillips screwdriver. On the back panel remove
all 6 screws. On the front of the receiver remove only the 2 far screws on the left
and the right side.
Remote
Address
Remove these screws

7
When you have removed all the necessary screws hold the front of the receiver
and slide the board out so you can see the address switches. Verify that they
switches match your remote.
NOTE: You can also run 2 or more receivers that are controlled by one remote.
Just open the receiver you want to add and match the address to your existing
receiver. You can also run multiple remotes to multiple receivers in this way.
Replacing the remote battery
Your battery should last for 2-3 years of normal
use. You can easily nd replacement batteries
at most chain stores or you can order them
from our site. The size needed is 2032 lithium
coin cells. To replace the battery just pop
open the back by pulling downward on the
compartmentlid.
NOTE: Do not change the position of the switch
inside the battery compartment. If your remote
is paired correctly but is still not working, after
checking the battery, check this switch and verify
that it is in the correct position (down).
Please contact us with any questions or problems at:
support@audioaperemote.com
Always
In Down
Position
Battery
Size
2032

8
This equipment has been tested and found to comply with the limits for a class
B digital device, pursuant to part 15 of the FCC Rules. These limits are designed
to provide reasonable protection against harmful interference in a residential
installation. This equipment generates, uses and can radiate radio frequency
energy and if not installed and used in accordance with the instructions, may
cause harmful interference to radio communications. However, there is no
guarantee that interference will not occur in a particular installation. If this
equipment does cause harmful interference to radio or television reception,
which can be determined by turning the equipment o and on, the user is
encouraged to try to correct the interference by one or more of the following
measures:
• Reorient or relocate the receiving antenna.
• Increase the separation between the equipment and receiver.
• Connect the equipment into an outlet on a circuit dierent from that to which
the receiver is connected.
• Consult the dealer or an experienced radio/TV technician for help.
In order to maintain compliance with FCC regulations, shielded cables must
be used with this equipment. Operation with non-approved equipment or
unshielded cables is likely to result in interference to radio and TV reception.
The user is cautioned that changes and modications made to the equipment
without the approval of manufacturer could void the user’s authority to operate
this equipment.


www.audioaperemote.com
Table of contents


