manuals.online logo
Brands
  1. Home
  2. •
  3. Brands
  4. •
  5. Audio Authority
  6. •
  7. Amplifier
  8. •
  9. Audio Authority SF-16M Manual

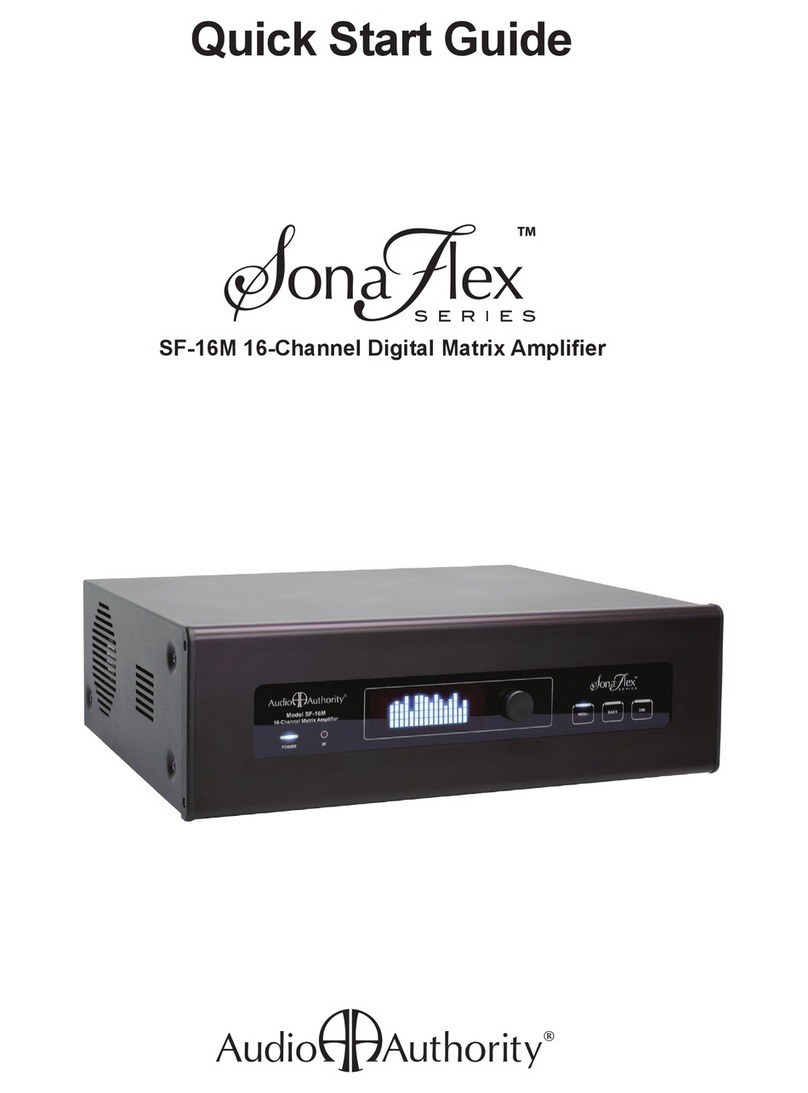
Audio Authority SF-16M Manual

SF-16M 16-Channel Digital Matrix Amplier
Setup Utility Guide
2
Advanced Conguration Using the Setup Utility
The Setup Utility is the most efcient way to set up SF-16M advanced features (using *Mac or PC), and provides
an easy way to save a copy of each conguration to edit off-site, or for backup. For more detail, see video tutorials
at www.audioauthority.com/sonaex_tip4. The following settings can only be congured using Ethernet/serial
commands or the Setup Utility (not front panel controls): Advanced DSP (EQ), Network Settings, System Trigger,
Contact Closure, Groups, Scenes, Overrides, Sleep Timer, and Lockouts. Some of the SF-16M features are not
compatible with third party controllers that are designed to perform similar functions.
Setup Tips:
1. Choose Advanced or Basic Mode - Advanced mode allows Sound Scenes and advanced DSP, and allows
control per individual speaker output, whereas Basic Mode simplies the front panel interface, combining
outputs into “Zones” for control, and is limited to Bass and Treble DSP settings. You can use Basic Mode if you
do not plan to use a third party control system such as Control4, URC, CasaTunes, or RTI; these systems have
their own methods of grouping outputs into Zones or rooms. Zones are only useful for front panel control.
2. Connect to the SonaFlex - To connect via Ethernet, connect the SonaFlex to the network via DHCP, and click
Connection>Telnet; click the Detect button, or enter the IP address manually.
3. Existing Systems - Import your SF-16M conguration from your SonaFlex using Receive All from the
Connection menu or File>Load a previously saved conguration from your computer hard drive or a USB drive.
*All examples show setup using a Mac for conguration. Using Windows OS, the Advanced mode is selected by unchecking Basic.
Connection Menu and Mode Menu
Basic or Advanced Mode.
Connection method.
Detect command.
3
Source Setup
Stereo or Mono.
Name Sources.
Gain or Trim.
Source Setup Tab - Type a name for each source, select gain adjustment (if any), and choose mono or stereo. All inputs
and outputs are mono by default. Designating a source as stereo ties the selected odd numbered source to the next even
number for switching, volume and DSP. Mono sources appear without a checked box (example Source 7, microphone 1),
while stereo pairs appear with a checked box and the even numbered source name greyed out (e.g. Source 1, 2 Blu-ray).
4
Output Setup Assignment Tab - In Basic Mode, assign each output to a Zone, and/or name the outputs and indicate
whether the outputs are mono or stereo. In Advanced Mode, Zone assignments are ignored, and all of the DSP settings
are available. Source switching is included for convienence; this utility is not intended to be a day to day user interface.
Advanced Mode
DSP settings unlocked.
Basic Mode
Output settings are greyed
out because Basic mode
is active. Many of these
settings are available on
the Zone Setup Tab.
Assign to a Zone.
Output Name.
Stereo or Mono.
5
Zone Setup (available in Basic Mode)
Power On minimum and
maximum volume limits.
Maximum Volume.
Bass and Treble are
available in Basic Mode
but not advanced DSP.
Loudness on or off.
Name the Zones you plan
to use. Zones with no
outputs assigned do not
appear on the front panel.
Zone Setup Tab - Switch to Basic Mode to use Zones instead of Outputs. Set volume levels, loudness, bass, treble, and
maximum volume levels. Some settings on this tab are permanent (e.g. volume and maximum volume levels, etc.), and
some are intended for temporary convenience while setting up levels (e.g. source, mute, power off, etc.). Set Power On
Minimum and Maximum levels to ensure moderate volume levels when an output is powered on (limits do not apply
after mute).
6
Scenes
Choose a Scene
(one of ten).
Bypass = Output 15 not
included in this Scene.
Choose a Source for
each included Output.
Set Volume for
each Output.
Set Mute and
Power status.
Scenes Tab - Sound Scene Presets are available only in Advanced Mode but you can apply a Scene from the front panel.
A Scene is a system-wide snapshot of all volume levels and source assignments. Scenes allow the end-user to recall
previously captured system settings with a single button press. Up to 10 sound Scenes can be saved and recalled per
SF-16M. Scenes can also be saved and recalled across multiple SF-16M ampliers linked together, however each
individual SF-16M has a maximum of 10 unit or “global” Scenes. Scene settings include Scene naming, source selection,
volume levels, mute status and an “Bypass” option which allows any output to always ignore a Scene preset.
PATIO
BAR
BALCONY
DINING ROOM
RESTROOMS
Sound Scene Examples:
Live Music
Apply the Live Music Scene when a
band is playing on the stage. The band’s
mixer can connect to the SonaFlex
via a FlexPort transmitter at the stage.
The SonaFlex can provide high volume
sound reinforcement in the bar area, and
lower volume in the balcony. The dining
room and restrooms can be playing
background music from a music server
at a lower volume. Guests on the patio
can be listening to a different source at a
higher volume.
Lunchtime
During the day, it’s easy to set up a
standard sound Scene with background
music playing from a music server in all
areas, louder on the patio and quiet in
the restrooms.
STAGE
7
Overrides Tab - The purpose of audio override is to provide a convenient method of temporarily switching a pre-dened
Group of outputs to a specic input. Once the audio override is released or cancelled, the outputs effected by the override
return to their previous inputs and volume levels. Overrides can be brief, for applications like paging and doorbells, or
longer duration for local source selection like an iPod, AppleTV, or audio mixer. Audio override can be triggered by two
contact closure inputs on the back of the SF-16M, as well as specic serial, IR commands, and Flex Port triggers. Up to
10 audio override congurations can be set up per SF-16M, plus FlexPort overrides (see FlexPort Manual). Audio override
settings include source assignment, output members, output levels, and override priority. An override with a low number
(e.g., 1) outranks an override with a high number priority (e.g., 3).
Overrides
Choose a Source for
Override.
Set Priority for each
Override.
Selected Active Override.
PATIO
BAR
BALCONY
DINING ROOM
RESTROOMS
Audio Override Examples:
Announcements
A practical example of this feature is a
Host/Hostess station. The speakers in the
restaurant normally play background music
from a satellite radio receiver or music
server. The microphone push-to-talk button
triggers Override 1 which is programmed to
switch the speaker outputs for all rooms from
background music to the Microphone 1 input.
When the button is released, all speakers
return to the previous source.
STAGE
HOSTESS
STATION
8
Front Panel Controls Tab - Adjust the SF-16M front panel display settings here. Set Front Panel Brightness (the brightness
of the keys and front panel display) by adjusting the slider (25, 50, 75, or 100%). The Sleep Timer slider (0,1,2, or 5 minutes)
indicates when to turn off the front display after the front panel keys and knob have not been used for a period of time. Set
the Front Panel IR On/Off to disable or enable front panel IR sensor (If not required for control, leave it off to avoid issues
with sunlight or other interference). Set the Front Panel Lock to disable or enable the front panel controls (disable if IR is not
required for daily use).
Output Trigger, and Contact Closure - The SF-16M provides two “Audio Override” contact closure inputs, which allow
pushbuttons, partition wall contacts, and other contact sensors to engage an override.
The System Trigger contacts on the SF-16M allow equipment such as A-V receivers or power managment devices to put the
SF-16M in standby to conserve energy. Choose Audio Sense or Audio Sense Plus Trigger for the trigger mode.
Contact closures may be used to engage an override or a sound Scene preset. Choose toggle or momentary. Contact
closures can not be used to trigger a FlexPort override (see FlexPort Manual).
Front Panel, Contacts and Trigger
Control functionality
of SF-16M Front
Panel display.
Choose Mode for
System Trigger.
Set Contact Closure
Parameters.
The SF-16M provides two “Audio
Override” contact closure inputs, which
allow pushbuttons, partition wall contacts,
and other contact sensors to engage
an override. Audio override provides a
convenient method of temporarily switching
to an alternate audio input when a sensor
is triggered.
PUSH-BUTTON
OVERRIDE 1
SF-16M
OVERRIDE
CONTACTS
OVERRIDE 2
PARTITION
PARTITION
CONTACT
MICROPHONE
1
SATELLITE RADIO
MICROPHONE
2
ROOM A
SPEAKERS
ROOM B
SPEAKERS
1 2
3 4 5 6 7 8 9 10 11 12 13 14 15 16
ETHERNET
USB
RS-232 IN
RS-232 OUT
LINK
SPEED
MAIN IR
IN
MAIN IR
OUT
UNIT ID
DB25 AUDIO INPUT
CONTACT CLOSURE 5V - 24V AC / DC
AUDIO LOOP OUTPUT
LINE INPUTS
OUT
IN
1 2
IN OUT
SYSTEM
TRIGGER
AUDIO
OVERRIDE
Set voltage selector
and install correct
fuses according to
local power supply.
Régler le sélecteur
de tension et
installer les fusibles
corrects selon
l’alimentation locale.
4002715
1 3 5 7 9 11 13 15
2 4 6 8 10 12 14 16
L
R
ETL LISTED CONFORMS
TO UL STD 60065
CERTIFIED TO CAN/CSA
STD C22.2 NO. 60065
Audio Authority® Corp. • 2048 Mercer Rd. Lexington, KY 40511 USA
800-322-8346 • 859-233-4599 • www.audioauthority.com Model SF-16M 16-Channel
Digital Matrix Amplifier
VOLTAGE SELECTOR
OUT
IN
CAUTION: Do not connect Ethernet to FlexPort
100-120V~ 50-60 Hz 1125W
Replace Fuses Only
with T 10A, 250V
Remplacer Uniquement avec
Fusible T 10A, 250V
TECH TIPS
C
9
Groups Tab - Groups are a collection of Zones that can be controlled simultaneously using Group volume and Group
switching commands, etc. When several Zones are members of a Group, you can still adjust their settings individually,
but when a Group command is issued, all member Zones respond. Up to 10 Groups can be created per SF-16M. Group
settings include Group naming and output Zone members.
Network - This displays the status of the network, the native IP address, gateway, subnet mask, and MAC address. It
is often convenient to turn DHCP on to connect automatically to a DHCP network for initial setup. Once the SF-16M is
installed, use a static IP address and turn DHCP off. Use Simple Device Discovery Protocol (SDDP) when using Control4
products to connect to the SF-16M.
Groups and Networks
Select to connect
automatically.
Select to use
Control4™protocol.
Name the Group.
Select the Zone to add
to the Group.
Add or remove
the Zone.
SPEAKER OUTPUTS
ZONE 3
LOBBY
GROUP 1
INTERIOR
GROUP 2
EXTERIOR
ZONE 1
BAR
ZONE 2
DINING RM
ZONE 4
PATIO
1 2 3 4 5 6 7 8 9 10 11 12 13 14 15 16
In this restaurant example, the speaker outputs are divided into Zones,
and two Groups include overlapping members.
Zones and Groups are useful for control of SonaFlex speaker outputs – they are not compatible with third party
controllers, which have their own methods of controlling multiple outputs at once. Each Zone may contain one
or many speaker outputs, which can be mono and/or stereo. Zones may not overlap. Groups can contain one or
many Zones, and their members can overlap, as shown below.
1 0
DSP Tab - The Digital Signal Processing tab is available only in Advanced Mode. Seven lters are available, to be used
individually and/or as a multi-band EQ. Filters include high-pass, low-pass, high shelf, low shelf, and parametric. To create
a seven-band parametric EQ (shown on page 11), select type: parametric for all lters, then set frequencies at regular
intervals. Set levels to compensate according to requirements for each output. High-pass and low-pass lters are intended
for passive subwoofers and full range speakers. If low-pass or high-pass lter is used, always use lter slot 1.
DSP Tab in Advanced Mode
Choose an Output.
(Bypass = inactive).
Graph shows combined
results of all lters.
Activate a lter, set
frequency and gain for
each lter.
To use the DSP tab you must switch to Advanced Mode. Be aware that making this switch is semi-permanent, so you may
wish to back up the Basic Mode conguration onto your computer or USB drive. Once you switch to Advanced Mode, bass
and treble adjustments are no longer possible, because you have chosen to use advanced DSP adjustments on Outputs,
not on Zones. To revert back to Basic Mode from Advanced Mode, you must either load the Basic Mode archived on your
computer, or use the Front Panel menu to reset the SF-16M to Factory Default.
DSP Tab in Basic Mode
DSP settings are greyed
out because Basic mode
is active.
The rst four lters are
used for bass, treble and
loudness in basic mode.
11
Zone Control Tab - Use the Zone Control feature for troubleshooting or testing the SF-16M installation. Select a Zone,
choose a Source, and adjust Volume, Treble, Bass, Mute and Loudness. This tab works in Basic Mode, and if all outputs
are mapped to their own zone (default settings), it works in Advanced Mode as well.
Zone Control
Zone Control tab is
convenient for testing in
Basic Mode.
Select a Zone.
Choose a Source.
Volume and Filtering.
DSP Tab in 7-band parametric conguration
Set frequencies at
regular intervals.
Adjust in realtime.
audioauthority.com/adx_tips
audioauthority.com/sonaex_tips
ADX TIPS
• VIDEOS
• FAQ
• TUTORIALS
SONAFLEX
• VIDEOS
• FAQ
• TUTORIALS 2048 Mercer Road, Lexington, Kentucky 40511-1071
800-322-8346 • 859-233-4599 • Fax: 859-233-4510
www.audioauthority.com • support@audioauthority.com
v 1.5.0
E-139
20151208

Other manuals for SF-16M

3

Other Audio Authority Amplifier manuals

Audio Authority 1710B User manual

Audio Authority

Audio Authority 1710B User manual

Audio Authority 1816-1 User manual

Audio Authority

Audio Authority 1816-1 User manual

Audio Authority DTV User manual

Audio Authority

Audio Authority DTV User manual

Audio Authority SF-16M User manual

Audio Authority

Audio Authority SF-16M User manual

Audio Authority Sona Flex SF-16B Operating instructions

Audio Authority

Audio Authority Sona Flex SF-16B Operating instructions

Audio Authority SonaFlex SF-16M User manual

Audio Authority

Audio Authority SonaFlex SF-16M User manual

Audio Authority Access EZ 955 User guide

Audio Authority

Audio Authority Access EZ 955 User guide

Audio Authority 1392A User manual

Audio Authority

Audio Authority 1392A User manual

Audio Authority HDMI 1398B User manual

Audio Authority

Audio Authority HDMI 1398B User manual

Audio Authority 1374A User manual

Audio Authority

Audio Authority 1374A User manual

Audio Authority SF-16M Operating instructions

Audio Authority

Audio Authority SF-16M Operating instructions

Audio Authority AMP-1235 Owner's manual

Audio Authority

Audio Authority AMP-1235 Owner's manual

Audio Authority 1398D User manual

Audio Authority

Audio Authority 1398D User manual

Audio Authority 916X DC User manual

Audio Authority

Audio Authority 916X DC User manual

Audio Authority 985DTV Operating instructions

Audio Authority

Audio Authority 985DTV Operating instructions

Audio Authority SF-16M Operating instructions

Audio Authority

Audio Authority SF-16M Operating instructions

Audio Authority 1805 User manual

Audio Authority

Audio Authority 1805 User manual

Audio Authority 1816 User manual

Audio Authority

Audio Authority 1816 User manual

Audio Authority 985U Operating instructions

Audio Authority

Audio Authority 985U Operating instructions

Audio Authority 1185ci User manual

Audio Authority

Audio Authority 1185ci User manual

Audio Authority Distribution Amplifiers 985DTO Operating instructions

Audio Authority

Audio Authority Distribution Amplifiers 985DTO Operating instructions

Audio Authority 1398 User manual

Audio Authority

Audio Authority 1398 User manual

Audio Authority 1805 User manual

Audio Authority

Audio Authority 1805 User manual

Audio Authority 1185ci User manual

Audio Authority

Audio Authority 1185ci User manual

Popular Amplifier manuals by other brands

Tektronix 7A18A instruction manual

Tektronix

Tektronix 7A18A instruction manual

Bogen Gold Seal GS250 Specifications

Bogen

Bogen Gold Seal GS250 Specifications

thomann the t.amp S-75 MK II user manual

thomann

thomann the t.amp S-75 MK II user manual

powersoft Ottocanali 12K4 user guide

powersoft

powersoft Ottocanali 12K4 user guide

Perreaux 200 MkII owner's manual

Perreaux

Perreaux 200 MkII owner's manual

Monacor 21.0680 manual

Monacor

Monacor 21.0680 manual

Ceriatone Bluesbreaker JTM45 user manual

Ceriatone

Ceriatone Bluesbreaker JTM45 user manual

GLOCKENKLANG Heart-Rock user manual

GLOCKENKLANG

GLOCKENKLANG Heart-Rock user manual

Pioneer GM-42A owner's manual

Pioneer

Pioneer GM-42A owner's manual

CARVIN PB200 II manual

CARVIN

CARVIN PB200 II manual

Cerwin-Vega V250.2 owner's manual

Cerwin-Vega

Cerwin-Vega V250.2 owner's manual

Audison HV SEDICI owner's manual

Audison

Audison HV SEDICI owner's manual

Kingray KDA20 installation manual

Kingray

Kingray KDA20 installation manual

MartinLogan Unison user manual

MartinLogan

MartinLogan Unison user manual

Panasonic FX-305 instruction manual

Panasonic

Panasonic FX-305 instruction manual

Sherbourn PRE-1 user manual

Sherbourn

Sherbourn PRE-1 user manual

Pioneer SA-1490 operating instructions

Pioneer

Pioneer SA-1490 operating instructions

Sennheiser HDVA 600 user manual

Sennheiser

Sennheiser HDVA 600 user manual

manuals.online logo
manuals.online logoBrands
  • About & Mission
  • Contact us
  • Privacy Policy
  • Terms and Conditions

Copyright 2025 Manuals.Online. All Rights Reserved.