Audio Authority 1704 User manual

User Manual
Model 1704
Demonstration Media Player
2
Introduction
The 1704 plays a wide array of audio and video les for interactive HD media
demonstrations. It has a variety of interface methods including four push-buttons,
serial communication, and IR. Load video and/or audio les on an SD card using
a Microsoft Windows® PC. Output can be digital and/or analog video and audio.
It is ideal for use with one or more Audio Authority® audio distribution ampliers
such as Model 1726 headphone demonstrators.
Features
• HDMI audio-video output (1080p)
• Composite video output (480i)
• Digital and analog audio output (2-channel)
• Multiple video and audio le formats
• Autoplay at power-up
• Small footprint, 4” x 6” x 1.5” including anges
Package Contents
Before installing this product, please check the
packaging and make certain the following items are
contained in the shipping carton:
• 1704 Media Player
• DC Power Adapter
• Remote Control (CR2025 battery not included)
• User Manual
Model 1704

3
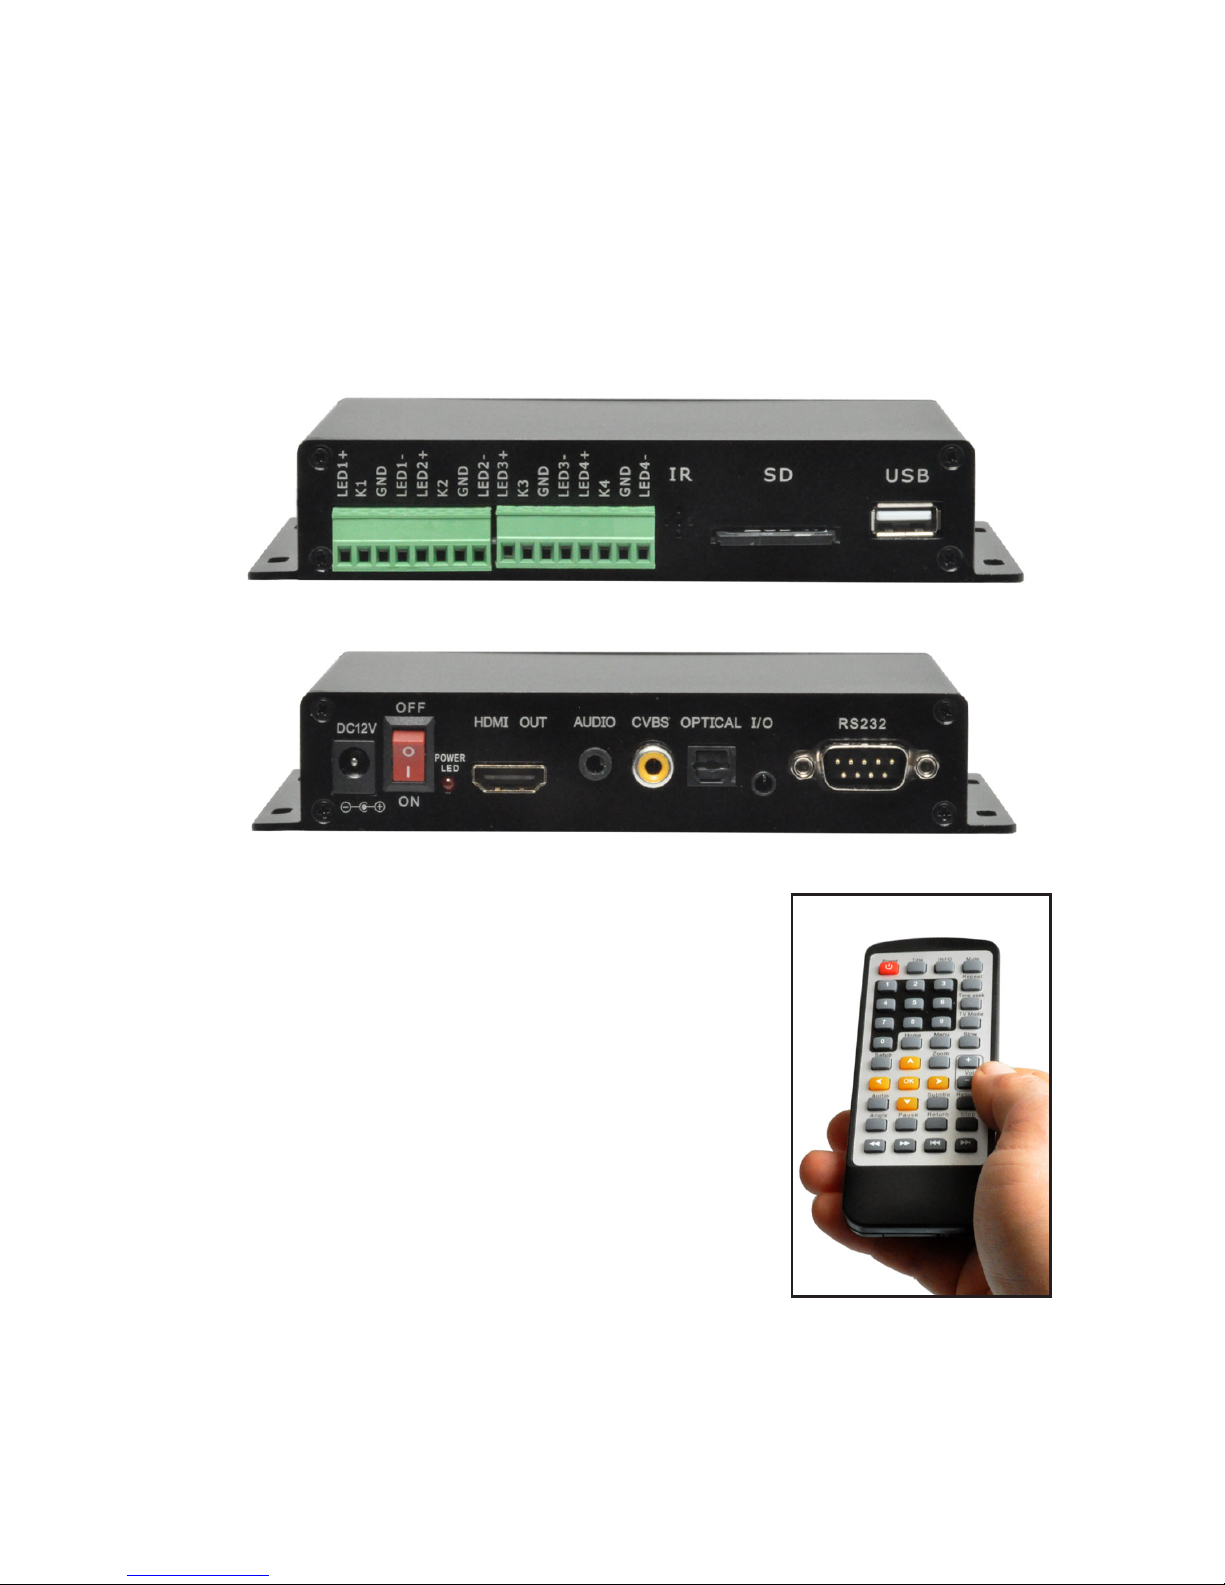
Model 1704 (rear panel)
Model 1704 (front panel)
USBSDIR
LED1+
LED1-
LED2+
LED2-
LED3+
LED3-
LED4+
LED4-
GND
GND
GND
GND
K1
K2
K3
K4
A B C D E F G
DC12V
OFF
HDMI OUT AUDIO CVBS OPTICAL I/O RS232
POWER
LED
HI J K L M N O P
Panel Descriptions
# 1 push-button # 2 push-button # 3 push-button
# 4 push-button IR receiver SD card slot USB (rmware updates)
A B C
DE F G
12V power input Power switch Power light HDMI output
Analog audio output 3.5 mm Composite Video Digital output (Toslink®)
I/O port for motion sensor (3.5mm) Serial port (DB9 connector)
HIJK
L M N
O P
4
SD Card Slot
The video and audio les are stored on an SD card (SD up to 4GB, SDHC up to
32 GB, does not accept SDXC) as well as programming instructions for custom
functionality. Do not use a computer running Mac OS to put les on the SD card.
Video, still images, and audio les placed on the root of the SD card will autoplay
on power up. If the SD card is updated to add new video les, check to make
sure the custom programming remains on the card.
Video Output
The 1704 HD output connects via an HDMI cable to HDMI display screens.
Composite Video may be connected (if needed) at the CVBS connector. Both
video outputs play at the same time.
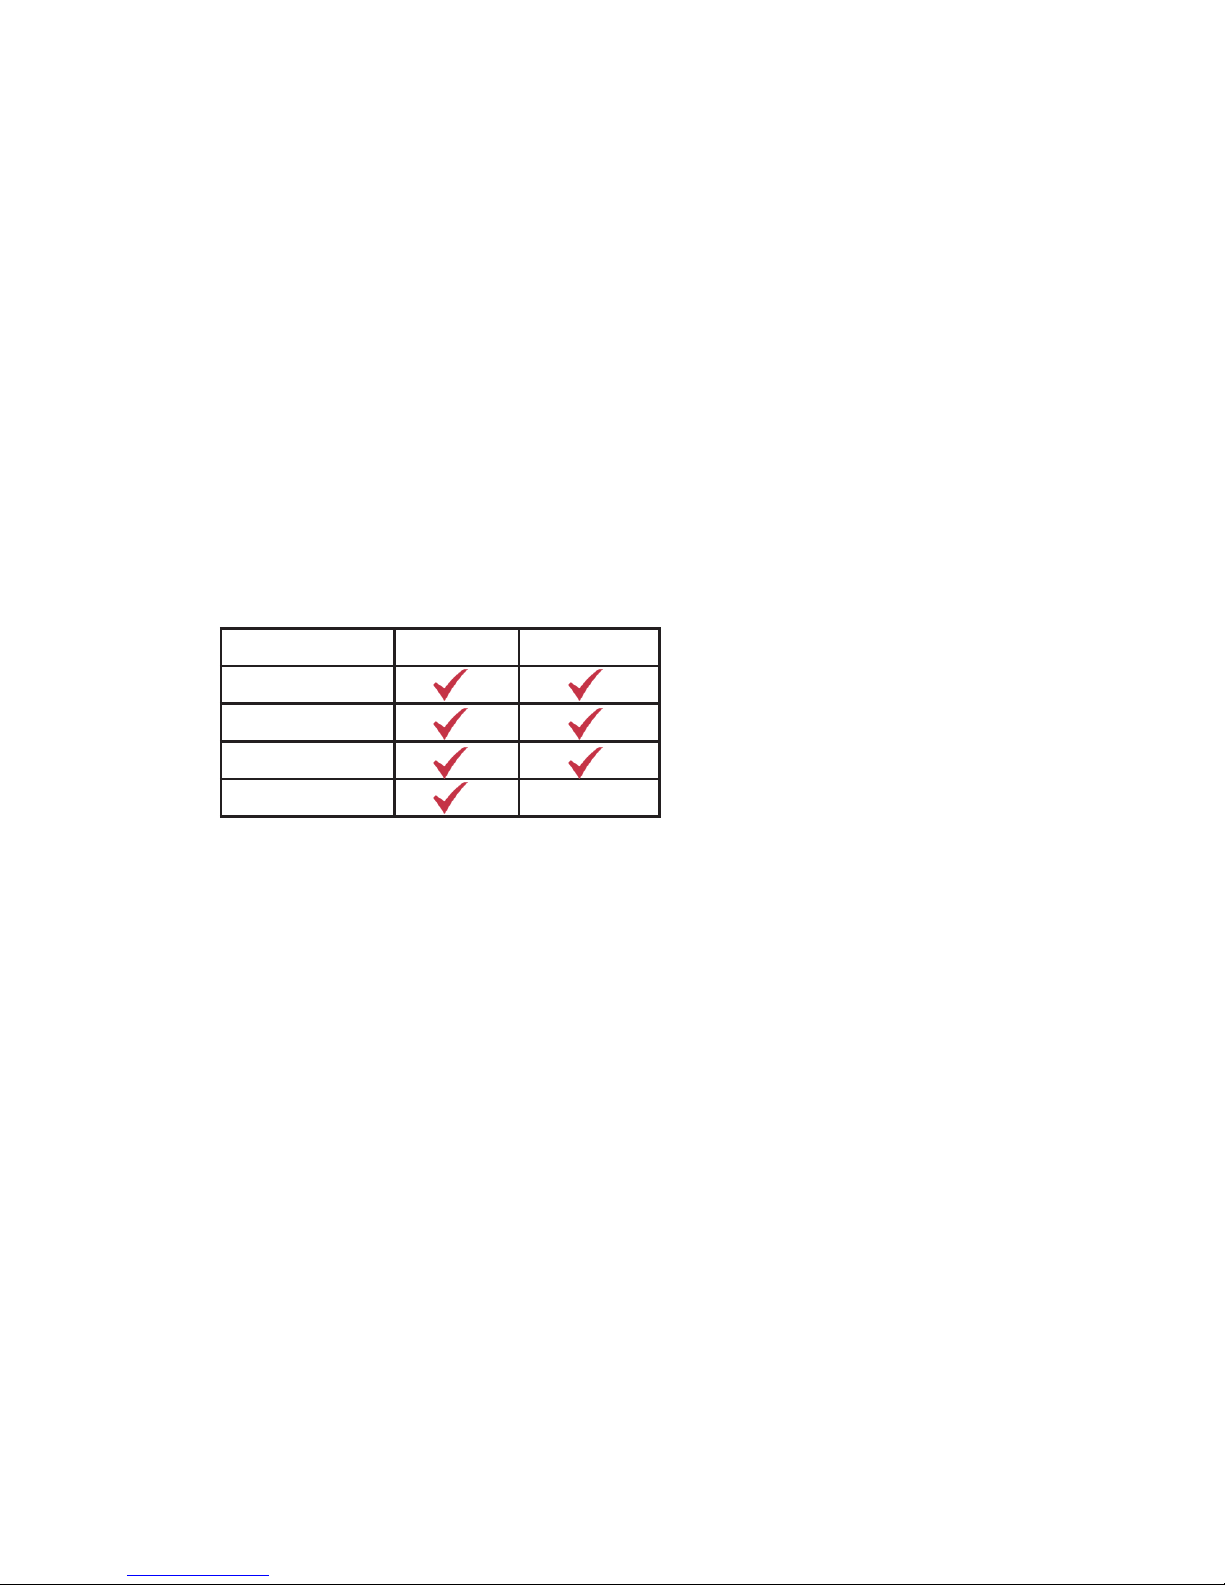
Video File Information
Supported le types are listed below, with maximum video resolution and audio
format. Test all les before deployment.
Audio Output
The 1704 connects to any device that can accept 2-channel PCM digital audio
via an optical cable, or low-level analog audio through 3.5mm stereo connector.
Audio File Information
• Audio le types include MP3, WAV, ADPCM, AAC, OGG,
RA-lossless, and SRS.
• MP3 les: variable or constant bit rate (up to 320 kbps).
• WAV les: ADPCM, any sample rate up to 48kHz.
• FLAC les: 2 channel, variable bit rate 24bit/192K.
RS-232
The 1704 can respond to external commands via RS-232, or it can issue
commands to other devices. Basic commands are listed on page 8, custom
programming is available from Audio Authority.
File Type 720p/2-ch 1080p/2-ch
MP4
MKV
TS
MOV

5
Control Interface Connections
The 1704 can be controlled using four push-buttons,
RS-232, remote control, and/or via IR.
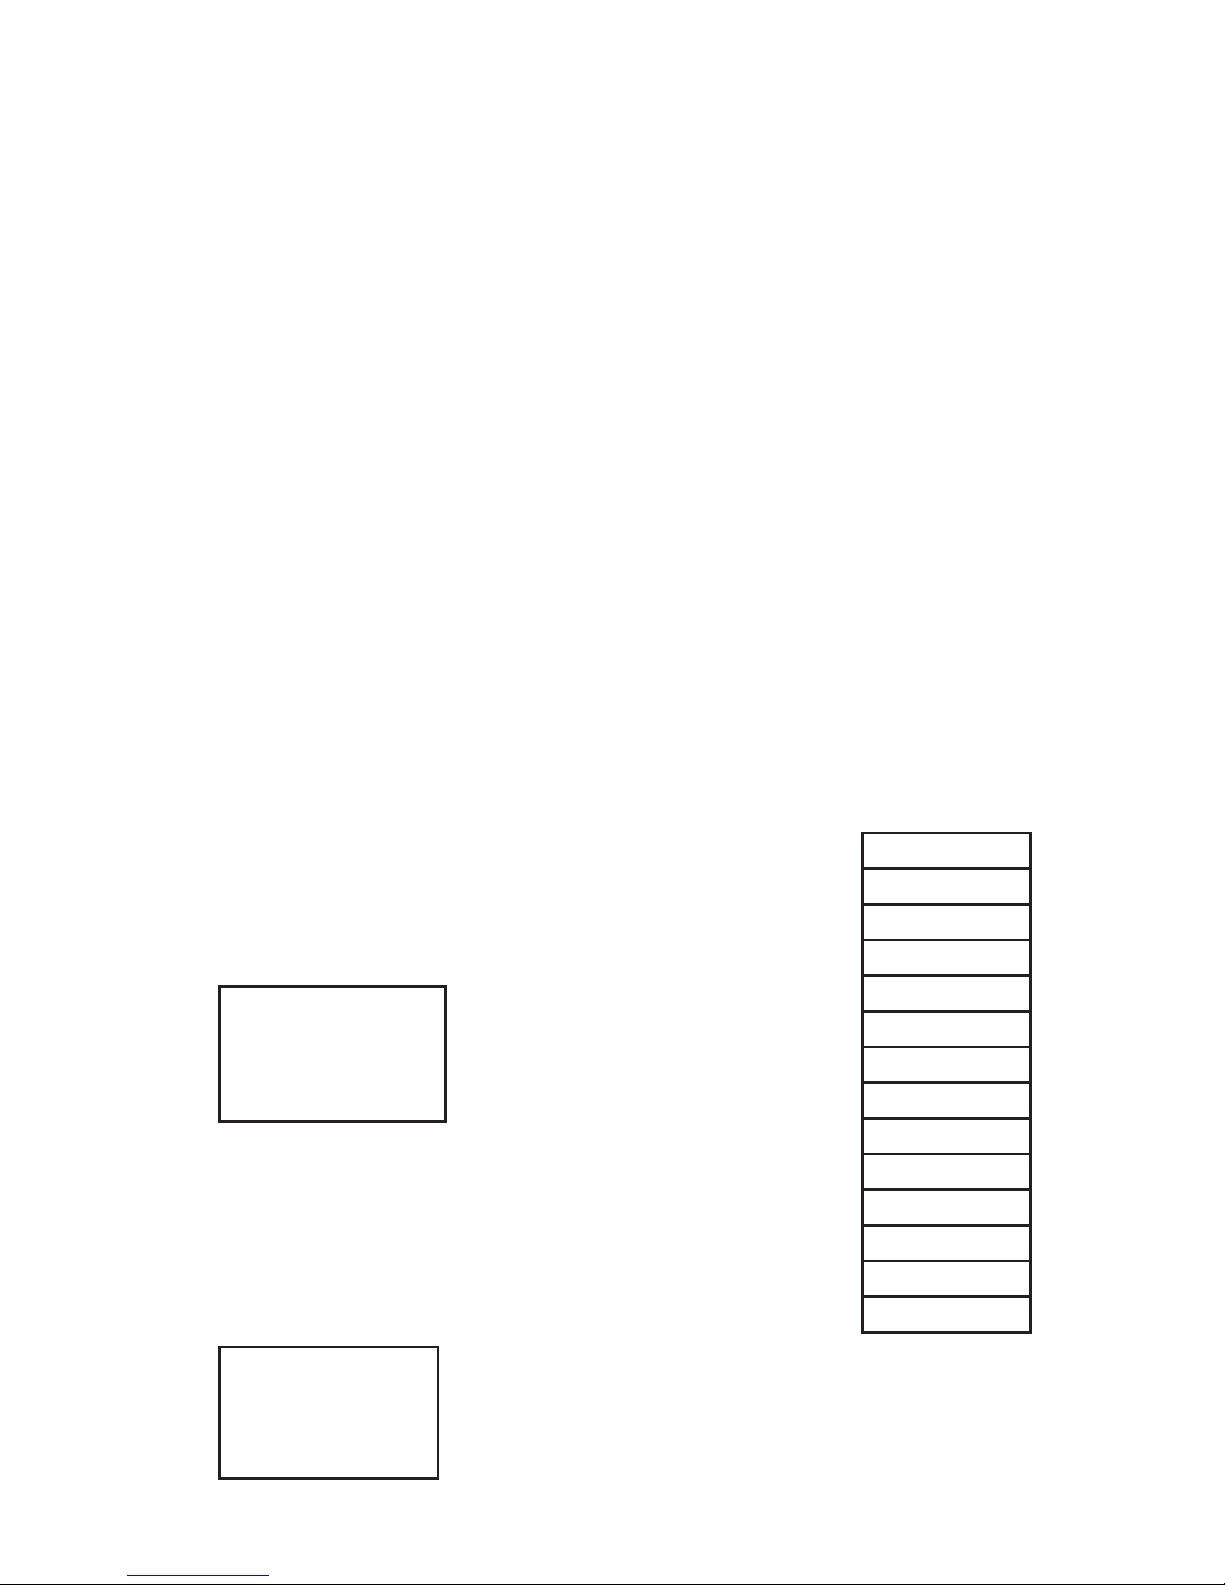
Push-Buttons
To control media using push-buttons, connect
4-wire momentary switches to each position at the
green terminal sockets (Figure 3). Compatible
push-buttons are available from Audio Authority
(Figure 2). Push-buttons are available in several styles
and colors; Figure 1 shows a stainless steel button
illuminated with blue LED ring.
Figure 1. Model 999S push-button
Figure 2. Push-button with optional disconnect harness
Button 2
Button 1
Red = LED+
Red = LED+
Black = LED-
Black = LED-
Blue = Switch
Blue = Switch
White = GND
White = GND
Button 4
Button 3
Red = LED+
Red = LED+
Black = LED-
Black = LED-
Blue = Switch
Blue = Switch
White = GND
White = GND
Figure 3. Push-button harness connections

6
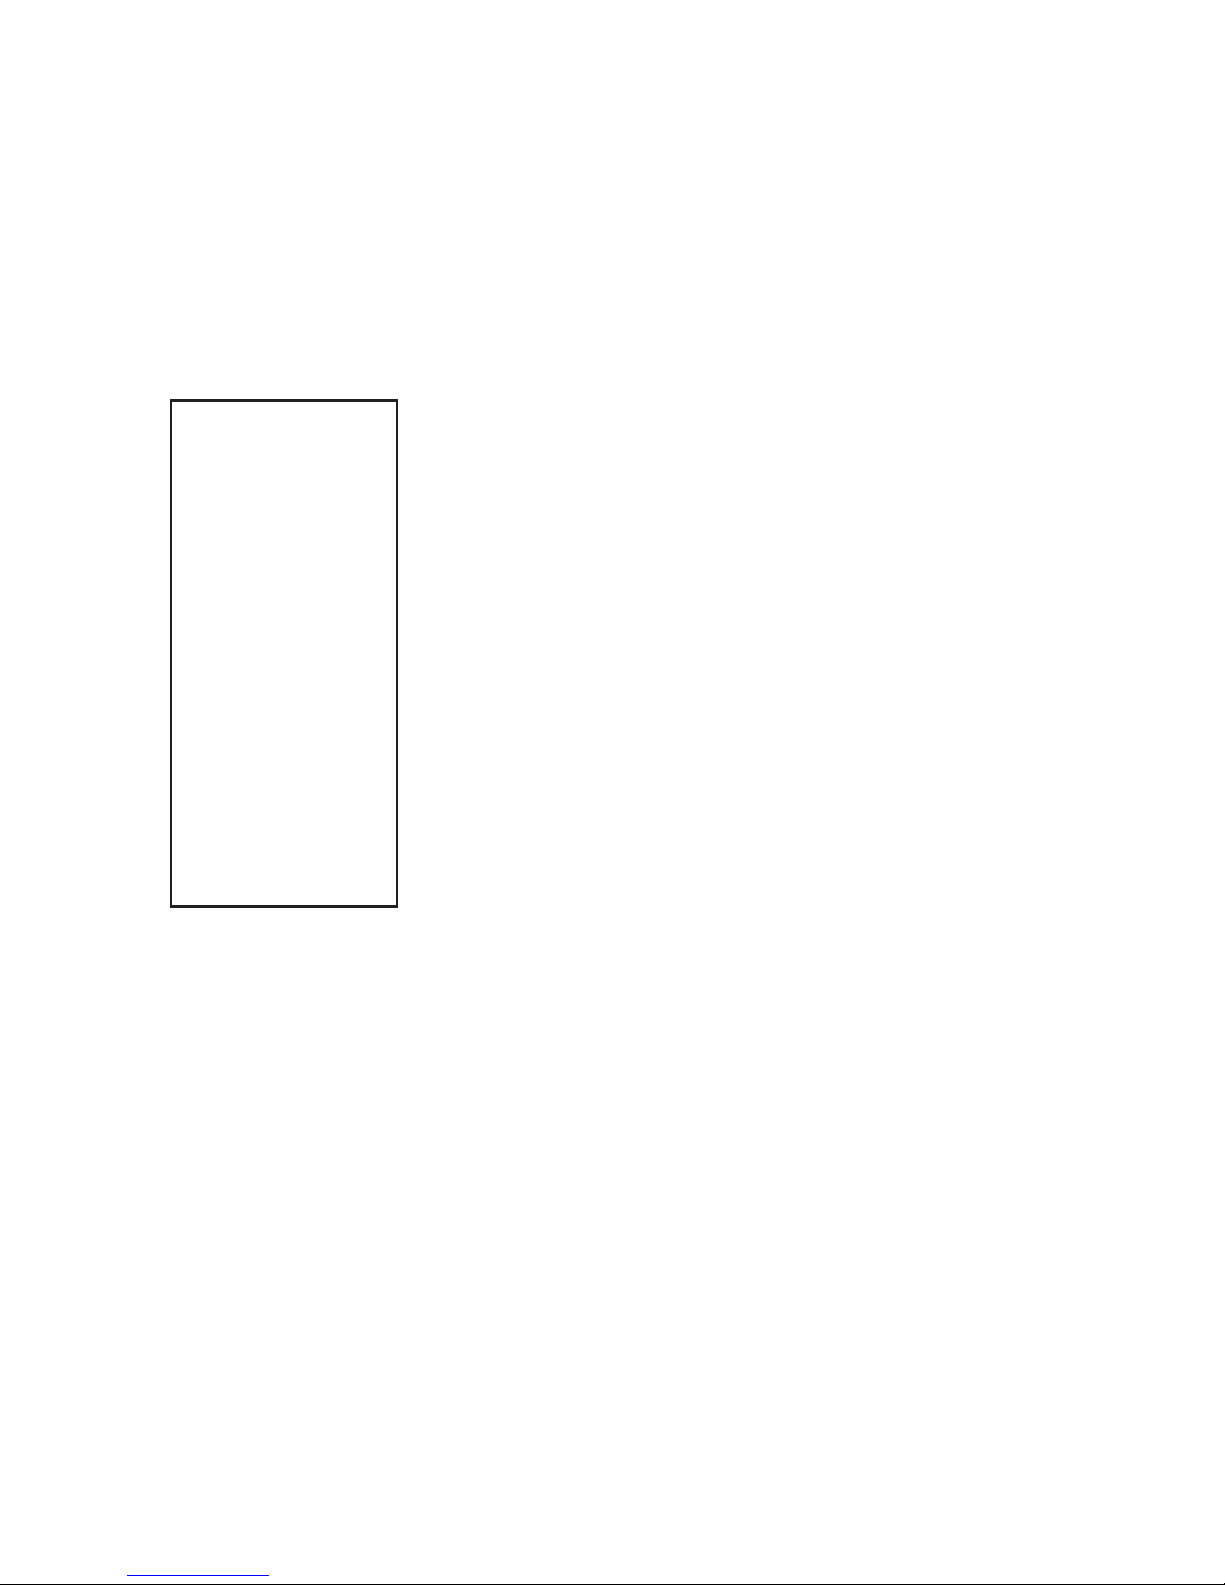
Remote Control
The remote control is useful for setup and testing (Figure 5). Insert a CR2025
battery (not included).
Power Press to power on/off
Title Press to view title
Info Press to view channel info
Mute Press to mute audio output
Numeric Press to enter numeric input
Repeat Press to set repeat option
Time Seek Press to jump to specic point
TV Mode Press to switch between NTSC/PAL
Home Press to return to main menu
Menu Press to enter main menu
Slow Press to play in slow-motion
Setup Press to access Setup menu
Zoom Press to zoom in/out when playing back
Navigate Press the arrow buttons to navigate menu
OK Press to conrm selection
Volume - Press to reduce volume
Volume + Press to increase volume
Audio Press to select audio format
Subtitle Press to activate subtitles
Resume Press to resume play
Angle Press to view angle
Pause Press to pause playback
Return Press to return to previous screen
Stop Press to stop playback
FR Press to fast rewind
FF Press to fast forward
Previous 1. Press to go to the previous le when playing music
2. Press to page up the le list in browser
Next 1. Press to go to the next le when playing music
2. Press to page down the le list in browser

7
Figure 5. Remote Control
8
Using Control Interfaces
The player can be controlled by four push-buttons, IR commands (including
remote control), and RS-232 commands. All player interaction depends on how
les are named and arranged on the SD card (PC setup only, not Macintosh
compatible). Video, still images, or audio les placed on the root of the SD card
will autoplay on power up. To use playlists, put media les in separate playlist
folders. The folders can be any name but must be linked by name to a playlist
number within the autoplay.txt le, as shown in Example 2.
Note: If you need more than four “buttons” you can use the number keys on the IR
remote, or RS232 commands such as @00:05$, to trigger the corresponding playlist.
For example, the 1726 demonstrator allows eight buttons via RS-232; see page 11.
Using Push-buttons
Push-buttons can be used for transport controls like Play and Next Track, or they
can be used to start a media le or a playlist of les. Sample SD card folders are
available to demonstrate the capabilities of the 1704 media player:
www.audioauthority.com/downloads/videos/1704transport.zip
www.audioauthority.com/downloads/videos/1704playlists.zip
To test the functionality of each mode, copy the contents of a demo folder into
the root folder of an empty SD card and then insert it in the 1704 SD card slot.
Program the buttons using the example text le contents below.
Example 1: Push-buttons for Transport Control
This example shows how to use push-buttons to trigger
basic media player functionality. The player refers to the
commands in a text le on the SD card.
Inside the autoplay.txt le:
PLAY=1 assigns “Play” to push button 1
STOP=2 assigns “Stop” to push button 2
NEXT=3 assigns “Next” to push button 3
PREV=4 assigns “Previous” to push button 4
Example 2: Push-buttons Trigger Video Playlists
This example shows how to use push-buttons to trigger
specic video playlists.
Inside the autoplay.txt le:
01=Playlist1/*.* play les in the “Playlist1” folder when push-button 1 is pressed
02=Playlist2/*.* play les in the “Playlist2” folder when push-button 2 is pressed
03=Playlist3/*.* play les in the “Playlist3” folder when push-button 3 is pressed
04=Playlist4/*.* play les in the “Playlist4” folder when push-button 4 is pressed
NEXT
PREV
STOP
RETURN
PLAY
UP
DOWN
LEFT
RIGHT
SETUP
MENU
VOL_PLUS
VOL_MINUS
MUTE
Buttons
9
Creating a Slideshow with Audio
The push-buttons can be used for transport control of each slideshow. Place
still images in folders of the root directory and label the folder photo1/. Create a
corresponding audio folder named photo1_audio and place the background audio
les that folder. Place the autoplay.txt le in the root folder. Inside the text les
slideshow parameters can be adjusted such as playing time (parameter range 1-13
seconds), transition time (parameter range 1-13 seconds) and volume (parameter
range 1-31).
Inside the autoplay.txt le:
Transition=9 assigns transition from image to image in folder.
Slide time=13 assigns length of screen time per image.
Volume=30 assigns custom volume level for audio playback.
01=photo1/*.* play les in the “photo1/” folder when push-button 1 is pressed
Transition=9 assigns transition from image to image in folder.
Slide time=13 assigns length of screen time per image.
Volume=30 assigns custom volume level for audio playback.
02=photo2/*.* play les in the “photo1/” folder when push-button 2 is pressed
Transition=9 assigns transition from image to image in folder.
Slide time=13 assigns length of screen time per image.
Volume=30 assigns custom volume level for audio playback.
03=photo3/*.* play les in the “photo1/” folder when push-button 3 is pressed
Transition=9 assigns transition from image to image in folder.
Slide time=13 assigns length of screen time per image.
Volume=30 assigns custom volume level for audio playback.
04=photo4/*.* play les in the “photo1/” folder when push-button 4 is pressed

10
Using RS-232 Commands
Use the command format shown in the command list, and make sure the les and
folders are arranged and named correctly as shown above.
Basic Serial Command List
@00:OK$ OK
@00:UP$ Direction Key, Up
@00:REV$ Playback
@00:FWD$ Fast Forward
@00:REP$ Repeat Play
@00:MUTE$ Mute/Unmute Toggle
@00:VOL+$ Volume Up
@00:VOL-$ Volume Down
@00:STOP$ Stop
@00:PREV$ Previous File
@00:NEXT$ Next File
@00:ENTER$ Enter
@00:LEFT$ Direction Key, Left
@00:DOWN$ Direction Key, Down
@00:SYNC$ Start Over (return to the beginning of the le)
@00:POWER$ Power Toggle (On or Off)
@00:AUDIO$ Open Audio Format Window
@00:PAUSE$ Pause
@00:RIGHT$ Direction Key, Right
@00:01$ Play les in folder linked to Playlist 1 in autoplay.txt
@00:02$ Play les in folder linked to Playlist 2 in autoplay.txt
@00:99$ Play les in folder linked to Playlist 99 in autoplay.txt
Serial Protocol
Transfer Rate 9600 bps
Data Bits 8
Parity None
Stop Bits 1
Flow Control None or Off
5 4 3 2 1
9 8 7 6
GND RX TX
Pinout
Pin 2, Tx
Pin 3, Rx
Pin 5, Ground
Shell, Ground
11
Installation
• Attach the player to a at surface with the screws provided.
• Connect push-buttons, if desired, for media selection. Push buttons should
be four-wire momentary switches, and can be illuminated (2-5 volt LED).
• Connect A-V output(s) to a monitor, amplier, or a headphone amplier
if desired.
• Connect power supply to AC power, then to the 1704 power port.
• For initial testing, connect A-V output(s) to a test player to check for
desired functionality.
• Call Audio Authority with questions that are not addressed in this manual.
Operation
On power up, the POWER LED comes on to show normal operation. If media
les have been placed in the root of the SD card, the 1704 begins playing the rst
media le in the root. Operate push-buttons (if installed) to select media tracks.
Demonstration may also be triggered by selecting a product with push-buttons
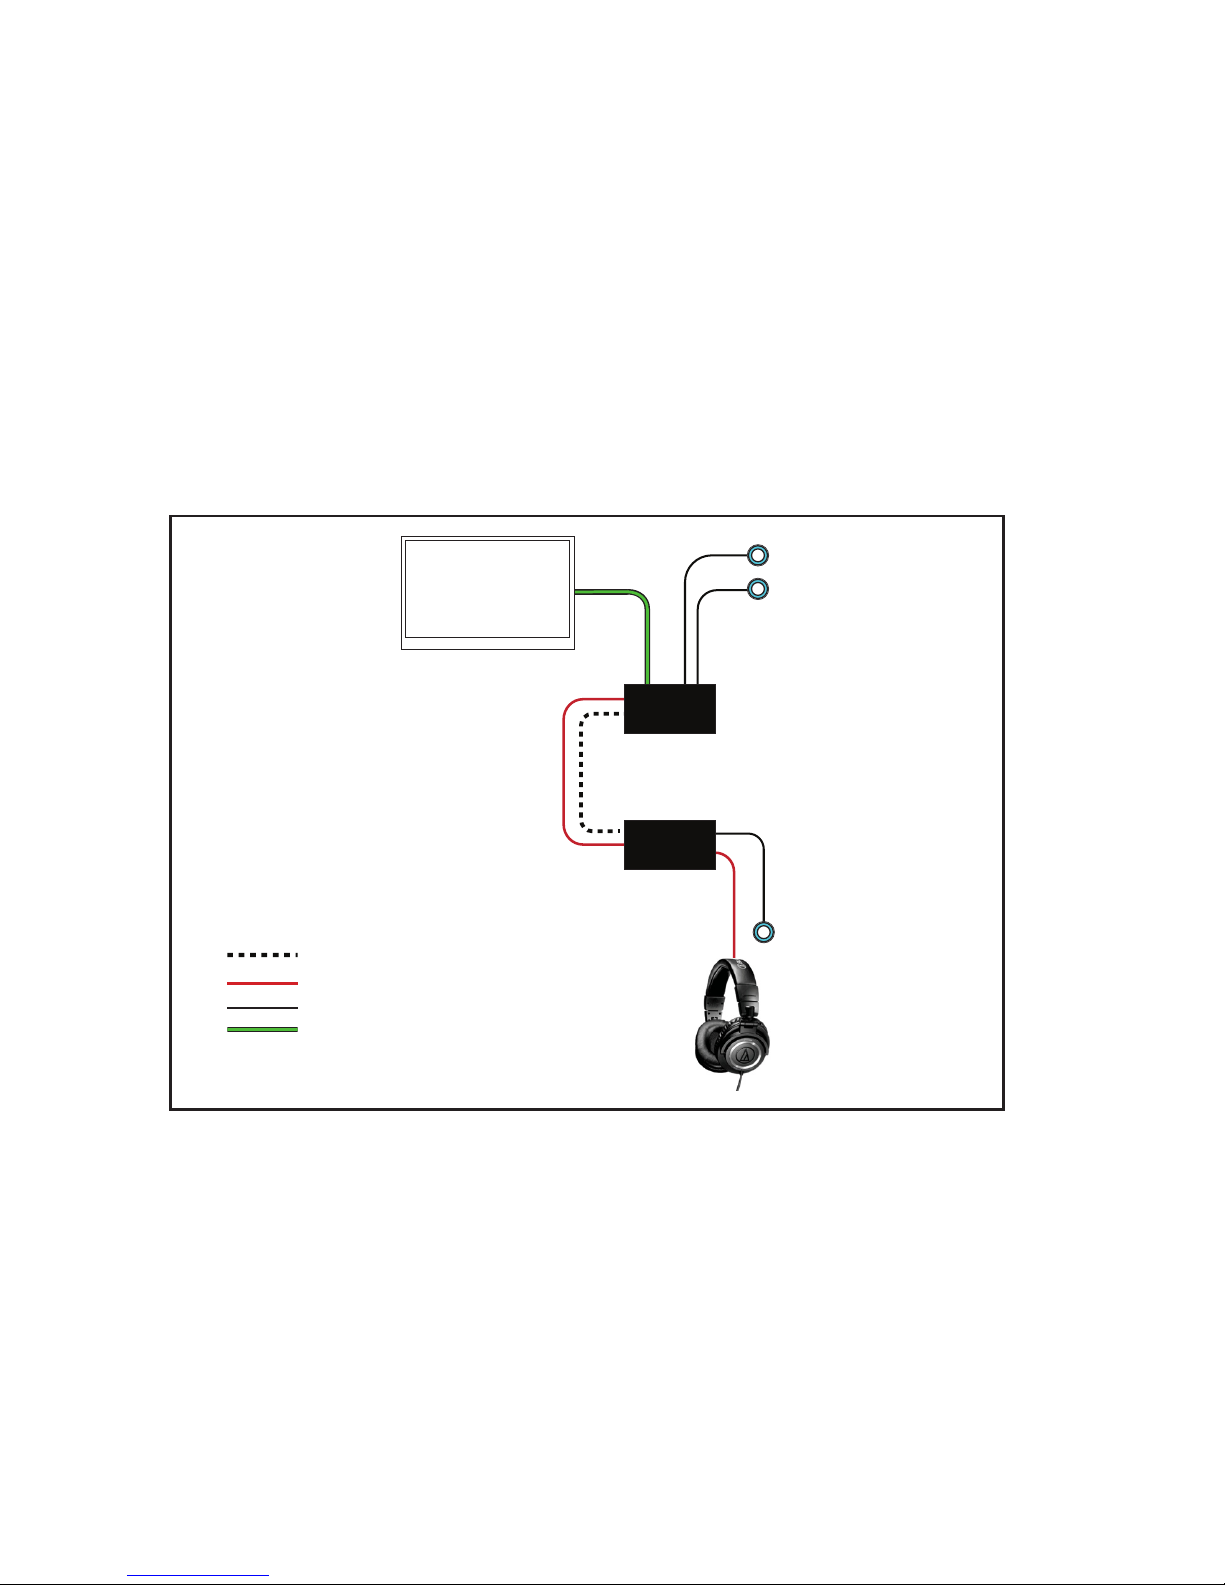
attached to an accompanying Model 1726 headphone demonstrator (Figure 6).
Figure 6. Example System with Model 1726. With custom programming, the 1726 can trigger the 1704
to play a specic media le for each product.
Speaker
1704
Video Display
1726
Product Select Push-Button
Volume Up
Volume Down
(Up to 8 Push-Buttons)
Example System
Speaker
1704
Video Display
1726
Product Select Push-Button
Volume Up
Volume Down
(Up to 8 Push-Buttons)
RS-232
Button Harness
HDMI
Digital Output
Digital Audio
RS-232
Digital Audio (Optical)
Button Harness
HDMI
RS-232
Audio
Button Harness
HDMI

2048 Mercer Road, Lexington, KY 40511-1071 USA
800-322-8346 • 859-233-4599 • Fax: 859-233-4510
support@audioauthority.com • www.audioauthority.com
752-698
Rev.20160929
Table of contents
Other Audio Authority Media Player manuals

Audio Authority
Audio Authority BrightSign MH2-4K User manual

Audio Authority
Audio Authority BrightSign MH4-HD User manual

Audio Authority
Audio Authority 1703 User manual

Audio Authority
Audio Authority 1703 User manual

Audio Authority
Audio Authority BrightSign MH4-4K User manual

Audio Authority
Audio Authority BrightSign MH2-HD User manual

Audio Authority
Audio Authority 1703-1 User manual

Audio Authority
Audio Authority BrightSign MH6-HD User manual


