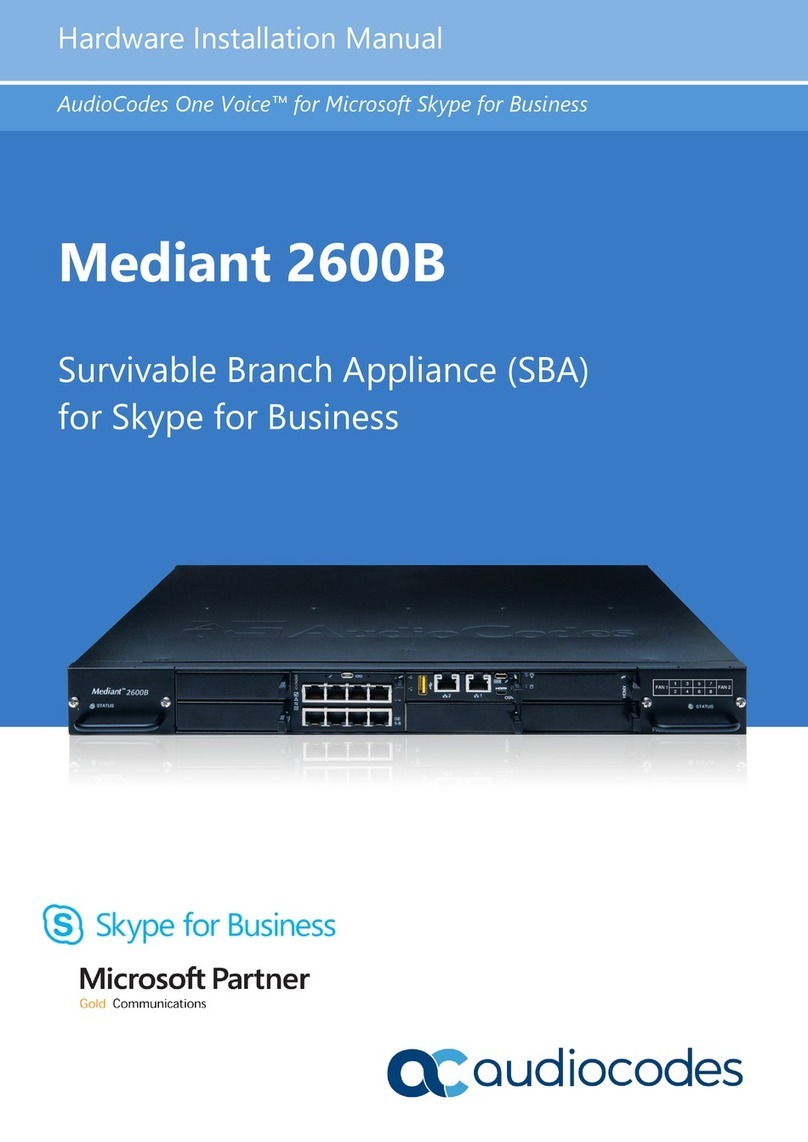
AudioCodes Mediant Series User manual

Quick Setup Guide
AudioCodes Mediant™ Series
BroadCloud Hosted UC Solution using
AudioCodes Mediant™ CRP
Version 7.2


Configuration Note Contents
BroadCloud Hosted UC 3 AudioCodes Mediant CRP
Table of Contents
1Introduction .........................................................................................................5
1.1 Making BroadCloud Preparations............................................................................5
1.2 Component Information............................................................................................5
1.2.1 AudioCodes CRP Version .........................................................................................5
1.2.2 BroadCloud Hosted UC Version................................................................................5
1.2.3 Solution Topology......................................................................................................6
2Installing the Hardware.......................................................................................7
2.1 Mediant 500L ...........................................................................................................7
2.1.1 Front Panel................................................................................................................7
2.1.2 Rear Panel.................................................................................................................7
2.1.3 Cabling.......................................................................................................................8
2.1.3.1 Connecting Ethernet Interfaces..................................................................8
2.1.3.2 Connecting to the Power Supply................................................................9
2.1.4 Powering the Device On / Off..................................................................................10
2.2 Mediant 500 ...........................................................................................................11
2.2.1 Cabling.....................................................................................................................12
2.2.1.1 Grounding the Device...............................................................................12
2.2.1.2 Connecting Ethernet Interfaces................................................................12
2.2.1.3 Connecting to the Power Supply..............................................................13
2.3 Mediant 800B.........................................................................................................15
2.3.1 Front Panel..............................................................................................................15
2.3.2 Front Panel LEDs ....................................................................................................15
2.3.2.1 Operational Status LEDs..........................................................................15
2.3.3 Rear Panel...............................................................................................................16
2.3.4 Cabling.....................................................................................................................16
2.3.4.1 Grounding the Device...............................................................................16
2.3.4.2 Connecting to Ethernet.............................................................................16
2.3.5 Powering up.............................................................................................................17
2.4 Mediant 2600 .........................................................................................................19
2.4.1 Front Panel..............................................................................................................19
2.4.2 Rear Panel...............................................................................................................19
2.4.3 Cabling.....................................................................................................................20
2.4.3.1 Grounding the Device...............................................................................20
2.4.3.2 Connecting to Ethernet.............................................................................20
2.4.3.3 Connecting to the Power Supply..............................................................21
3Connecting to the Management Interface.......................................................23
3.1 Default OAMP IP Address......................................................................................23
3.2 Connecting to the Embedded Web Server.............................................................23
3.2.1 Change Default Management User Login Passwords ............................................24
4Configuring the Device.....................................................................................25
4.1 Step 1: Download, Install BroadCloud Certified Firmware / Configuration.............25
4.2 Step 2: Configure a Network Interface for the Device............................................30
4.2.1 Step 2a: Configure Network Interfaces....................................................................31
4.2.2 Step 2b: Configure NAT...........................................................................................32
4.3 Step 3: Configure the UDP Ports for RTP between CRP and IP-Phones and/or
ATA Devices....................................................................................................................34
4.4 Step 4: Adopt Classification Policy for CRP Users (if Required)............................36
4.5 Step 5: Check the Connectivity and Registration Status........................................37

BroadCloud Hosted UC
AudioCodes Mediant CRP 4 Document #: LTRT-29836
4.6 Step 6: Secure Device Access...............................................................................39
4.6.1 Secure Management Access via WAN....................................................................39
4.7 Step 7: Save the Configuration, Connect to DMZ..................................................40
AConfigure PSTN FallBack (if Required)...........................................................41
A.1 Step 1: Cabling.......................................................................................................41
A.1.1 Connecting BRI to the Mediant 500L.......................................................................41
A.1.2 Connecting ISDN PRI (E1/T1) Trunk to the Mediant 500 and Mediant 800B.........42
A.2 Step 2: Configure PSTN Trunk Settings ................................................................43
A.2.1 Step 2a: Configure the BRI PSTN Interface............................................................43
A.2.2 Step 2b: Configure PCM Law Select.......................................................................44
A.2.3 Step 2c: Configure the PRI PSTN Interface............................................................45
A.3 Step 3: Configure Trunk Group Parameters ..........................................................46
A.3.1 Step 3a: Configure the BRI Trunk Group (for Devices with BRI PSTN Interface)...46
A.3.2 Step 3b: Configure the PRI Trunk Group (for Devices with PRI PSTN Interface)...46
A.4 Step 4: Configure CRP Gateway Routing..............................................................47
A.5 Step 5: Configure SIP Parameters for CRP PSTN Fallback..................................47
A.5.1 Step 5a: Enable the CRPGatewayFallback Parameter...........................................47
A.5.2 Step 5b: Update the CRP Gateway Proxy Set........................................................48
BTroubleshooting................................................................................................49
B.1 Connecting to CLI ..................................................................................................49
B.2 Enabling Logging on CLI........................................................................................49
Notice
Information contained in this document is believed to be accurate and reliable at the time of
printing. However, due to ongoing product improvements and revisions, AudioCodes cannot
guarantee accuracy of printed material after the Date Published, nor can it accept
responsibility for errors or omissions. Updates to this document and other documents as
well as software files can be viewed by registered customers at
http://www.audiocodes.com/downloads.
This document is subject to change without notice.
Date Published: September-07-2017

AudioCodes Mediant 1. Introduction
BroadCloud Hosted UC 5 AudioCodes Mediant CRP
1 Introduction
This guide shows how to set up AudioCodes' Cloud Resilience Package (referred to as
CRP in this document) for interworking between BroadCloud's Hosted UC and IP-Phones
and/or ATA devices environment.
1.1 Making BroadCloud Preparations
Before reading and using this Quick Setup Guide, read the BroadCloud Hosted
Survivability Service Definition guide available from the BroadCloud knowledgebase
(info.broadcloudpbx.com).
Note: The BroadCloud Hosted Survivability Service Definition Guide details how to
provision the Survivability device and the Survivability Users
. This guide assumes
you've read that guide and that the required provisioning has been completed.
When provisioning, select the appropriate Shared Device Type:
AudioCodes Mediant Device
Note: If you do not have this device type available in your service offering, contact your
Account Manager who will arrange it for you.
1.2 Component Information
1.2.1 AudioCodes CRP Version
Table 1-1: AudioCodes CRP Version
CRP Vendor AudioCodes
Models Mediant 500L
Mediant 500
Mediant 800B
Mediant 2600 (Without PSTN connectivity)
Software Version F7.20A.152.003
Protocol SIP/UDP (to the BroadCloud Hosted UC Service)
SIP/UDP or SIP/TCP (to the IP-Phones and/or ATA devices)
1.2.2 BroadCloud Hosted UC Version
Table 1-2: BroadCloud Version
Vendor/Service Provider BroadCloud
SSW Model/Service BroadWorks
Software Version 21
Protocol SIP/UDP

BroadCloud Hosted UC
AudioCodes Mediant CRP 6 Document #: LTRT-29836
1.2.3 Solution Topology
Interoperability between AudioCodes CRP and BroadCloud Hosted UC Service with the IP-
Phones and/or ATA devices was achieved using the following topology setup:
Enterprise IP-Phones and/or ATA devices
AudioCodes Mediant CRP device, connecting the enterprise’s IP-Phones and/or ATA
devices to the BroadCloud Hosted UC service over IP
Internet/MPLS network connectivity to the BroadCloud Hosted UC service
The figure below illustrates this solution's topology:
Figure 1-1: Solution Topology between CRP, IP-Phones and/or ATA Devices with BroadCloud
Hosted UC Service

AudioCodes Mediant 2. Installing the Hardware
BroadCloud Hosted UC 7 AudioCodes Mediant CRP
2 Installing the Hardware
2.1 Mediant 500L
2.1.1 Front Panel
LEDs on the front panel indicate functionality statuses.
Figure 2-1: Front Panel - LEDs
When green, 1 (power LED) indicates power is on. Table 2-1 describes 2 (Status LED).
Table 2-1: Status LED
LED
Color LED State Description
Green On Device is operational.
Flashing Initial rebooting stage.
Red On Boot failure.
- Off Advanced rebooting stage.
2.1.2 Rear Panel
Figure 2-2: Rear Panel
Table 2-2: Rear Panel
Item # Label Description
1 POWER 12V -
- 3A AC power supply plug entry to connect to the external AC power supply
adapter.
2 ON / OFF Power button which powers on the device when pressed in and powers

BroadCloud Hosted UC
AudioCodes Mediant CRP 8 Document #: LTRT-29836
Item # Label Description
off the device when pressed again (pressed out).
3 CONSOLE RJ-45 port for RS-232 serial communication with the device.
4
USB 2.0 port, not applicable.
5 // Reset pinhole button to reset the device or to restore to factory defaults.
To restore to factory defaults: With a paper clip or any other similar
pointed object, press and hold down the pinhole button for at least 12
seconds, but no longer than 25 seconds
6 S1 / FE LAN Up to four Fast Ethernet (10/100Base-T) ports (RJ-45) to connect to LAN
or WAN. These support full-duplex modes, auto-negotiation, and straight
or crossover cable detection.
2.1.3 Cabling
2.1.3.1 Connecting Ethernet Interfaces
Four Fast Ethernet (10/100Base-T) ports (supporting half- and full-duplex modes, auto-
negotiation, and straight or crossover cable detection) allow connection to the LAN/WAN.
To connect the device to the BroadCloud service (WAN-DMZ):
1. If the device's IP isn't configured yet, connect as shown in Section 3.
2. If the device's IP has already been configured:
a. Connect one end of a straight-through RJ-45 Cat 5e or Cat 6 cable to the RJ-45
port labeled S1 / FE LAN port 1.
b. Connect the other end to the DMZ port assigned by the IT administrator.
Figure 2-3: Cabling Ethernet Ports
To connect the device to the Enterprise LAN:
1. If the device's IP isn't configured yet, connect as shown in Section 3.
2. If the device's IP has already been configured:
a. Connect one end of a straight-through RJ-45 Cat 5e or Cat 6 cable to the RJ-45
port labeled S1 / FE LAN port 3.
b. Connect the other end to your local network LAN layer 2 switch port. This port will
be used to communicate with the IP-Phones and/or ATA Devices.

AudioCodes Mediant 2. Installing the Hardware
BroadCloud Hosted UC 9 AudioCodes Mediant CRP
2.1.3.2 Connecting to the Power Supply
The device is powered by an external 12V AC/DC power adapter (supplied), connected to
a standard alternating current (AC) electrical wall outlet.
Table 2-3: Power Specifications
Item Description
Power Supply Single universal external AC power supply
Input Ratings 100-240 VAC, 50-60 Hz
Output Ratings 12V/3A
Warning: Use only the AC/DC power adapter supplied with the device.
The device is shipped with the AC/DC power adapter shown the figure below which also
supports interchangeable plugs to suite the electrical wall outlet type requirement of the
country in which the device is being installed.
Figure 2-4: AC/DC Power Adapter
Table 2-4: Power Adapter with Interchangeable Plugs
Item Description
1 Plug slot
2 Plug lock
3 Plug release lever
4 DC power cord
5 DC power plug
To connect the device to the power supply using the power adapter:
1. Insert the relevant AC plug into the housing power adapter:
a. Insert the top part of the plug into the upper part of the housing slot (1).
b. Press down on the bottom part of the plug until a click is heard, indicating that the
plug is securely inserted in the housing slot. To remove the plug, push and slide
down the OPEN plug release lever (3).

BroadCloud Hosted UC
AudioCodes Mediant CRP 10 Document #: LTRT-29836
Figure 2-5: Inserting Plug into Power Adapter
2. Insert the DC plug (5) located at the end of the power cord (4) of the power adapter
into the device's power socket located on the rear panel.
Figure 2-6: Cabling to Power using Power Adapter
3. Plug the power adapter directly into a standard electrical wall outlet.
2.1.4 Powering the Device On / Off
The power switch is located on its rear panel (see Section 2.1.2).
To power on the device:
Press in the power button; the device receives power and the Power LED on the front
panel lights up.
To power off the device:
Press out the power button; the device powers off and the Power LED goes off.

AudioCodes Mediant 2. Installing the Hardware
BroadCloud Hosted UC 11 AudioCodes Mediant CRP
2.2 Mediant 500
Figure 2-7: Front Panel - Ports
Table 2-5: Front Panel
Item # Label Description
1 POWER /
STATUS LEDs indicating the status of the power and reboot/initialization.
2 // Reset pinhole button to reset and optionally to restore to factory
defaults. To restore to factory defaults: Press and hold down the
pinhole button for at least 12 seconds, but no longer than 25 seconds,
with a paper clip or any other similar pointed object.
3 CONSOLE RJ-45 port for RS-232 serial communication
4 LAN Up to four Gigabit Ethernet (10/100/1000Base-T) ports to connect to
LAN (IP phones, computers, or switches). These ports support half-
and full-duplex modes, auto-negotiation, and straight or crossover
cable detection.
6 USB Two USB 2.0 ports. Do not use.
Figure 2-8: Rear Panel – Earth and Power
Table 2-6: Rear Panel
Item # Label Description
1
Protective earthing screw.
2 I / 0 Power switch (Ois off; Iis on).
3 100-240V~50-60Hz 0.8A
Max. Three-prong AC power supply entry.

BroadCloud Hosted UC
AudioCodes Mediant CRP 12 Document #: LTRT-29836
2.2.1 Cabling
2.2.1.1 Grounding the Device
The device must be connected to earth (grounded) using an equipment-earthing conductor.
Protective Earthing
The equipment is classified as Class I EN60950 and UL60950 and must be
earthed at all times.
For Finland: Laite on liltettava suojamaadoituskoskettimilla varustettuun
pistorasiaan.
For Norway: Apparatet rna tilkoples jordet stikkontakt.
For Sweden: Apparaten skall anslutas till jordat uttag.
To earth the device:
1. Connect an electrically earthed strap of 16 AWG wire (minimum) to the chassis'
earthing screw (located on the rear panel), using the supplied washer.
2. Connect the other end of the strap to a protective earthing. This should be in
accordance with the regulations enforced in the country of installation.
Figure 2-9: Earthing the Device
2.2.1.2 Connecting Ethernet Interfaces
Up to four Gigabit Ethernet (10/100/1000Base-T) ports supporting half- and full-duplex
mode, auto-negotiation, and straight/crossover cable detection allow connection to
LAN/WAN.
To connect the device to the BroadCloud service (WAN-DMZ):
1. If the device's IP isn't configured yet, connect as shown in Section 3.
2. If the device's IP has already been configured:
a. Connect one end of a straight-through RJ-45 Cat 5e or Cat 6 cable to the RJ-45
port labeled S1 / LAN GE port 1.
b. Connect the other end to the DMZ port assigned by the IT administrator.

AudioCodes Mediant 2. Installing the Hardware
BroadCloud Hosted UC 13 AudioCodes Mediant CRP
Figure 2-10: Cabling the Ethernet Ports
3. Connect the other end of the cable to the Gigabit Ethernet network.
To connect the device to the enterprise LAN:
1. If the device's IP isn't configured yet, connect as shown in Section 3.
2. If the device's IP has already been configured:
a. Connect one end of a straight-through RJ-45 Cat 5e or Cat 6 cable to the RJ-45
port labeled S1 / LAN GE port 3.
b. Connect the other end to your local network LAN layer 2 switch port. This port will
be used to communicate with the IP-Phones and/or ATA Devices.
2.2.1.3 Connecting to the Power Supply
The device receives power from a standard alternating current (AC) electrical outlet. The
connection is made using the supplied AC power cord.
Table 2-7: Power Specifications
Physical Specification Value
Input Voltage Single universal AC power supply 100 to 240V
AC Input Frequency 50 to 60 Hz
AC Input Current 0.8A
Warnings: The device must be connected to a socket-outlet providing a protective
earthing connection. Use only the AC power cord that is supplied with the device.
To connect the device to the power supply:
1. Connect the line socket of the AC power cord (supplied) to the device's AC power
socket (labeled 100-240V~50-60 Hz 0.8A), located on the rear panel.

BroadCloud Hosted UC
AudioCodes Mediant CRP 14 Document #: LTRT-29836
Figure 2-11: Connecting to the Power Supply
2. Connect the plug at the other end of the AC power cord to a standard electrical outlet.
3. Press the power switch to on (I) position so that the device receives power; the
POWER LED on the front panel is lit green.

AudioCodes Mediant 2. Installing the Hardware
BroadCloud Hosted UC 15 AudioCodes Mediant CRP
2.3 Mediant 800B
2.3.1 Front Panel
Figure 2-12: Front Panel
Table 2-8: Front Panel Description
Item
# Label Description
1
USB/WWAN
N/A
2
RS-232
RS-232 port for serial communication. Cable not included.
3 POWER/ST
ATUS LEDs indicating power and reboot/initialization status. See also
Section 2.3.2 on page 15.
5 -Reset pinhole button to reset and optionally to restore factory defaults. To
restore to factory defaults: Press and hold down the Reset pinhole button
with a paper clip or similar pointed object, for at least 12 seconds but no
more than 25.
6 GE Four 10/100/1000Base-T (Gigabit Ethernet) LAN/WAN ports.
7 FE N/A
2.3.2 Front Panel LEDs
2.3.2.1 Operational Status LEDs
The STATUS LED indicates the operating status.
Table 2-9: STATUS LEDs
LED Color LED State Description
Green On The device is operational and in Standalone mode (not in High-
Availability mode).
Flashing Initial rebooting stage.
Slow Flash HA mode - LED on Active device.
Slow-Fast
Flash HA mode - LED on Redundant device.
Red On Boot failure.
Off Advanced rebooting stage.

BroadCloud Hosted UC
AudioCodes Mediant CRP 16 Document #: LTRT-29836
2.3.3 Rear Panel
Figure 2-13: Rear Panel
Table 2-10: Rear Panel
Item # Label Description
1
Protective earthing screw.
2 100-240V~1.5A
50-60Hz 3-Prong AC power supply entry.
2.3.4 Cabling
2.3.4.1 Grounding the Device
The device must be connected to earth (grounded) using an equipment-earthing conductor.
Protective Earthing
The equipment is classified as Class I EN60950 and UL60950 and must be
earthed at all times.
For Finland: Laite on liltettava suojamaadoituskoskettimilla varustettuun
pistorasiaan.
For Norway: Apparatet rna tilkoples jordet stikkontakt.
For Sweden: Apparaten skall anslutas till jordat uttag.
To ground the device:
1. Connect an electrically earthed strap of 16 AWG wire (minimum) to the chassis'
grounding screw (located on the rear panel), using the supplied washer.
Figure 2-14: Grounding the Device
2. Connect the other end to a protective earthing (according local regulations).
2.3.4.2 Connecting to Ethernet
Up to four 10/100/1000Base-T (Gigabit Ethernet) RJ-45 ports supporting half- and full-
duplex modes, auto-negotiation, and straight or crossover cable detection, allow
connecting to the LAN/WAN.

AudioCodes Mediant 2. Installing the Hardware
BroadCloud Hosted UC 17 AudioCodes Mediant CRP
To connect the device to the BroadCloud service (WAN-DMZ):
1. If the device's IP isn't configured yet, connect as shown in Section 3.
2. If the device's IP has already been configured:
a. Connect one end of a straight-through RJ-45 Cat 5e or Cat 6 cable to the RJ-45
port labeled LAN GE port 1.
b. Connect the other end to the DMZ port assigned by the IT administrator.
Figure 2-15: Connecting the LAN Ports
To connect the device to the enterprise LAN:
1. If the device's IP isn't configured yet, connect as shown in Section 3.
2. If the device's IP has already been configured:
a. Connect one end of a straight-through RJ-45 Cat 5e or Cat 6 cable to the RJ-45
port labeled LAN GE port 3.
b. Connect the other end to your local network LAN layer 2 switch port. This port will
be used to communicate with the IP-Phones and/or ATA Devices.
2.3.5 Powering up
The device receives power from a standard alternating current (AC) electrical outlet. The
connection is made using the supplied AC power cord.
Table 2-11: Power Specifications
Physical Specification Value
Input Voltage Single universal AC power supply 100 to 240V
AC Input Frequency 50 to 60 Hz
AC Input Current 1.5A
Warning:
•The device must be connected to a socket-outlet providing protective earthing.
•Use only the AC power cord that is supplied with the device.

BroadCloud Hosted UC
AudioCodes Mediant CRP 18 Document #: LTRT-29836
To connect the device to the power supply:
1. Connect the line socket of the AC power cord (supplied) to the device's AC power
socket (labeled 100-240V 1.5A ~50-60 Hz), located on the rear panel.
Figure 2-16: Connecting to the Power Supply
2. Connect the plug at the other end of the AC power cord to a standard electrical outlet.
After cabling and powering up, the POWER LED on the front panel lights up green.

AudioCodes Mediant 2. Installing the Hardware
BroadCloud Hosted UC 19 AudioCodes Mediant CRP
2.4 Mediant 2600
2.4.1 Front Panel
Figure 2-17: Front Panel – Port Interfaces
Table 2-12: Front Panel - Ports
Item # Label Description
1 Reset pinhole button:
To reset the device, press it for at least 1 second but no longer than 10s.
To reset to factory defaults, press for at least 12s but no longer than 25s.
2 IOIO RS-232 port for serial communication with a computer.
3 - Pinhole button (reserved for future use).
4 - Handle of AMC module for installing and removing the module.
5 - LAN sub-module, providing eight, 1000Base-T (Gigabit) Ethernet ports for
connecting to the IP network. The Ethernet ports operate in pairs, where one
port is active and the other standby, providing 1+1 Ethernet redundancy. These
ports support half- and full-duplex modes, auto-negotiation, straight-through and
crossover cable detection.
2.4.2 Rear Panel
Figure 2-18: Rear Panel
Table 2-13: Rear Panel Description
Item # Label Description
1
1
AC power supply inlet (100-240V~2.5A, 50-60 Hz) for power supply module No. 1.
2
2
AC power supply inlet (100-240V~2.5A, 50-60 Hz) for power supply module No. 2.
3
ESD
Electrostatic Discharge (ESD) socket.
4
Protective earthing screw.

BroadCloud Hosted UC
AudioCodes Mediant CRP 20 Document #: LTRT-29836
2.4.3 Cabling
2.4.3.1 Grounding the Device
The device must be connected to earth (grounded) using an equipment-earthing conductor.
Protective Earthing
The equipment is classified as Class I according to EN-60950-1 and UL 60950-1 and
must be earthed at all times (using an equipment-earthing conductor).
To ground the device:
1. Connect an electrically earthed strap of 16 AWG wire (minimum) to the chassis'
earthing screw (located on the rear panel), using the supplied washer.
Figure 2-19: Grounding the Device
2. Connect the other end of the strap to a protective earthing in accordance with the
regulations enforced in the country in which the device is installed.
2.4.3.2 Connecting to Ethernet
To connect the device to the BroadCloud service (WAN-DMZ):
1. If the device's IP isn't configured yet, connect as shown in Section 3. If the device's IP
has already been configured:
a. Connect one end of a straight-through RJ-45 Cat 5e or Cat 6 cable to the RJ-45
port labeled LAN GE port 1.
b. Connect the other end to the DMZ port assigned by the IT administrator.
Figure 2-20: Connecting the LAN Ports
To connect the device to the enterprise LAN:
2. If the device's IP isn't configured yet, connect as shown in Section 3. If the device's IP
has already been configured:
a. Connect one end of a straight-through RJ-45 Cat 5e or Cat 6 cable to the RJ-45
port labeled LAN GE port 3.
Other manuals for Mediant Series
2
This manual suits for next models
4
Table of contents
Other AudioCodes Network Hardware manuals
Popular Network Hardware manuals by other brands

Vivotek
Vivotek NR8201 Quick installation guide
Cisco
Cisco CE 2000 Platform SCE 2000 4xGBE Installation and configuration guide
Systimax
Systimax AirSPEED AP541 user guide
ICP DAS USA
ICP DAS USA PDS-734D quick start guide
DPS Telecom
DPS Telecom NetGuardian 216F user manual
General DataComm
General DataComm OCM-2000 Installation & operation manual
