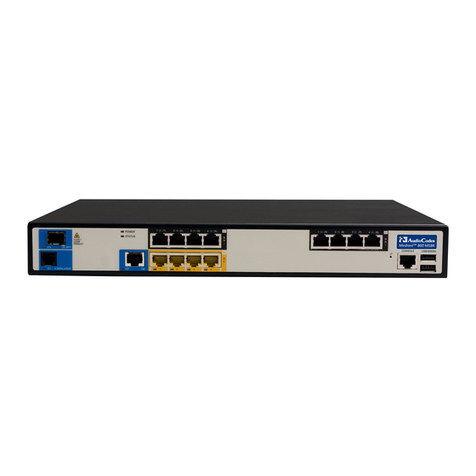
AudioCodes Mediant MSBR Series Assembly instructions

Hardware Installation Manual
AudioCodes Family of Multi-Service Business Routers (MSBR)
Mediant™ 500 MSBR


MSBR Series 3 Mediant 500 MSBR
Hardware Installation Manual Contents
Table of Contents
1Introduction....................................................................................................... 11
2Unpacking the Device ...................................................................................... 13
3Physical Description ........................................................................................ 15
3.1 Physical Dimensions............................................................................................ 15
3.2 Front Panel Description ....................................................................................... 15
3.2.1 Ports and Buttons.................................................................................................... 15
3.2.2 LEDs ....................................................................................................................... 17
3.2.2.1 WAN LEDs............................................................................................... 17
3.2.2.2 LAN Interface LED................................................................................... 18
3.2.2.3 E1/T1 LED ............................................................................................... 19
3.2.2.4 BRI LED................................................................................................... 19
3.2.2.5 FXS LED .................................................................................................. 19
3.2.2.6 FXO LED ................................................................................................. 20
3.2.2.7 Operational Status LED ........................................................................... 20
3.2.2.8 Power LED............................................................................................... 20
3.3 Rear Panel Description ........................................................................................ 21
4Mounting the Device ........................................................................................ 23
4.1 Desktop Mounting................................................................................................ 23
4.2 Wall Mounting...................................................................................................... 24
4.3 19-Inch Rack Mounting ........................................................................................ 29
4.3.1 Using a Pre-Installed Rack Shelf ............................................................................ 29
4.3.2 Using Mounting Brackets ........................................................................................ 30
5Cabling the Device ........................................................................................... 33
5.1 Grounding and Surge Protection.......................................................................... 33
5.2 Connecting to WAN ............................................................................................. 34
5.2.1 Copper Gigabit Ethernet Cabling ............................................................................ 34
5.2.2 Fiber-Optic Gigabit Ethernet Cabling ...................................................................... 35
5.2.3 ADSL/2+ and VDSL2 WAN Cabling ....................................................................... 37
5.2.4 SHDSL WAN Cabling.............................................................................................. 39
5.2.5 3G/3.5G Cellular WAN USB Modem Cabling ......................................................... 41
5.3 Connecting to LAN............................................................................................... 42
5.4 Connecting to ISDN PRI E1/T1 Trunks ................................................................ 43
5.5 ISDN BRI Interfaces ............................................................................................ 44
5.5.1 Connecting to BRI Lines ......................................................................................... 44
5.5.2 Connecting the PSTN Fallback for BRI Lines ......................................................... 45
5.6 Analog Interfaces................................................................................................. 46
5.6.1 Connecting the FXS Interfaces ............................................................................... 46
5.6.2 Connecting the FXO Interface ................................................................................ 48
5.6.3 Connecting the FXS Analog Lifeline ....................................................................... 50
5.7 Connecting the Serial Interface to a PC ............................................................... 51
5.8 Connecting a USB Storage Device ...................................................................... 52
5.9 Connecting to a Power Supply............................................................................. 53
AApproved Laser SFPs ...................................................................................... 55

Hardware Installation Manual 4 Document #: LTRT-10764
Mediant 500 MSBR
List of Figures
Figure 3-1: Front Panel .......................................................................................................................... 15
Figure 3-2: Rear Panel........................................................................................................................... 21
Figure 4-1: Location for Applying Rubber Foot...................................................................................... 23
Figure 4-2: Wall-Mounting Bracket Parts............................................................................................... 24
Figure 4-3: Keyhole Dimensions for Horizontal Wall-Mounting ............................................................. 25
Figure 4-4: Keyhole Dimensions for Vertical Wall-Mounting ................................................................. 25
Figure 4-5: Protruded Screw Distance from Wall Surface..................................................................... 26
Figure 4-6: Removing Ground Screw .................................................................................................... 26
Figure 4-7: Removing Side-Panel Screws............................................................................................. 26
Figure 4-8: Lowering Device into Wall-Mounting Bracket...................................................................... 26
Figure 4-9: Device Inserted into Wall-Mounting Bracket ....................................................................... 27
Figure 4-10: Attaching Bracket to Device using Grounding Screw ....................................................... 27
Figure 4-11: Attaching Bracket to Device using Ground Screw with Grounding Lug ............................ 27
Figure 4-12: Attaching Bracket to Device using Side-Panel Screws ..................................................... 27
Figure 4-13: Hanging Device on Screw Heads for Horizontal Orientation ............................................ 28
Figure 4-14: Hanging Device on Screw Heads for Vertical Orientation ................................................ 28
Figure 4-15: Left Mounting Bracket ....................................................................................................... 30
Figure 4-16: Right Mounting Bracket ..................................................................................................... 30
Figure 4-17: Attaching the Mounting Brackets ...................................................................................... 31
Figure 5-1: Earthing the Device ............................................................................................................. 34
Figure 5-2: Cabling the WAN Copper GbE Port .................................................................................... 35
Figure 5-3: Removing Protective Dust Plug........................................................................................... 36
Figure 5-4: Cabling the Fiber-Optic WAN GbE Port .............................................................................. 36
Figure 5-5: Cabling the xDSL WAN Port ............................................................................................... 38
Figure 5-6: Cabling the SHDSL WAN Port ............................................................................................ 40
Figure 5-7: Plugging the 3G Cellular Modem into the USB Port ........................................................... 41
Figure 5-8: Cabling the LAN Ports......................................................................................................... 42
Figure 5-9: RJ-48c Connector Pinouts for E1/T1 .................................................................................. 43
Figure 5-10: Cabling E1/T1 Ports .......................................................................................................... 43
Figure 5-11: RJ-45 Connector Pinouts for BRI Ports ............................................................................ 44
Figure 5-12: Cabling BRI Ports.............................................................................................................. 44
Figure 5-13: Cabling (Ports 1 and 2) BRI PSTN Fallback ..................................................................... 45
Figure 5-14: RJ-11 Connector Pinouts for FXS Interface...................................................................... 46
Figure 5-15: Connecting FXS Interfaces ............................................................................................... 47
Figure 5-16: RJ-11 Connector Pinouts for FXO Interface ..................................................................... 48
Figure 5-17: Connecting FXO Interface................................................................................................. 49
Figure 5-18: Cabling FXS Lifeline.......................................................................................................... 50
Figure 5-19: RS-232 Cable Adapter ...................................................................................................... 51
Figure 5-20: Cabling Serial Port ............................................................................................................ 51
Figure 5-21: Connecting USB Storage Device ...................................................................................... 52
Figure 5-22: Connecting to the Power Supply....................................................................................... 53

MSBR Series 5 Mediant 500 MSBR
Hardware Installation Manual Contents
List of Tables
Table 3-1: Physical Dimensions ............................................................................................................ 15
Table 3-2: Front Panel Description ........................................................................................................ 16
Table 3-3: GE WAN LED Description .................................................................................................... 17
Table 3-4: A/VDSL WAN LED Description ............................................................................................ 17
Table 3-5: SHDSL WAN LED Description ............................................................................................. 18
Table 3-6: WAN SFP LED Description .................................................................................................. 18
Table 3-7: LAN LED Description............................................................................................................ 18
Table 3-8: E1/T1 LED Description ......................................................................................................... 19
Table 3-9: BRI LED Description............................................................................................................. 19
Table 3-10: FXS LED Description.......................................................................................................... 19
Table 3-11: FXO LED Description ......................................................................................................... 20
Table 3-12: STATUS LED Description .................................................................................................. 20
Table 3-13: POWER LED Description ................................................................................................... 20
Table 3-14: Rear Panel Description....................................................................................................... 21
Table 5-1: RJ-45 Connector Pinouts for Copper GbE WAN.................................................................. 34
Table 5-2: RJ-11 Connector Pinouts for xDSL ...................................................................................... 38
Table 5-3: RJ-45 Connector Pinouts for SHDSL ................................................................................... 40
Table 5-4: RJ-45 Connector Pinouts for GbE ........................................................................................ 42
Table 5-5: DB-9 to RJ-45 Serial Cable Connector Pinouts ................................................................... 51
Table A-1: Approved SFP Modules ....................................................................................................... 55

Hardware Installation Manual 6 Document #: LTRT-10764
Mediant 500 MSBR
This page is intentionally left blank.

MSBR Series 7 Mediant 500 MSBR
Hardware Installation Manual Notices
Notice
Information contained in this document is believed to be accurate and reliable at the time of
printing. However, due to ongoing product improvements and revisions, AudioCodes cannot
guarantee accuracy of printed material after the Date Published nor can it accept responsibility
for errors or omissions. Updates to this document can be downloaded from
https://www.audiocodes.com/library/technical-documents.
This document is subject to change without notice.
Date Published: November-22-2020
WEEE EU Directive
Pursuant to the WEEE EU Directive, electronic and electrical waste must not be disposed
of with unsorted waste. Please contact your local recycling authority for disposal of this
product.
Customer Support
Customer technical support and services are provided by AudioCodes or by an authorized
AudioCodes Service Partner. For more information on how to buy technical support for
AudioCodes products and for contact information, please visit our website at
https://www.audiocodes.com/services-support/maintenance-and-support.
Stay in the Loop with AudioCodes
Abbreviations and Terminology
Each abbreviation, unless widely used, is spelled out in full when first used.
Throughout this manual, unless otherwise specified, the term device refers to Mediant 500
MSBR.
Related Documentation
Document Name
Release Notes
Mediant 500 MSBR SIP User's Manual
CLI Reference Guide

Hardware Installation Manual 8 Document #: LTRT-10764
Mediant 500 MSBR
General Notes and Warnings, and Safety Information
Note: Read and adhere to all warning statements in this document before installing the
device.
Note: Open source software may have been added and/or amended for this product. For
further information, please visit our website at https://www.audiocodes.com/services-
support/open-source or contact your AudioCodes sales representative.
Warning: The device is an INDOOR unit and therefore, must be installed only indoors.
Caution Electrical Shock
Do not open or disassemble this device. The device carries high voltage and contact with
internal components may expose you to electrical shock and bodily harm.
Warning: The device must be installed and serviced only by qualified service personnel.
Warning: For deployment in Finland, Sweden and Norway, the device must be installed
only in restricted access locations that are compliant with ETS 300253 guidelines here
equipotential bonding has been implemented.
Warning: Disconnect the device from the mains and Telephone Network Voltage (TNV)
before servicing.

MSBR Series 9 Mediant 500 MSBR
Hardware Installation Manual Notices
Document Revision Record
LTRT Description
10331 Maximum FXS and FXO ports.
10332 FXO warning statement added.
10334 SHDSL LEDs added.
10335 A/VDSL and SHDSL LEDs updated.
10336 Power surge protection warnings.
10337 A/VDSL connector pinouts updated.
10338 AC power cable warning (Japanese).
10339 Wall-mounting added.
10760 19-inch rack mounting brackets supplied; fallback/lifeline upon no-ping removed.
10761 Logo updated; PSTN/Analog fallback updated.
10763 SFP module for WAN fiber-optic or WAN copper interface
10764 Wi-Fi removed; serial cable removed from supplied items;
Documentation Feedback
AudioCodes continually strives to produce high quality documentation. If you have any
comments (suggestions or errors) regarding this document, please fill out the
Documentation Feedback form on our website at
https://online.audiocodes.com/documentation-feedback.

Hardware Installation Manual 10 Document #: LTRT-10764
Mediant 500 MSBR
This page is intentionally left blank.

MSBR Series 11 Mediant 500 MSBR
Hardware Installation Manual 1. Introduction
1 Introduction
This document provides a hardware description of the Mediant 500 MSBR (hereafter
referred to as device) and step-by-step procedures for mounting and cabling the device.
The device supports the following interfaces:
Multiple WAN:
•Single Gigabit Ethernet copper (10/100/1000Base-T) unshielded twisted pair
(UTP) interface port
•Dual-mode of 1.25 Gbps Optical Fiber Small Form-Factor Pluggable (SFP)
•ADSL2+ / VDSL2
•SHDSL
•3G Cellular WAN access (primary or backup) using a USB modem
Four Gigabit Ethernet (10/100/1000Base-T) LAN ports
Two USB ports for an optional, 3G cellular WAN modem and/or USB storage services
Serial console port (RJ-45) for device management
(Optional, customer-ordered) Single ISDN PRI (E1/T1) port
(Optional, customer-ordered) Two BRI ports, supporting up to four voice channels as
well as PSTN fallback
(Optional, customer-ordered) Four FXS ports and four FXO ports, or eight FXS ports
only
Note:
•Hardware configurations may change without notice. Currently available hardware
configurations are listed in AudioCodes Price Book. For further enquiries, please
contact your AudioCodes sales representative.
•The SFP module can be used for WAN fiber-optic interface or WAN copper interface.
•For information on configuring the device, refer to the device's User’s Manual.

Hardware Installation Manual 12 Document #: LTRT-10764
Mediant 500 MSBR
This page is intentionally left blank.

MSBR Series 13 Mediant 500 MSBR
Hardware Installation Manual 2. Unpacking the Device
2 Unpacking the Device
Follow the procedure below for unpacking the carton in which the device was shipped.
To unpack the device:
1. Open the carton and carefully remove packing materials.
2. Remove the chassis from the carton.
3. Check that there is no equipment damage.
4. Ensure that in addition to the chassis, the package contains the following items:
•Four anti-slide bumpers for desktop installation
•Two mounting brackets for 19-inch rack mounting
•One AC power cable
•(Optional, customer-ordered item) Wall-mounting kit
5. Check, retain and process any documents.
If there are any damaged or missing items, notify your AudioCodes sales representative.

Hardware Installation Manual 14 Document #: LTRT-10764
Mediant 500 MSBR
This page is intentionally left blank.

MSBR Series 15 Mediant 500 MSBR
Hardware Installation Manual 3. Physical Description
3 Physical Description
This section provides a physical description of the device.
3.1 Physical Dimensions
The device's physical dimensions and weight are listed in the table below:
Table 3-1: Physical Dimensions
Physical Specification Value
Dimensions (H x W x D) 4.37 (1U) x 31.0 cm x 21.0 cm (1.72 x 12.2 x 8.3 in.)
Weight 2.0 kg (4.4 lbs.)
3.2 Front Panel Description
The front panel provides the telephony port interfaces, various networking ports, reset
pinhole button, and LEDs.
3.2.1 Ports and Buttons
The device's front panel is shown in the figure below and described in the subsequent
table.
Figure 3-1: Front Panel
Note:The figure above is used only as an example. The hardware configuration
depends on the ordered model.

Hardware Installation Manual 16 Document #: LTRT-10764
Mediant 500 MSBR
Table 3-2: Front Panel Description
Item # Label Description
1 // Reset pinhole button for resetting the device and optionally, for
restoring the device to factory defaults. To restore the device to
factory defaults, do the following:
With a paper clip or any other similar pointed object, press and hold
down the pinhole button for at least 12 seconds, but no longer
than 25 seconds
2 CONSOLE RJ-45 port for RS-232 serial communication
3 WAN WAN interface, which can be any of the following (depending on
ordered configuration):
Copper GE
SFP module (single pair, supporting 1 GbE)
ADSL/2+ and VDSL2
SHDSL
Note: For available WAN configurations, contact your AudioCodes
sales representative.
4 LAN Up to four Gigabit Ethernet (10/100/1000Base-T) ports for
connecting to LAN network (IP phones, computers, or switches).
These ports support half- and full-duplex modes, auto-negotiation,
and straight or crossover cable detection.
5 PSTN Telephony interfaces, depending on ordered configuration:
Single ISDN PRI E1/T1
Up to two ISDN BRI port interfaces (RJ-45)
Up to eight FXS port interfaces (RJ-11)
Up to four FXO ports (RJ-11)
6 POWER / STATUS LEDs indicating the status of the power and reboot/initialization. For
more information, see Section 3.2.2 on page 17.
7 USB Two USB 2.0 ports, which can be used for the following:
3G cellular WAN modem for primary or backup WAN
External USB hard drive or flash disk (disk on key) for USB
storage capabilities

MSBR Series 17 Mediant 500 MSBR
Hardware Installation Manual 3. Physical Description
3.2.2 LEDs
The front panel provides various LEDs depending on the device's hardware configuration
(e.g., the available telephony interfaces). These LEDs are described in the subsequent
subsections.
3.2.2.1 WAN LEDs
3.2.2.1.1 GE WAN LED
The GE WAN port(s) provides a LED for indicating operating status, as described in the
table below.
Table 3-3: GE WAN LED Description
LED
Color
LED
State
Description
Green On WAN link established.
Flashing Data is being received or transmitted.
- Off No WAN link or no power received by the device.
3.2.2.1.2 A/VDSL WAN LED
The A/VDSL WAN port provides a LED for indicating operating status, as described in the
table below.
Table 3-4: A/VDSL WAN LED Description
LED
Color
LED State Description
Green On DSL link connected (trained) successfully with peer
("showtime").
Fast
Flashing
Training up (connection in progress) and negotiating with peer.
Slow
Flashing
DSL port is administratively up, but idle (not connected and no
peer detected).
Two Fast
Flashes
and then
Idle
Sequences
DSL port is initializing itself after being enabled or upon mode
change.
- Off DSL port is administratively shutdown or not configured.

Hardware Installation Manual 18 Document #: LTRT-10764
Mediant 500 MSBR
3.2.2.1.3 SHDSL WAN LED
The SHDSL WAN port provides a LED for indicating operating status, as described in the
table below.
Table 3-5: SHDSL WAN LED Description
LED
Color
LED
State
Description
Green On At least one of the links is synchronized.
Fast
Flashing
At least one of the links is initializing.
Slow
Flashing
SHDSL firmware is running.
- Off No WAN link or no power received by the device.
3.2.2.1.4 SFP WAN LED
The WAN SFP LED indicates the status of the optical fiber WAN link, as described in the
table below.
Table 3-6: WAN SFP LED Description
LED
Color
LED
State
Description
Green On WAN fiber link established.
Flashing Data is being received or transmitted.
- Off No WAN fiber link or power not received by the device.
3.2.2.2 LAN Interface LED
Each Ethernet port provides a LED for indicating LAN operating status, as described in the
table below.
Table 3-7: LAN LED Description
LED
Color
LED
State
Description
Green On Ethernet link established.
Flashing Data is being received or transmitted.
- Off No Ethernet link.

MSBR Series 19 Mediant 500 MSBR
Hardware Installation Manual 3. Physical Description
3.2.2.3 E1/T1 LED
The trunk port provides a LED for indicating operating status, as described in the table
below:
Table 3-8: E1/T1 LED Description
Color State Description
Green On Trunk is synchronized (normal operation).
Red On Loss due to any of the following signals:
LOS - Loss of Signal
LOF - Loss of Frame
AIS - Alarm Indication Signal (the Blue Alarm)
RAI - Remote Alarm Indication (the Yellow Alarm)
- Off Failure / disruption in the AC power supply or the power is
currently not being supplied to the device through the AC
power supply entry.
3.2.2.4 BRI LED
Each BRI port provides a LED for indicating operating status, as described in the table
below:
Table 3-9: BRI LED Description
Color State Description
Green On Physical layer (Layer 1) is synchronized (normal operation).
Red On Physical layer (Layer 1) is not synchronized.
- Off Trunk is not active.
3.2.2.5 FXS LED
Each FXS port provides a LED for indicating operating status, as described in the table
below.
Table 3-10: FXS LED Description
LED
Color
LED
State
Description
Green On Phone is in off-hook state.
Flashing Extension line ringing.
Red On Error - malfunction in line or out of service due to Serial
Peripheral Interface (SPI) failure
Disabled port initiated by user (using the CLI command,
analog-port-enable
)
- Off Phone is in on-hook state.
- Off No power received by the device.

Hardware Installation Manual 20 Document #: LTRT-10764
Mediant 500 MSBR
3.2.2.6 FXO LED
The FXO port provides a LED for indicating operating status, as described in the table
below.
Table 3-11: FXO LED Description
LED
Color
LED
State
Description
Green On FXO line is off-hooked toward the PBX.
Flashing Ring signal detected from the PBX.
Red On Error - malfunction in line or out of service due to Serial
Peripheral Interface (SPI) failure
Disabled port initiated by user (using the CLI command,
analog-port-enable
)
- Off Line is on hook or no power received by the device.
3.2.2.7 Operational Status LED
The STATUS LED indicates the operating status, as described in the table below.
Table 3-12: STATUS LED Description
LED
Color
LED
State
Description
Green On Device is operational.
Flashing Initial rebooting stage.
Software upgrade (.cmp file) in process (currently supported
only in Software Version 6.8).
Red On Boot failure.
- Off Advanced rebooting stage.
3.2.2.8 Power LED
The POWER LED indicates the operating status, as described in the table below.
Table 3-13: POWER LED Description
LED
Color
LED
State
Description
Green On Power is received by the device.
- Off No power received by the device.
Other manuals for Mediant MSBR Series
5
This manual suits for next models
1
Table of contents
Other AudioCodes Wireless Router manuals
Popular Wireless Router manuals by other brands
US Robotics
US Robotics USR8001 Quick installation guide
Planet
Planet XRT-711A user guide
BroadLink
BroadLink BL3383-P user manual
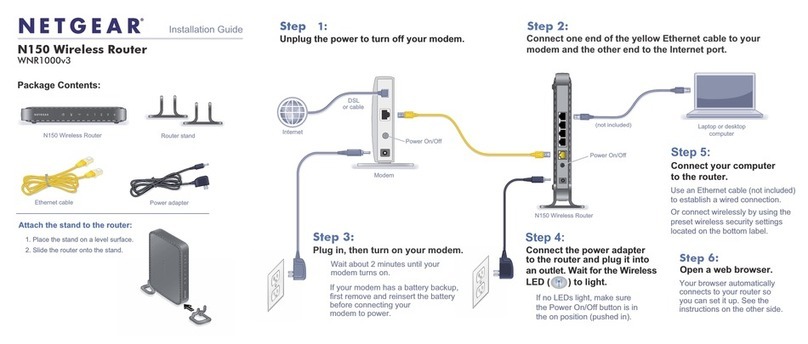
NETGEAR
NETGEAR WNR1000v3 - Wireless- N Router installation guide
TRENDnet
TRENDnet TEW-637AP - 300Mbps Wireless Easy-N-Upgrader Quick installation guide
Tenda
Tenda AC19 quick start guide
