Servicing | Return to AudioQuest
Servicing of the PQ-2 must be performed by AudioQuest, and is only required when:
• The PQ-2 has been exposed to rain, ooding, or extreme moisture.
• The PQ-2 does not appear to operate normally. (See “Trouble-Shooting Guide.”)
• The PQ-2 has been dropped and sustained considerable physical damage.
If sending the PQ-2 to AudioQuest for servicing (or shipping it for any reason), please use bubble wrap or other professional
packaging materials so that it may arrive safely. If you have to send the unit to us and have questions regarding the packaging
requirements or best practices, please contact AudioQuest.
Power Source
Ideally, the power source to which the PQ-2 is connected should be adequate for use at 120VAC single-phase nominal voltage, 15
amps (current capacity RMS). However, the PQ-2 will operate very well with a 120VAC 20-amp service outlet.
For proper operation, the PQ-2 requires a safety ground (supplied via the power utility AC wall outlet).
Installation
Wall and Detachable Base Mounting Options
1. There are mounting holes on the back of the surge protector for wall or baseboard mounting. To help with the installation, we’ve
included a simple drill template. Position the template in the location where you would like to mount the PQ-2. With the template
in place, use a pencil, pen, or marker to accurately mark the mounting holes before drilling. Once the holes have been marked,
remove the template.
2. Install screws (not included) on wall or baseboard surface (leaving at least ¼” of the screw exposed).
3. Place and secure the PQ-2 on the mounted screws as you would hang a picture frame on a nail.
4. The PQ-2 features both a slim prole and a rugged oor-mounting base that makes it ideal for mounting behind cabinets.
Installation is simple: Insert the rectangular tabs into the corresponding slots on the PQ-2’s underside. Slide the base to move the
tabs into place. (The base will only slide when correctly oriented.) With the tabs in place, press the lock button to secure the
base onto the unit. Power cords plug straight down to the AC outlets, making installation trouble-free. For shelf mounting, the
oor-mounting base can be easily removed. Simply press the unlock button , slide the base to release the tabs from the slots,
and remove the base from the unit.
Specications
Extreme Voltage Shutdown: 140VAC - Will activate the main power circuit relay to open within less than 0.25 seconds; automatically
resets once the incoming power is within a safe range.
Dierential-Mode Noise Dissipation: In excess of 22dB reduction from 30kHz-1GHz.
Filter linearized for dynamic (rising) line impedance with frequency from 0.05 Ohms (source) and 10 to 50 Ohm load, (system current
dependent).
Input Current Maximum Capacity: 15 amps RMS
USB Charge Capacity: 2 x Ports – Total capacity 3.4 Amps
Signal Line Protection: Coaxial (Cable/Satellite)
Weight: 4.85 lbs.
Dimensions: 15.47” L x 3.15”W x 6.02” H
Hook-up Guide
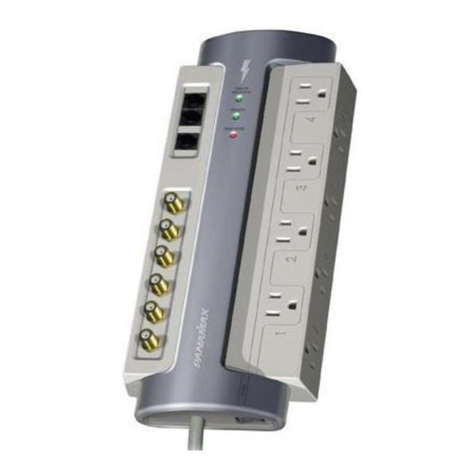
The PQ-2 outlets have been engineered to ensure optimum performance from your home entertainment system. For the very best
results, please use the hook-up recommendations below when connecting your system to the PQ-2.
OUTLET 1
4K/8K Video Optimized Linear Filter:
Best when connected to video screens, televisions, projectors, or universal players.
OUTLETS 2/3/4/5
Linear Filter:
Best when connected to audio/video source components, computers, modem, or router.
OUTLET 6
High-Current:
Best when connected to soundbar, power amplier, audio/video receiver, or subwoofer.
Operation
Power Switch | Circuit Breaker and LED Power Indicator
Once the components are connected to the appropriate outlet banks, it is safe to energize the PQ-2. On the left side of the PQ-2’s
chassis, there is a black rocker switch. Firmly press the rocker switch so that its white dot is ush with the“On”label that is on the right
portion of the side panel. Typically within less than a second, you should hear an audible“clack” sound from the relay within the unit.
At the same time, the LED“Protection On”indicator will glow (opposite side panel), signifying that the unit is operational. (If this does
not occur, see the “Trouble-Shooting Guide” in this manual.)
Overvoltage Protection Indicator
One portion of the PQ-2’s non-sacricial surge protection is dedicated to a fast-acting extreme voltage shutdown circuit. If more than
140VAC is present on the incoming AC line for more than a quarter of a second, the circuit will instantly open a high-current relay that
will disengage the AC power from all of the PQ-2’s AC outlets, activating the red LED “Overvoltage Protection” warning indicator.
Once the event has passed, or the building wiring fault has been corrected, the circuit will automatically re-engage.
High-Speed USB Ports
Either of these two ports can be used for fast charging of USB A devices. The maximum current draw for the two charging ports is 3.4
amps total.
Signal Line Surge Protection
The 75-ohm coaxial connectors are for series connection to either cable or satellite signal and provide some additional protection in
locations where lightning could strike either the home or oce in which the PQ-2 is used. These are sacricial surge devices.
FRONT
BACK
LEFT RIGHT
Push to unlock
BACK
FRONT
C
M
Y
CM
MY
CY
CMY
K
