manuals.online logo
Brands
  1. Home
  2. •
  3. Brands
  4. •
  5. auer
  6. •
  7. Water Heater
  8. •
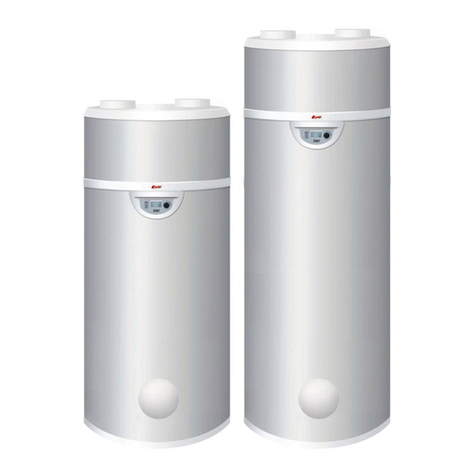
  9. auer Edel Air 200 Operator's manual

auer Edel Air 200 Operator's manual

Made
in France
Manual ref: 1895306
Edition n°: 15.342
User instruction manual
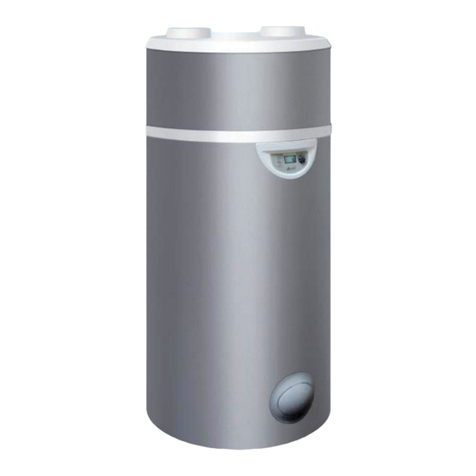
Edel AIR
Air source Heat Pump Water Heater
for outdoor air or non-heated ambient air
Edel Air 200
and 270 liters
The domestic hot water heater mainly operates using the integrated heat pump, as long as the air intake
is within the -7°C to 35°C temperature range.
A 1.5kW electrical backup function ensures comfort at all times, and particularly in the following cases:
- air taken in outside the operating range.
- minimum comfort function: when this function is activated, both means of heating (heat pump and
electrical backup) operate at the same time to ensure that the water temperature remains above
38°C.
- “Boost” function: when this function is activated, both means of heating (heat pump and electrical
backup) operate at the same time to reach the desired temperature quickly.
Depending on how many people are using the water and to optimise savings, we would advise you not
to set the default temperature too high (
for example at 50°C
).
..... Compressor activated
.... Fan activated
........ De-icing in progress
........ Electrical backup
activated
.... Domestic hot water
request
....... Economy mode
activated
....... Freeze protection mode
activated
...... Holiday mode activated
1 - Control box
Pictograms:
3
4
5
12
1Display screen
2Dial
3Menu
4On/o
5Time setting
The information contained in this documant is non-contractual. Auer reserves the right to change technical data and equipment of all appliances without prior notice.
- user 200L AIR SOURCE HEAT PUMP WATER HEATER instructions -
2
2 - Setting the language
Set language
Enter
LANGUAGE LANGUAGE
ENG
• Press: .
•Turn the dial to scroll through the menu options :
• Press to return to main screen.
3 - Setting the time
• Press “Clock settings”
Set month
26/09/11
17: 32
--/09/11
17: 32
26/--/11
17: 32
26/09/--
17: 32
monday
17: --
Monday
-- : 32
Set day
Set year
Set minutes
Set hour
NB: In order to get the best from your heat pump, we
recommend that you do not set the water temperature
too high unless necessary. The default temperature is set at
55°C.
4 - Setting the water temperature
TEMP. sett Temp. sett.
50°C
• Press:
• Turn the dial to scroll through the menu options:
The water temperature can be adjusted between 30°C and 65°C.
The heat pump alone heats the water up to 60°C. Beyond this
temperature, the electrical backup takes over.
•Press to return to main screen
Enter
Set temperature
•Press to return to main
screen
ELEC Mode
yes
7 - Standby mode
Enter
Holidays Holi.return
8
“Holiday” mode switches o automatically at the same time when
the number of days set has ended. Throughout the holiday period,
the heat pump water heater shows “RETURN” on the display
screen, as well as a countdown of the days.
“Holiday” mode puts the appliance on standby whilst the
freeze protection mode remains active. This function can be
programmed to run between 1 and 99 days and is eective as
soon as the number of days has been conrmed.
Set number of days
in standby mode
5 - Electric mode
(to operate with electrical backup)
Enter
Electric mode uses only the boiler to heat the water in the heat
pump water heater. It provides a back-up option if for any reason
the heat pump is not running ( piping not yet connected, dusty
renovation work being carried out near the appliance....).
• Press
• Turn the dial to scroll through the menu options
Press
to return to main
screen
The “BOOST” function temporarily forces electrical backup and
backup from the pump at the same time to speed up the rise
in temperature during a heating cycle. The “electrical backup”
symbol ashes while it is activated.
• Press
• Turn the dial to scroll through the menu options:
The “BOOST” function is automatically deactivated as soon as the
set temperature is reached (end of heating cycle).
BOost
yes
6 - BOOST function
(for occasional use and guaranteed comfort)
Enter
Press
to return to main
screen
- user 200L AIR SOURCE HEAT PUMP WATER HEATER instructions -
3
8 - Locking the keyboard
Enter
Select locking level
locking. locking.
no
NB : • When locking is activated, it is only possible to
access unlocking and reset the alarm.
pro = To lock access to menus with
temporary unlocking (300 seconds),
press for 3 seconds then
and for 3 seconds
Manual locking from the main screen
Without gaining access through the “Installer” menu and provided
that locking settings are not already in place.
To lock manually, press for 3 seconds.
Permanent and automatic locking
The “locking” option enables you to create three possible levels of
locking for accessing the menus.
In the “Installer” menu, turn the dial to “LOCKING”
Press for
3 seconds
NO = Locking is not activated, but manual
locking is possible by pressing
for 3 seconds
Enter
Select yes
500C
unlock
no
Press for
3 seconds
Enter
Select yes
500C
Unlock
no
Unlock
Yes
Appui
3 sec
Press for 3
seconds
Locking
9 - Programming
• Press “Clock settings” and hold down for 3 seconds
= Copy programming from day before
=Copy a standard programme or a
programme from another day
= Modify existing programme
= See existing programme
Set end of rst
time period
Set comfort level
for rst time period Set end of
second time
period
new PRoG.
monday 0000-____
00:30h
0000-0630
frost pt
0630-____
06:30h
Select day
...and so on, for up to
7 time periods per
day
COPy PROG.
MODIFy PR.
see PROG.
COPy sun
Heating time
for tank varies
according
to outdoor
temperature.
Ensure that the
operating time of
the appliance is not
too limited.
AUTO = To lock menu access with temporary
unlocking (60 sec), press for 3
seconds
FROST PT= Frost protection mode
ECO = Heat pump only running
CONF = Heat pump only running
+ electrical back-up if
needed
- user 200L AIR SOURCE HEAT PUMP WATER HEATER instructions -
4
10 - Troubleshooting: errors, solutions and operating in case of error
N.B: Errors can be seen by briey pressing the dial
Display Error Probable causes Solutions Temporary operation measures
MEMO/BUS
• PCB defect
• Bus wire not correctly connected to
display screen
• Display screen defect
• Voltage too high on electrical
network
• Wiring error (connection to
electricity provider or moisture
sensor
• Damage during transport
• Replace main PCB
or
• Replace display screen PCB
• Appliance non-functional
t_AIR • Air temperature sensor defect
(air taken in)
• Sensor not functioning
• Sensor unplugged from PCB
• Sensor cable damaged
• Replace sensor
• Heat pump non-functional
• Electrical back-up heats water to
43°C (38°C min.)
t_defrost • Evaporator sensor defect
(de-icing temperature)
• Sensor not functioning
• Sensor unplugged from PCB
• Sensor cable damaged
• Replace sensor
• Heat pump non-functional
• Electrical back-up heats water to
43°C (38°C min.)
t_water • Tank water sensor defect
• Sensor not functioning
• Sensor unplugged from PCB
• Sensor cable damaged
• Replace sensor • Appliance non-functional
clock • Clock / timer defect
• Voltage too high on electrical
network
• Damage during transport
•1-Press ‘clock settings’ and set date
and time
•2- If the error is still there: Replace
the PCB
• Progammed heating periods are no
longer valid: the water is maintained
continuously att hes tandard set
temperature (if no signal or control
is connected to the ‘external control’
switch.
over press. •Heat pump pressure too high
• No water in tank
• Water too hot (>75°C)
• Water sensor removed from tank
• Water sensor defect
• Check that tank has been properly
purged and lled with water
• Change water sensor
• Check that the DHW* sensor is
correctly positioned in the thimble
• Heat pump non functional
• Automatic reset
• Authorised to run on back-up
freq. defro •De-icing too often
• Insucient airow
• Air inlet / outlet blocked
• Air vent duct blocked
• Pipe too long or too many elbows
• Evaporator clogged
• Set the fan to max speed (capcitor
shunted)
• Check that air is circulating properly
throughout the piping circuit
• Check pipe lengths:
-10m max. exible hose
-20m max. rigid pipes
• Check any lters on air ducts
• Check that evaporator is clean
• Heat pump non-functional
• Electrical back-up heats water to
43°C (38°C min.)
low pres. • Heat pump pressure too low
• Insucient airow
• Air inlet / outlet blocked
• Air vent duct blocked
• Ventilateur bloqué ou HS
• Evaporator clogged or blocked
• Evaporator iced over
• Check fan is running
• Check that air is circulating properly
throughout the piping circuit
• Check pipe lengths:
-10m max. exible hose
-20m max. rigid pipes
• Check any lters on air ducts
• Check that evaporator is clean
• Heat pump non-functional
• Electrical back-up heats water to
43°C (38°C min.)
overheat. • Domestic hot water over-heated
(water temperature >85°C)
• Water sensor defect
• Water sensor removed from tank
• Check that the sensor is correctly
positioned in the tank
• Heat pump non functional
• Automatic reset
ERR.01
• Incorrect readings from temperature
sensors
• Air temperature sensor and de-icing
sensor inversed on PCB
• De-icing sensor and water
temperature sensor inversed on PCB
• De-icing sensor connected to air, air
sensor connected to water, water
sensor connected to de-icing
• Reposition the temperature sensors
correctly on the main PCB
• Heat pump non-functional
• Incorrect reading from de-icing
sensor
• The de-icing sensor is positioned
incorrectly on the pipe and taking
readings from the air
• Reposition de-icing sensor to be in
contact with the pipe
• No gas left in heat pump • Leak on refrigerant circuit • Find and repair the leak before
relling refrigerant circuit
• Expansion vessel not functioning
• Thermal bulb is broken due to
intervention or being placed near a
vibrating part of the installation
• Replace expansion vessel
• Compressor not functioning and
temperature safety alert activated • Compressor too weak • Replace compressor
ERR.02 • Incorrect readings from temperature
sensors
•Air sensor and water sensor are
inversed on the PCB
• De-icing sensor is connected to
water, air sensor is connected to
de-icing
• Reposition the temperature sensors
correctly on the main PCB • Appliance non-functional
ERR.03 • Incorrect readings from temperature
sensors
• De-icing sensor is connected to
water, water sensor is connected
to air, air sensor is connected to
de-icing
• Reposition the temperature sensors
correctly on the main PCB • Appliance non-functional
ERR.04 • Incorrect readings from water and
de-icing sensors
• De-icing sensor and water sensor are
inversed on PCB
• Reposition the temperature sensors
correctly on the main PCB • Heat pump non-functional
EPR0 ALARm • Memory problem on display screen
PCB • Display screen PCB damaged • Replace the disaply screen PCB • Appliance non-functional
*DHW = Domestic Hot Water

This manual suits for next models

1

Other auer Water Heater manuals

auer Edel 270 AIR DE/2 Owner's manual

auer

auer Edel 270 AIR DE/2 Owner's manual

auer Edel 200 WATER/2 User manual

auer

auer Edel 200 WATER/2 User manual

auer Edel AIR 200 L User manual

auer

auer Edel AIR 200 L User manual

auer Edel AIR Series User manual

auer

auer Edel AIR Series User manual

Popular Water Heater manuals by other brands

Rheem RTG-66DV Specification sheet

Rheem

Rheem RTG-66DV Specification sheet

Takagi T-KJr2-IN / 110 Installation manual and owner's guide

Takagi

Takagi T-KJr2-IN / 110 Installation manual and owner's guide

GREENoneTEC Sunpad instruction manual

GREENoneTEC

GREENoneTEC Sunpad instruction manual

clage MBH Series Operating and installation instructions

clage

clage MBH Series Operating and installation instructions

Noritz NR98-DVC-CA owner's guide

Noritz

Noritz NR98-DVC-CA owner's guide

A.O. Smith ATX-199 instruction manual

A.O. Smith

A.O. Smith ATX-199 instruction manual

Laars IGI-180R-10N Installation and operating instruction manual

Laars

Laars IGI-180R-10N Installation and operating instruction manual

State Water Heaters 50 HXRT/YXRT parts list

State Water Heaters

State Water Heaters 50 HXRT/YXRT parts list

Rheem 81VR120-1 Specification sheet

Rheem

Rheem 81VR120-1 Specification sheet

Trebor 2472 Operation & maintenance manual

Trebor

Trebor 2472 Operation & maintenance manual

State Water Heaters FVIR Installation Instructions and Use & Care Guide

State Water Heaters

State Water Heaters FVIR Installation Instructions and Use & Care Guide

A.O. Smith BPD-80 Series Installation and operating manual

A.O. Smith

A.O. Smith BPD-80 Series Installation and operating manual

Immergas UB INOX SOLAR 200 ERP Instruction and recomendation booklet

Immergas

Immergas UB INOX SOLAR 200 ERP Instruction and recomendation booklet

GE GP50T06AVR Energy guide

GE

GE GP50T06AVR Energy guide

Noritz NR98-OD-NG installation manual

Noritz

Noritz NR98-OD-NG installation manual

A.O. Smith Fit it & Forget it HSE-SBS-006 user guide

A.O. Smith

A.O. Smith Fit it & Forget it HSE-SBS-006 user guide

Regulus RBC 300 HP Installation and operation instructions

Regulus

Regulus RBC 300 HP Installation and operation instructions

dafi IPX4 Instruction for attachment and use

dafi

dafi IPX4 Instruction for attachment and use

manuals.online logo
manuals.online logoBrands
  • About & Mission
  • Contact us
  • Privacy Policy
  • Terms and Conditions

Copyright 2025 Manuals.Online. All Rights Reserved.